Category: Turntable

  • A Quick Explanation Of Pitch Control For A Turntable

    A Quick Explanation Of Pitch Control For A Turntable

    What is pitch control on a turntable? If you own some vinyl records and a record player, you probably heard of the term pitch control. However, it is vital to understand the exact definition and the importance of this term.

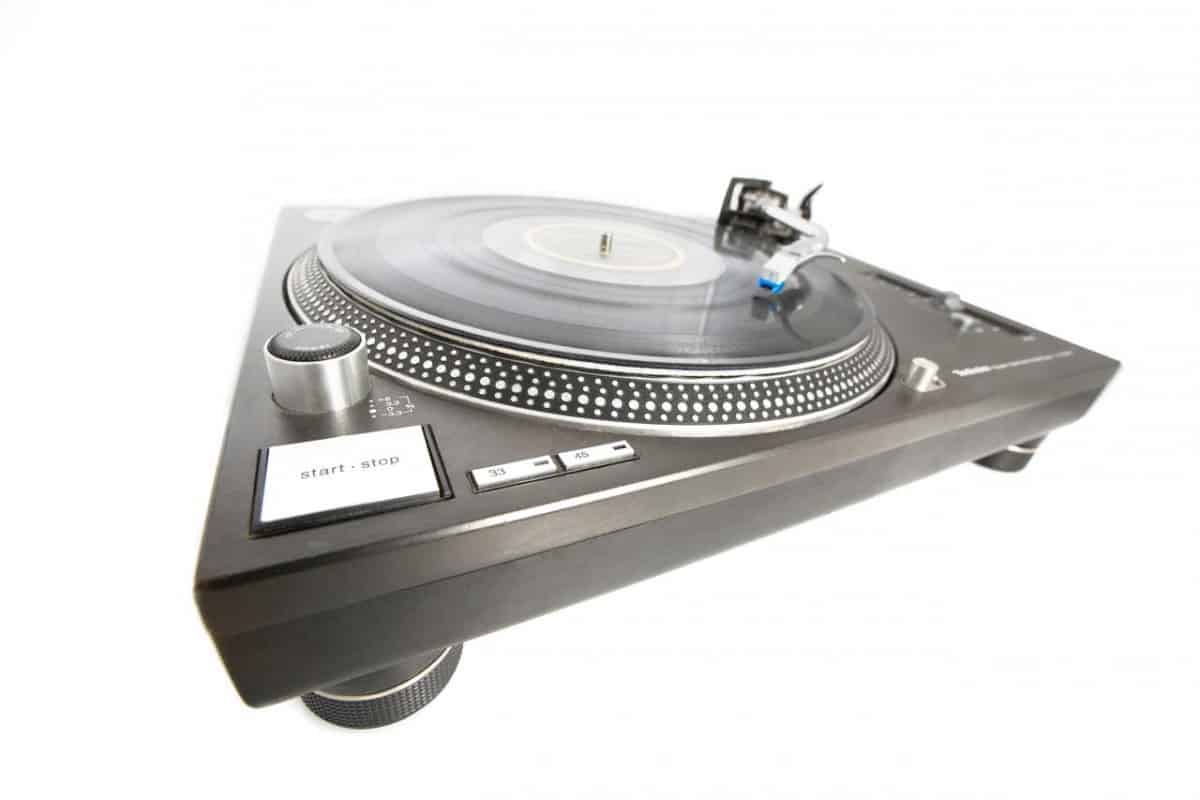
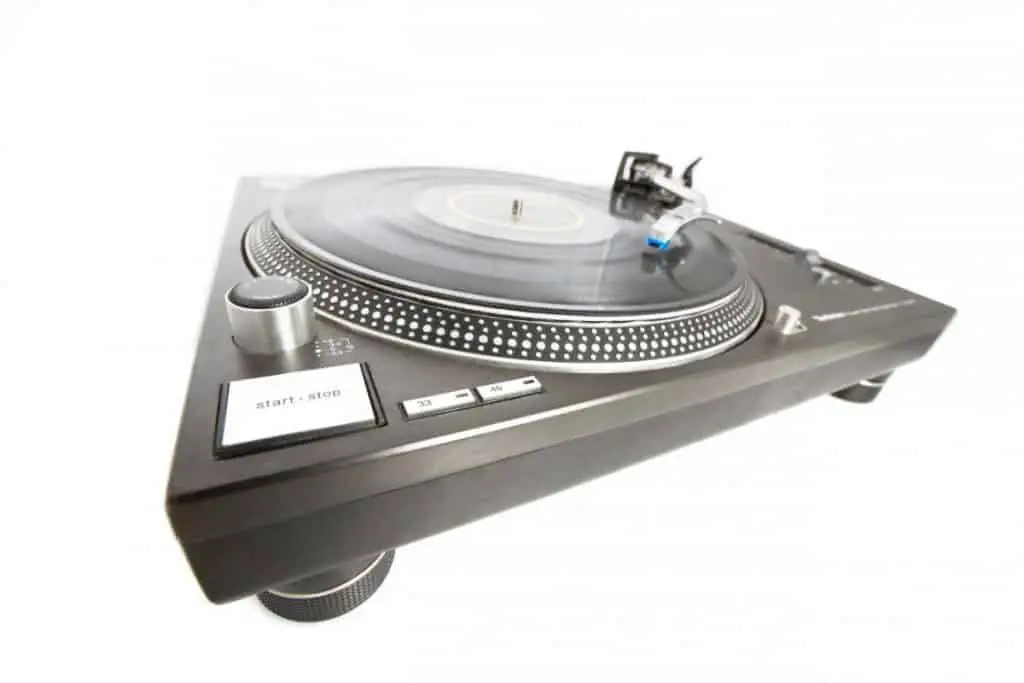
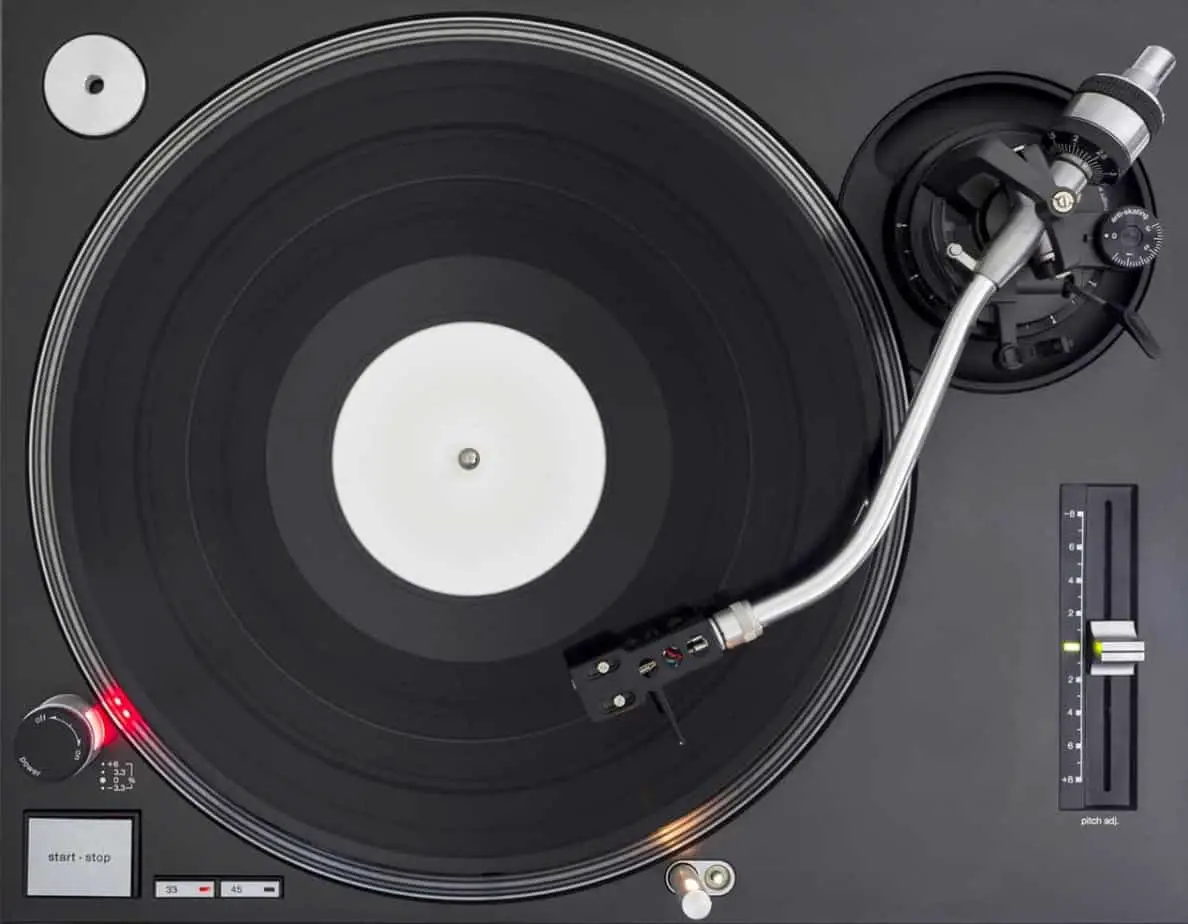
    Pitch control on a turntable is an option that allows users to deviate from a standard speed. By controlling the pitch, you will be able to choose between three RPMs:

    • 33rpm
    • 45rpm
    • 78rpm

    Moreover, pitch control allows you to choose the tempo of your record. (source)

    It is essential to understand what pitch control on a turntable is. Additionally, by knowing how to control your turntable’s pitch, you can easily adjust it to the correct speed when it goes too slow or too fast. 

    What Is Pitch Control On A Turntable?

    Many record player owners are familiar with the idea of pitch control. On the other hand, some people know the idea but are not entirely familiar with its exact explanation. So, what is pitch control on a turntable?

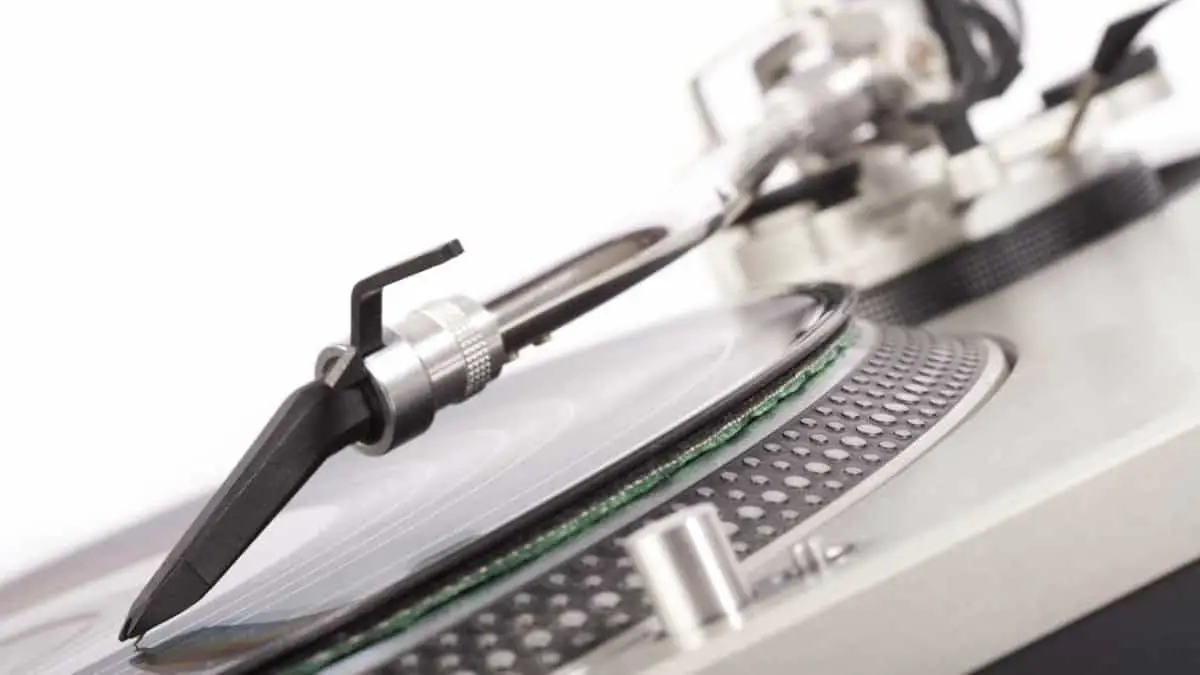
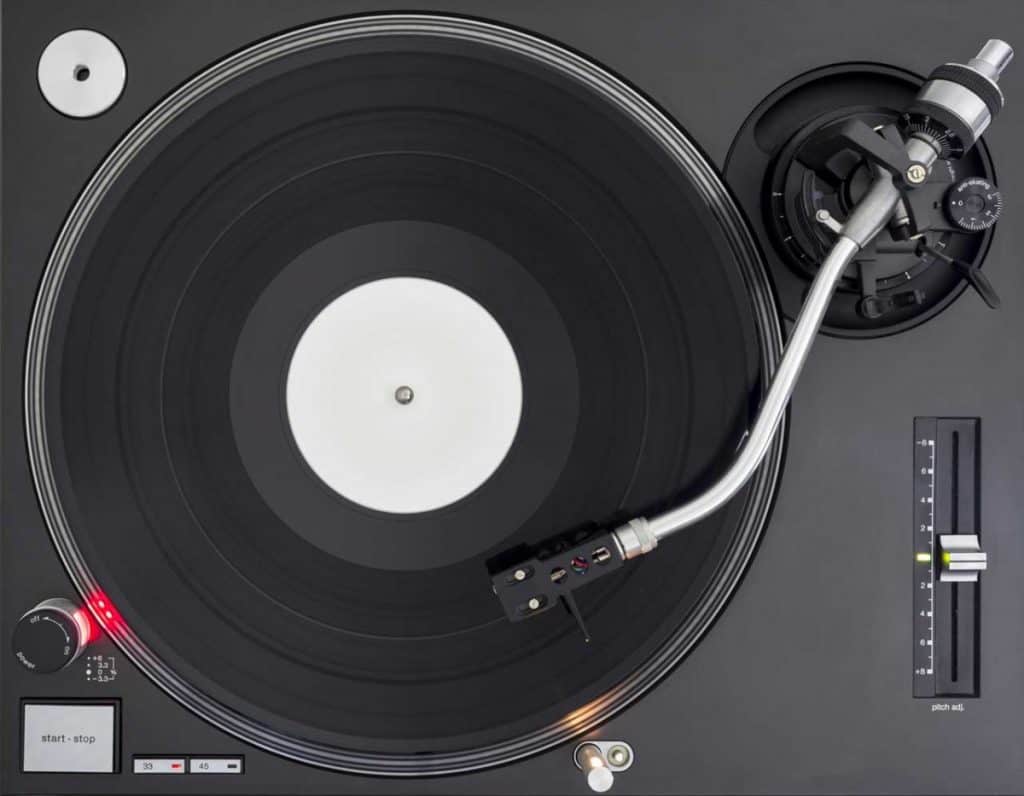
    A turntable pitch control is a mechanism that allows you to control the speed of the equipment. For record players, changing the playback speed will inevitably change its pitch. Slow playback speed means lower pitch, while a fast speed means high pitch. So, you can say that pitch control and speed adjustment are the same mechanisms of record players.

    Moreover, vinyl records play at different speeds, depending on the composition of the song. The typical speed that a vinyl record plays at is 33, 45, 78 RPM, or rotations per minute. 

    However, it is important to note that vinyl records with 78 RPM are rarer than the standard 45 RPM and 33 RPM these days. 

    Moreover, there are times when a turntable will have a playback speed that is too fast or too slow. If such a problem happens to your record player, you can use the pitch control option to correct the speed. Knowing what pitch control is and how to change a turntable’s pitch will allow you to improve the audio quality produced by your record player. (source)

    How Do You Set The Pitch On A Turntable?

    Now that you know pitch control on a turntable, you will be able to fix your record player in case its speed becomes too fast or too slow. Setting the pitch of your record player is not a topic often talked about. However, the process is relatively easy.

    If you are unsure where you should start, four simple steps can help you change your record player’s pitch.

    1. Test the speed of your record player

    Before tuning the speed of your turntable, you first need to know how fast or slow the playback is. To do this task, you can perform two methods:

    • compare the vinyl record sound to the digital playback
    • perform a stroboscopic disk check

    Compare The Record Player Sound With Digital Playback

    Comparing the vinyl record and digital audio is the easiest way to determine if your player needs pitch control. Get a digital copy of the song you are trying to play on the turntable to do this test. You can use any music streaming application, such as Apple Music, Spotify, and iTunes, to access a digital record of that particular song. 

    Next, prepare your vinyl record and turntable for playback. Now, play the turntable and digital audio side by side. Listen carefully for lower-sounding pitch and slower sound throughout the song. 

    It is important to note that you will base the correct pitch and speed on the digital version of the song. So, if you find that the vinyl record’s pitch is off, that indicates that your record player is playing slow. Since you know pitch control on a turntable, you should be able to fix the issue quickly. 

    Perform A Stroboscopic Disk Check

    Comparing the vinyl record to a digital playback of a song is easy. However, the human ear can only pick up so much. For this reason, you should perform a stroboscopic disk check for a visual approach. 

    Nobsound 50/60Hz Stroboscopic Speed Strobe Light + Tachometer Disc for Turntable LP Record Player (Power Supply Version)

    This method involves using a cardboard disc with equally spaced markings around the edge. You place it on the record player and turn the equipment on. If the turntable’s pitch is correct, the markings on the edges of the cardboard should appear as an unmoving circle. But if your turntable’s pitch is off, the markings will appear like they are spinning along with the turntable. (source)

    1. Give your turntable a good clean

    After the speed test, the next thing you want to do is give your turntable a good clean. For this process, you will need:

    • carbon fiber brush
    • microfiber cloth
    • lubricant

    Use the brush to remove dust buildup and static charge on a record. After some thorough brushing, you can use a microfiber cloth to clean your record deeply. Finally, lubricate the moving parts of the turntable to ensure that they move smoothly. 

    This way, the record player will function well as you change its pitch. Since you already know pitch control on a turntable, tuning the equipment will be relatively easy. (source)

    Related Article:

    1. Check the belt

    A loose belt can cause your turntable to make a high-pitched sound. If you know pitch control on a turntable, you should also be aware that a change in the pitch can result from problems with the belt.

    If you find out that your turntable is spinning slower than it should, you may have to check the belt to see if it became stretched out and loose. The culprit behind a record player that is too slow is a loose belt most of the time. The reason is that a loose belt no longer has enough grip on the pulley, affecting the equipment’s audio quality. 

    If the belt has indeed become loose, you can either shrink it back to size or replace it.

    In boiling the belt, you need to have a container to soak it in hot water. Next, boil a cup of water and pour it into the container. 

    Finally, let the belt soak for about five to eight minutes. Moreover, if boiling the belt did not work for you, the quickest solution is to replace it altogether. Belts for turntables are quite inexpensive and easy to replace. For this reason, you will not have a problem changing the belt of your record player. 

    Related articles:

    1. Perform fine-tuning adjustments

    After finding out that your turntable has an incorrect speed and replaced the belt, but nothing happened, the last thing you can do is adjust the tuning. 

    To perform some fine-tuning adjustments, you may need to look for your record player’s manual. But if you cannot find your manual anymore, you can look for a similar record player online and access its manual. 

    First, you will need to find the adjustment screws of your turntable. You can sometimes find them right under the platter, but some turntables have their screws underneath. 

    Once you find the adjustment screws, you need to ensure that the turntable is on a flat and leveled surface before making any adjustments. 

    If you need to slow down the turntable, you need to turn the screws clockwise. On the other hand, turning them counterclockwise will slow down the platter.

    Moreover, you need to understand that fine-tuning adjustments are a trial and error process. Meaning, it is quite a challenge to get your turntable to an entirely accurate playing speed. But always make sure you run your record player on speed tests in between adjustments. This way, you will be able to fine-tune as needed. If you understand pitch control on a turntable, you should be able to fine-tune it without hassle. (source)

    Sources

    1. Ben James, The Turntable DJ, Google Scholar, https://books.google.com.ph/books?id=vTk2IFj6g68C&pg%/ Accessed September 11, 2021. 
    2. Stroboscope, Wikipedia, The Free Encyclopedia, https://en.wikipedia.org/wiki/Stroboscope
    3. Kat Bein, How To Clean And Care For Your Turntable Stylus, Discogs.Com, https://blog.discogs.com/en/how-to-clean-and-care-for-your-turntable-stylus/ Accessed September 11, 2021. 
    4. Martin Do, et. al, Vinyl Player 2.0, Google Scholar, https://www.ece.ucf.edu/seniordesign/fa2017sp2018/g15/documentation/Final_Report.pdf/ Accessed September 11, 2021. 
  • How To Lubricate A Technics Turntable

    How To Lubricate A Technics Turntable

    “How do you lubricate a Technics turntable” is a question that needs a thorough answer. This particular turntable is expensive, so enthusiasts take care of it the best way they can. That way, they will be able to maintain the quality of their record player. 

    To lubricate a Technics turntable, you need to:

    • Remove the platter and clean any residual grease
    • Apply about a pea size of lubricant inside the spindle hole
    • Place the platter back to the turntable and let it run for 1-2 hours to distribute the grease. (source)

    A record player is no doubt an expensive piece of equipment. So, apart from lubricating it, you also need to know how to take care of it properly. 

    How Do You Lubricate A Record Player?

    A turntable is a type of equipment that requires mechanical precision for it to work correctly. If one of its parts is not working the way it should, the entire record player will mess up. 

    “How do you lubricate a Technics turntable” is a question that needs a thorough answer. This particular turntable is expensive, so enthusiasts take care of it the best way they can.

    One of the problems that can mess up a record player is not enough lubrication. If the moving parts of the turntable become dry, they will not spin smoothly, which may decrease its sound quality.

    So, how do you lubricate a Technics turntable and other turntable types in general? 

    Lubricate The Bearing

    Lubricating the platter bearing is essential to maintain the right speed of your record player. Proper lubrication of the platter bearing can even affect the turntable’s overall lifetime. On the other hand, the turntable will acquire damages, which can render it useless. 

    Moreover, the lubrication on the turntable bearing can disappear by playing the equipment regularly. It can also get dirty as the metals rub against each other. 

    That said, you need to regularly check up if the turntable’s axle has enough oil. The ideal thing to do is to renew the lubrication after three years of continuous turntable use. 

    Apply a pea-size amount of lubricant to the platter bearing. Then, turn the record player on and allow it to spin to distribute the oil evenly. 

    Lube Up The Cartridge

    How do you lubricate a Technics turntable and any other turntables? Apart from lubricating the platter bearing, it is essential to note that the cartridge also dries out over time. 

    The stylus or diamond is grooving continuously with the record. For this reason, it suffers from degradation in the long run. If your record player has a high tracking force, the faster it will be for the stylus to wear out. 

    Additionally, the rubber of the cartridge suspension loses its lubrication over time. If that happens, the rubber hardens and becomes less sensitive. As a result, the playback quality of the record player decreases. (source)

    To prevent this issue from happening, you need to lubricate the cartridge correctly. For this step, you need to: 

    • remove and clean the u-clamp
    • inspect if there is any hard, cracked rubber or dents
    • check if the outer rim has become slippery
    • remove any residual grease or dirt buildup in the axle hole
    • apply a dab of grease on the bottom of the idler wheel hole, making sure not to grease the rubber surfaces (source)

    How Do You Lubricate A Technics Turntable?

    Lubricating your Technics turntable is similar to how you lubricate other record players. You need to clean the parts carefully, ensuring no dust, dirt-buildup, or grease left. 

    However, it is essential to note that you should never use any cleaning agent that contains alcohol, thinner, or benzine. In addition, you should avoid wiping the platter bearing with a chemical dust cloth. The reason is that chemical-based and harsh cleaners can ruin the surface or your turntable, impeding its audio quality. 

    After cleaning the turntable and the platter bearing, the next thing you need to do is to lubricate it. So, how do you lubricate a Technics turntable?

    For every 2000 operation hours of your Technics turntable, you need to apply two to three drops of lubricant. Then, just like any other record player, turn your Technics turntable on and let it spin for approximately one to two hours. This way, the oil that you applied will distribute evenly. (source)

    Maintaining Your Technics Turntable

    There is a considerable increase in the popularity of turntables. But since most of the record players you can find in the market were created a long time ago, they can be expensive to acquire. 

    Technics SL-1210MK2 Professional Turntable

    But no matter how expensive your record player is, keeping it in good shape is not difficult or costly. The key to keeping your record player in its best shape regardless of continuous use is regular maintenance. Meaning you need to keep your turntable cleaned and tuned. Proper care will also help your record player to have a long cartridge life. 

    If you happen to have a Technics record player, it is not enough that you know how to you lubricate a Technics turntable. Instead, you also need to know how to take care of your record player to maintain its quality. 

    1. Apply support for your record player

    Whenever you walk across your room, your footsteps tend to cause a jarring effect on your record player. To prevent it from happening, you need to choose the right platform for your turntable. 

    It would be best if you prevented your turntable from vibrating to avoid messing up its parts. The reason is that letting your record player shake will interfere with its signal. This way, you will be able to keep the equipment from having distorted sound. 

    1. Clean the stylus using a carbon fiber brush

    Your turntable will skip and have a distorted sound if the stylus acquires dirt and dust buildup. For this reason, you must have an excellent stylus brush made of carbon fiber. You can also use mild cleaners to maintain the excellent quality of your stylus. 

    In addition, it is ideal for replacing the stylus after every 3000 hours of use. This way, you will be able to maintain the good audio quality of your record player.

    1. Replace the turntable’s belt every few years

    If you have a belt-drive turntable, it is not enough that you can answer, “how do you lubricate a Technics turntable.” But you also need to be familiar with when you should replace certain parts.

    For instance, you should know when it is time to replace the turntable belt. 

    It would be best if you replaced the belt the moment you begin to see it slipping on its pulley lower than usual. Hearing the belt slipping whenever you open your record player indicates that the belt already requires replacement. 

    1. Calibrate the anti-shake, tracking force, and height settings correctly

    Proper calibration is vital to help you avoid an increase in record wear and skipping of needles. 

    Moreover, it is essential to check all the parts of your record player to maintain the best quality that it can offer. But you need to know how many superior arms for the tonearms matter. It is regarded as one of the essential parts of your record player. 

    1. Align your anti-skate counterweight 

    The anti-skate counterweight of your record player makes sure that your stylus is sitting perfectly in the grooves’ center while the record is spinning. Proper alignment is crucial as it can heavily affect how your stylus sits inside the grooves of your record. 

    It is not enough that you know how do you lubricate a Technics turntable. Instead, it is equally important that the anti-shake counterweight is aligned correctly, si the stylus does not move away from the record grooves. (source)

    Related Articles

    Sources 

    1. Maintenance Rules, Pro-ject Audio Systems, Accessed September 9, 2021. 
    2. Henry Haven Windsor, Twelve Record Changers, Popular Mechanics, Accessed September 9, 2021. 
    3. Manuals Brands Technics Manuals Turntable SL-3200 Operating Instructions Manual: Adjustment Of Arm-Lift Height; Adjustment For Automatic Return Position – Technics SL-3200 Operating Instructions Manual, Manuals Lib, Accessed September 9, 2021. 
    4. How To: Tips On How To Take Care Of Your Turntable, Techaeris.Com,/ Accessed September 9, 2021. 

    • How To Lubricate A Technics Turntable

      How To Lubricate A Technics Turntable

      “How do you lubricate a Technics turntable” is a question that needs a thorough answer. This particular turntable is expensive, so enthusiasts take care of it the best way they can. That way, they will be able to maintain the quality of their record player.  To lubricate a Technics turntable, you need to: Remove the

      Read More


    • A Step By Step Guide To Cleaning Your Technics 1210

      A Step By Step Guide To Cleaning Your Technics 1210

      Technics make a fantastic bunch of turntables. But maintaining your turntable is essential to keeping it in good condition. The 1210 model is no different in its requirements for maintenance. However, knowing the correct way to perform a cleaning service is vital to proper turntable maintenance. The process for cleaning a Technics 1210 is no

      Read More


    • The Differences Between Technics 1200 and 1210

      The Differences Between Technics 1200 and 1210

      Technics 1200’s are known as some of the best direct-drive turntables in the industry. The record player has dominated the industry for decades, leading as a benchmark to follow for competition. But what is the difference between the SL-1200 and the slightly more expensive SL-1210 models? Let’s find out. The Technics SL-1200 and the SL-1210

      Read More


  • Can A Turntable Be Set On Top Of A Receiver?

    Can A Turntable Be Set On Top Of A Receiver?

    Can you put a turntable on top of a receiver? Turntable setups have evolved. With so many options in the market, correctly positioning your setup can be a chore. No worries, this article will help you efficiently set up your turntable and all the different devices that come with it. 

    Firstly, experts recommend not placing your turntable on top of your receiver. Here are the reasons why:

    1.Receivers generate a lot of vibrations that will negatively affect your turntable.

    2.Experts recommend placing your turntable on a vibration-free and movement-free surface

    3.An improper setup can damage your records. 

    If you’re looking for a guide to help you position your turntable correctly, you’re in the right place. This article will give you advice on your turntable, receiver, etc., setup, and a bit more information to help you along the way. If you’re interested, then be sure to keep reading.

    Can You Put A Turntable On Top Of A Receiver?

    Physically, you can take the turntable and put it on the receiver. It should take less than five minutes to do the entire process. But is it the right thing to do? 

    Unfortunately, it’s not. In my experience, putting your turntable on top of your receiver is not the best thing for your turntable setup. At first, it may seem easy and probably efficient. Everything would be at a convenient distance, and you can save up on space if that’s what you’re looking for in a setup.

    However, don’t get it twisted; this positioning will bring more harm than good, and here’s why. 

    What Is A Receiver?

    It’s best to address the elephant in the room that some readers may not have basic turntable knowledge. It’s nothing to be ashamed of; knowledge is power. Maybe they’re starting, and it’s good practice to include everyone in a conversation. 

    A turntable tends to output a low phono signal that the human ear cannot possibly pick up. So how do we finally hear the phono signal? It’s all thanks to the receiver. 

    A receiver is a phono signal amplifier. It boosts the signal to a point the human ear can decipher. 

    Others may define a receiver as a combination of the following devices:

    • Power amplifier
    • Line-stage amplifier
    • Radio Tuner
    • Phono preamplifier

    It’s a 4-in-1 package, and to be honest, it’s a steal to audiophiles. In simple terms, a receiver’s primary purpose is to transmit the sound from the turntable to the speakers. 

    What Is A Phono Preamplifier?

    You may have also come across the term preamp or preamplifier. Receivers and preamps tend to do the same thing. However, they are two entirely different components. 

    Users use preamps alongside power amplifiers. You use the power amplifiers to generate power for your speakers. 

    Nowadays, preamps tend not to come with a phono stage. Some brands will come with a phono stage, but it’s not mandatory. Why? Consumers prefer to have these two components separate. 

    As the name suggests, a phono preamplifier has something to do with the low phono sound mentioned earlier. A phono preamplifier takes the phono signal from the phono cartridge and converts that signal into music.

    It does this conversion process through equalizing and then amplifying the sound. 

    The phono preamplifiers come in three ways:

    • As a singular unit
    • Combined into the turntable and sold as a unit
    • It comes with a receiver, integrated amp, or preamplifier.

    It was important to mention preamps and phono preamplifiers to differentiate these components from receivers. They may have the same purpose, but they function differently and produce different results. 

    What Should I Put My Turntable On?

    You want to put your turntable on a surface that does not vibrate and will not move at all. Turntables can be pretty fragile things; because of this reason, they need a surface that will reduce the risk of any accidents.

    Some experts recommend positioning the speakers and the turntable on different surfaces. By doing this, you do not provide a transmission mechanism for the vibrations to travel through. 

    Sound travels fast, and with suitable mediums, vibrations can travel across surfaces. It’s why soundproofing is such a chore. Sound waves and sound vibrations escape faster than you can guess. In a way, by putting the speakers and turntable on different surfaces, you are creating your version of a soundproof scenario. 

    It’s not exactly at the recording studio level, but it shows that you grasp the concept of sound and its properties, which is great if you’re an audiophile into turntables. 

    What Happens When You Put A Turntable On Top Of A Receiver?

    While saying that putting a turntable on top of a receiver is not the best professional practice is simple. However, it’s always best to give reasons behind the logic. How else would scientists accept assumptions without proof?

    So why is it a big no-no?

    1. Experts recommend a vibration-less flat surface

    Mainly, you want a surface that is free from movement and vibrations. Vibrations will negatively impact the quality of the sound. It may turn to borderline noise at some point. 

    That’s not what you’re trying to achieve from a turntable. You want lovely and seamless sound or music coming from your turntable. Other factors may impede this desire, but let’s not add wrong turntable positioning to the list. 

    2. Receivers generate a lot of unwanted vibrations

    This point ties back into the first one, your turntable requires a vibration-less surface. The receiver is not vibrationless. The process of amplifying the sound involves sound vibrations, and these vibrations will inevitably impede your turntable. 

    3. Incorrect turntable setup can damage your records or your equipment.

    The science of it all can be frustrating at times. However, it all has a purpose. By putting the turntable on top of the receiver, you’re blocking airflow to the receiver. 

    This blockage could result in overheating, and finally, you would no longer have a fully functional receiver. Wrong positioning has ruined several turntable setups, which is why it’s best to learn from the mistakes of others. 

    Care and maintenance of turntable setups are the responsibility of its owners. The first step in caring for your turntable is by placing it in the correct position. Make sure to allow it a firm space to sit, and it will be a worthy investment.  

    Are You Interested In What Other Like-minded Individuals Are Asking? Here Are Some Extremely Helpful Faqs. 

    1. Can you stack a record player on an amp?

    Depending on the type of amp, it’s best not to test it out and not stack it at all. It might come across as convenient and efficient to some degree, but in the long run, it’s not. Stacking it reduces the proper airflow and can cause dust accumulation and, finally, overheating. 

    Experts recommend separating your record player and your amp (regardless of which amp it is) in your setup. Make sure to allow the necessary space for each component. 

    2. Can you position a record player on its side?

    Vintage record players may not survive this evolution. But there are specialized record players that manufacturers built to reduce the amount of space they take and increase the portability. 

    However, regular record players or turntables will not be worth the try. The design is to have them as flat and horizontal as possible. You cannot play it while it’s on the side if it could work while they’re on the side. 

    Kindly stick to the manual; it may help you more than you think.

    3. How should you go about starting your turntable setup?

    It depends on your budget, research, and what you want your turntable set up to do for you. Firstly, understand what components you want as part of your setup. This information will give you a starting point for your setup. A significant component of the setup would be some records. 

    Sources

    1.Jenna Miles, The Beginner’s Guide to Vinyl Records: How to Build, Maintain and Experience a Music Collection in Analogue (Massachusetts: Adams Media,2017) 256.

    2.Jeffree Lee Pucket, The Beginner’s Guide to a Basic Turntable Set-Up, Discogs, https://blog.discogs.com/en/turntable-set-up-guide-gear/ July 30th, 2021.

    3.Discogs, Turntable 101: How To Set Up Your Turntable Correctly, Discogs, https://blog.discogs.com/en/how-to-setup-your-turntable/ Accessed July 30th, 2021.

    4.U-Turn Audio, How to Position your Turntable, U-Turn Audio, https://uturnaudio.com/pages/turntable-positioning Accessed July 30th, 2021.

    5.Purdy Lounge, Preamp vs. Receiver – Detailed Comparison, Purdy Lounge, https://purdylounge.com/preamp-vs-receiver/ Accessed July 30th, 2021.