Blog

  • Do All Record Players Use The Same Needle? Let’s Find Out

    Do All Record Players Use The Same Needle? Let’s Find Out

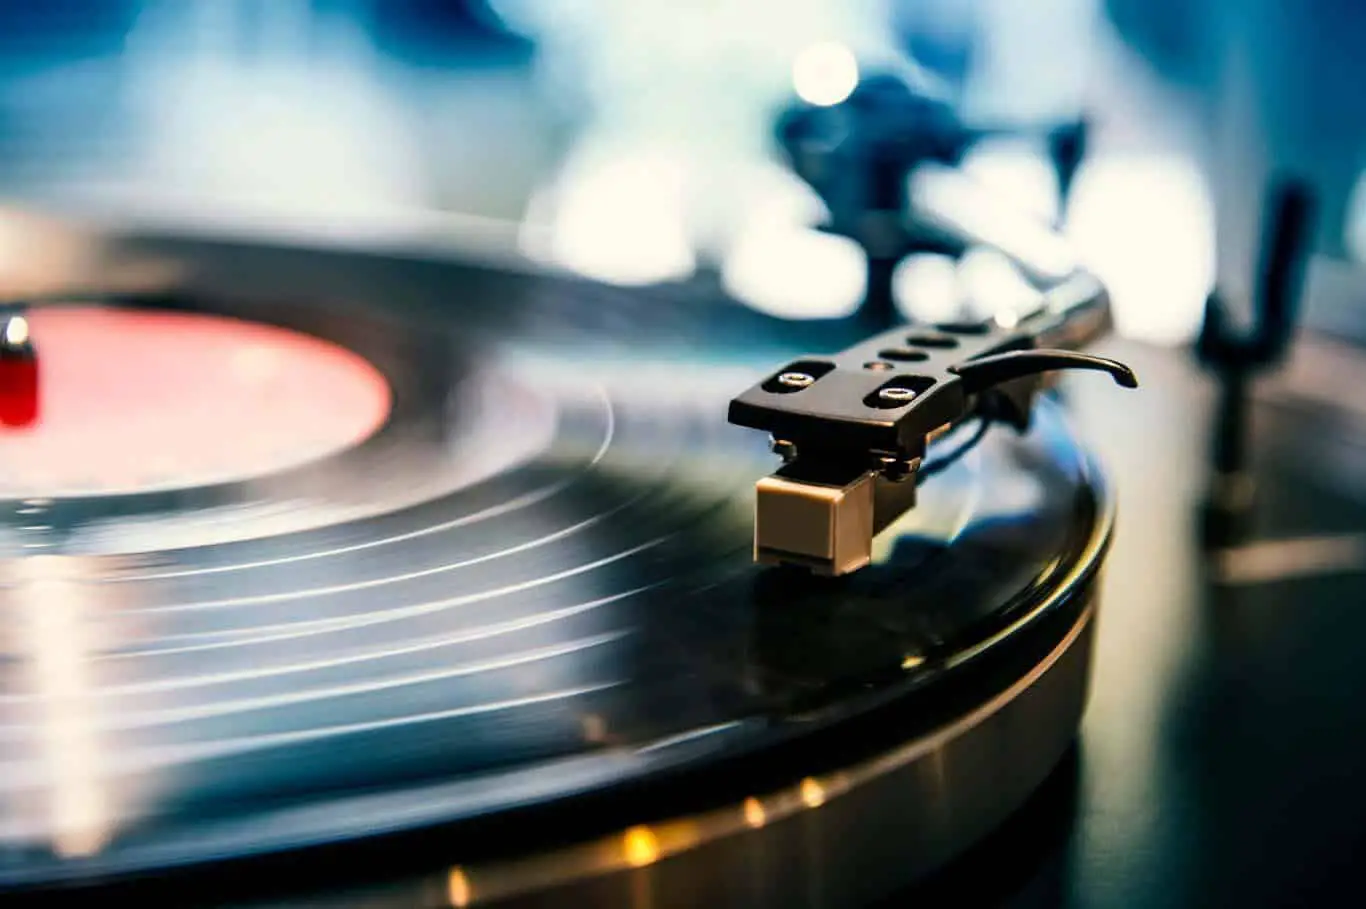
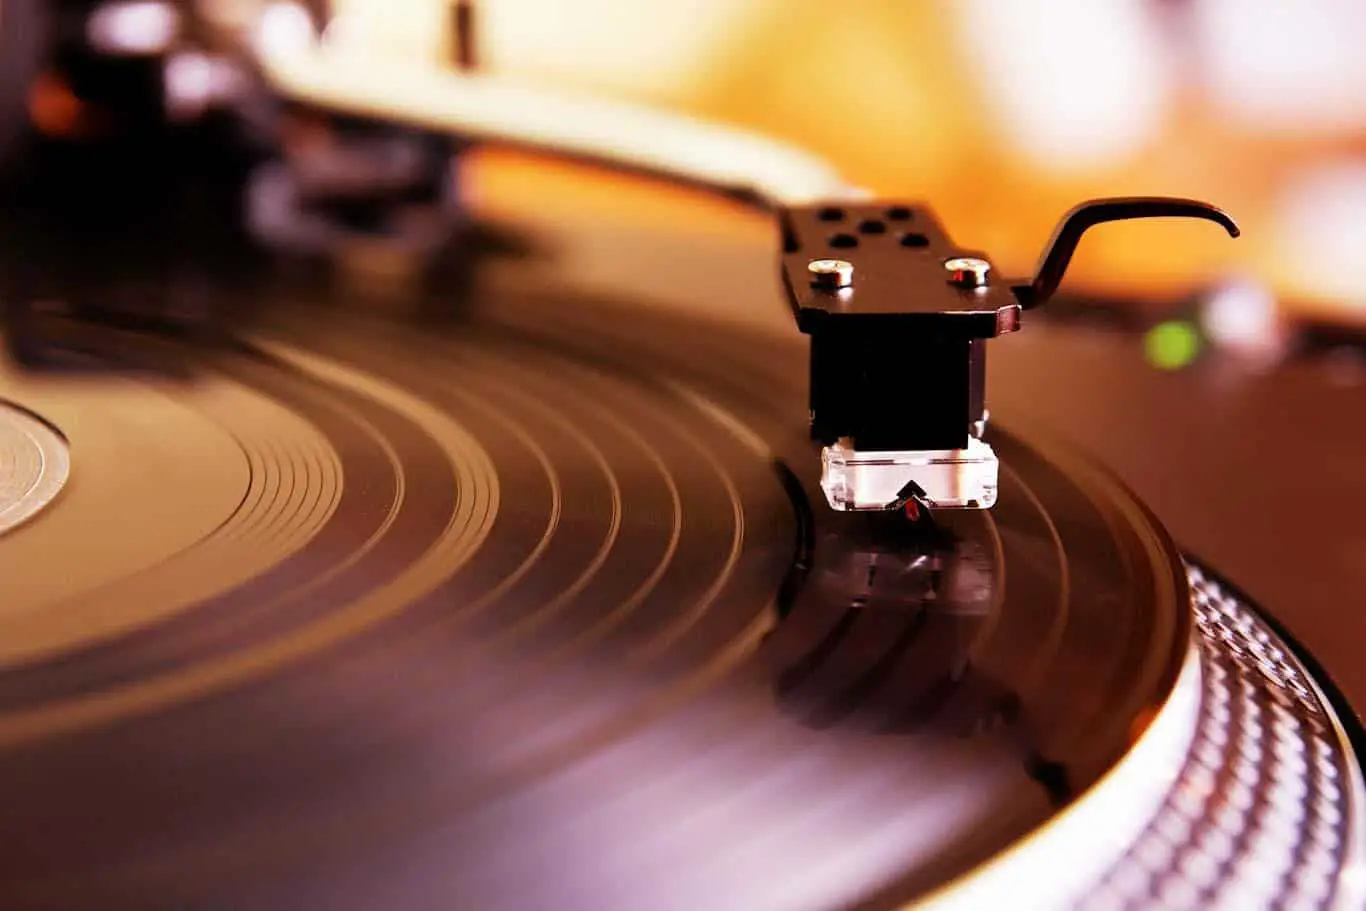
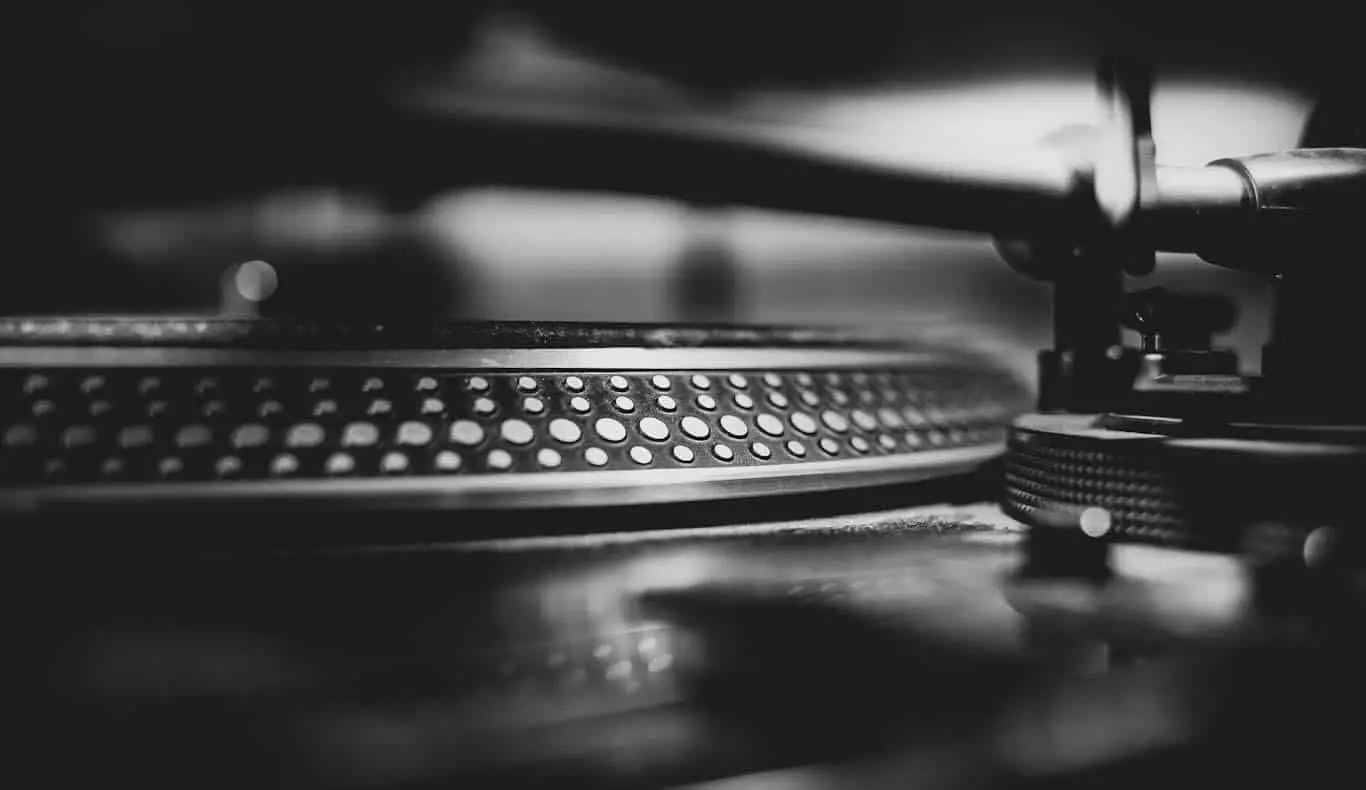
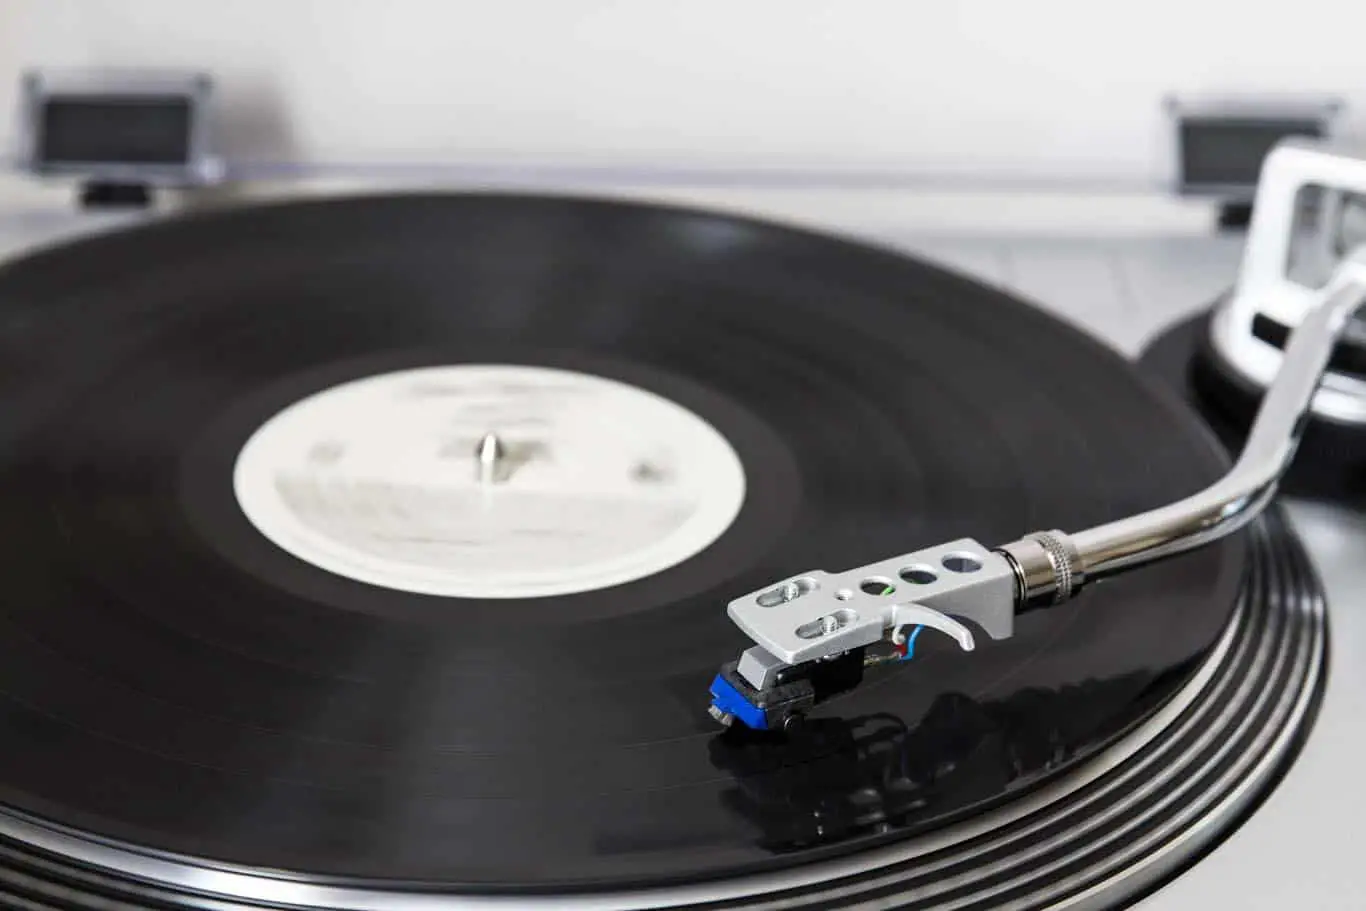
    Your record player cartridge comes with a stylus, also referred to as a needle that sits on the record’s groove. Unfortunately, when that needle goes, you’ll need to replace it, but are they all the same? Can you just swap it out with a generic one? I wanted to know if they were all the same, so after thorough research, this is what we found out.

    When it comes to stylus or needles, no one needle fits all. Therefore, all turntables don’t use the same needle or stylus. After all, they have different designs, and different types of stylus vary in designs, material, even how they mount.

    The cartridge is the most crucial part of the record player responsible for reading the vibrations on the vinyl record. In this article, we will show you why record players don’t use the same needle. We will also show you the different types of needles for record players.

    What Is A Stylus?

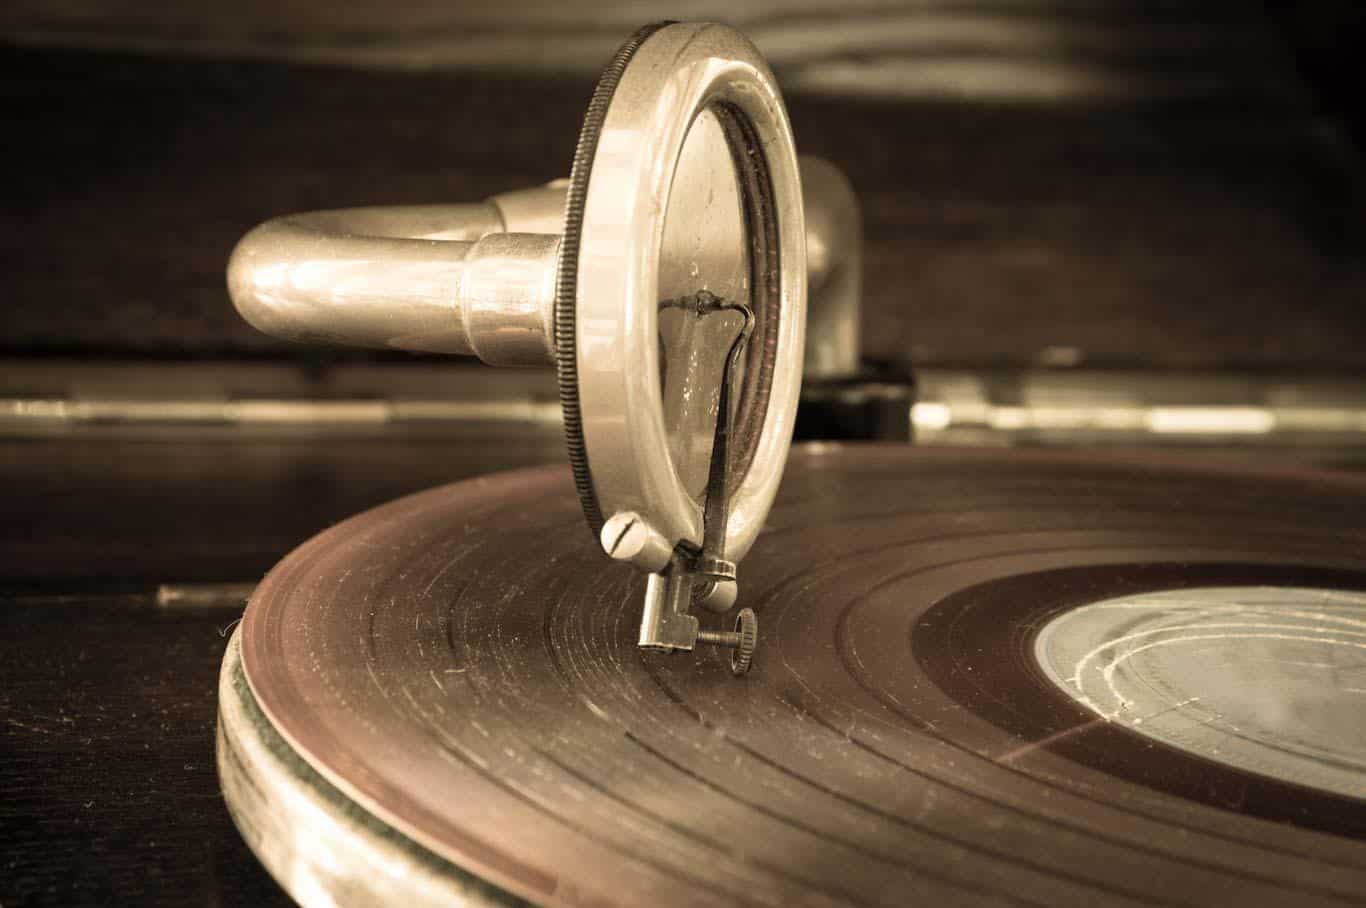
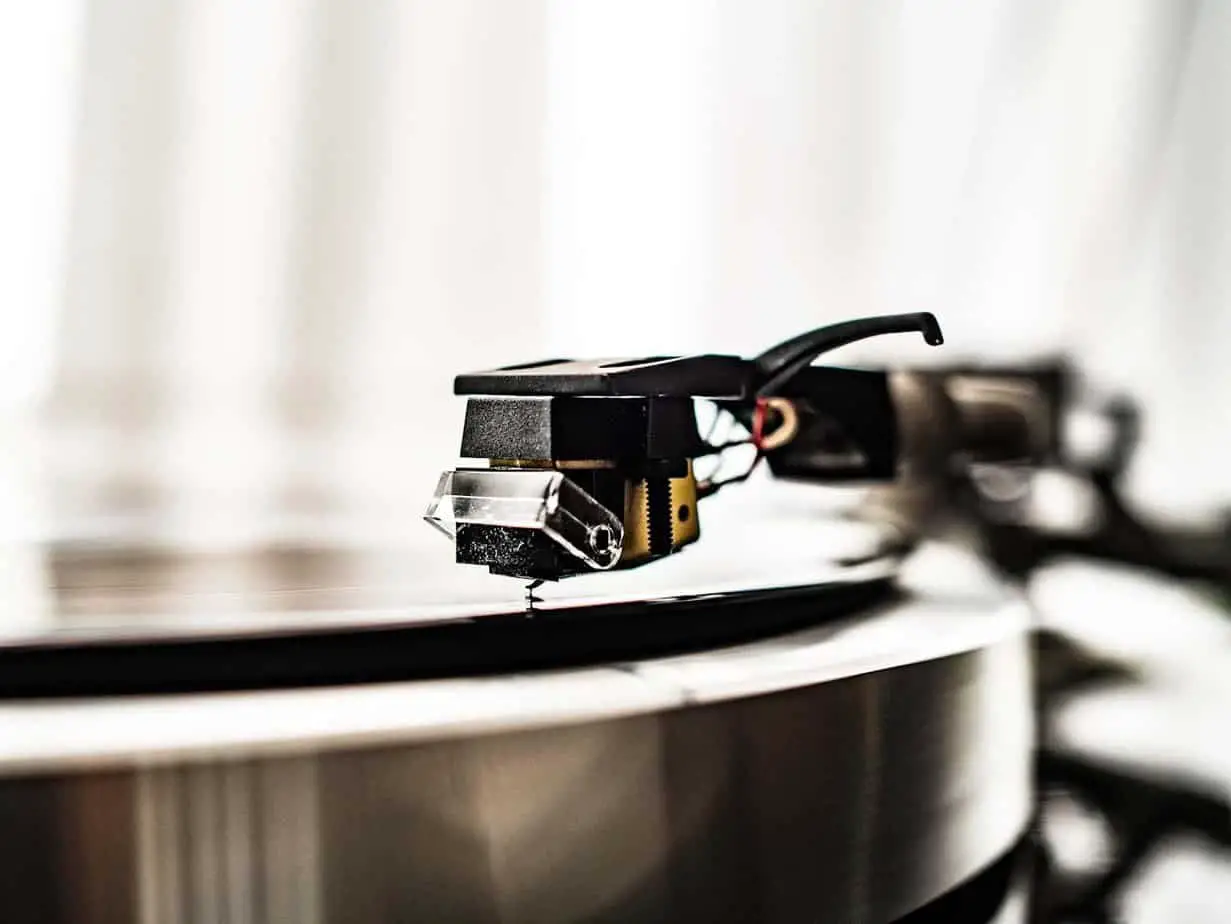
    A stylus is a uniquely shaped needle that rests on the record player’s grooves and helps pick the vibrations. In fact, the names needle and stylus are used most of the time interchangeably. The needle is the only part of the turntable that comes into contact with the vinyl record. Unfortunately, this component is subjected to hard wear thanks to the pressure it applies to the grooves. (source)

    Luckily, there are three desired characteristics of these needles:

    • The needle faithfully follows the vinyl record’s groove contour and picks the transmitted vibrations.
    • Secondly, the needle does not break the vinyl record despite the amount of force used while on the record’s grooves.
    • The stylus is resistant to wear; therefore, it can take years before you ever have to replace your turntable’s needle or cartridge. (source)

    Remember, a damaged needle can degrade the quality of sound produced and damage the vinyl records’ grooves. Manufacturers have used different materials to make the needle over the years; in fact, Thomas Edison introduced a diamond stylus in 1910 and a sapphire one in 1892. The early record players used short-lived needles besides the diamond and sapphire stylus.

    In fact, the most preferred materials for turntable needles over the years have been tungsten, copper, steel, and bamboo, among others. Unfortunately, steel needles needed replacement regularly, thanks to the high wear and tear rate. Therefore, the adverts asked folks to replace the steel needle after listening to each side of the record player, which meant that you had to purchase lots of needles at once.

    Luckily, the steel needles were relatively cheap; in fact, you could get a packet of 500 needles for only 50 American cents. Plus, they were sold in small tins and packets. These needles varied in length and thickness. The longer stylus produced muted softer tones while the short, thick ones made loud, intense sounds. Therefore, record players used the same needle in the past, so you had to pick which type of music you wanted to listen to and enjoy. (source)

    The shortage of steel in 1916 forced people to turn to tungs-tone needles. Produced by Victor, these needles played between 100 to 300 records before being replaced. They were long, so you had to use them until they were too short to be used. (source)

    Therefore I am sure you are wondering, do record players use the same needles? Technology has changed over the years with better and reliable needles produced. After all, high-end turntables don’t use the same needles as the low-end record players.

    Do All Record Players Use the Same Needle?

    All turntables come with many components that work together to convert the vibrations to music. And depending on the cartridge, record players can be grouped as the moving coil and magnet cartridges. (source)

    The cartridges are electromagnetic generators that convert the vibration (mechanical movement) picked by the stylus. The cartridge converts the vibrations to an electric signal amplified and converted to sound by the amplifier and speakers.

    Both the magnetic coil and moving magnet cartridges use a coil and a magnet, vibrating in unison with the needle assembly. These cartridges come with either a permanent or removable stylus; therefore, each turntable brand has a unique needle. Luckily, there is a perfect replacement that you can install in your record player.

    Remember, low-end record players, come with a permanent cartridge that supports needle replacement. So when upgrading your turntable, you can install a new high-end stylus that can improve your listening experience.

    Therefore, turntable styli are not universal; every turntable comes with a specific needle. After all, folks are allowed to upgrade the stylus of their low-end turntable with the high-end options. But for it to work, you have to make sure that it is compatible with your record player’s original needle. So you may have to do some research online for compatible options for your turntable.

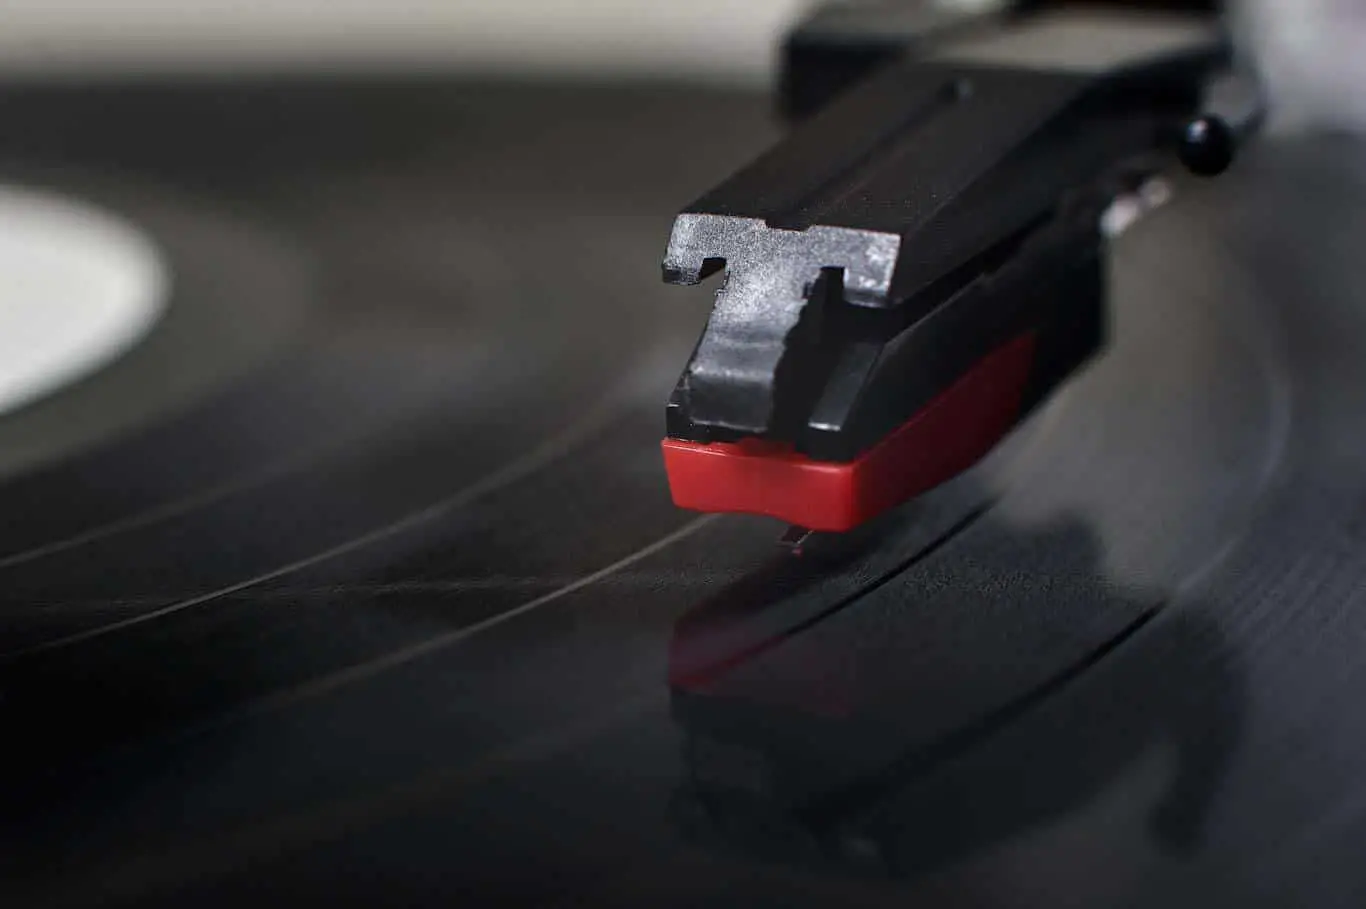
    Plus, different types of needles vary in material, size, and shape. These needles also vary in shank construction. Therefore, when replacing your turntable’s needle, you can’t just walk into the local store and pick the first stylus you get on the shelf. You have to choose a replacement needle that matches your device’s needle.

    You have to make sure that the replacement needle fits your cartridge perfectly and is compatible with your device. Luckily, many replacement needles match your device online that you can order.

    Construction Of The Stylus

    Before we even talk about the different types of needles, we need to consider the shank construction. Remember, this needle sits at the tip of the cantilever in the cartridge connected to the tonearm. The needle attached to the cantilever is either a tipped diamond or a nude diamond.

    Just as the name suggests, the tipped diamond comes with a diamond tip on the stylus, while the other part consists of metal. But with the nude diamond, the stylus is made from diamond and attached to the cantilever. Luckily, the diamond tracks easily and accurately; plus, it has a lower mass, which means it applies less pressure on the vinyl record’s grooves.

    The diamond-tipped needles are less costly to produce, but they increase the stylus’s overall mass. This design will affect the transient response of the tipped diamond than a nude stylus.

    Types Of Stylus

    As aforementioned, there is no one fits all needle. And that is because every manufacturer tries to design a perfect needle for their different record players. Plus, these needles are designed for reading certain types of vinyl records.

    Generally, there are four types of needles, excluding those meant for reading the 78 RPM records. After all, the needles for reading the grooves on 78 RPM are about four times wider than the typical needle for 33 1/3 records. (source)

    The radius of the tip for a 78 RPM stylus is about 20mm, and anything smaller than that can ride low in the vinyl’s grooves. A typical stylus will produce noisy signals with a 78 RPM record, accelerating its wear. Plus, 78 RPM records are pretty rare these days, so the four types of the stylus are:

    Conical Or Spherical Stylus

    The spherical stylus is the most common and the least costly in the market. (source) This stylus resembles the tip of your ballpoint pen. And thanks to their huge radius, this stylus traces less on small grooves with high frequencies.

    The rate of wear and tear with the spherical is debatable among members of the Hi-Fi community. Some claim that this needle produces the most wear since the contact region is restricted to only 2 points. On the other hand, some music lovers claim that the spherical stylus produces minor wear. (source)

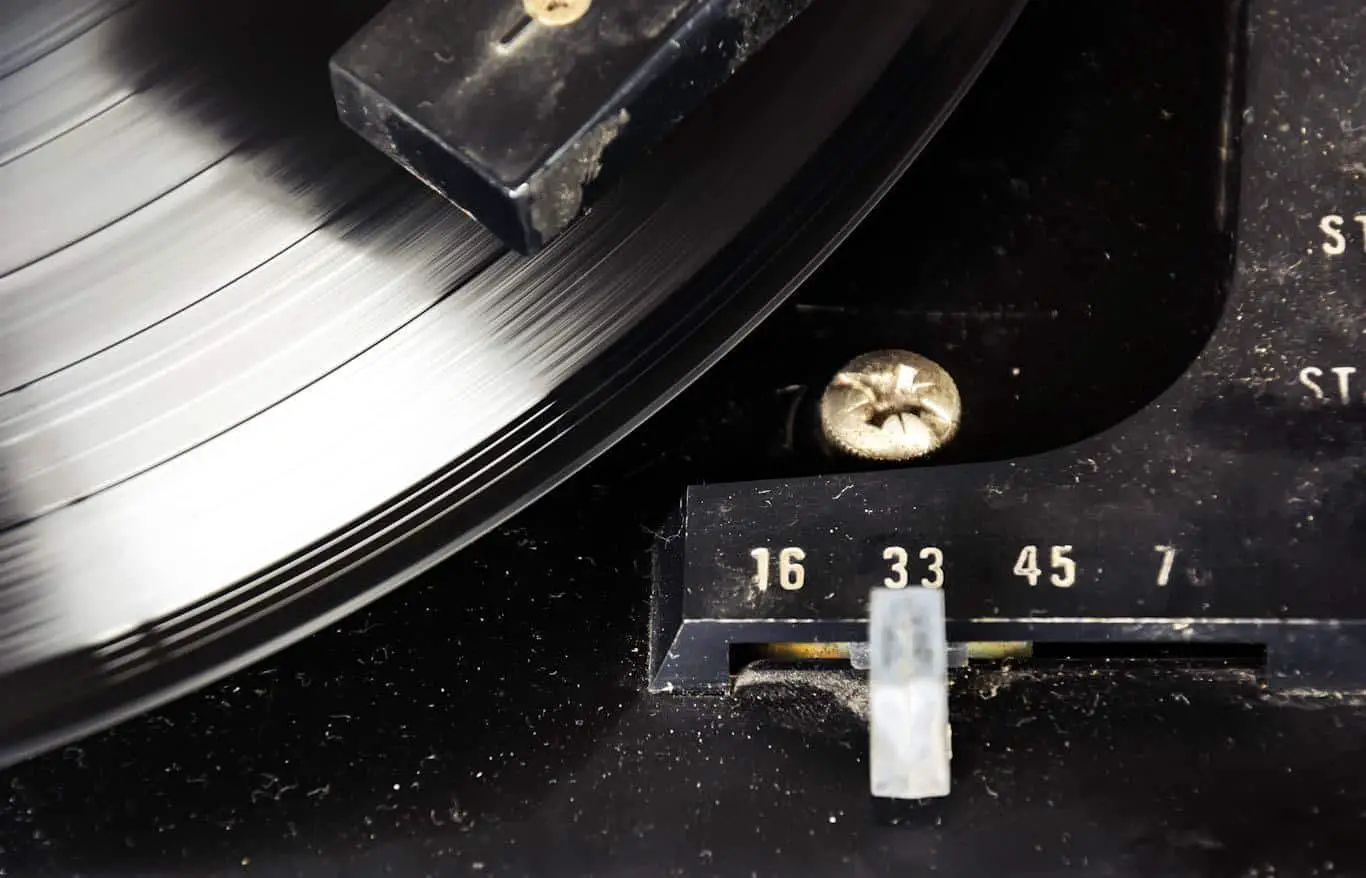
    This stylus has a radius of about 0.6mil*; therefore, it does touch the center of the vinyl record’s groove. This device works perfectly with older and lower to moderately priced turntables. Plus, the tonearm tends to apply high tracking force than the other types of needles. (source)

    Elliptical Stylus

    The second most common needle in the market is the bi-radial or elliptical stylus. The elliptical stylus contacts a larger area of the grooves than the dual radii. It guarantees you lower distortion (especially in the hard-to-track parts of the grooves), improved phase response, improved frequency response, and more precise tracking.

    These needles tend to wear a bit faster than the conical stylus. So, you will have to pay attention to the tonearm alignment and cartridge for perfect results. (source) The elliptical stylus has two radii; the wider front radii and the side radii. Its unique design makes it possible for the needle to track the middle of the groove. At the same time, the side radius allows it to track more accurately. (source)

    Compared to the spherical stylus, this needle has a narrower back to the front area and an extended vertical contact region. This needle is available in 3 sizes: 0.4 by 0.7mil, 0.3 by 0.7mil, and 0.2 by 0.7mil, with the first number representing the side radius. Remember, the smaller the side radius, the better the sound quality produced. The smaller the tip radius, the less tracking force you will ever need. (source)

    Hyper Elliptical

    The third most common stylus is the hyperelliptic needle, also referred to as stereohedron, fine line, or Shibata. This stylus represents the next phase of stylus evolution, which is sharpening the needle for more significant contact. When correctly aligned, this needle can offer low record wear, improved tracking, longer tip life, and high-frequency performance. This stylus has an even longer vertical contact area than the elliptical needles.

    But thanks to its vast tracing footprint, this stylus can produce more noise on worn-out records. This stylus is ideal for high-end cartridges. (source)

    The MicroLine Stylus

    The Microline also referred to as the micro-ridge, is one of the most advanced needles in the market. This computer-designed needle has a unique tip that resembles the stylus used to make the master disc. Its unique multilevel ridge shape will guarantee high-performance frequency with exceptional life and extended record. Unfortunately, they are pretty expensive and difficult to manufacture. (source)

    Why Does The Shape Of The Stylus Matter?

    If you are a casual turntable enthusiast, you don’t have to lose too much sleep over the shape of the stylus. But for audiophiles, the shape of the stylus matters because of the following:

    • The construction and shape of the needle play a key role in sound replication, thanks to its access to the groove’s surface.
    • The shape of the stylus also plays a crucial role in the record player’s rate of wear and tear.
    • The shape and construction affect the stylus price; therefore, if you have some cash and want to upgrade your record player, you need to know the benefits and types of the style.

    How Do You Know When It’s The Right Time To Replace The Stylus?

    Fortunately, physical and audible indicators can tell you when to replace the needle. A few things on the physical sign can show you if the needle is damaged. Some of them include:

    • Misshaped or crooked needle tip
    • The stylus may jump or skip out of the record’s grooves when playing.
    • Accumulated muck on the tip of the stylus might be the culprit. The accumulated dirt can be black spots, which means that you haven’t cleaned your record player in a long time.

    On the audible side, there are a few things you have to listen to and consider. Some of them include:

    • The record won’t sound great when using a damaged or old stylus
    • The record will produce a static or crackling noise
    • It may create distorted music

    When this happens, then it is time to replace the turntable needle. But make sure you get a suitable replacement for your record player. And if the record player’s needle cannot be removed, you will have to replace the entire cartridge. (source)

    If you didn’t purchase a new turntable, the chances are that the needle is not in good shape. Plus, you don’t know if the previous owner took good care of it. So the first thing you should do is replace the stylus with a new one. You can even choose to upgrade your device’s needle to a high-end option.

    How To Replace The Stylus

    Generally, you should replace the needle after every 3 to 5 years or after 1,000 hours of play. So if you can replace your record player’s needle, then you should do the following:

    • Unplug the turntable and hold its arm using your non-dominant hand.
    • Grip the metal or plastic case covering the needle using the other hand
    • Pinch the sides of the needle and remove it
    • Slide the needle out of the cartridge while ensuring it is parallel to the tonearm. If the needle can’t come out, you will have to go online and look for the manual.
    • If the stylus is attached to the cartridge frame, then it’s not removable. So you may have to replace the entire cartridge.
    • With the old stylus removed, you can look for a perfect replacement. Most needles have some numbers or letters on them. These numbers are the model numbers, and they can help you get a replacement. You can order a suitable replacement online or a better option if you’re upgrading the turntable.
    • Slide the new needle into the cartridge with the stylus facing outside. Remember, the stylus is very sharp; you should wear some rubber gloves, but make sure you don’t touch the needles’ tip. (5)

    FAQs

    Does The Stylus Fit Any Turntable?

    The stylus, also referred to as the needles, are not universal. Every turntable uses a certain kind of stylus, so it is technically impossible to replace your record player’s needle with a different type of needle. So make sure they are compatible with the original stylus before purchasing it.

    How Do I Know If The Needle For My Turntable Can Be Replaced?

    If you are not sure it is replaceable, you can look at the tonearm. You can replace the needle if some screws mount your cartridge to the tonearm. But if there are no screws, you will not be able to replace them.

    Are All The Needles Diamond?

    Most of the modern needles are made using either sapphire or diamond. But there are some needles made from sapphire-diamond combination and steel. Therefore, not all needles are made from diamonds or have a diamond tip.

    Conclusion

    The needle is the most crucial part of the turntable, which is responsible for the quality of the sound produced by your record player. Unfortunately, no one needle fits all kinds of turntables. So before replacing your record player’s needle, you need to know the difference between the several types of needles in the market. Remember, before installing a different kind of needle, you have to make sure that it’s compatible.

    Sources

    1. Audio-Technica staff, Audio-Solutions Question of the Week: What are the Differences Between Moving Magnet and Moving Coil Phono Cartridges? Accessed January 07, 2022
    2. Wikipedia Contributor, Phonograph, Accessed January 07, 2022
    3. Jess Thompson, The Different Types of Turntable Styli (and Which is Right for you) Accessed January 07, 2022
    4. Tucker Bowe, When Should You Replace Your Turntable’s Stylus, Accessed January 07, 2022
    5. Eric McClure, How to Change the Needle on a Record Player? Accessed January 07, 2022
  • 9 Turntables That You Can Scratch Records On

    9 Turntables That You Can Scratch Records On

    The turntables that you can scratch records on are not challenging to find. The real challenge is learning how to scratch records. Still, you need to make sure that you purchase the best turntable for your hobby.

    Direct-drive turntables are the record players that you can scratch records on best. They have a record platter that sits directly above the motor. This feature lets the turntable platter get to the correct speed instantly.

    Turntables That You Can Scratch Records On

    A turntable is a significant device for people who aim to become professional DJs. While there are other devices that you can use for DJing, such as DJ mixers and CDJs, professionals mostly use turntables. The reason is that many people want the pure scratching sound that only turntables can produce.

    The problem is that finding a turntable suitable for scratching can be a real challenge. Such is especially true for beginners who are still trying to develop their abilities. For this reason, we listed down some of the best turntables that you can scratch records on easiest.

    9 Turntables For DJs

    1. Technics SL-1210GR

    Technics is the leading name in the turntable industry. For this reason, you cannot expect anything less from the Technics SL-1210GR.

    According to the brand, the SL-1200G (SL-1210GR) combined Technics’ traditional analog technology and advanced digital technology, while redesigning parts throughout.”

    The SL-1210GR is a top-of-the-line direct drive turntable. The coreless motor with a unique design provides the device with the ultimate speed and torque. Yet, the platter does not suffer from vibrations.

    This turntable features a 2.5 kg cast aluminum casing added with polymer. This way, the turntable has some vibrations along with excellent audio quality.

    Even better, the device has an S-arm with pipe and advanced suspension. For this reason, the SL-1210GR packs ultimate precision.

    That said, there is no denying that the SL-1210GR is one of the best turntables that you can scratch records on easily. (source)

    2. Numark PT01 Scratch Portable DJ Turntable

    An affordable and low-end turntable model yet boasts fantastic options is ideal for beginners. Such is a factor that the Numark PT01 Scratch can provide you with for some tremendous turntabling.

    This portable turntable is lightweight, so you can easily carry it anywhere. Despite the portability, it packs a power supply from a standard AC outlet. It also has six D batteries.

    Additionally, this turntable features a USB and 1/8″ input along with double RCA 1/8″ and 1/4″ outputs.

    Moreover, the best feature about this turntable is the Scratch Slide Switch. Meaning it has a joy-stick slide switch instead of the usual slide switch. (source)

    3. Pioneer DJ PLX-500

    The PLX-500 from Pioneer is a small yet high-quality turntable that boasts a die-cast aluminum body. In addition, it has a direct drive and a built-in preamp. You can even connect it to your computer with its USB port.

    There is also a phono-line switch that enables the turntable to perform excellently.

    This turntable also has a short S-arm to provide the best sound quality possible. Even better, the S-arm is adjustable so that you can set the optimal height for you. It also comes with an internal anti-skate mechanism and a pitch-shifter. (source)

    4. Audio-Technica AT-LP120XUSB-SV

    If you are looking for turntables that you can scratch records on, this one from Audio-Technica is worth checking out.

    This direct-drive turntable allows you to do both forward and reverse playback. It also delivers fast start-ups with the pitch slider, allowing you to adjust the pitch quickly. Additionally, the device has a removable dust cover that helps you keep your turntable clean.

    Even better, the AT-LP120XUSB-SV has a speed selection feature that lets you set the playback speed to either 33, 45, or 78 revolutions per minute (RPM).

    This turntable has a USB cable and port, so you can easily connect it to your computer. (source)

    5. Technics SL-1200MK7

    Professional DJs will find it fantastic to scratch records with the Technics SL-1200MK7. The reason is that it has a coreless direct-drive motor, which delivers accuracy. The motor also eliminates the speed variations encountered by other lesser direct-drive motors.

    Moreover, the problem you may encounter with some turntables that you can scratch records on is stability. Fortunately, the SL-1200MK7 has four insulated feet that minimize vibrations and provide stability.

    Additionally, the S-shaped tonearm helps produce precise sound. You can even adjust the pitch by +8% or +16% with the pitch control feature. (source)

    6. Stanton STR8.150 MKII

    This turntable is for people who are serious about developing their scratching technique. The STR8.150 MKII is a high-end turntable dedicated to professionals. This aluminum model has a fine adjustment and a straight tonearm, producing a fantastic sound quality.

    In addition, this Stanton turntable runs using a 4.5 torque engine. The all-metal casing and the engine allow the device to play smoothly without interference.

    In terms of connectivity, the device has:

    • two phono lines
    • RCA double output
    • pitch shifter
    • reverse button

    With all these features, it is essential to note that the STR8.150 MKII costs a bit more than the other turntables on this list. (source)

    7. Reloop AMS-RP-4000-MKII

    Reloop is a brand that not many people are familiar with these days. Still, the AMS-RP-4000-MKII turntable can provide the needs of every aspiring DJ out there.

    This turntable has a direct-drive motor and a fader located on the right side of the platter. It lets you shift the playback speed between +/08% and +/-16%.

    In addition, you can reverse your record’s direction with this turntable. Meaning you can play your records backward for scratching. (source)

    8. Audio Technica AT-LP120XBT-USB-BK

    This turntable from Audio Technica looks similar to the other turntables in this guide. However, it has features that make it different from the other turntables that you can scratch records on. Its most advanced feature is that it supports Bluetooth connectivity. For this reason, you will be able to stream music from the turntable to a wireless speaker or headphones.

    The AT-LP120XBT-USB-BK also has a USB port behind it, which allows you to digitize your records quickly. It also has a dust cover that keeps it free from dust and dirt buildups.

    Moreover, this device has a fader on the right side. You can use it to start and stop a record or switch between 33.3, 45, or 78RPM. (source)

    9. Pioneer PLX1000

    The best thing about the Pioneer PLX1000 is its overall design. It consists of a high torque motor that, according to the brand, can spin the table to 33/3RPM within 0.3 seconds. Die-cast zinc composes the chassis so that you can ensure extreme stability.

    Pioneer also claims that the PLX1000 is a “club grade.” For this reason, you can use it regularly as it can withstand abuse.

    Moreover, this turntable has its start and stop buttons at the left of the platter. It also has a 45 adapter that fits into a seven-inch single’s larger hole. The only downside is that it does not have a needle, so you must purchase a separate one. (source)

    How To Choose A DJ Turntable

    You need to consider five factors when choosing turntables that you can scratch records on. That said, it is essential that you know each of them to ensure that you are getting the best device.

    Direct Drive

    It is critical to get a direct-drive turntable when choosing a turntable that you can scratch your records on. The reason is that this type of record player is more precise and more durable than belt-drive record players.

    Speed Shift

    Turntables that let you change the speed between 33/3 and 45RPM will allow you to play singles and full-sized records.

    Tempo Controls

    One of the features that you need to look for in a DJ turntable is tempo control. With this feature, you can increase or decrease the platter’s speed to change the speed of the song.

    Casual Use

    Although DJ turntables are meant for scratching records, there are some devices that you can use for listening to albums.

    Preamp

    Some turntables come with a built-in preamp, a sound component that increases the output’s volume. A turntable with a preamp will let you connect it to any input on a stereo receiver. This way, you can produce a louder sound whenever you need to. (source)

    Does Scratching Ruin Vinyl?

    Vinyl records are fragile. A single scratch and it will skip while you are playing it. So, if you see turntables that you can scratch records on, you may wonder whether or not it can ruin the vinyl record.

    Since vinyl records are delicate, scratching will definitely damage them. In fact, even too much pressure from the turntable’s needle can cause damage to a record.

    But even without scratching it, vinyl records will inevitably get damaged in time. The reason is that vinyl records consist of polyvinyl chloride (PVC) – a type of plastic.

    Vinyl records are thin and round plastic contraptions. These factors make them prone to melting, warping, and scratching when exposed to unideal conditions.

    That said, the only thing you can do is to prolong the lifespan of your vinyl record by:

    • using a special mat
    • washing your hands before touching the record

    Related article: Does Record Scratching Damage The Vinyl?

    Use A Special Mat

    There are mats that you can buy for your turntable platter. The original purpose of such mats is to provide a higher fidelity music experience. But apart from that, you can also use them to protect your vinyl record while you are scratching them.

    However, it is essential to note that turntables that you can scratch records on do not have a built-in mat. For this reason, you will need to purchase a mat separately.

    Related articles:

    Wash Your hands Before Scratching A Record

    Your hands produce natural oils. You will transfer the oils from your skin to the vinyl’s surface as you touch the record. Such will result in the degradation of the record’s quality, thus shortening its lifespan.

    For this reason, you need to wash your hands before DJing. This step will help you reduce the risk of transferring oils from your hands to your vinyl.

    Unfortunately, there is no way to prevent your vinyl record from getting damaged while scratching it. While initial damages will be unnoticeable at first, they will always be there. So, the only thing you can do is to minimize these damages. (source)

    Can You Scratch On Belt Drive Turntables?

    You may be overwhelmed with direct drive and belt drive if you are new to turntables that you can scratch records on. However, these two turntable types are not confusing if you know how they differ.

    Direct Drive Turntables

    A direct-drive turntable has a motor located directly underneath the vinyl platter. This motor is linked directly, meaning there are no moving parts like a belt between the platter and the motor. With this type of build, all the turntable’s force and energy that the motor generates transfers immediately into the platter.

    As a result, direct-drive turntables spin at the speed needed almost instantly. Since the motor is powered, the platter will spin freely even after turning the record player off. This way, you will be able to do the wind-down effect that a lot of DJs do.

    Additionally, this type of turntable transfers forces directly to the platter, making the speed predictable and reliable. As a result, two tracks will blend well together as you know that both will hold their tempo.

    That said, you should go for a direct drive if you are looking for turntables that you can scratch records on.

    Belt Drive Turntables

    Casual listeners use this type of turntable. As the name implies, a belt-drive turntable has either a natural or synthetic rubber belt that drives the record platter. The platter also sits on a center spindle with a bearing that supports it.

    Additionally, the belt revolves around a pulley attached to a drive motor. This drive motor sits separately from the platter, preventing vibration from traveling to the entire turntable.

    Moreover, a belt-drive turntable sounds better in terms of casual listening.

    Can You Scratch Records On Belt-Drive Turntables?

    Do belt-drive record players belong to turntables that you can scratch records on with all that’s said and done? Well, you can scratch on this type of turntable. However, such is not an ideal thing to do.

    The reason is that since a belt turns the platter, it takes a little time before it gets to the right speed. As mentioned, direct-drive turntables instantly get to the correct speed since the platter sits directly on the motor. On the other hand, belt-drive turntables have a slight lag in speeding up.

    That said, belt-drive turntables are not as responsive as direct-drive turntables. For this reason, they are not the ideal turntables that you can scratch records on. (source)

    How Do Beginners Scratch Records?

    Scratching is a skill seen as a challenging part of turntablism. It takes time and practice to master the techniques. But the most difficult part is that beginners do not know where to start and how they will progress.

    That said, you need to take one step at a time if you want to learn how to scratch records.

    Here are the steps for beginners to start record scratching:

    1. Get a basic DJ setup

    A basic DJ setup consists of two direct-drive turntables, a mixer, and vinyl records that you can practice scratching. Remember that you need two turntables, as using only one will not produce music.

    2. Find a mixer with curve adjustment on the crossfader

    Using a mixer’s cross adjustment option, you can control switching sound back and forth between your turntables. For this reason, you need to find a mixer equipped with a crossfader. Having your mixer will make it easier for you to begin doing advanced scratching techniques later.

    3. Prepare a collection of records to practice on

    Turntablists need as many vinyl records as they can get to build music. The reason is that you need to use the beats from multiple records along with sampled portions from other records to make music.

    That sounds like a complicated collage-style of making music. But you can accomplish it with a lot of practice and many vinyl records to scratch.

    How To Start Scratching

    Back then, DJs would take round stickers and place them next to the record groove just beyond the sample. This way, they have a visual cue to where the sample begins. With this trick, you can easily place the stylus to the groove where the music will begin.

    Once you already have a visual cue, the next thing you need to do is to practice stopping the record using your fingertips. All you have to do is to rock the platter back and forth over a particular sound, and that will allow you to create a distinct scratch sound.

    After mastering how to scratch, put another song that compliments the beat you create. (source)

    Does Scratching Damage The Needle?

    One of the most common questions asked in the world of turntablists is whether or not a scratched record can damage a turntable’s needle. Fortunately, it does not. The reason is that the needle consists of a hard, precious stone, such as a diamond or sapphire, while vinyl records are plastic.

    Additionally, the needle stays within the grooves when you are scratching. For this reason, scratching a record will not damage the needle in any way.

    For that reason, turntable needles can withstand the pressure coming from uneven surfaces. (source)

    The Takeaway

    Finding turntables that you can scratch records on is relatively easy. In fact, you can use any direct-drive record player to start DJing. Still, you need to ensure that you get a suitable turntable for you.

    The reason is that the turntables for record scratching have different features – some are for beginners while others are for professionals. So, if you are a beginner, getting a suitable turntable will help you practice and hone your skills.

    Sources

    1. Direct Drive Turntable System SL-1210GR.” Technics. Accessed January 4, 2022.
    2. The New Era of Scratch.” Numark. Accessed January 4, 2022.
    3. PLX-500.” Pioneer DJ. Accessed January 4, 2022.
    4. AT-LP120XUSB.” Audio Technica. Accessed January 4, 2022.
    5. Direct Drive Turntable System SL-1200MK7.” Technics. Accessed January 4, 2022.
    6. STR8.150 M2.” Stanton DJ. Accessed January 4, 2022.
    7. RP4000MK2 Professional High Torque Turntable System. Accessed January 4, 2022.
    8. “AT-LP120XBT-USB.” Audio Technica. Accessed January 4, 2022. https://www.audio-technica.com/en-us/at-lp120xbt-usb.
    9. A Reborn Classic.” Pioneer DJ. Accessed January 4, 2022.
    10. John Steventon, DJing For Dummies. West Sussex: John Wiley & Sons, Ltd, 2014.
    11. Mark Katz, Groove Music: The Art and Culture of the Hip-hop DJ. USA: Oxford University Press Inc., 2012.
    12. Stephen Webber, DJ Skills: The Essential Guide to Mixing and Scratching. USA: Elesevier, 2008.
    13. Ben James, DJ 31hz, DJ KNS, Ultimate Beginner Series DJ Styles Series: The Turntable DJ. Alfred Music.
    14. Nicolae Sfetcu, Dance Music. Nicolae Sfetcu, 2022.
  • A Guide To Grounding A Turntable Without A Receiver

    A Guide To Grounding A Turntable Without A Receiver

    Most people prefer to do a complete setup for their turntables receiver and all. However, what if you don’t have a receiver? How do you ground your turntable without one? We’ve created a complete guide to help you ground your turntable without a receiver.

    In a setup that has a receiver, the receiver houses the amp. However, if you get rid of the receiver, you’ll lose your amplifier as well. It means you’ll need to get an external amplifier, preamp (if your turntable doesn’t have one), and speakers.

    It doesn’t matter if you’re a newbie or an oldie in the vinyl world; grounding your turntable is one decision that would always turn out great when it comes to turntables.

    Why wait till your record player starts to emit a humming sound when you can prevent that all along?

    ​Grounding problems in a turntable is not uncommon and can be very annoying. For most turntable users, it is an essential factor that comes into play, especially before choosing which brand and model to purchase.

    This unexpected but common phenomenon, called a ground loop, happens when all the different chassis connections in many or other pieces of audio equipment are not at the same voltage or ground potential.

    An example of this is how your turntable needs to be grounded correctly and adequately to an amplifier to prevent unwanted noise or sound distortions. (Source)

    What Materials Do You Need for the Grounding Process?

    It doesn’t require much learning to ground your turntable successfully. You may be lucky to own a turntable that is already pre-fitted with all you need for the grounding process.

    Getting extra materials to complete the process is also pretty easy if you own a turntable that isn’t pre-fitted. What materials do you need to ground your turntable efficiently?

    A Grounding Wire

    This ground wire goes into the external amplifier

    for turntables that already have a ground wire.

    If there is no ground wire on your turntable, you will need to purchase an insulated wire about 18-20 inches long.

    A Grounding Terminal

    The ground wire on the turntable must be attached to the grounding terminal on the external amplifier. If your turntable does not have a grounding terminal, there is a method to bypass this.

    For this method, you will need a pair of needle-nose pliers; this will be helpful to position, hold the wire in place, and cut the wire you need to ground the turntable.

    You will also need some gaffer tape. This tape is going to help create a grounding terminal for the turntable.

    How Do You Ground A Turntable Without A Receiver?

    When it comes to effectively grounding your turntable, a six-step method works well, regardless of if you’re a beginner, and this is your first attempt.

    The First Step: Turn Off The Power

    The first step before you proceed to ground your turntable is to turn off the power. Remember you’re dealing with two different equipment, so shut down the power for the amplifier too.

    The purpose is to prevent unwanted or unexpected electrical shocks. It also eliminates harmful or damaging noise from the speakers during the connection.

    The Second Step: Find The Turntable’s ​Grounding Wire

    To successfully ground a turntable, you need to identify and differentiate its wires, and the same goes for all other external audio equipment connected to the turntable.

    These wires are commonly connected under the metal turntable chassis and always have an unconnected copper spade with the connector.

    When considering most of the modern turntable models available on the market, it is safe to say the turntable’s wire is commonly green. It, however, does not mean your turntable’s wire will not have a different color.

    If your turntable is new, this wire is most likely under the chassis, folded and covered with a twist tie. To access the turntable’s ground wire, you will need to uncover this wrapping.

    The Third Step: Locating The Grounding Terminal On The Amplifier

    Depending on the turntable brand and model, you can find the grounding terminal on an amplifier behind the turntable.

    You know you have the right spot when you see it is marked “ground.” Depending on your turntable’s model, this could be a screw terminal or a metal post with contorted knots. Once you have this, proceed to loosen or disconnect the ground terminal.

    The Fourth Step: To Connect The Turntable’s Grounding Wire To The Amplifier’s Ground Terminal

    Once completed with loosening the ground terminal on the amplifier, you need to ensure that the ground wire from the turntable gets connected to the marked ground terminal on the amplifier. Try to keep both pieces of equipment close to each other. It is to ensure the connection stays in ace without any issue.

    The Fifth Step: Drop The Ground Wire With The Spade Connector To The Grounding Terminal

    If and after moving your equipment, you should use the spade connector to lower the ground wire to the grounding terminal.

    Once complete, you can then tighten the connection paying attention not or using too much force on the tightening.

    The Sixth Step: Connect And Check

    The last and final step to completing this turntable grounding wire process is to turn back on the power. Your turntable is ready to go as soon as the power is back on. The entire process is that simple and easy.

    Why Do I Need to Ground My Record Player?

    Every vinyl lover wants each music experience to be soothing and pleasurable. A “humming distortion” can surface while playing your record and ruin this experience.

    It isn’t easily noticeable for some because the playback on the turntable can easily mask this.

    However, this is not the same as others who might find this humming quite annoying.

    A faulty turntable does not necessarily cause this distortion. If you set the amplifier tuning to the maximum or when your record is not even playing, it can also occur.

    To make sure that every music experience is melodious and soothingly pleasurable, you always have to keep your turntable in peak condition.

    One of the best ways to ensure your timetable is optimal at all times is to ground the turntable. Most turntables require grounding.

    The only set excluded from this is those models with a built-in preamp grounding. There are two main reasons why you should ground your turntable:

    To Eliminate Ground Loop

    It is not uncommon for turntable users to experience a ground loop. As previously explained, this occurs when different chassis connections in many or other pieces of audio players are not at the same voltage or ground potential. (Source)

    Just as with your regular electrical appliances, the metal casing on your turntable can come in contact with a live wire.

    This metal casing will naturally conduct and pass the electric current received and disrupt the voltage or ground potential. It is what causes the hum.

    To Ensure Your Record Player’s Safety

    It is one thing having to deal with the annoying humming that can occur if a turntable is not grounded. Another risk to not grounding a turntable is an electric shock while using the turntable.

    Grounding a turntable ensures that any excess or unwanted electrical current directs away from the turntable.

    It subsequently protects you from the risk of electric shock, protects your turntable from getting blown up or, worse, also your electrical connections and home from electrical surges or further unwanted damages.

    How Do I Know When My Record Player Requires Grounding?

    It is not uncommon for vinyl newbies or even old record lovers who have just bought a new turntable to make adjustments.

    You don’t learn everything about your turntable immediately, as the knowledge comes with experience. However, you should seriously consider grounding if you start to experience some of these issues.

    • Electric shock- if you start to experience electric shock every time your body comes in contact with the metallic parts of your turntable, then it is time to ground your turntable.
    • Humming – While this is not easily noticeable if you start to hear a faint hum or screeching sound distortions, then you should immediately proceed to ground your turntable.

    How to Assemble a New Turntable Smoothly

    If you’re at a loss on how to set up your new turntable, then this section is for you. Once you can successfully set up your turntable, you will better understand the turntable and the turntable’s ground wire.

    Step 1: Fastening The Cartridge To The Tone Arm Or The Head Shell

    You need to use two screws and nuts for this process, which usually come with the cartridge. The phono cartridge is commonly attached to the cartridge holder.

    The cartridge holder is also widely called the headshell and is generally connected directly to the tonearm cartridge.

    Then, you proceed to detach the cartridge holder from the tonearm. To do this, move the tonearm lift bar to the bottom of your new turntable.

    Before tightening the screws, make sure to put the cartridge in its correct position right in the center before placing it on the cartridge holder.

    To prevent damage to the stylus during this process, you should keep the stylus cover on all through this process.

    Step 2: Attaching The 4 Wires To The Phono Cartridge

    After tightening the phono cartridge to the headshell or the tonearm, you should then attach the four wires on the cartridge headshell to the proper terminals behind the cartridge.

    These wires, just like the headshell, are labeled and have different colors. In order to avoid confusion, it is best to consult the manufacturer’s manual for more guidance.

    Then you can attach the cartridge holder to the tonearm and slightly tighten it. It gives the cartridge freedom to move back and forth and allows the angle to be adjustable.

    Step 3: Stabilizing The Tone Arm and Setting The Tracking Force on the Tonearm

    In order to allow the tonearm to float smoothly, the cartridge weight needs to be balanced. To balance your tonearm is pretty straightforward.

    The typical balance is around 2.5 to 3 on the dial of most standard machines. However, the real way is to find where the arm balances on the parallel.

    The parallel is where the tonearm is parallel to the platter and balanced. Once you lower it, it tends to drop slightly, and that slight drop is what keeps it in the groove of the record without damaging it.

    With that in mind, the longevity of your record should get the balance right.

    Remember that the needle is delicate, so don’t let it crash down at any time. I like to put a small dry sponge under the needle when I’m balancing it, so when I let it go to see if it’s balanced, it can only fall onto the sponge.

    The amount of downward force the needle exerts when touching a record is called the tracking force.

    Adjusting the tracking force should be done carefully and precisely. Each cartridge design has a different tracking force specification, and it commonly ranges between 1 and 3 grams. Therefore it is essential to follow the number specified on the tonearm. (Source)

    If there is as much as a slight mistake and the tracking weight is set too high, the sound becomes ponderous and dull. If it is set too low, the presentation turns thin, and the cartridge won’t track the groove as required. (Source)

    The last adjustment to the tonearm concerns the bias. Bias is known as the sideways force on the cartridge, which balances out the inward pull of the groove. You’ll typically set the bias to the same amount as the tracking weight.

    Step 5: Skating-Resistant Control

    Some turntables come with an anti-skating handle. This skating-resistant handle compensates for the skating force that moves the tonearm to the center of the turntable when it is spinning.

    It also helps the turntable reduce unbalanced pressure on the sides of the groove. The skating-resistant control does not need to be adjusted because it’s completed with the tracking force adjustment.

    How To Connect Yоur Nеw Turntable to а Record Player or Audio Equipment

    Some turntable models come with built-in speakers, which means you don’t have to purchase any external audio equipment. This feature is particular primarily to the high-end turntables or the best ones.

    For turntables that don’t have this feature, here is how to rightly connect the turntable for better sound production.

    Under the turntable are colored outputs that you can attach tо thе phono input оn thе bасk оf thе external amplifier. For turntables that don’t have this feature, use the external phono preamp instead. You should also make sure to have completed the grounding process at this point as well.

    To avoid placement or input issues, you can use the wireless options. There are Bluetooth turntable models that offer a lot of additional features.

    Most Bluetooth turntables also come as automatic, which means you barely have to deal with handling everything manually. A simple button push is all you need to enjoy high-quality sound production.

    How to Maintain The Turntable During Use

    You have successfully learned how to ground a turntable effectively and how to set up a new turntable, and now it’s time to learn how to care for your turntable accurately. To enjoy the best sound quality, you must keep your turntable in premium condition. Here are a few maintenance tips to help you. (Source)

    Clean Your Turntable Periodically

    Regular cleaning of your turntable helps avoid damages to some replacement part or the turntable in general. It also makes sure that your turntable is running at all times in premium condition.

    There are several cleaning kits available to suit this purpose. You can also use a clean microfiber cloth and some dishwasher liquid in clean water. (Source)

    Keep The Needle/Stylus Clean At All Times

    It is essential to pay attention to all parts of your turntable while cleaning. One of such vital parts is the stylus. A clean stylus is critical to the quality of sound produced by the turntable. Try using soft anti-static brushes to clean out dust and debris on the needle effectively.

    Weather Maintenance

    Avoid placing your turntable in places with extreme heat or under direct sunlight. There are instructions on the manual that indicate what kind of weather is most suitable for your turntable and its coating.

    Try to keep the turntable away from moist areas or areas prone to water. Be careful not to spill water or other liquid contents on the turntable to avoid damages or electrical shock.

    Avoid Using It All The Time

    As excited as you are to enjoy your new turntable, try not to overuse it. Avoid using it straight for several hours at once. Also, remember to keep your turntable powered down when it is not in use.

    Routine Maintenance Of The Turntable

    It is advisable to routinely check your turntable, pay attention to the sound quality and the turntable’s frequency. You can also seek professional help for more advanced maintenance.

    Conclusion

    Grounding your turntable is a critical step to enjoying a quality experience of the vinyl life. Getting this done is easy with the steps outlined above. This detailed guide will help you avoid common mistakes and bad practices.

    Sources

    1. Davis, Arthur. “Grounding, Shielding, and Isolation.” Journal of the Audio Engineering Society 1, no. 1 (1953): 103-104.
    2. Definition of ground loop | PCMag Accessed December 23, 2021
    3. Chris Heinonen, How to Set Up Your Turntable to Sound Its Best | Reviews by Wirecutter, Published August 17, 2021, Accessed December 23, 2021
    4. Kates, James M. “Low-Frequency Tracking Behavior of Pickup Arm-Cartridge Systems.” Journal of the Audio Engineering Society 24, no. 4 (1976): 258-262.
    5. Victrola, “Record Player-Care 101,” Victrola, Accessed December 23, 2021, Record Player Care 101 | Victrola
    6. Libby Plumer “How to set up and maintain your turntable for analogue audio joy,” Wired, Published January 26, 2020, Accessed December 23, 2021, https://www.wired.co.uk/article/how-to-set-up-maintain-turntable-record-player

  • A Guide To Connecting Your Turntable To Serato

    A Guide To Connecting Your Turntable To Serato

    “File:Kaisei of MasonDJs using Serato SL2.jpg” by Kaisei-kun is licensed under CC BY-SA 3.0

    Some years ago, people were confused about how vinyl and turntables still survive with their antique system. Some DJs began to spin vinyl and record their music through emulation software like Serato. It is one of the main reasons for the survival of vinyl records and turntables. What is Serato?

    During the last decade, some DJs started to sell their music record creations that Play through Serato. Many rock music fans started buying their new vinyl records. The popularity of vinyl records and turntables raised gradually, thanks to Serato. Serato vinyl emulation software is an innovation for DJs who like to play music through turntables and mix it through a computer. (source)

    How Do I Connect My Turntable To Serato?

    Serato helped the DJs to break the limits of technology and strengthen their love for vinyl records and turntables. Many famous DJs like A-Trak (Alain Macklovitch) started careers as turntablists. Are you interested in becoming a turntablist and starting your DJ career? How to connect your turntable to Serato? (source)

    How To Set Up Your Turntables With Serato

    You can connect your turntables with Serato by using a few simple steps. +Here are the steps you can follow to set up your turntables with Serato software:

    1. Firstly, you need to buy and activate the Seato software DVS expansion pack.

    2. But first, you have to buy the Seato software DVS expansion pack. Follow the following steps:

    I. Open Serato DJ and enter your account details or create a new account.

    II. After this, you will see the main screen of Serato. Go to the expansion pack tab and select DVS expansion pack.

    III. After buying the DVS expansion pack, you will get a voucher code from Serato.

    IV. Now, you have successfully bought the DVS expansion pack to connect your turntable with Serato.

    V. Go to the main tab of Serato DJ and click on the top right corner to enter the voucher code.

    VI. Now, enter the voucher code, and your DVS expansion pack is activated.

    3. Now go to the setup screen of Serato software and click on the expansion packs tab.

    4. Now select the CDJ/Vinyl control option from the given menu, and this option is available if the DVS expansion is active.

    5. Then check that whether the CDJ/Vinyl control is enabled or not. You have to enable this feature to connect your turntables to Serato.

    I. You have to re-enable it by ticking the CDJ/Vinyl control option.

    6. Now, you are using the DVS mode having audio data of 16-bit depth.

    7. Now, you can connect your turntables with Serato using the Pioneer DDJ-SX2 controller. (source)

    How To Connect Analog And DJ Turntables With Serato

    1. There are two types of turntables you can connect with Serato.

    I. Analog turntables

    II. DJ turntables (ADA digital turntables)

    2. First, we will describe connecting an Analog turntable to Serato. Follow the following steps:

    I. First, turn off the Pioneer DDJ-SX2 to connect your analog turntables to Serato DJ. Press the on switch button to turn off the power to Pioneer DDJ-SX2.

    II. Now, connect the input terminals of Pioneer DDJ-SX2 and the output terminals of your analog turntables by using the RCA cable.

    III. Then connect the grounding wires of your analog turntables to the Signal-GND terminal of Pioneer DDJ-SX2 to stabilize the control signal of the analog turntables. (source)

    IV. Now, select the PC option from the input switches for channels 1 and 2.

    V. Now, connect the Pioneer DDJ-SX2 to your laptop or computer using a USB cable.

    VI. After connecting all the devices, press the switch on button again to turn on the Pioneer DDJ-SX2.

    VII. In this way, you can connect your analog turntables to Serato.

    3. Now, we will describe connecting a DJ turntable to Serato. Follow the following steps:

    I. First, turn off the Pioneer DDJ-SX2 to connect your DJ turntables to Serato DJ. Press the on switch button to turn off the power to Pioneer DDJ-SX2.

    II. Now connect the input terminals of Pioneer DDJ-SX2 and the output terminals of your DJ turntables by using the RCA cable. (source)

    III. Now, connect the Pioneer DDJ-SX2 to your laptop or computer using a USB cable.

    IV. Now, select the PC option from the input switches for channels 1 and 2.

    V. After connecting all the devices, press the switch on button again to turn on the Pioneer DDJ-SX2.

    VI. In this way, you can connect your DJ turntables to Serato.

    4. You can not use an analog turntable with a DJ turntable. You can either use two analog turntables or two DJ turntables.

    A Complete Guide On Serato And Its Turntable Setup

    “technics + serato” by UnholyKnight is licensed under CC BY-NC 2.0

    Serato software came in 2019, and people do not have enough information about Serato. We have guided you on how to connect your turntable to Serato, but now, we have to discuss Serato. You can connect your turntable easily if you have some knowledge about Serato. So, let us discuss some confusing questions about Serato, DVS, and the use of turntables.

    1. What is Serato DJ software?
    2. What is Digital Vinyl System (DVS)?
    3. How to set up DVS mode?
    4. How many DVS modes are there?
    5. How Do Turntables Work On Serato?

    1. What is Serato DJ software?

    Serato DJ is a platform for Disk Jockey (DJs) developed by Serato software company in 2013. This music software allows you to mix audio files in a digital environment which symbolizes the traditional vinyl DJing. The Serato DJ connected to your turntable setup can incorporate up to four virtual decks. You can use the additional features and performance modes while using and connecting your turntables to Serato.

    The Serato DJ also allows you to stream your music on various streaming platforms including, Soundcloud, Beatport Link, BeatSource, Tidal e.t.c. This DJing software brings a new development for the Digital Vinyl Solution (DVS). The Serato DJ gained a massive fan following in the US market and became extremely popular among the Hip Hop community. This DJing software also provides you the freedom to use any DJ hardware you prefer to use. (source)

    Due to hardware freedom, many techno DJs, house DJs, freeform DJs, and turntablists use Serato DJ for mixing their music. You can connect your turntables to Serato by using the Serato DJ lite or Serato DJ Pro. Both versions of Serato Dj are exceptional, powerful, and provide excellent DJ tools. The Serato DJ Lite is a smaller free version of Serato DJ Pro but fulfills all the requirements of digital DJing and supports many third-party DJ hardware.

    On the other hand, Serato DJ Pro is a paid version especially for professional DJs who wants more performance and advanced options. You can also buy expansion packs to use additional features of the Serato DJ Pro. You have to buy the DVS expansion pack to use DVS for connecting your turntables to Serato. Serato DJ is an excellent digital DJing platform for both beginners and professional DJs to progress in their profession. (source)

    2. What is Digital Vinyl System (DVS)?

    DVS or Digital Vinyl System is a playback method to control the Serato software by using the inputs from the turntables connected to Serato. DVS is the technology that allows you to connect and use your turntables with Serato. DVS can be complex for new users, but we will guide you about this playback method. Digital Vinyl System promotes DJing using Serato (or other DJ software), digital music files, and turntables.

    The DVS brings the taste of using vinyl turntables in digital DJing. It means you do not have to replace your old turntables or other hardware, and you can use them for digital DJing. DJ controllers can make your DJ hardware work with your computer, and Serato, thanks to DVS. Many professional DJs still use the DVS system for mixing their music. You have to pick a DVS compatible with the Serato, like a DVS-enabled mixer, Soundcard, or DJ controller. (source)

    You can also use Virtual DJ that works with any DJ hardware that supports DVS. You can use three setup options for DVS, including breakout boxes, DJ controllers, and mixers. Each setup option has its pros and cons for connecting your turntables to Serato.

    3. How to set up DVS mode?

    A DJ has to set up the DVS mode to connect his turntables to Serato. We use CDs or records on traditional turntables or DJ players in DVS mode. The sound card box or DJ controller with DVS routes the output of the timecode playing on your turntables. The Serato changes your song according to the given data including, its direction, position, and playback speed. (source)

    You can jump, scratch, and spin a record by shifting the position of the needle. After this, the DJ controller, sound card, or mixer receives the output from Serato software. In this way, we use turntables in DVS mode to spin the digital audio play.

    4. How many DVS modes are there?

    There are four DVS modes for Digital Djing:

    1. Absolute Mode
    2. Relative Mode
    3. Internal Mode
    4. Thru Mode

    Absolute Mode

    The absolute DVS mode is for someone who likes the vinyl experience during DJing. In this DVS mode, the music starts with the timecode, and you can jump around it by placing the needle at different points of the vinyl record. When you shift the position on the vinyl, the music will not skip as if it is an actual record. This DVS mode was famous during the early years of digital DJing due to its comfort and ease. (source)

    The absolute DVS mode is a traditional mode to use DVS and provides an excellent experience during DJing. This DVS mode is easy to use, but this easiness comes at a price. You can not use many good features in the absolute DVS mode. For example, you can not use the cue points and many other DJ features with this DVS mode.

    If you connect your turntables to Serato in the absolute DVS mode, you can not use Serato software at its full potential. You can not access many Serato functions in this DVS mode, like hot cues and other loop functions.

    Relative Mode

    The relative DVS mode converts your record turntables connected to Serato into jog wheels. In this DVS mode, the position of your needle on the vinyl record does not change anything. It means the song will continue playing as usual even if you jump, scratch, or spin the vinyl record. This DVS mode is useful when you play music at a heavy bass, and your needle will move often. (source)

    Moreover, you can use all the standard advanced features of Serato using the relative DVS mode. This DVS mode is for you if you like the tactile feel of vinyl and want to use all the features of Serato. You can connect your turntables to Serato in relative DVS mode to use Serato at its full potential.

    Internal Mode

    The Internal DVS mode ignores the timecode signal and permits you to use the Serato via a device (DJ controller). If you connect Serato DJ Pro to your turntable, you use the internal DVS mode by default. We also use this DVS mode with other media players like the Pioneer CDJs to access Human Interface Device mode (HID Mode). The Human Interface Device mode converts your music player into a controller for Digital DJing.

    The music player sends MIDI (musical instrument digital interface) to your computer in Human Interface Device mode. In HID mode, you can not use MIDI to play the timecode from your USB.

    Thru Mode

    The Thru DVS mode allows you to play your songs directly from your vinyl, USB drive, or Cd and ignore the Serato DJ Pro. In this DVS mode, you can play your recorded music on the music player connected to your computer or laptop. You have to put your DJ deck into Thru DVS mode if you want to play an original vinyl record during a concert. (source)

    This DVS mode informs the Serato DJ Pro to play music from an external device. But you have to keep your computer plugged in, or your music will stop.

    How Do Turntables Work On Serato?

    The setup method of connecting your turntables to Serato is as simple as it was before. Firstly you will need a Pioneer DDJ-SX2 mixer, a computer, two turntables, and two or more speakers for this setup. The Serato allows you to give a digital file to the vinyl spinning on your turntables. The records spinning on your turntables connected to Serato have a tone instead of music.

    The tones of these records spinning on your turntables connected with Serato have a time code. Firstly, the turntables send these tones to the computer, and then the computer reads the time code of these tones. Then you can assign your selected songs to each turntable using your connected computer. If you do something on a record, the computer considers it as if it were an original record.

    You can increase or decrease the pitch on the turntable connected to Serato, and the computer gets this data as input. For example, the computer receives a time code that informs it that music plays at plus 2%. Then the computer generates music according to the instructions given by the time code. When you move your records back and forth, you move the time code back and forth.

    So, these time codes inform the computer where the vinyl record is going forward and backward. Then a scratch voice generates with the music you are playing while connecting your turntables to Serato. In this way, you can use turntables to edit your music with Serato.

    The Bottom Line

    So, here is a complete guide to connect your turntables to Serato software. The traditional vinyl DJing is still alive, thanks to Serato DJ Pro. It is an excellent way to use the new features of digital DJing, with the classical feel of vinyl records. You have to use a DVS mode to use your turntables with Serato DJ Pro.

    We hope this guide will help you connect your turntables to Serato.

    Sources

    1. Serato DVS Manual
    2. Using Serato DJ & CD/Media players with DVS
    3. A Revisit of Farrugia and Swiss’s “Tracking the DJs” (JPMS, 17.1)
    4. https://heinonline.org/HOL/LandingPage?handle=hein.journals/sjost8&div=9&id=&page=
    5. Turntable Music in the Digital Era: Designing Alternative Tools for New Turntable Expression
  • Reasons Why Your Record Player Is Making Loud Humming

    Reasons Why Your Record Player Is Making Loud Humming

    To most folks, the sound produced by the vinyl record when playing on the turntable is unmatched. It provides an unforgettable listening experience with inherent warmth that you can only compare to live music. Unfortunately, disruption of this exceptional listening experience by a loud humming noise produced by the record players can happen. So, after thorough research, we compiled the following article on the main reasons your record player is making a loud humming noise.

    When it comes to record players, the main reasons why it produces humming noises is feedback and ground loops. Remember, the hum is a low-pitched continuous tone produced by turntables, and you can easily correct the humming noise triggered by grounding problems. (source)

    The buzzing or humming noises are so annoying, right! These noises can mess up your vinyl record experience. So in this article, we’re going to troubleshoot the problem and find out the main reasons why your record player is making a loud humming noise. We’ll also show you how to solve this humming problem once and for all.

    Why Is the Record Player Producing Humming Noises?

    Vinyl records are excellent sources of analog music that were once thought dead but are making a comeback. And that is because they produce sound in its original form without any distortion or background noise. In fact, this music source is only rivaled by live music; after all, it is a perfect recording of live music. (source)

    It has forced many turntable producers to manufacture modern record players with fewer distortions. Digital music has dominated the sales record for decades, but for the first time, record sales exceeded CD sales in 2020, thanks to the COVID pandemic. (source) After all, most audiophile and live music lovers couldn’t access the live concerts. Therefore, they had to settle for record players, which produce high-quality analog music.

    Over the last few years, the increase in popularity of vinyl records and turntables has introduced a few record player issues that most folks had forgotten. And one of the most problematic issues is producing a loud humming noise when playing the vinyl record. Plus, with many young audiophiles turning to turntables, most folks don’t know how to fix most of these issues.

    Remember, the hum is a low-pitched continuous tone produced by turntables, while noises can be howls, hisses, clicks, or sharp crackling sounds. The hum or buzz noise produced by a turntable is a low-frequency noise linked with induced 60-cycle noises, and in most cases, it often has something to do with ground loops. (source) Some of the leading causing of the humming or buzzing noises include:

    Problems With the Amplifier

    If your turntable produces humming noise, the first thing you should focus on is the amplifier. If you lower the volume and the humming noise persists, the amplifier may be the issue. There is a connection between the amplifier’s chassis and the metallic part of the turntable from where you can ground this system to the water pipe. But if the issue persists even after creating a ground loop, you need to service the amplifier.

    Grounding Issues

    As aforementioned, there is a connection between the metal part of your system and the amplifier’s chassis where you can easily ground the system. Without proper grounding, your device will produce humming noises when playing the music. (source)

    Feedback

    A turntable is a susceptible unit that can be easily affected by the surrounding noises. So if placed on a tape recorder or a power amplifier, the record player will start producing the humming noises. Plus, being a sensitive device, the turntable can pick the humming noises made by other devices near it and amplify them.

    The best solution for getting rid of feedback noises is isolating the turntable. So if feedback noises are a problem, you can move the turntable away from the power amplifier, speakers, or tape recorder. After all, a motor or transformer can produce an isolated hum field. (source)

    The humming produced by ground loops differs from the noises made by feedback. Plus, feedback humming is relatively high when the volume of the record player is high. (source)

    The Turntable Motor May Have Excessive Hum Field

    Even though this is quite rare, it does happen in some situations. Some turntable motors come with excessive hum fields. In fact, the excess hum field occurs when you install a magnetic pickup in a vintage records player designed for a ceramic pickup. (source)

    Cartridge’s Metal Headshell Is Not Grounded

    The metal headshell isn’t grounded if the hum increases when you place your hand on the cartridge headshell. If your turntable has a plastic headshell, then it should also come with a metal grounding clip that is usually marked “RG.” If your device has a metal headshell that produces a steady hum, uninstalling the grounding clip can help. (source)

    Another solution is removing and then installing the headshell, ensuring correct installation. If the problem persists, you can clean its contacts using isopropyl alcohol. And before reinstalling the headshell, you can check if the wires connecting the cartridge to the headshell are sturdy. If any of the cables are loose, you can tighten it and confirm if it still produces the humming noises. (source)

    A Connection Between the Turntable’s Metal Parts and Cables’ Shield

    Lift the turntable and look at all the connections on the underside of your device. Remember, there should be no connection between the cables’ shield and the metallic parts of the turntable. These connections can force your turntable to start humming when playing your favorite records. If there are connections, you should remove them and install a new ground wire. (source)

    How to Get Rid of the Humming Noise Produced by Turntables

    The leading cause of the humming noise is usually obscure, and it even baffles most experts; fortunately, the hunt for the reason can be fun. After all, the worst enemy for exceptional music produced by turntables is the noise and hum. Noises are any disturbing crackling howls, clicks, or hisses produced by turntables when playing your record, while hums are low-pitched noises. So instead of hiring a professional to help you solve this issue, you can track the leading cause of the problem. (source)

    Therefore, the first step to solving this problem is locating the cause of the humming noise. If you hear the hum only when one of the sources of sound is being used (radio tuner and record player), then the issue is in that device. The problem is more than one element if you can hear the noise with the record player and radio tuner. The humming noise may originate from the units’ wiring, external cabling, the speaker, or the amplifiers. (source)

    So when troubleshooting the humming noises, you should start with:

    The External Wiring

    When troubleshooting this issue, the first place you should look at is the external wiring. The AC cables can produce humming noises when placed near the other audio cables. So, it would help if you didn’t tie the AC cords together with other lines simply because they look neat. After all, they may seem extraordinary, but the amount of humming they will produce will disrupt your music experience.

    When diagnosing this issue, you should unplug everything, insert every cable in the chassis socket, and confirm if it produces noises. But make sure the record player is playing your favorite music. If it produces a humming noise when plugged in, then the issue may be a loose socket/plug contact or loose connections in the contacts. So you may have to repair the damaged socket contacts before reinstalling the cables.

    When examining the cables, you shouldn’t forget to flex the cables a bit before plugging them in. if the cable produces a sharp crackling noise when bent, the cable may have broken braids in the shielding braid or the inner conductor. (source) Therefore, make sure you replace the broken cables with new ones and try and confirm if it is still producing humming noises.

    To Ground Or Not Ground

    To lower the hum and noises in your system, you should be ready to ground the turntable. It would be best to connect a particular part of the system to the water pipe using a ground wire and create an earth ground. Creating a ground loop is an exceptional idea, but don’t assume that it will always work; it can sometimes worsen the situation.

    When connecting numerous components, you may create more than two ground connections between the external ground wire, power cables, and audio cables, among other elements. These connections can create a closed-loop, also referred to as a ground loop, that serves as a pickup coil. The hum fields nearby can induce a hum voltage in the ground loop.

    The condenser connected from the chassis to the power cord may also be a hidden connection to the earth’s ground. After all, the power line is already grounded; therefore, it produces a small hum voltage that can magnify by the high-gain amplifier between the water pipe and the grounding point. Consequently, it would help approach the grounding connection with an open mind.

    So, it would help if you started with some trial connections at different positions. And make sure the volume is adequate so that you can notice any changes in the sound produced. Try and ground various components separately or together while monitoring the reduction or increase in hum. Remember, all the hi-fi installations are different, so you may have to experiment before finding an ideal arrangement. (source)

    Treat Your Amplifier as a Separate Unit

    Even if the power supply, power amplifier, and pre-amp are separate, you may want to consider treating them as a single unit. So you should reverse the AC plugs in the wall socket; if you have several AC cords, you should try different combinations. Try troubleshooting with these questions:

    • Are the bass and treble inadvertently set at extreme ranges?
    • Are the tuner and record player feeding more than enough signals to the amp?
    • Have you installed the equalizer in the wrong place? It can force it to start hissing excessively. (source)

    Add a Hum-Balancing Control

    Most modern amplifiers come with a hum-balancing control unit that helps silence the record player. So if your record player doesn’t have one, you install one. Look for a 2watt 100-or-50ohms potentiometer and install it in the chassis near the input tube. If a certain part of the radio player is grounded, you may have to disconnect the ground wire at all the tube sockets and pass the wire to the transformer.

    In some hi-fi amplifiers, the filament will be parallel wired, with the filament’s center tap winding around the grounded transformer. So, before installing the hum-balancing control unit, you should disconnect the center-tap ground. Next, connect the potentiometer’s outer lugs to the filament lugs of the input tube. Finally, you can connect the potentiometer’s center lug to the chassis ground and then confirm that every ground line is passing through the potentiometer.

    After installing it, you can adjust the minimum hum of the hum-balancing control for the minimum buzz using the input selector on the magnetic phono. You should turn the bass control to maximum bass, and the volume control should be wide. Look inside the amplifier for poorly or missing seated shields on the glass tube. You can tap all the tubes with a pencil and confirm if the humming changes with intensity or steadiness. If it doesn’t, you should replace it, since it’s faulty.

    If the tapping noises duplicate a howling or humming noise and you hear them on specific notes, the speaker may be the issue. The speaker may cause certain parts of the tube to vibrate. So if the new tube is not enough to stop the humming, you should try wrapping solder around it. Substitute all the tubes in the pre-amp and amplifier separately.

    Tighten all the screws holding the power transformation perfectly. After all, the loose laminations can vibrate the first-stage tube to start humming. If the vibration is too much, you should mount the transformer on rubber washers and ground its case to the chassis.

    Clean the tone, and loud volume controls using the contact cleaning fluid. Examine the chassis for bare sires and connections touching the chassis or each other and suspicious solder joints, particularly the ones binding the braids to the chassis.

    If the amplifier doesn’t have a bottom plate, you should make one. If that is not an option, you should set it on a sheet and bind it to the ground wire. If the problems persist, you should contact a technician to help you replace the electrolytic capacitors. (source)

    Repair a Damaged Loudspeaker

    The speaker’s cone might have a tear, resulting in the production of rattles. So if the puncture is large, then you may have to replace the cone, but if it’s a puncture, you can repair it using masking tape. Try and press the center of the cone lightly and see if the humming stops.

    If the noise stops, the voice coil may be rubbing against the magnet. If this is the case, you should hire a professional to help center the cone. Vibrating panels and loose joints can force the speaker to produce some noises. (source)

    Consider the Record Player

    If it turns out that the noise is coming from the record player, you should try and find out if you are mistaking the rumbling noise for humming. Remember, the rumble is the outcome of the roughness in its mechanism that vibrates the stylus, so if you hear any disturbance when the music starts but stops when you lift the stylus on the disc, it is rumbling.

    The cause of the rumble is misaligned idlers and drive wheels or dirt. If the rumble is a hum, then you should check the following:

    • The cartridge leads are too close to the motor wiring
    • Loose grounding bond between the deck and motor frame
    • Bad shield connection to pre-amplifier chassis, deck, and cartridge case
    • Pickup can be affected by the motor’s hum field

    With its motor running, you should try swinging its arm across the turntable. If the humming worsens when the pickup is over, the motor is the cause. If you have a separate tonearm, you should mount it in different positions. (source)

    FAQs

    Why Is My Turntable Producing Weird Noises?

    A worn or old stylus can cause the vinyl record to produce ominous or scratchy noises. But if it has some ground issues, it will start making humming noises. In this case, you may have to connect your system directly to the wall outlet.

    How Can I Fix a Humming Record Player?

    There are many solutions for the humming noises, with the main one being connecting the turntable to the ground earth cable. If the cause of the humming is feedback, then you should move it away from the source of the humming noises, like the speaker or external amplifier.

    What Are the Causes of the Humming Noises?

    The leading causes of humming are feedback and ground loops. The ground loops get triggered by grounding issues which you can easily correct by adding a ground cable. But with feedback, you have to relocate the turntable to another surface away from the source of the humming noises.

    Conclusion

    Nothing is more disappointing than a loud humming noise disrupting your music experience. And to make it worse, the humming noise can increase when you increase the voice. Luckily, there are many methods you can use to eliminate the humming noises.

    Sources

  • Why Your Record Player Sounds Muffled And How To Fix It?

    Why Your Record Player Sounds Muffled And How To Fix It?

    Notice a strange sound from your record player, and you’re unsure what it is? All you know is that it sounds muffled and unclear.

    You don’t have to throw out your record player for this reason, as it is entirely fixable. There are several reasons why your record player can produce muffled or fuzzy sounds and quick DIY fixes to sort this issue. The first step is to identify why it sounds fuzzy.

    Fuzzy or muffled sounds are not uncommon when it comes to record players. Several reasons can cause this distorted sound: dust, a record player kept in poor condition, a worn-out stylus, or a poorly set up record player.

    Let’s examine each reason, how to prevent them from happening, and proffer solutions on how to fix these issues.

    Common Issues That Might Result In Muffled Sounds In Record Players

    These are some of the reasons that may cause your record player to sound muffled:

    1. Dirty, Broken, or Worn Out Needles

    The leading cause of most audio issues associated with a record player is the needle. The needle is an essential part of your record player and should be in optimal conditions at all times.

    Refined sound comes from the record player’s groove edges, where the stylus usually reads. A damaged stylus would be hitting down your record, not the edges anymore, and this would result in distorted sounds. (Source)

    Subsequent use of a lousy needle might damage your records as well as produce worse sounds. Examine your stylus for dirt or damage once you notice any strange sound coming from your record player. If you see your needle damaged, you should get a new one and change the old set.

    Depending on your budget and preferences, you can change the needle or get a whole new cartridge set.

    You should check your needle for dust balls or debris. If you find some stuck on the needle, this might cause a poor sound. To clean off the dust, do not use your fingers. Record player needles are pretty fragile. (Source)

    If you own a dust cleaner, now is the time to bring it out and put it to use. You can also try to blow off the dust gently. There are stylus cleaners designed specifically for your needles to solve this issue quickly. (Source)

    2. Faulty Records

    There are several reasons why a record can be faulty. One of such reasons is the accumulation of dust on the record surfaces. Once dust particles have gathered or settled on the record, then it becomes difficult for even a new stylus to read the groove properly as it should.

    Your new record can produce fuzzy or muffled sounds. It is because dust particles must have settled on it through the manufacturing and shipping process before it gets to you.

    To fix this, all you need is a good cleaning brush. Record cleaning brushes will effectively clean out all dust specks and particles without causing any damage to the record.

    3. Worn Out Records

    Another reason the sound produced is muffled, or fuzzy is an overplayed or worn-out record. It is possible to get so lost and carried away in the beauty of the great sound produced that we overplay a record till it dies.

    When the stylus goes over and over and over the record continuously, wear and tear eventually starts to set in, which has a negative effect on the sound produced.

    To confirm if your record is bad, try to compare it to a newer one. If you notice some flattening, then yup, lousy record.

    Another way to check if you notice your stylus sliding off the record, that’s an indication that it’s time to throw it out.

    There is no quick fix to a worn-out record. Once it’s bad, you have to throw it out and get a new one. Not only do you have to deal with awful sound, but continuous play might also cause damage to your needle or worse. The best advice would be not to overplay any particular record.

    There are digital vinyl libraries for your indulgence. You can easily switch between your record and the digital counterpart, reserving your record for special moments.

    4. Wrongly Setup Record Player

    It is a broad topic with several factors involved in faulty or wrongly setting up record players. However, we would try to narrow it down and make it as brief as possible.

    The first of these issues could be a misaligned cartridge. The primary function of the cartridge is to turn mechanical movements into a signal. In an ideal situation, a properly functioning cartridge change all the vibrations picked up by the stylus into electrical energy, then converted into sound.

    Getting your cartridge set up correctly is essential to reduce wear and experience optimal sound production. A misaligned cartridge would only produce awful sounds or cause damage to your records.

    Setting up the cartridge is tedious, mainly because you have to correctly get the angles and positions. The invention of the cartridge alignment protractor has made this easy.

    It makes realigning the cartridge fast and straightforward. Once you’ve completed this and the tracking weight has been reset; you should experience an immediate change in the quality of sound produced.

    5. Faulty Record Player

    What type of record player do you own? Did you buy a pre-owned set or a cheap new one down the block? The sound produced by your record player is only as good as the record player itself.

    If you happen to own a pre-owned set, you have to run a check through yourself or with the help of a professional to be sure all components are of optimal quality.

    If you happen to own a cheap set, this might be the cause of the terrible sound production. Some of these cheap record players are made without following the proper guidelines or with shoddy components that are as good as dead.

    Instead of having to spend double the price from fixing broken parts or purchasing a new one entirely, you should instead save up and do proper research before buying a set.

    6. Faulty Tone Arm

    The tonearm is another essential component of the record player that significantly affects the sound it produces. Properly setting up your tonearm is crucial as this affects the quality of sound made and the balance of the turntable.

    The job of the tonearm is to support the cartridge, apply the anti-skate force, apply the correct weight and pressure, and maintain a fixed angle for the cartridge. Any slight change in this ultimately affects the overall function of the record player.

    With the tonearm, there are two types of problems: the mechanical problem that you can see with the naked eye and other less visible issues but affect sound quality. Our focus is on the issues that significantly affect the sound quality.

    The first of the tonearm’s less visible issues would be a humming or muffled sound. In this case, you should check to see if your tonearm has a ground wire; if it does, confirm that it’s properly connected to the ground terminal. The record player’s manual would be a helpful guide in fixing this.

    Another possibility is the balance fix. It has to do with the vertical tracking force. Without the right amount of weight bearing down on the stylus, the stylus won’t track the record properly. It leads to weak or muffled sound production or, in some cases, loss of bass frequencies.

    The manufacturer determines the correct amount of VTF, and it is usually stated on the cartridge package. (Source)

    7. Nonlevel Surface And Inner Groove Distortion

    Placing your record player on a level surface before starting your music playing section is equally as essential. A nonlevel surface will result in vibrations and shakes that will affect the quality of sound produced.

    In cases where the record player tilts forward or sideways, the needle drags on the inner walls of the grooves and causes a distorted sound.

    To sort this, all you have to do is ensure that your turntable is on a level and balanced surface. Avoid placing the record players on your speakers and woofers. You can equally purchase a slipmat; this helps hold the record player in place sturdily and filter out external vibrations.

    Loose screws could also cause muffled or sound distortions. A misaligned record player will also produce distorted or muffled sounds.

    Check through the components of your record player to be sure everything is correctly in place. Tighten loose screws and play a record to ensure the problem is fixed correctly, or you’ll have to troubleshoot further.

    8. Sound System Setup

    Suppose your record player connects to a receiver with other components such as a CD player and TV. You have ruled out other possible possibilities that could be causing the muffled sounds.

    In that case, you should check the input ports on your record player to be sure they are correctly connected. If you have a new set of cables, you can even swap them to ensure it’s not a bad cable issue that’s causing you problems.

    Another possible cause could be your input cables are wrongly connected. In this case, switch them, making sure each cable mouth goes into the correct port.

    Your sound speakers and how they are positioned could be the reason for your muffled sound production, as the positioning is known to have significant effects on the quality of the sound produced and the richness.

    Keeping your speakers side-by-side would significantly differentiate between the sounds from instrumentals and other musical pieces. Keeping them close to a wall could muffle up the bass sounds.

    Try to keep your speakers away from the wall as much as possible, especially if they are significant. Try to keep a reasonable distance between the two speakers and the record player.

    9. Check Your Phono Preamp

    The sound produced by the record player naturally is a shallow audio signal that needs amplification. The preamp is just the device for that. It acts like a booster for the signal transmitted by the record player.

    Another function the phono preamp has is to help apply the RIAA equalization curve. What this does is that it effectively balances out the high and low frequencies of the record, thereby allowing for a better-equalized playback. (Source)

    An incorrectly set up phono preamp can cause your record player to produce muffled sounds.

    The Types of Phono Preamps and How They Can Cause Muffled Sounds

    There are two types of phono preamps, the internal and the external. You practically have little to no control over the internal preamp and might be unable to fix it if that’s the cause of the muffled sound.

    However, that’s not to say you cannot tweak a few things with this. A common mistake with the internal phono preamp is the setting switch is commonly left on the wrong option. Often, they have the internal phono preamp set to LINE and the audio cables plugged into PHONO on the receiver. It is bound to give out distorted sounds.

    Internal phono preamps on record players should be set to PHONO, while you should plug the audio cables into the PHONO input on your receiver.

    The External Phono Preamp

    The external phono preamp is our focus here. With this, you have complete power over controlling the quality of sound produced. A separate power supply source also cancels out the electrical noise the internal phono preamp often picks up.

    To set up your external phono preamp, you need audio cables; you will then plug these audio cables into the L/R output ports on your record player.

    Once complete, you should plug the other ends of these audio cables into the input ports on your external phono preamp. If your record player has a ground terminal, you should connect to it as required by the set-up instructions.

    The next step is to connect excellent and quality audio cables to the output jacks on your external phono preamp and then plug the other ends of the cables into your audio system. It could be your amplifier or speakers.

    Whatever you do, make sure you don’t plug them into a phono input by accident, as this would cause massive sound distortion.

    When it’s down to connecting this equipment, it is essential to avoid running the power and audio cables parallel.

    You should also ensure they don’t cross one another. It helps prevent your cables from getting tangled up and tied together. Mangled cables can cause humming feedback or muffled sounds too.

    Just as with your record player, pay attention not to place your external phono preamp on other devices or equipment. It can lead to muffled sound production or hums. Be careful not to plug your phono preamp into a different audio device, such as a TV. The difference in signal level can lead to severe damage.

    How to Maintain Your Record Player

    We have explored the different possibilities as to why your record player might produce muffled sounds and simple DIY fixes to get it back to normal.

    Now let’s talk about maintenance processes that could help you avoid some of these issues.

    • Try to purchase a vinyl record cleaning kit. These kits are specially designed for vinyl and would not cause static or damage. The kit’s contents include an anti-static brush, a cleaning solution, and some wipes. You can buy a kit off Amazon.
    • If you cannot purchase a cleaning kit, you can wipe down your record with distilled water and a clean microfiber cloth. (Source)
    • Keep your record player away from direct sunlight, excess heat or exposure to water, and other harmful liquids.
    • Try to clean your record player once a week with a clean microfiber cloth, distilled water, and wipes.
    • Regularly check that you’ve installed all components correctly and screws fastened before use.
    • Always keep your record player on a level surface. Avoid shaky surfaces or vibration-prone surfaces.

    Conclusion

    Muffled or fuzzy sound production by your record player is not enough reason to discard or throw it out. All it could require is a simple fix. However, suppose you’re unfamiliar with the components of a record player, or you own a high-end record player with expensive parts.

    In that case, it is advisable to seek professional help since record players that belong to the high-end group commonly come with warranties, so that should keep you covered.

    The above-outlined factors are hiccups your record player could be experiencing, causing it to produce muffled sounds.

    Now, suppose you have tried any of the above methods without any success. In that case, you should try visiting your local store or seeking the help of a professional to prevent further or irreparable damage to your record player or records.

    Sources

    1. Ngai, Mun‐Hay. “Record player.” The Journal of the Acoustical Society of America 68, no. 4 (1980): 1241-1241.
    2. Walter L. Welch. 1972. “Preservation and Restoration of Authenticity in Sound Recordings,” Library Trends (1972) 21(1):83–100.
    3. How to Change the Needle on a Record Player ” Wikihow, Accesses November 17, 2021
    4. “Audio Solutions Question of the Week: How Do I Balance the Tone Arm and Set the Tracking Force for the AT-LP120-USB and AT-LP1240-USB Turntables?

    Accessed November 17, 2021,

    1. Galo, Gary A. “Disc recording equalization demystified.” ARSC Journal 27, no. 2 (1996): 188-211.
    2. Bret Helm’s Life On This Planet Blog, “Spin Clean Vinyl Record Washer: Demo & Review,” YouTube Video 9:14, Posted By “Bret Helm,” March 4, 2014, https://youtu.be/DaUKsA_yytA
  • How To Tell If Your Turntable Cartridge Is Bad

    How To Tell If Your Turntable Cartridge Is Bad

    The cartridge, also mistakenly referred to as the styli or needle, is the most crucial part of the turntable. After all, every record player has a component that sits on the vinyl record’s grooves and reads the undulation on the grooves’ walls. Unfortunately, some parts of the cartridge, particularly the stylus, tend to wear down with time. So if you want to know how to tell if your turntable cartridge is bad, please read on.

    The phono cartridge is a crucial component generally attached to the tonearm that directly contacts the vinyl record. The cartridge is typically mistaken for the needle; after all, the stylus and needles are in the cartridge. And one of the main signs of a damaged cartridge is a damaged stylus. (source)

    As aforementioned, the cartridge is the most crucial part of the turntable containing the styli. The stylus is the needle that sits on the grooves of the vinyl; unfortunately, different components of the cartridge break down or wear out with time. So in this article, we will show you the signs to watch out for when the cartridge goes bad. We’ll also show you how to replace a bad cartridge.

    What Is a Turntable Cartridge?

    Generally, there are two kinds of cartridges: moving coil (MC) and moving magnets (MM). The MC and the MM have pros and cons, but they play a crucial role in the quality of the sound produced by your turntable. So before picking any cartridge, you should first test them out.

    The vibrating magnets vibrate near the coiled wires in the MM cartridge system. The MM cartridge has a high output, and you can easily replace its stylus; therefore, it has a sturdier design. Unfortunately, they are heavier than the MC cartridges. (source)

    So they tend to press deeply into the vinyl’s grooves than the MC cartridges. Therefore, they are less detailed than the MC cartridges, especially how they travel along the vinyl’s grooves. On the other hand, the MC cartridges attach to cantilevers and travel within the field of its fixed magnet. The MC cartridges are lighter than the MM, producing accurate and detailed sound. (source)

    Unfortunately, since you can’t replace the stylus of the MC cartridge when the needle gets damaged, you have to replace the entire cartridge. Compared to the MM cartridge, replacing the MC cartridge can be quite costly. (source) So, if you don’t know how often or the right time to replace the cartridge, you need to know which signs to watch out for regarding the component.

    How Does It Work?

    The work of a cartridge is to convert the movement of the stylus into signals thanks to the magnet attached to the cantilever. Therefore, when the needle moves, the magnets move, which can induce voltages in the coil placed between them. The coil of wire links to the pins situated at the back of your cartridge. There are four pins at the back of your cartridge (the negative and positive connections for all the channels) and two sets of coils.

    It works for the MM cartridge, but with the MC cartridges, the magnet remains static, and the coil moves. Therefore, the MC cartridge is lighter, which means that the coils, cantilever, and stylus weigh less. So they can start and stop the vinyl records faster than with the MM cartridges. But the MC cartridge requires a fine wire for greater precision, so they are more expensive than the MMs.

    In fact, the MM cartridges wear down faster than the MC cartridges. Fortunately, cartridges have a lifespan, and they tend to wear out with time.

    How Often Should You Replace the Stylus?

    A considerable percentage of the turntable manufacturers recommend that you should replace the cartridge or the styli after about 1,000 hours of playing time. Therefore, if you’re using your device for about an hour every day, you will have to replace the cartridge or stylus once every few years. But this varies with manufacturers and the materials used to make them. So you should confirm the recommended lifespan of the stylus before purchasing it.

    Some turntable users will claim that sticking to the manufacturer’s lifespan is too cautious. And as long as you’re cleaning the stylus, then it will serve you for a very long time. On the other hand, some will say that replacing the needle or cartridge is essential to getting the most out of your turntable.

    Fortunately, there are many ways you can extend the lifespan of the stylus. And one of the easiest and most effective ways is by taking good care of it. After all, if you take care of the cartridge, it will take good care of your vinyl records. Remember, anything that sticks to the grooves of the vinyl, like dirt or dust, can damage the stylus forcing you to either replace the needle or the entire cartridge. (source)

    So it all depends on you; after all, there is no science behind this. Numerous factors can increase the wear and tear level of the needle. So before replacing the cartridge as per the manufacturer’s recommendation, you should consider the following signs of a bad turntable cartridge.

    What Are the Signs of a Damaged Cartridge That Needs Replacing?

    As aforementioned, the stylus, which is the part of the cartridge that comes into contact with the vinyl, tends to wear out with time. Other than the cartridge’s lifespan, many signs warn you when it is time to replace it. Some of the critical signs to watch out for include:

    The Needle Is Jumping or Skipping Out of the Vinyl’s Groove

    The turntables come in different types of style, with the most common ones being the spherical/conical and the elliptical. The design of these styli is to rest on the grooves of the vinyl and help convert the undulations on the grooves to analog sound picked by the amplifier. But with time, the needle can wear out, making it hard for it to rest on the vinyl tracks. (source)

    Therefore, when it starts skipping the grooves, it means that it has worn out and it is time to replace the stylus. If your device uses an MC cartridge, you may have to replace the entire cartridge, but you may need to replace the stylus with the MM cartridge. So when it starts skipping the grooves, you should stop the record player and replace the cartridge. After all, if you continue using it, the stylus may damage the vinyl records.

    Examine the Tip of the Stylus for Wear and Tear

    If you have a high-powered magnifying glass, you can examine the needles’ tip for signs of wear. Look for bends and jagged edges on the stylus’ head. If you notice any black residue on the needle, it means that it has been overused and has never been maintained or cleaned in a very long time. If the stylus tip is damaged, you need to replace the cartridge or the stylus.

    Use a magnifying glass to examine the tip of the stylus for dirt and any deformity. If it is dirty, you have to clean it and continue listening to exceptional music. (source)

    Change in Sound Quality

    One of the most prominent signs of a damaged cartridge is a change in sound quality. So the first thing you should do is listen to the dips in the quality of the sound produced by the record player. After all, there is a high likelihood that the stylus may be the issue. Therefore, you should test the dips by playing a familiar record, but make sure it’s not too valuable as it may get destroyed by the stylus. (source)

    The record player will produce a distorted or muffled sound if the issue is the stylus. You may find the treble and upper mids extremely hard to discern, or the record player may skip the “ting of the cymbals” in any music. You may also hear static or hiss in places where there was none before. The change in the quality of the music will be gradual, so you need to be keen when listening to the record.

    The change in sound quality is the best sign for a bad MC cartridge that needs to be replaced or change the stylus of the MM cartridges.

    Dirt Buildup

    The needle is one component that is in the front line of your music experience. So if anything were to affect the needle, you wouldn’t be able to enjoy your music. The stylus is the most delicate component of the record player known for diving the dust and dirty grooves of the vinyl record. Therefore, it’s bound to catch the dirt and dust that sits on the record’s groove. (source)

    With time the dirt can accumulate if not cleaned regularly, and the stylus can end up with yellow-brown dirt on its tip. The dirt can end up damaging your precious vinyl records, so you should be ready to clean them regularly. But if not cleaned on time, it may result in the stylus getting damaged. After all, the longer the dirt stays, the harder it will be to remove it.

    You may try dissolving the dirt buildup, but you will end up with a damaged needle. Therefore, the best option is to replace the stylus if it’s removable or the entire cartridge.

    Brittle components

    Vintage record players have ancient parts like a rubber cantilever that may become brittle after drying up. And while the record player can still work, excessive tracking may damage all your vinyl records. Therefore, if you inherit a turntable or purchase a second-hand turntable, you should always be ready to replace the cartridge.

    After all, determining how old the record player’s age can be challenging. Plus, the previous owner may not have taken good care of it. In other words, some parts may have broken down already. Therefore, replacing the cartridge will ensure that you enjoy your second-hand record player for an extended period. (source)

    Broken Cartridge

    If your record player has fallen at some point, then the chances are that some parts of the cartridge may have broken down. So if you notice some loose parts when shaking the turntable, then the magnets, cantilever, or needle may have broken down. If that is the case, you may have to replace the cartridge to enjoy your music.

    If your record player fell, then the connection between the cantilever and the stylus may not be sturdy enough. A loose connection between the needle and cantilever means the turntable won’t work. After all, anything can happen to the cartridge resulting in the connection between the cantilever and the needle becoming loose. So you will have to replace the cartridge when this happens.

    How Do You Replace a Bad Cartridge?

    So depending on the type of cartridge your record player is using, you may be required to either replace the whole unit or the stylus. Luckily, most MM cartridges come with a replacement stylus which is relatively easy to replace. All you have to do is clip it into the forepart of the cartridge, and in most cases, you may never have to uninstall the cartridge. But if your device has an MC cartridge, then a lousy needle spells doom for the cartridge; therefore, you have to replace it.

    If you notice the above signs, it is time to replace the cartridge. Unfortunately, most record player owners don’t know how to replace the cartridge. When replacing the bad cartridge, you should do the following:

    Pull Out the Cables Attaching the Cartridge to the Tonearm

    Hold the turntable’s tonearm in one hand and pull the wires using needle-nose pliers. Remember, not every turntable comes with removable wires, so you may have to replace the headshell if your device doesn’t have removable wires. (source)

    Unscrew the Mounting Screws and Uninstall the Cartridge

    Using a flat-head screwdriver, you can unscrew the two screws attaching the cartridge to the tonearm. If you don’t see the headshell screws, then it means that you can only replace the stylus.

    Install the New Cartridge

    Slide the new cartridge in place by simply pushing it into the tonearm. Place the screws in place and then tighten them partially. The stylus cover must be in place while you’re installing the new cartridge to prevent further damages.

    Push the Cables Back in Place as per the Color Combinations.

    Remember, the cables are blue, white, green, and red, so you should look for the letters corresponding to the colors of the wires. Next, push the blue cable to the nub marked “B” and vice versa. Unfortunately, manufacturers label their cartridges differently; therefore, you should refer to the manual and plug the cartridge correctly if the markings are different.

    Every cartridge comes with the recommended stylus pressure labeled on its packaging. So make sure you confirm the correct pressure before setting your machine. If the replacement cartridge’s recommended pressure is between 1.8 and 2.2 grams, you should rotate the turntable’s counterweight to 2. After all, two is at the center of this pressure range, and it can work perfectly if your device falls within this range. (source)

    Confirm the stylus pressure using a stylus force gauge by placing it on the turntable right near the tonearm and switching the turntable to the on position. Remove the stylus cover and lift the record player’s tonearm before setting it on the gauge. Read the pressure being displayed by the gauge and make sure it falls within the required range. So you should be ready to turn the counterweight right and left to adjust the pressure until you get the proper stylus pressure.

    Finally, you can align the cartridge using an alignment protractor, and you’re good to go.

    FAQs

    How Will I Know if My Cartridge Is Damaged?

    First, you need to check if the cartridge is damaged or crooked. You should monitor this stylus while playing the record if it’s okay. And if it’s skipping out of the records’ grooves, then it is damaged, and you have to replace the stylus or cartridge.

    Do Turntable Cartridges Wear Out?

    Yes, cartridges do wear out, especially the ones with rubber components. The rubber components can be impacted by pollution and degrade quickly. The stylus can also wear out, leaving you with a deformed cartridge that can’t read the undulations on the record’s grooves.

    Which Is Better, the MC or the MM Cartridge?

    Both the MC and the MM are exceptional, but the MC can go a step higher and even exceeds the audiophiles’ height. But if you’re looking for an affordable option that can still guarantee you excellent music, then you should go for an MM design. If you’re looking for the best overall sound, you should go for the MC cartridge.

    Conclusion

    The turntable cartridge is one of the most crucial components responsible for determining the quality of the sound produced by the turntable. Unfortunately, the stylus does wear out with time, so you need to know when the right time to replace the cartridge is. But with the above symptoms of a bad cartridge, you will never have to worry about your records getting damaged or listening to distorted music.

    Sources 

    1. David Murray, A Guide TO Turntable Cartridge and the Best Budget Models, Accessed December 27, 2021
    2. Ketan Bharadia, How to Change the Cartridge on your Turntable, Accessed December 27, 2021
    3. Jess Thompson, How Often Should You Change Your Turntable’s Stylus? ,Accessed December 27, 2021
    4. Tucker Bowe, When Should You Replace Your Turntable’s Stylus? Accessed December 27, 2021
    5. Kat Bein, How to Clean and Care for Your Turntable Stylus, Accessed December 27, 2021
    6. wikiHow staff, How to Change a Turntable Cartridge, Accessed December 27, 2021

    .

  • How To Use A Turntable Mat (Plus 9 Best Mats On The Market)

    How To Use A Turntable Mat (Plus 9 Best Mats On The Market)

    How to use a turntable mat is a question often asked by people who are new to turntablism. Platter mats look relatively simple, so people often think that they will not make much difference. But how can this thin, round mat make a difference with your music experience?

    You can use a turntable mat simply by placing it at the top of your platter before putting the record that you want to play. This accessory will reduce vibration and dampen unwanted noises to help your record produce better sounds. Turntable mats also help reduce skip rates.

    How To Use A Turntable Mat

    Platter mats seem to confuse record player enthusiasts regardless of whether they are new or knowledgeable about turntables. These materials, although thin, can change the sound that your device creates. For this reason, it is crucial to understand how to use a turntable mat correctly. It is also vital that you know which ones are the best mats in the market.

    How To Use A Platter Mat

    Platter mats are thin and round materials that record player owners place on their platter before putting a vinyl record. Their size is usually the same as the platter’s size, with a thickness ranging from 1.5mm to 4mm.

    Additionally, there are four significant types of turntable mats:

    • Felt – the most common and aesthetically pleasing platter mat. DJs also use felt mats as slip mats as they have less friction, making scratching easier.
    • Rubber – firmer than other types of platter mats, thus giving it an extra grip onto the platter. As a result, rubber mats can isolate the platter from any vibrations coming from the turntable parts.
    • Cork – an inexpensive option that creates a smooth contact between the platter and the record.
    • Leather – a material that dampens some sounds while enhancing the quality of others. A leather turntable platter creates a warm sound for bass tones.

    Moreover, you use a turntable mat to dampen resonances and reduce the vibrations between the platter, the surface of the turntable, and the other parts of the record player. A turntable mat should provide you with a higher fidelity sound than devices without it when used correctly.

    A platter mat also increases the quality of sound by reducing skip rates. This way, the music will be more integrated with the system, thus resulting in a more natural sound.

    To use a platter mat, the only thing you need to do is to place the mat on top of the platter before putting the record on. This way, you will increase the sound quality of the record you are playing. Additionally, it will protect the back of your record from getting scratches. (source)

    9 Best Turntable Mats In The Market

    Choosing the suitable platter mat depends on what you have for a type of record player. Whether your turntable is a belt or direct driven, its materials and even the platter’s weight can affect the sound that it will make. According to Hudson Hi-Fi founder Ely Liberov, “The platter mat’s sonic effect will vary across turntables and music styles.” Notably, Hudson Hi-Fi is a New York-based company that manufactures turntable accessories.

    So, if you are planning to use a turntable mat, it is essential that you know which ones to purchase. This way, you can ensure that you get the best out of your purchase.

    1. Pro Spin Acrylic White Turntable Mat

    This acrylic mat by Pro Spin can bring the best out of your turntable’s sound quality. With a thickness of 3mm and a weight of 6.4 ounces, it can help your device produce crisp and punchy music while removing resonances.

    PRO SPIN Acrylic Turntable Mat - Platter Slipmat for 12" Vinyl Vintage Record Player - Antistatic Cover, Reduces Noise & Sounds from Static & Dust - Tighter Bass, High-Fidelity Audio Quality - White

    This turntable mat can also absorb unwanted popping and static sound. It works on 33 1/3 and 45RPMs, resulting in a noticeable sound improvement from the first listen. (source)

    2. Hudson Hi-Fi Premium Acrylic Turntable Mat

    The Hudson Hi-Fi Acrylic Mat is more than just its classy look. Instead, it offers a significant reduction to the annoying noise and static produced by your record player.

    Acrylic Turntable Mat - Black - LP Slipmat with Record Label Recess

    You also notice a decrease in resonance when you use a turntable mat like this one from Hudson Hi-Fi. Its leather surface provides an excellent grip on the record. The material also isolates vibration and boosts bass for clear and lively music.

    Moreover, this turntable mat fits any 12-inch record player. (source)

    3. Facmogu Anti-Static Wool Mat

    If you are worried about your turntable mat making your entire platter heavier than it already is, the Facmogu Wool Mat is only 1.44 ounces. The wool material reduces static and takes away bumps and vibrations, which results in a crystal clear sound.

    Facmogu Turntable Slipmat Anti-Static Wool Mat - 12 inches Phonograph LP Vinyl Record Player Black Mat - Improves Sound & Reduces Noise

    Additionally, this anti-static wool mat is foldable yet lays flat on the platter. The wool helps vinyl records adhere well on the platter during play. As a result, it creates a unique sound that more rigid mats cannot produce. (source)

    4. Outus Three-Piece Cork Turntable Mats

    The brand Outus offers a three-piece set of turntable mats, which allows you to change your mat every day.

    3 Pieces Cork Turntable Mats in 12 Inch x 3 mm Recessed Turntable Platter Cork Mat Cork Record Mats with High Fidelity for Vinyl LP Record Players Audiophile Reduce Noise

    This product reduces the static and pops produced by your record player. The reason is that cork is natural sound damping and absorption capabilities. Additionally, the cork turntable mat has a soft texture, allowing you to play your vinyl record without damaging it.

    Moreover, this cork mat by Outus fits any 12-inch turntables. (source)

    5. Pro Spin PU Leather Turntable Mat

    If you want to use a turntable mat that offers noise dampening and absorption, a leather turntable mat is what you need.

    Pro-Spin PU Leather Turntable Mat for Vinyl LP Record Players (1.8mm) High-Fidelity Audiophile Acoustic Sound Support | Help Reduce Noise Due to Static and Dust

    This platter mat by Pro Spin consists of high-grade PU leather. For this reason, it can provide a fantastic listening experience. And if you want to add a retro feel and look to your record player, this anti-static leather mat can provide you with that.

    The Pro Spin PU Leather Mat works with most record players. However, it best fits 45RPM and 33 1/3RPM records. (source)

    6. Hudson Hi-Fi Premium Swiss Leather Turntable Mat

    Hudson Hi-Fi crafted this turntable mat using leather that you can only find in the US. This leather material reduces static and vibration. Even better, it does not attract dirt and dust, so you do not have to worry about dust buildup scratching your record.

    Premium Swiss Leather Turntable Mat - Black - Platter Mat

    If you plan to use a turntable mat, this one from Hudson Hi-Fi is worth having. But you have to make sure that your turntable platter measures 12 inches. (source)

    7. Electrohome Turntable Platter Mat

    The best thing about this turntable mat is that it has a silicone rubber material. For this reason, the mat’s surface will never scratch your vinyl record.

    Electrohome Turntable Platter Mat (Black Rubber) - Durable Silicone Design for Vinyl Record Players (PENTRP)

    This record player mat will let you hear music exactly as the artist intended. It has a hollow center, allowing vinyl records to lay flat on the platter regardless of their thickness. Even better, it is compatible with any 12-inch turntable platters. It can even conform to your device’s spindle. (source)

    8. Tamwell Turntable Mat

    The Tamwell turntable offers a significant amount of noise absorption, making the music you listen to crisper and more precise. It has a rubber silicone material, making it naturally slip-resistant. The manufacturer added grooves into the mat to make this slip resistance better.

    Tamwell Turntable Mat for Audiophile and DJs Slip Mat 12 Inch Silicone Universal Turntable Platter Mat with Antistatic Cloth

    However, the mat comes with an anti-static cloth that you need. Without this fabric, the mat could generate more static than your vinyl record produces. (source)

    9. Feir Store Turntable Mat

    People who want to use a turntable mat should have what they pay for, equating to good quality. Such is something that Feir Store turntable mat can offer.

    Turntable Platter Mat Black Rubber Silicone Design for Universal to All LP Vinyl Record Players

    This platter mat works with almost all record players. It has a record label recess along with grooves for slip resistance. On top of that, this mat is an affordable option for first-time mat users who do not want to spend much on their first purchase. (source)

    Should I Use A Turntable Mat?

    A turntable mat is an accessory for your record player’s platter. Of course, it is not something that you are required to use. But if you want to make your music experience better, a turntable mat can help you achieve that.

    The reason is that a record player mat is a vital interface between the record player platter and the vinyl record you are playing. It makes a positive difference to your record sounds by making them clearer and more natural. If a muddy bass performance is a problem with your turntable, you will be able to fix it using a platter mat.

    So, should you use a turntable mat? If you aim for overall improved sound quality, you should use this accessory.

    Moreover, turntable mats may look pretty simple. Despite this simplicity, it provides benefits such as:

    • vinyl record protection
    • friction reduction
    • steadying your vinyl when it is in play
    • overall sound improvement

    That said, simply putting your mat on top of your turntable platter before playing a vinyl record can make a huge difference. (source)

    Are Felt Turntable Mats Any Good?

    Vinyl enthusiasts know how essential it is to use a turntable mat. They know precisely which mat type will deliver the best sound quality.

    But for people who are not that familiar with turntablism, a platter mat might be another accessory to overlook. If you are new to record players and turntable mats, it is crucial to know how this accessory works and why they matter.

    As mentioned, there are five significant types of turntable mats, and one of them consists of felt. Considering how lightweight and thin this material is, will they do any good to your record?

    What Are The Qualities Of Felt Platter Mats?

    Felt turntable mats are the most average of all platter mats. They usually feature a thin to a medium thickness of 2mm on average. Additionally, they offer a safe and soft surface protecting your vinyl record against scratches and scuffs. They also reduce friction, making them an ideal slip mat for DJs.

    However, it is essential to note that felt platter mats are relatively low sound dampening ability. It also cannot control stylus vibrations.

    The Pros And Cons Of Felt Platter Mats

    Pros

    Cons

    Felt platter mats are lightweight, so they do not add additional weight to your record player.

    Felt is a magnet for dirt, dust, and other airborne particles. For this reason, you may have to goose every record player with an anti-static gun.

    The material has a soft surface, so it will not cause any scratching to your vinyl record.

    This material sticks to the platter, which stresses audiophiles as they think it will damage their record. (source)

    Felt is versatile, allowing DJs to use felt platter mats as a slipmat.


    That said, despite the disadvantages of felt platter mats, it is still beneficial to use, especially if you are into record scratching. It is affordable, making it a good option if you want to know how to use a turntable mat without spending too much.

    Moreover, you can solve the problem of a felt turntable mat attracting dust and dirt by removing it from your platter after using it. This way, you can ensure that it will not face airborne particles that may stick to it.

    Are Rubber Turntable Mats Better Than Felt?

    There is no denying that a turntable mat can make your record player look visually appealing. This turntable accessory is available in different materials, designs, and colors. For instance, felt can give your record player a modern look while leather makes it look classic.

    But with all the types of record player mats available, there are two that audiophiles often compare: rubber and felt.

    That said, are rubber platter mats better than felt?

    A Comparison

    Rubber

    Platter mats made out of rubber are lightweight yet firm. Since rubber materials are natural sound dampeners, these platter mats can reduce the static and popping noise that your vinyl record produces.

    In addition, rubber turntable mats can prevent too much vibration. The reason is that it can isolate your vinyl record from the rest of the record player, making music playback clear and crisp.

    Felt

    As mentioned, felt is a soft material. This factor makes felt platter mats easily adjustable and removable from the turntable platter. But while it can protect your vinyl record from scratches and scuffings, it does not do much when it comes to dampening unwanted noises.

    But what makes this turntable mat ideal is its versatility. Apart from being a turntable platter, you can also use it as a slip mat for DJing.

    Which Is Better Between Felt and Rubber?

    With all that’s said and done, it is safe to conclude that rubber is better than felt. The reason is that it provides sound dampening benefits to your record player. So, if you use a turntable mat made of rubber, you can ensure that you will hear the music you are playing exactly how it should sound. (source)

    How Can I Make My Vinyl Sound Better?

    Your listening experience will undoubtedly become better if you use a turntable mat. The reason is that this material can bring a massive difference to vinyl records. But apart from that, there are other ways to make your vinyl sound better than it already is.

    1. Keep dust away from your records

    A good turntable brush is a key to keeping your vinyl records dust-free. Just purchase a soft carbon fiber dust and brush your record before playing them. This way, your music experience will be free from static and skips.

    2. Reduce annoying vibrations

    A record needle is sensitive to vibration. It can pick up unwanted vibrations, resulting in a poor listening experience. You can use a turntable mat to reduce that vibration. However, you can also purchase a vibration isolator to prevent needle skipping.

    3. Clean your records

    If your vinyl record still produces muddy sound even after using a record brush, it may need deep cleaning. This way, you will be able to remove hard-to-clean dirt and the natural oils that came from your hands.

    However, it is essential to note that you should never use household cleaning materials when deep cleaning your record. The reason is that they contain harsh chemicals that can ruin your record’s surface.

    4. Check your turntable’s cables

    Sometimes, the problem is on the record player and not on the vinyl. For instance, a crackling noise coming from your record player means that the cables connecting it from the gear have frayed connections. If such a thing happens, you need to replace your old cables with better quality ones.

    5. Get a better cartridge

    While your turntable already has a suitable cartridge, there will always be room for improvement. If your record player has a nut on the tonearm that you can loosen, replacing the cartridge yourself will be reasonably straightforward. But if you do not have this option, the best thing to do is get a professional to help you. (source)

    Sources

    1. Joshua Kanter, “What Are the Different Types of Turntable Mats?” Why Mats Matter: Choosing The Best Platter Mat for Your Turntable (blog). February 18, 2021. https://www.rollingstone.com/product-recommendations/electronics/best-turntable-mats-1124719/
    2. “PRO SPIN Acrylic Turntable Mat.” Amazon. Accessed January 7, 2022. https://www.amazon.com/dp/B08H52BXY1?ots=1&slotNum=1&imprToken=f6bf18e0-10d8-5b59-f50&tag=rollingston07-20&linkCode=ogi&th=1&language=en_US&asc_source=web&asc_campaign=web&asc_refurl=https%3A%2F%2Fwww.rollingstone.com%2Fproduct-recommendations%2Felectronics%2Fbest-turntable-mats-1124719%2F.
    3. “Acrylic Turntable Mat.” Amazon. Accessed January 7, 2022. https://www.amazon.com/dp/B0727PT125?ots=1&slotNum=0&imprToken=f6bf18e0-10d8-5b59-f50&tag=rollingston07-20&linkCode=ogi&th=1&language=en_US&asc_source=web&asc_campaign=web&asc_refurl=https%3A%2F%2Fwww.rollingstone.com%2Fproduct-recommendations%2Felectronics%2Fbest-turntable-mats-1124719%2F.
    4. “Facmogu Turntable Slipmat Anti-Static Wool Mat.” Accessed January 7, 2022. https://www.amazon.com/dp/B07KK7P5WW?ots=1&slotNum=3&imprToken=f6bf18e0-10d8-5b59-f50&tag=rollingston07-20&linkCode=ogi&th=1&language=en_US&asc_source=web&asc_campaign=web&asc_refurl=https%3A%2F%2Fwww.rollingstone.com%2Fproduct-recommendations%2Felectronics%2Fbest-turntable-mats-1124719%2F.
    5. “3 Pieces Cork Turntable Mats in 12 Inch x 3 mm Recessed Turntable Platter.” Accessed January 7, 2022. https://www.amazon.com/dp/B08LPK62W4?tag=recordplayerpro-20&th=1&psc=1&geniuslink=true.
    6. “Pro-Spin PU Leather Turntable Mat for Vinyl LP Record Players.” Accessed January 7, 2022. https://www.amazon.com/dp/B07PZ951BL?tag=recordplayerpro-20&th=1&psc=1&geniuslink=true.
    7. “Premium Swiss Leather Turntable Mat.” Accessed January 7, 2022. https://www.amazon.com/dp/B01BJE4TDO/?tag=sleepstatemusic-20&th=1.
    8. “Electrohome Turntable Platter Mat.” Accessed January 7, 2022. https://www.amazon.com/dp/B01N6F2DK9/?tag=sleepstatemusic-20.
    9. “Tamwell Turntable Mat for Audiophile and DJs Slip Mat.” Accessed January 7, 2022. https://www.amazon.com/Turntable-Audiophile-Universal-Antistatic-Tamwell/dp/B08CNHYN6V/tag=recordplayerpro-20?tag=niche-project-20&geniuslink=true.
    10. “Turntable Platter Mat Black Rubber.” Accessed January 7, 2022. https://www.amazon.com/dp/B07DHJ8K43?tag=recordplayerpro-20&th=1&psc=1&geniuslink=true.
    11. Jenna Miles, The Beginner’s Guide to Vinyl: How to Build, Maintain, and Experience a Music Collection in Analog. USA: Adams Media, 2017.
    12. Mark Katz, Capturing Sound: How Technology Has Changed Music. USA: University Of California Press, 2010. https://books.google.com.ph/books?id=r_p_Q6TUrQoC&pg=PA128&dq=Are+Rubber+Turntable+Mats+Better+Than+Felt?&hl=en&sa=X&ved=2ahUKEwjkycTn2J_1AhXKwosBHYV9DNQQ6AF6BAgIEAI#v=onepage&q=Are%20Rubber%20Turntable%20Mats%20Better%20Than%20Felt%3F&f=false.
    13. Dirk Sutro, Jazz For Dummies. USA: Wiley Publishing Inc., 2006. https://books.google.com.ph/books?id=tqkRibY3RHoC&pg=PA319&dq=How+Can+I+Make+My+Vinyl+Sound+Better?&hl=en&sa=X&ved=2ahUKEwiLwqrB2J_1AhW5rVYBHRtABn8Q6AF6BAgDEAI#v=onepage&q=How%20Can%20I%20Make%20My%20Vinyl%20Sound%20Better%3F&f=false.

    The Takeaway

    Some turntable owners, especially those still new to turntablism, do not know precisely how a platter mat works. But with this accessory, you can increase the sound quality of your record player.

    However, it is essential to note that finding the best turntable mat is a game of trial and error. With all the different types of mats available, you may need multiple options to see which one will be a perfect fit for your turntable.

  • A Guide To Fixing A Record Player That Plays Too Fast

    A Guide To Fixing A Record Player That Plays Too Fast

    Does the fact that your turntable is revolving too fast keep you up every night? If it does, you’re an audiophile, and you appreciate the music art. Therefore, you love the idea of listening to live music, and digital music just can’t cut it for you. Plus, you may have a perfect pitch and can tell when the turntable is playing too fast. So to help you solve this issue, we have prepared the following guide to fix a record player that plays too fast.

    The vinyl records come in three speeds: 78 rpm, 45 rpm, and 33 1/3 per minute (generally referred to as a 33). The RPM shows how fast your record player should be spinning; therefore, you will know when the speed changes. (source)

    Generally, one determines the speed of the record player by the vinyl record; after all, they are designed to spin at a certain pace when playing. You have come to the right place if you notice that your record player is moving too fast. So in this article, we will show you how to fix a record player that is playing too fast. We’ll also show you why your record player is playing too fast.

    Is the Record Player Playing Too Fast?

    You should first pick the right spinning speed when you purchase the record player. And if it is not spinning at the right pace, then a technician at the store will help you calibrate it. After all, if calibrated correctly, it can play different vinyl records.

    Remember, if the record player is spinning too slowly, it will sound like the battery is low. If the record player is spinning too fast, the music will sound like Alvin-and-the-Chipmunks. (source) And as an audiophile, this can be very frustrating. Therefore, you will know when the speed of the turntable changes.

    Generally, only three turntable speeds can play all the vinyl records in the market. For 12-inch vinyl, you will require a rate of about 33 RPM. On the other hand, a 7-inch disc requires a 45 RPM, while the older 10-inch discs play at 78 RMP. So it’s crucial you set the record’s speed correctly. But at times, the record can start spinning faster than usual. (source)

    Unfortunately, once you start believing that your record player is playing too fast, your subconscious will convince you that you’re right, and you’ll begin hearing more evidence. So before jumping to a conclusion, it’s always a good idea to first determine if it’s spinning at the right speed. But most folks don’t know how to test the speed of their record player. In fact, most record player owners have never heard of a device for setting the pace of their player.

    How Can I Determine the Speed of My Record Player?

    To test the speed of the turntable, you need a stroboscopic system. This system features a cardboard disc with equally spaced marks that goes on the record player. In fact, some record players have stroboscopic markings on their edges. This process works thanks to the optical illusion that can help you make precise and fast adjustments when the speed increases. (source)

    DollaTek LP Vinyl Record Turntable Phono Tachometer Calibration Strobe Disc Stroboscope Mat 33.3 45 78 RPM

    If you reside in Australia, Asia, or Europe, you will require a 50 Hz disc, and in North America, you will need a disc marked 60 Hz. Fortunately, you can download these discs from the internet or purchase the disc from the local stores. If the record player is spinning at the right speed, the markings may seem to stand still. If the turntable appears to rotate to the right or left, then the spinning rate is off, So you have to adjust it.

    The slower or faster the drift, the bigger the error; this illusion is more visible under most lights, including fluorescents. However, some folks prefer LED bulbs or specialized strobe lights. Press the play button, place the strobe disc, and lower the tone-arm for better results. Lowering the tone-arm and pressing play will let you compensate for the extra drag that the stylus and record will impose. (source)

    Some unique apps can also help you determine the turntable’s speed, such as the RPM iOS. The RPM (iOS) uses the phone’s gyroscope to measure the turntable’s speed. (source) All you have to do is start the program and place your smartphone on the platter, and press play. The program will measure the speed of the turntable.

    How Can You Fix a Record Player That Is Spinning Too Fast?

    Even though you set the speed correctly when you purchased the turntable, some record player parts will start wearing out with time. And this will force some features of the record player to either spin faster or slower, thereby distorting the quality of your music. But before you start looking for solutions for this issue, you need to find out the cause of the problem. Plus, this will help you troubleshoot and eventually repair your record player:

    Lube, Clean, and Check Every Part of the Turntable

    The first thing you should do is ensure that every movable part of the turntable is lubricated and clean. After all, the accumulation of dirt and dust can leave some turntable parts dry and clogged. So before you even test anything else, you should first ensure that the device is well maintained.

    Remember, lots of gears and motors in the turntable help your device function better. And for these parts to work, they have to be lubricated, and if there is too much friction, then the turntable’s speed can change. Too much friction can strain some parts of the turntable leaving the others to move even faster than expected.

    Another reason the turntable can move faster is the presence of grime and dirt on some of the most crucial parts of the turntable. Dirt or grime on different parts of the turntable can affect the turntable’s speed. So before you even check the other details for wear and tear, you can lube and clean all the movable parts of the turntable.

    After all, you must make sure everything is working flawlessly before tweaking the machine. So the first thing you should do is uninstall the platter and look at the motor’s tip. If you notice any grime or dirt, you should scrape it off before cleaning it using a few drops of synthetic oil like the Redline D4-ATF.

    Remember, the spindle and the motor’s shaft enter the housing, so you should only use two drops of the Redline D4-ATF. If purchasing a quart of high-tech, cool, exotic transmission lubricant is too much, you should go for the 20-weight oil with PTFE. Before reinstalling the platter, you should also examine the belt. The belt can get misplaced or stretched if it is rubbing on anything.

    On the other side, if particles of the turntable belt wear out, they can gunk on the motor pulley resulting in the record player spinning faster. And that is because of the increase in diameter of the motor pulley. So when this happens, you should remove the belt and then clean the pulley using a Q-tip cotton swab dipped in alcohol. But make sure you don’t use rubbing alcohol as it contains lanolin that will force the belt to slip. (source)

    After cleaning and lubricating some of the most crucial parts of the turntable, you should reassemble the device and test it. If the speed of the record player is still high, you should proceed to the next step.

    Confirm if There Are Any Turntable Belt Problems

    The turntable belt resembles all the other straps you may have seen in other devices, including vacuum cleaners. Therefore, it is bound to get repositioned or stretch with time resulting in the speed of the turntable changing. When stretched, even a few millimeters, it can slow down. Even as little as an increase by 6mm can distort your music. (source)

    The turntable’s speed can change when one repositions the belt, and its spinning rate increases or decreases accordingly. If it stays in the wrong position for too long, it can become overstretched. If it is repositioned, it can tighten, resulting in the speed of the record player increasing. The best solution is to replace the belt, but you could shrink it back to the average size if it’s still in exceptional condition.

    If the turntable belt ends up stretching because of being repositioned, then you should either shrink it down or replace it. To replace the belt, you should do the following:

    How to Replace a Damaged Turntable Belt

    When dealing with any repair work, the first thing you should do is disconnect it from the power. Unplugging the turntable will help prevent electrical shocks and keep the motor safe. Next, remove the plastic mat that supports the record when playing. Removing the plastic mat is relatively easy; all you have to do is pull it off and place it in a safe place.

    Remove the platter situated below the plastic mat, which has two access holes that make it possible for you to monitor the motor. Turn it upside down and place it on a flat surface and then stretch the new belt over the platter’s center hub. Make sure the belt is straight, and if there is a ribbon on it, you can align it with the access holes. It makes it easy for you to install the belt over the motor.

    If the platter has no access holes, then you should place a peg on the platter’s edge with the belt already installed on the center circle. Stretch it over the peg and create a round-bottomed triangle. You should ignore this step if the platter has two access holes.

    Reinstall the platter making sure the access holes expose its motor; you can use the access holes to access the motor and then stretch it around the body of the motor. If it doesn’t have access holes, you should align the peg or post with the motor spindle. Finally, you can spin the platter clockwise and then anticlockwise to hook the belt on the motor. (source)

    After replacing the turntable belt, you can proceed and measure its spinning speed and confirm if it’s back to normal. If the problem persists, you should try switching the spinning speed using the speed selector switch. If it doesn’t work, you should proceed to the next step.

    A Speed Selector Switch Issue

    All the turntables made after 1960 come with a 2-speed speed-selector switch for 33 1/3 and 45 RPM. (source) Unfortunately, the speed selector can get damaged or be covered with dust, resulting in the speed of the turntable increasing. Accumulation of the grime or the dirt in this switch can force too much voltage on the turntable’s motor, forcing it to spin faster.

    If the platter spins slower or faster when you switch the spinning speed, the issue could be the switch. So you can either clean it or replace it once and for all. Cleaning it can work but only for a short period. On the other hand, replacing it can seem costly, but it will save a lot of cash in the end. After confirming that every component is functioning perfectly, the issue may be with calibration.

    Rotation Speed Calibration Problems

    The calibration issue is the most straightforward solution, especially if you already know how to set the turntable’s speed. Generally, the turntable comes already calibrated when new and functions correctly. But with time, the motor’s speed can change abruptly and need to be calibrated. But before you conclude that it is a calibration problem, you should troubleshoot the above issues.

    If the problem persists even after cleaning and lubricating the dry parts of the turntable, then the issue may be with calibration. If the turntable’s speed is still high, you should try calibrating your turntable. Fortunately, most turntables come with manuals that you can find online. Plus, most manuals will show you exactly where the adjustment screws are situated.

    If you are using a vintage turntable and can’t find the manual, you can look for a similar model. If you still can’t find the adjustment screws, then you should lift the pad and confirm if the adjustment screw is below the platter. If the adjustment screws are not below the platter, you should look below the motor.

    Some turntables have surface holes or knobs that make it easy for you to adjust the turntable from the surface. You can change other turntables from beneath. But you must level your record player before you make any adjustments. Place it on a piece of wood or between two tables to access the underneath parts of the turntable.

    The adjustment screws are a set positioned next to each other. The screw that turns clockwise increases the turntable’s speed while the other one lowers the rate. So make sure you set the 33 1/3 RPM first. Some audiophiles use a small screwdriver to adjust, but that is not mandatory. the screws can help change the velocity of the potentiometers, so you should be patient and measure the speed using the app. (source)

    Remember, it can be almost impossible to set the right speed, and you might never get to the point in some cases. After all, even if you are 3% off, you will still notice the lag or speed of the turntable is still high. So you have to be very careful and take your time to get within 1% of accuracy.

    FAQs

    Why Are My Vinyl Records Playing Fast?

    The issue is usually a belt that has been improperly installed. If your turntable’s belt slips out of its grooves when the record is playing, it will start riding up and down. The movement of the belt up and down the spindle will force the platter to start spinning fast. Therefore, you will have to reinstall the belt in the platter’s inner ring.

    How Can I Fix a Record Player That Is Spinning Too Fast?

    The best method for repairing a turntable that spins too fast is recalibrating it. Some screws below the splatter can help you set the right spinning speed. If you don’t know where the calibrating screws are, consult the manual.

    Can Dirt Accumulation Increase the Speed of the Turntable?

    If not well maintained, most turntable’s movable parts can dry, resulting in increased friction. High friction can strain some parts of the turntable, leaving others to spin very fast.

    Conclusion

    If not well maintained, the turntable’s speed can increase, resulting in it producing distorted sound. When new, turntables are typically well-calibrated, but the spinning rate can improve with time. Luckily, there is a solution for this problem, and if every other component is working perfectly, then the only solution is recalibrating it.

    Sources

    1. Rich Tozzoli, Here’s What You Need to Know About Vinyl, Accessed December 24, 2021
    2. Libby Plummer, How toSet Up and Maintain Your Turntable for Analogue Audio Joy, Accessed December 24, 2021
    3. Nelson Kline, Dialing in Your Turntable Speed, Accessed December 24, 2021
    4. Wikihow Contributor, How to Replace a Record Player Belt, https://www.wikihow.com/Replace-a-Record-Player-Belt/ Accessed December 24, 2021
    5. Sam Sauls, Audio Production Worktext: Concepts, Techniques, and Equipment, Accessed December 24, 2021
    6. NewYork Times staff, How to Set Up Turntable, Accessed December 24, 2021
  • Ten of the Best Vintage Turntables

    Ten of the Best Vintage Turntables

    The demand for the best vintage turntables is on the rise. Vinyl enthusiasts want to know what to expect from their record players, and the choice is not an effortless one. With so many brands out there that offer selected turntables, how to know which is the one?

    These ten vintage turntables are sought-after due to their caliber of sound. Certain lines such as Technics or Rega have a few significant types of turntables. For example, Yamaha or Michell Gyrodec have been luminaries for decades.

    The re-emergence of records in recent years has provided a stage for turntables to make their comeback as well. Plenty of companies still produce them, but nothing beats the feel of an old-school record player.

    If you have been wondering which ten vintage turntables are the best on the market, look no further. Our in-depth list provides you with the models, specifications, and more.

    First, we will look at what a vintage turntable should consist of and why we call it vintage. There are plenty of second-hand record players going around, but are they all worthy of your attention (and money)?

    Vintage Turntables 101

    Ever since the invention of the gramophone in the late 19th century, people have developed ways to play their favorite tunes indoors. They were looking for the best musical experience possible, available from the comfort of their own homes.

    Original turntables were massive and needed two people to power them. One person held the structure while the other cranked the player. The sound that came out was raw and loud.

    The only types of records these turntables could play were the 78s. They used shellac to make them, which was a very resistant material.

    Scratches and moisture were out of the question. The biggest downside to a 78 was that it could contain no more than 5 minutes of music.

    Record companies developed new kinds of records, the 45s and the 33s. They were more compact, so their grooves could hold more sound. A need for an accompanying record player arose.

    Brands competed with one another to launch the best record player there is. In the 1970s, there wasn’t a home that didn’t have a proper sound system.

    Most of the famous vintage turntables are from this era. The attention to detail during production still has a high-value today.

    However, it’s not easy to stumble upon a record player in mint condition. Unless you know what you’re looking for and get lucky.

    Technics SL-1200

    A turntable that has started a cultural phenomenon and still delivers that sound quality nowadays? TheTechnics SL-1200 is a category on its own.

    It stems from the revolutionary SP-10, introduced in 1970, which marked the start of direct drive turntables. Because of their connection to the platter, the decks are more stable. They can also get to the desired speed faster. (1)

    These years saw the emergence of the hip-hop scene, with the Technics record players at the forefront. DJs only wanted to spin on them, which made sales surge. They were perfect for clubs for a few distinct reasons. (1)

    The turntable’s cabinet absorbs any vibrations, so there is no interference with tunes played. Any imperfections in rotation got solved with the pitch adjustment dial. Technics SL-1200 happened to be at the right place at the right time. (1)

    Technics have continued to develop their turntables bearing this model in mind. DJs requested certain things, and the company listened. The Quartz Lock system and fader controllers were introduced with the following model. (1)

    To recognize the Technics SL-1200, look to its sides. Each model from the series has dots engraved on it. If you happen to get your hands on one of these, rest assured it won’t disappoint.

    Garrard 301

    Garrard was a British company that used to make jewelry. It reverted to producing state-of-the-art turntables during the 1950s. (2)

    Their 301 model is the earliest transcription turntable, meaning it plays every recording format. Finally, vinyl lovers didn’t have to operate a couple of separate turntables with various recordings.

    Whether it’s the 33, 45, or 78, Garrard 301 plays them all. (2)

    This record player is the definition of vintage – since its creation in 1952, its exterior didn’t go through any changes. The heavy platter lays on deep-brown walnut, next to the SME M2-12R tonearm. (3)

    Even the tonearm’s base adjusts, but it’s nothing next to switching between the speed ranges. Reminiscent of an old-time scale, its whole structure provides for smooth listening. (3)

    There are plenty of second-hand Garrard 301s about. However, you can get a brand-new one from the company itself. Vintage meets modern has never looked better.

    Related article:

    Linn Axis

    More modest than its LP 12 older brother, the Linn Axis got introduced in the late 1980s as an alternative to CD players. This record player was belt-driven, and it didn’t cost as much. It’s not that hard to find it for a reasonable price today, either. (4)

    It is a relatively light turntable with a more modern approach than other vintage turntables. It comes with an electronic power supply, also used for switching speed. Linn Axis is a transcription turntable that changed between 33s and 45s. (4)

    Unlike LP 12’s suspended chassis, the Axis has a suspension made out of rubber that you can’t adjust. It does contain the same motor, drive belt, and container. This model sold quite well, and it was re-issued in 1991 with an Akito tonearm. (4)

    As good as this record player is, it has a downside: the electronics that control the motor can fail. It isn’t an easy fix as the company doesn’t service the turntables anymore. If you’re interested in purchasing, consider some possible maintenance investments. (4)

    Pink Triangle Tarantella

    As unassuming as the Pink Triangle Tarantella might look (or its name sound) at first, it’s one of the best vintage turntables out there. It’s known for its bold design – the platter is acrylic, and there’s no cover. There is the possibility of changing the speeds from 33 to 45 RPM and undeniable sound quality. (5)

    The engine needs a ‘Hornet’ to power it – this is its round power controller with two buttons for switching speeds as it lays on a spike. The Tarantella needs a flat structure to sit on, as it doesn’t come with a platform. (5)

    The tonearm to use with this turntable should be Rega’s, but you can substitute it for another one. It used to come in a package together with a Rega tonearm, yet it’s unlikely you’ll stumble upon it now. (5)

    The record player doesn’t come cheap – and it never did. The company making it, Pink Triangle, doesn’t manufacture turntables anymore, so your best bet is to find it second-hand. If you do so, get ready for one of the best sonic experiences of your life.

    Yamaha YP-701

    This list wouldn’t be complete without mentioning the Yamaha YP-701, a vintage turntable that came out in 1974. Sleek-looking and smooth-sounding, what more could you ask for?

    It’s an automatic belt-driven turntable that comes with an S-shaped tonearm. A cartridge wasn’t included back then, but the deck has a universal plug for your cartridge of choice. (6)

    Yamaha is a company famous for making motors, so it’s no wonder the motor is one of the highlights of this turntable. It has its own substructure and comes with a spring suspension, which minimizes the noise level. (6)

    The YP-701 has another notable characteristic: auto-cut prevents sound until the needle falls into the record’s groove. No more compromising on the sound. (6)

    It’s essential to note that this record player should come with the weights for setting up the tonearm in place. They’re hard to come by, as vintage turntable parts tend to be. Getting a YP-701 is definitely worth the trouble, though. (6)

    Thorens TD-124

    An iconic vintage turntable that came from a longstanding Swiss audio company, the TD-124 is available once again. The upgraded model, TD-124 DD, has the same classic look as its predecessor, but it comes with a few tricks up its sleeves. (7)

    Thorens builds all their equipment with the essential Swiss values in mind: precision and efficiency. The vintage TD-124 is no exception here. It comes with an in-built magnetic brake that calibrates the rotation’s speed. The transcription turntable has four speeds – 16, 33, 45, and 78 RPM. (7)

    Thorens TD-124 originally came as a built-in drive without a designated tonearm. You can adjust the suspension as well; Thorens left it all in the hands of the end consumer. The philosophy here is to create an authentic sound system. Yet the company sold the record player as a complete unit in later years. (7)

    This turntable is instantly recognizable because of its simple appearance. Do not let it fool you – TD-124 creates a nuanced sound, making it one of the best vintage turntables out there.

    Michell GyroDec

    Another vintage record player that got its modern counterpart, Michell’s GyroDec, came out in the 1980s. It had a groundbreaking design; Michell turned the entire structure upside down. They isolated the motor and hung the framework on three springs. (8)

    It’s belt-driven, which prevents any unwanted vibrations obstructing its sound. The belt is the only thing connecting the separate motor from the record player. (8)

    Another part of the GyroDec which guarantees a superior sound is its aluminum feet. They are low to have as little contact with the surface as possible. The turntable base is out of acrylic, a popular material at the time. (8)

    Although it looks light, Michell GyroDec weighs about 30 lbs. It has a low setting, making it a perfect addition to any living or playing area. (8)

    Getting a vintage turntable that looks contemporary has never been easier. Find out for yourself by making acquaintance with the GyroDec.

    Rega Planar 3

    The British company Rega had one thing in mind when launching their Planar 3: minimalism. It goes both for the design and the parts within. Sitting atop a glass platter, the plinth lays on rubber feet with no suspension. (9)

    The record player is belt-driven, with a single default speed, 33 RPM. The speed changes manually to 45 RPM. The cover is out of perspex to isolate the sound. It used the now-iconic RB300 tonearm, made out of aluminum alloy. (9)

    The main idea behind this turntable was to make it as affordable as possible without settling for a low-quality sonic experience. It did very well in sales, so it had a few successors in the subsequent years. (9)

    Certain audiophiles have issues with its lightness, as they believe it doesn’t offer a full sound. It makes for an easy turntable for beginners, as its set-up is relatively straightforward.

    Take a look at the Planar 3 and see if it suits you. The connection might be instantaneous.

    Dual 701

    In the 1970s, Dual made a resolute decision to launch the quietest turntable that has ever existed on the market. It was Dual 701, an automatic turntable, which became one of the most beloved vintage turntables of all time. (10)

    The biggest reason for its popularity was the electronic motor that operates at a low speed, leaving no room for resonance. The motor complements the two speeds: 45 and 33 RPM, which you can regulate electronically. Its precision is feedback managed, and it rotates the detachable platter. (10)

    The motor goes straight to the chassis, as there is no chance of any vibrations interfering. Even after many years of being in use, it will live on if you take care of it. Make sure to check which type of cartridge comes with it, as the original one might not suit your taste. (10)

    Although this record player might seem to be a lot to get used to, it’s beginner-friendly. It’s easy to use due to its simple Start/Stop lever and the lever that switches between the two speeds. All in all, Dual 701 is a model that you do not want to miss out on if you find it.

    Acoustic Research XA

    Last but not least, here’s one of the original classic turntables, Acoustic Research’s trusted XA model. Set very low, with a motor running at a low speed like the Dual 701, this record player still does the job today. (11)

    Everything about it is light: the platter, the motor, and the sound. The wow and flutter are very low, providing a grounded accent. Both the platter and the tonearm fit the sub-platform to lower the pulsation. (11)

    The XA has no electronics involved – the process is a very personal and a very manual one. If you’re not familiar with these types of vintage record players, don’t fret. It isn’t difficult to handle, and parts are available without scarcity.

    It is a perfect record player for those wanting to test their ears to subsonic melodies. Since its release in 1961, Acoustic Research has sold thousands of XAs.

    Who knows, you might come across one of these turntables and discover its charms for yourself.

    What Is the Best Vintage Turntable Brand?

    The best vintage turntables are the ones that stood the test of time. Brands such as Linn, Dual, and Yamaha have produced a few models that continue to deliver on their long-given promises.

    Then there are the classics like Technics, Garrard, and Acoustic Research, which are best suited for true audiophiles.

    It all depends on what you’re looking for: bold design is what sets Pink Triangle and Michell apart from the rest, next to the superb sound. Look for Rega’s and Thorens’ models to build your adventure.

    Plenty of great companies have been producing record players for a long time now. Many of them are getting back to the game, upgrading old prototypes with the new technologies.

    Is It Worth Buying A Vintage Turntable?

    Vintage turntables do not come by any day. Of course, you can buy them straight from the shop, but not always. These machines need devotion and regular maintenance, same as your favorite records they play.

    Investing in a vintage record player will ripple throughout different areas of your life. Consider it not only as your latest hobby; you will get up close with a new form of being. Complex and delicate on the surface, vintage turntables are a gift that keeps on giving.

    Don’t buy an old-looking turntable just because you’ve read a review on the internet. Or because it will look good in your living room. Try it out first and see if you can immerse yourself in the process. Remember, vintage turntables are still here for a reason.

    Sources:

    1. SL-1200 ‒ Heritage – Technics
    2. Garrard Engineering and Manufacturing Company – Wikipedia
    3. Garrard Turntables
    4. Linn Axis Integrated Belt-Driven Turntable
    5. SoundStage! Vinyl Word – Pink Triangle Tarantella Turntable (09/1998)
    6. Yamaha YP-701
    7. THORENS® TD 124 DD
    8. Michell GyroDec | Reference Turntables
    9. Rega Planar 3 – Wikipedia
    10. Dual 701 2-Speed Automatic Single Play Turntable Manual | Vinyl Engine
    11. A Classic Turntable’s Forgotten Roots: the AR XA – PS Audio