If you’ve never cleaned your vinyl records collection, the needle on your record player probably hates you for it. Besides that, your precious records could also be on the brink of succumbing to dust mites! Here’s a step-by-step guide to getting squeaky clean vinyl records.
Here’s how you can clean your vinyl records using soap and water:
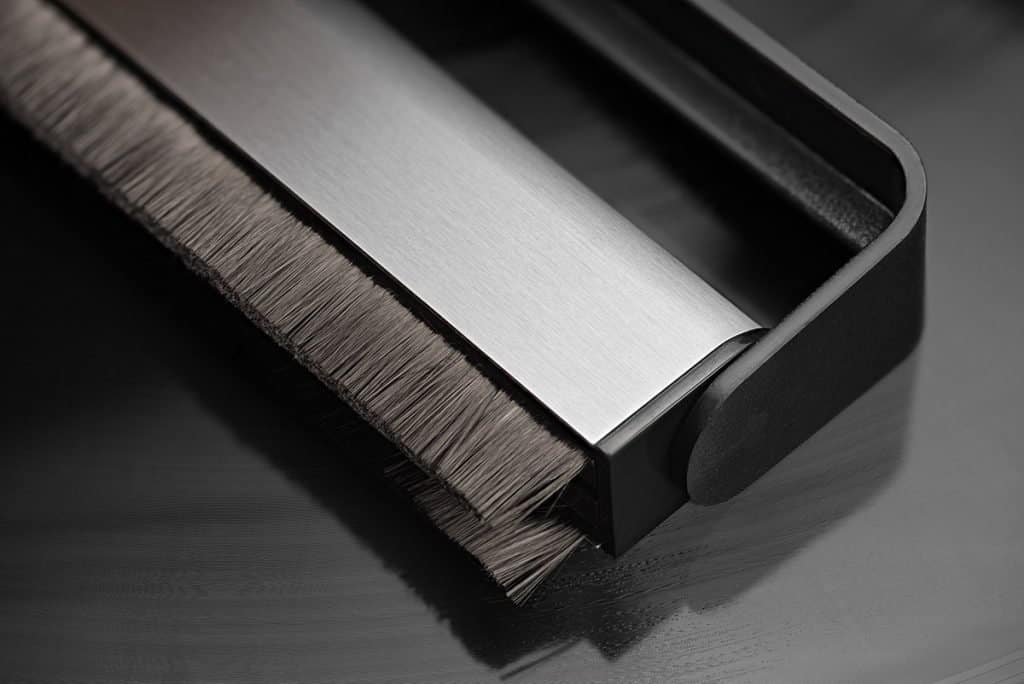
- Use a record brush to dust off the records.
- Check for imperfections and fingerprints.
- Prepare a cleaning solution using dish soap and water.
- Spray your DIY cleaning solution on the dirtiest patches.
- Rinse and wipe the records clean.
- Dry them up.
A responsible record junkie must understand the importance of keeping your collection clean. It has various benefits, such as improved playback, preventing needle wear, and longer vinyl life. Read on to follow the easiest method of cleaning your vinyl records properly!
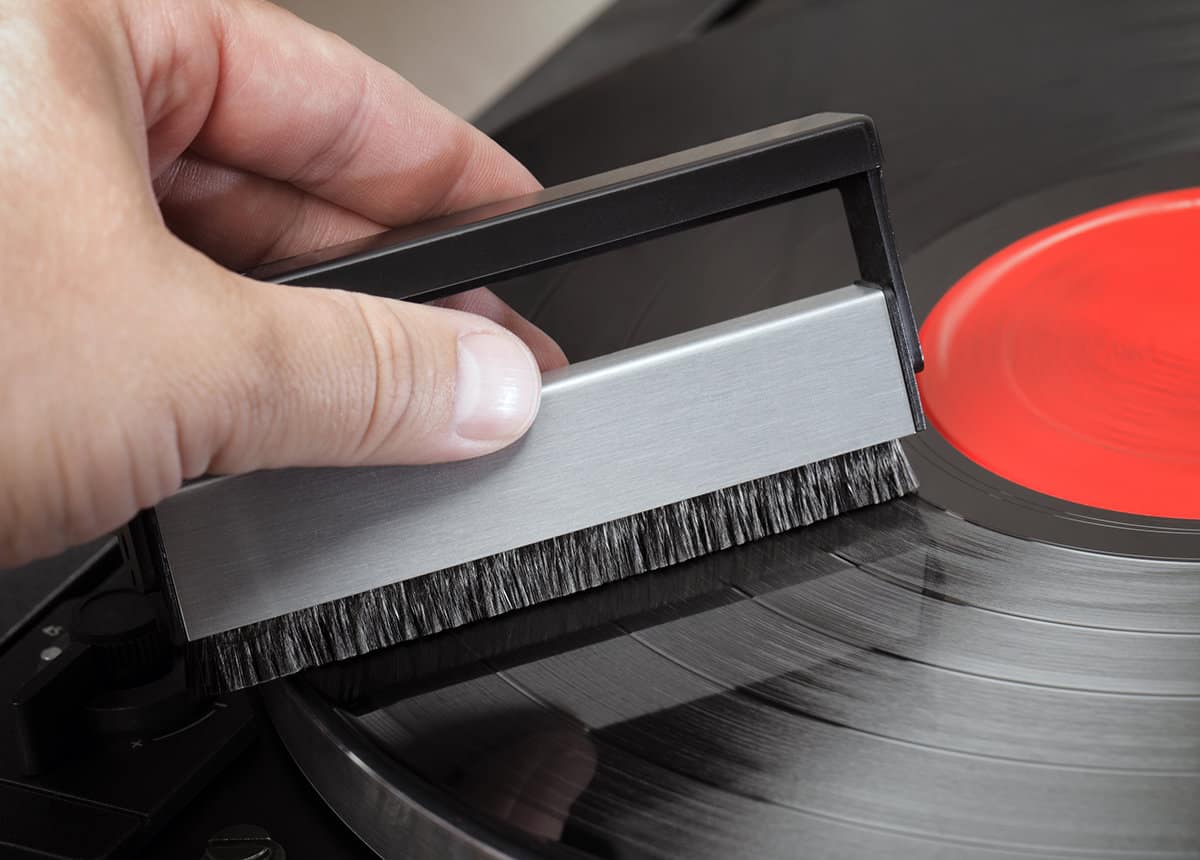
1. Use a Record Brush To Dust Off the Records
Start by stripping the sleeves and dust cover off your vinyl record. Inspect both sides of the record carefully to assess how bad the dust and grime situation is and which parts of the record need more attention.
The first step is to use a record brush to dust it off properly. The most efficient way to do that is by spinning it on your turntable without dropping the needle.
Spin the record at a high RPM and get your record cleaning brush into contact with the spinning vinyl applying gentle pressure. Move the brush back and forth between the inner and outer grooves of the record to cover its entire surface area. Keep it up until there’s no visible dust on the record.
Be careful not to press the brush too hard on the vinyl as that can damage it and push the gunk deeper into its grooves. Also, try not to touch the vinyl after you’ve freshly brushed off all the dust off its surface.
You can also clean the vinyl without spinning it on a record player if you prefer a toned-down method. Make sure you apply gentle pressure and brush the record with soft sweeping movements.
2. Check for Imperfections and Fingerprints
After brushing, look closely at the vinyl record to look for marks, scratches, fingerprints, and imperfections on either side. If you find anything on the surface that’s easily removable, revisit step 1 with a record cleaning brush.
Shine a bright light over the record to find imperfections. You can also hold the record up against bright light and pivot it in a circular motion to get the light to bounce off of the slightest imperfections. You can’t do much about scratches as they’re permanent marks of rough use, but leftover dust and grime on the surface can be removed before using the cleaning solution on it.
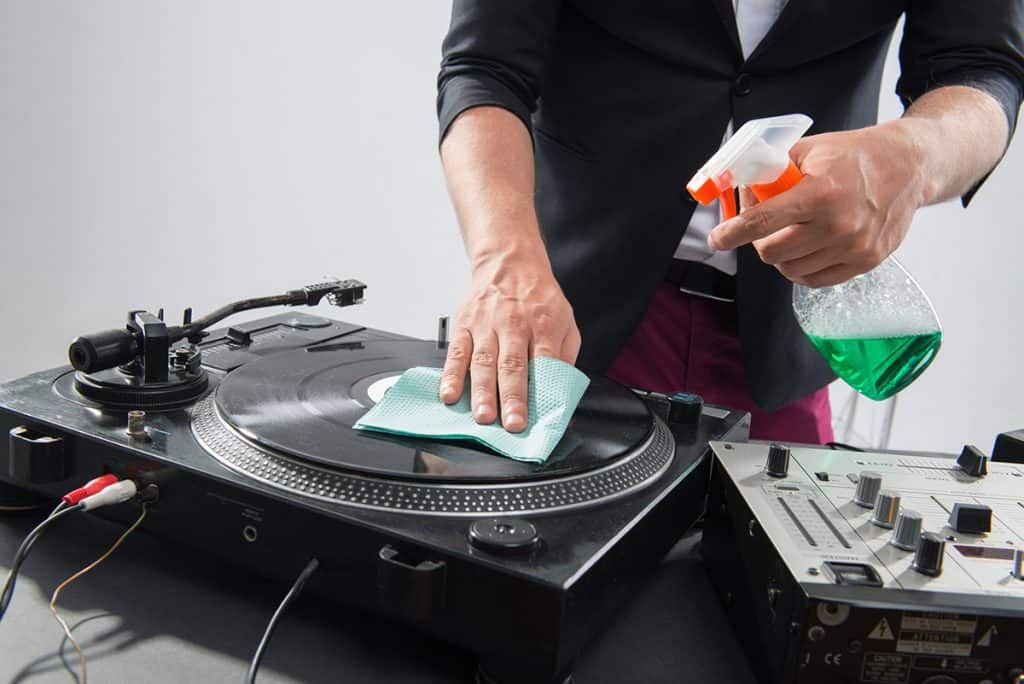
3. Prepare a Cleaning Solution Using Dish Soap and Water
The next step is to make a cleaning solution for your vinyl records using dish soap and water. I’d highly recommend adding isopropyl alcohol to the mix, but if you can’t get your hands on any of that, some water and a few drops of dish soap will do just fine.

The ideal cleaning solution consists of one part distilled water, one part isopropyl alcohol, and a couple of drops of dish soap. This exact mixture is a tried and tested mixture to clean vinyl records with a DIY mixture that’s pretty easy to put together.
From there, simply fill this mixture up into an empty spray bottle, and that’s it for step 3!
4. Spray Your DIY Cleaning Solution on the Dirtiest Patches
Remember that spray bottles aren’t a must-have for this cleaning procedure; they just make it easier to apply the cleaning mixture evenly across the vinyl records. If you don’t have spray bottles, you can carefully pour the solution onto the dirtiest patches of the records.
Once you’ve sprayed or poured the cleaning solution all over the vinyl, spread it around in a circular motion using a microfibre cloth. Apply gentle pressure to make sure you get to the gunk that’s trapped inside the grooves of the vinyl and work the stains away.
If you can’t seem to clean some stubborn patches of dirt or grime, feel free to spray or pour some more of your cleaning solution in those spots. You can also try letting the solution sit and soak into the problem areas for a few minutes before wiping it with a cloth. Repeat until there’s a clear before/after difference on difficult patches.
Some records are more challenging than others to clean, depending on the storage conditions and the number of years they’ve spent in your dusty drawers. It’s easy to lose patience and get aggressive while cleaning these, but that can easily lead to irreversible damage to your beloved records.
Don’t lose your patience — stay calm and clean them gently without using any caustic cleaning products that might harm the vinyl.
5. Rinse and Wipe the Record Clean
Once you’re done spraying and rubbing the grimiest spots on your vinyl record, the next step is to rinse and wipe it clean. This involves getting every bit of the cleaning solution off it. For this, you can either use a water spray bottle — or if you’re brave enough — wash it under the kitchen faucet.
The leftover cleaning solution on the vinyl acts as a grime and dust magnet, so it’s necessary to get it all off before moving on to the next step of drying it up. Rinsing the record will eliminate excess cleaning solution and fingerprints.
6. Dry Them Up
Finally, all that’s left to do is dry up your vinyl record. You’ll need a dry microfiber cloth for this. Get a fresh one since the ones from steps 4 and 5 are already wet. Wipe your record down to absorb all of its moisture into the dry cloth. This step also removes any static buildup from the vinyl record.
You’ll also get rid of those grimy fingerprints (if any) as you wipe the record clean with a dry cloth.
Proper Storage for Vinyl Records
Now that you’ve worked so hard on cleaning your vinyl records, it’s essential to store them properly to maintain them well. Since vinyl is a heat-sensitive material, it’s best stored in a cool and dark place. For instance, keeping them on a hot and sunny windowpane for several days can cause the metal on the record to melt and deform.
To store records safely, you need a hard case durable container that can fit your vinyl. Some are 12 by 12 inches (30.48 x 30.48 cm) in size, while others are 7 by 7 inches (17.78 x 17.78 cm). Ideally, the container should have sharp corners, flat sides, and almost identical dimensions to your record sizes.
You’ll also find lots of vinyl crates and shelves online — they’re one Google search away. For instance, check out this Amazon’s Choice Wooden Vinyl Records Case — it can hold records of several different sizes including 33s, 45s, and 58s. Remember that wherever you keep your records, make sure they’re at least secured in an inner sleeve, a plastic dust cover, and a cardboard jacket.
Related articles:

Alternative Methods To Clean Vinyl Records
Cleaning Vinyl Records With a Vacuum Cleaner
Regular carpet vacuum cleaners aren’t meant for your delicate records, and you shouldn’t use them for cleaning your vinyl either. However, there are vacuum wands in the market that are specially designed to clean records. They’re effective enough to suck out the majority of the dirt from the vinyl’s grooves, but the record won’t be ‘squeaky’ clean without the traditional cleaning procedure mentioned above.
Using Vinegar To Clean Records
Thanks to vinegar’s strong acidic properties, it’s commonly used as a cleaning agent. It might be super effective against grease buildup in the kitchen, but it doesn’t do a better job at cleaning vinyl records than good old dish soap or isopropyl alcohol. I wrote a separate article about how to clean records with vinegar. You can find it here: Is Vinegar a Good Way to Clean Vinyl Records?
Cleaning Records With an Ultrasonic Cleaner
Another alternative method of cleaning vinyl records is using record-specific ultrasonic machines. They do a great job at cleaning up your records requiring minimum effort on your part, but they’re expensive. Not everyone has one of these lying around the house, no matter how big of an audiophile they are.
Even the mid-range models aren’t a cheap solution to some dust buildup on your records — at least not as cheap as some dish soap and a microfibre cloth. However, affordability is subjective, so if you don’t have any budget constraints and want an easy and effective way to keep your vinyl records clean, an ultrasonic cleaning machine might be worth it.
Using Windex To Clean Vinyl Records
Windex is great for cleaning windows, so it’s natural for this one to pop into your mind as a potentially promising cleaning agent for records. However, it’s a caustic cleaner with a ton of chemicals in its ingredient list. The most problematic chemicals are ammonia and alcohol, which can eat pits into the vinyl.
Caustic cleaning agents are generally super harsh on vinyl, so if you love your records, you wouldn’t want to risk exposing them to Windex. Even if it doesn’t damage them, it’ll leave behind a pungent smell of chemicals that doesn’t belong on vinyl records. I’d strongly advise you to steer clear of this one!
Related article: Why You Should Never Use Windex To Clean Vinyl Records
Using a Record Washing Machine
Don’t confuse this option with regular washing machines — because those will destroy your vinyl records. Instead, record washing machines are specially designed to clean records. However, people have mixed feelings about them.
They can clean your records quite well, but they’re not nearly as gentle as the hands of a true audiophile, so your records might develop some scratches with regular use of record washing machines.
If you’re tired of hearing random pops and hiccups on your record player, it’s probably time to give your vinyl records a proper cleaning. Not only will your record player’s needle thank you for it, but also your ears when you play a squeaky clean vinyl record without any imperfections to mess with the audio.

Related Articles:
- A Step By Step Guide To Cleaning Vinyl Records With Microfiber
- A Complete Guide To Properly Cleaning Your Vinyl Records
- A Step By Step Guide To Cleaning Your Technics 1210
- How To Properly Use WD-40 To Clean Vinyl Records
- Is Vinegar a Good Way to Clean Vinyl Records?
- Why You Should Never Use Windex To Clean Vinyl Records