Author: Andrew

  • Can Record Players Play All Sizes Of Records?

    Can Record Players Play All Sizes Of Records?

    Can all record players play a 7-inch? If you’re new to vinyl and record players, you may have many questions regarding how record players work. This article will give you the answer to that question and more.

    The vinyl record industry consists of different types of record players. But which record players will play which vinyl records? Here’s how it works:

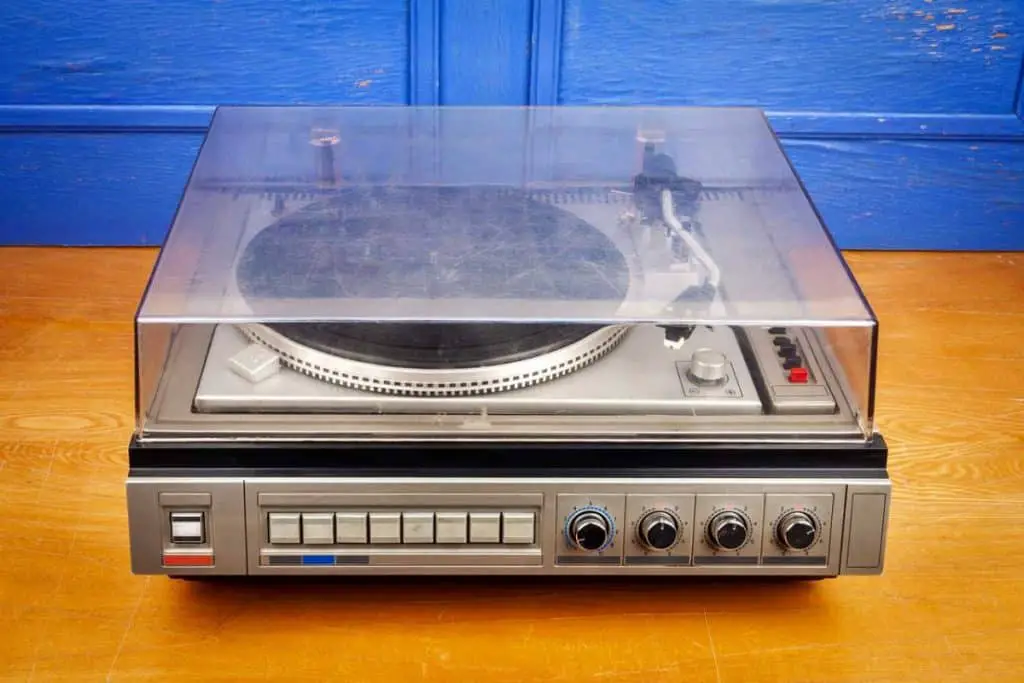
    1. Two-speed turntables play both 45 rpm (7 inches) and 33.3 rpm.

    2.Three-speed turntables play 45 rpm, 33.3 rpm, and 78 rpm.

    3.Select vintage will play four speeds: 45 rpm, 33.3 rpm, 78 rpm, and 16.66 rpm.

    As you continue reading, get ready for more information to get you up to speed with the fundamentals of vinyl records and record players. 

    Can Record Players Play All Sizes Of Records?

    You can choose to categorize record players in terms of speed. In my experience, I find this sorting process much, and you’ll understand why in a bit. 

    First things first is to explain the concept of rpm. 

    What is RPM?

    RPM breaks down to revolutions per minute. It refers to the speed at which a record spins on the turntable or the record player. 

    So why is rpm so important? The ability of vinyl records to play the sound or music depends on the types of speeds the turntable or record player can play.

    Different turntables or record players have different types of speeds they can play. The manufacturers are the reason for this feature. Some manufacturers will develop a record player with two speeds, while others will develop record players with three speeds. 

    It’s essential that you check which speeds a record player can handle and correlate that information to the types of vinyl records you’ll be owning or collecting. 

    How Do You Set Up A 45 Rpm Or 7-inch Vinyl Record?

    During the 1950s and the 1960s, there was a controversial cold war between music producers in the US and the UK. Because of this unspoken war, the 45s or the 7-inch vinyl records came in two formats:

    • 7-inch vinyl records with a 1.5-inch hole (the US version)
    • 7-inch vinyl records with a 0.25-inch hole (the UK version) 

    The 1.5-inch hole 45 is the most common 7-inch vinyl record. You can still find a 45 with a 1.5 -inch, but it’s best to know what’s the most common in the market. 

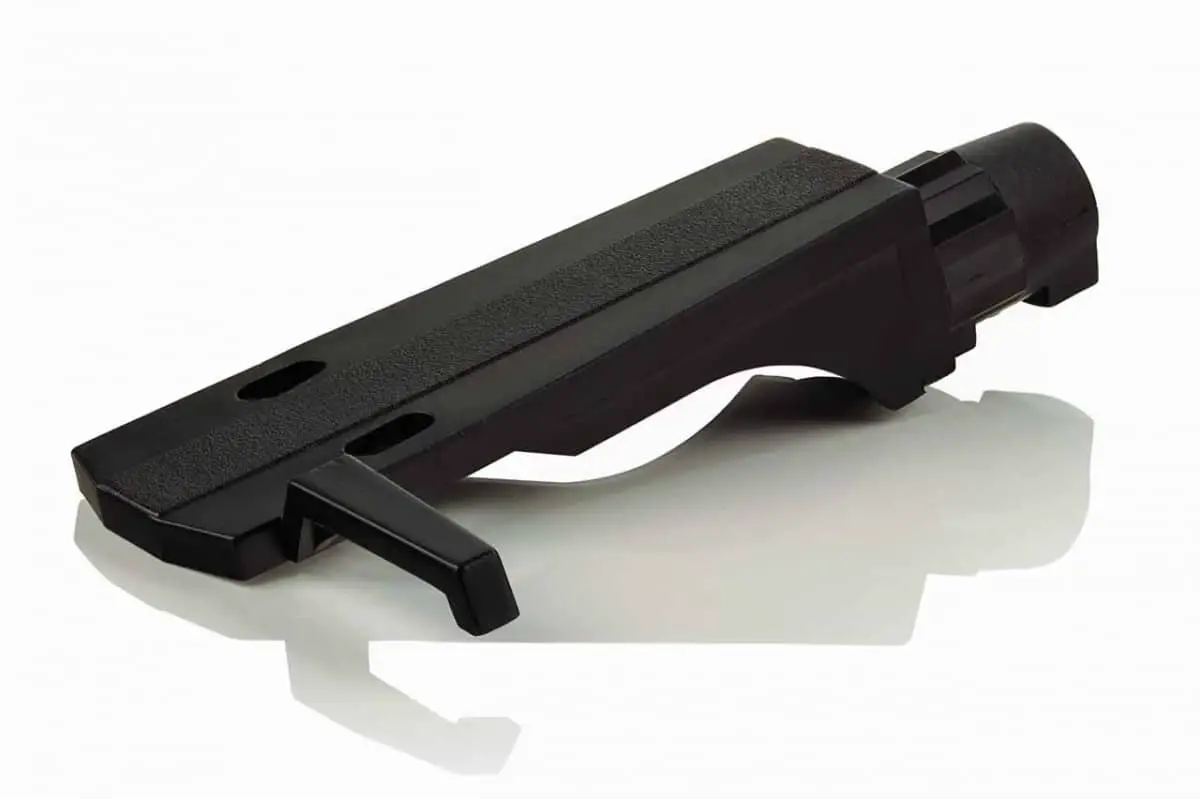
    So how do you set up a 1.5-inch hole 45? You will require an adaptor. The adaptor must have a diameter of 1.5 inches and a hole of 0.25 inches. 

    45 RPM Adapter - Aluminum, for 7 inch Vinyl Record Dome 45 Adapter, Stability and Durability, for All Turntables

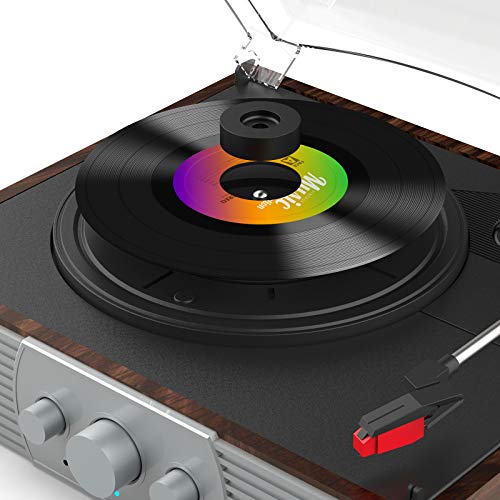
    This adaptor is the only way to play a 7-inch vinyl record. There are three types of adaptors:

    • Traditional adaptors 
    • Aluminum adaptors 
    • Plastic adaptors 

    Here’s one thing to note at this point in the article, if you have a 7-inch vinyl record with a 0.25-inch hole, you will not require an adaptor. You can place it like the 33.3 rpm vinyl record. 

    Now that the issue of adaptors is out of the way, it’s time to delve into how you set up using a 7-inch vinyl record. It’s pretty easy. 

    1. If you have a 45 with a 1.5-inch hole, take the adaptor and place it over the center spindle. You’re essentially placing it at the core of the turntable.
    2. After placing the adaptor, you place the 45 over the adaptor. 
    3. Finally, switch the speed of the record player to 45. Once you’ve done this, it is all about releasing the needle, and voila, mission complete. You have set up and played music from your 45. 

    Can You Play A 45 With A Different Speed?

    Yes, you can play a 45 with a different speed. It will not harm the vinyl record, but the vinyl record won’t sound like it’s supposed to. It may sound like it’s too fast or too slow, depending on which random speed you decided to try out. 

    Always note that you should play vinyl records at their designated speed. Too fast or too slow, and it will sound a lot less more like music and more like background music at an animated TV show. You could compare it to having the Powerpuff girls opening song but more vintage and less joyful. Reality can be disappointing. 

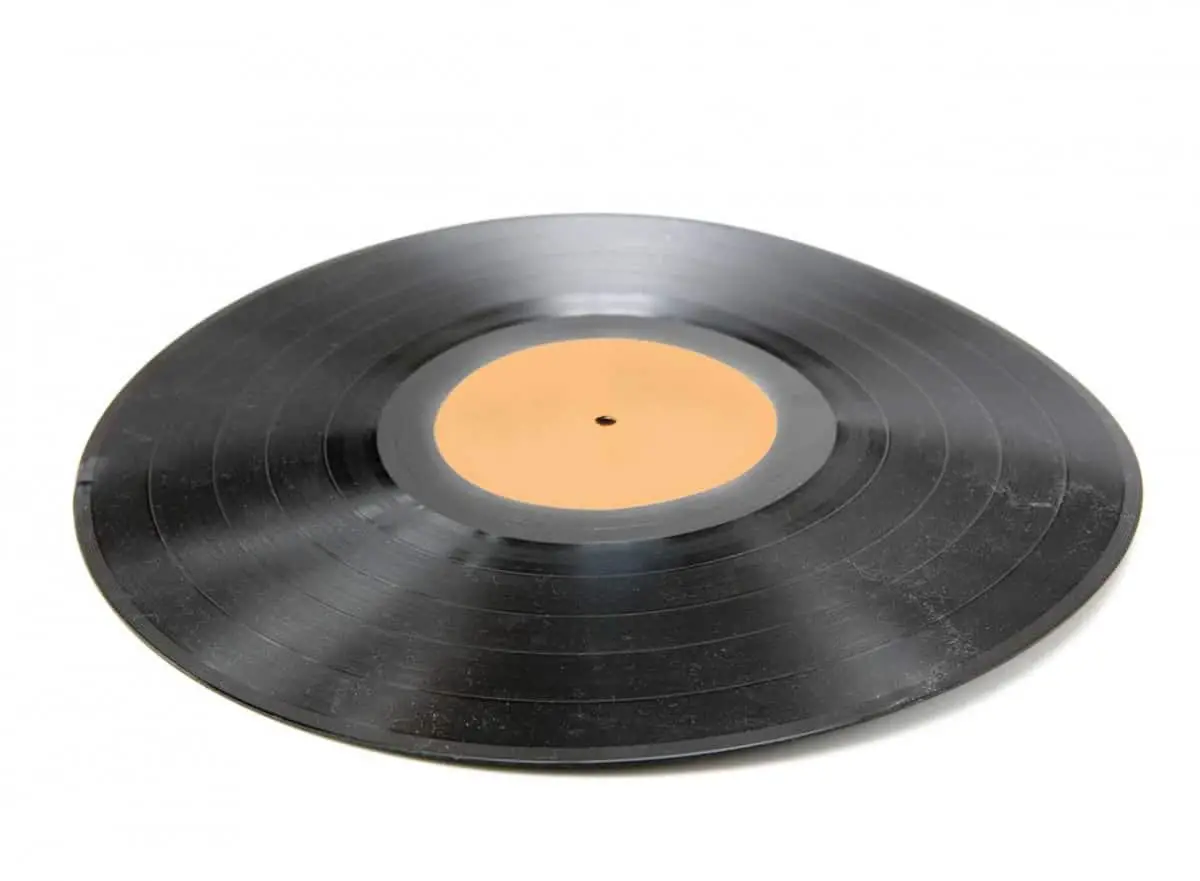
    How Much Music Can Fit On A 7 Inch?

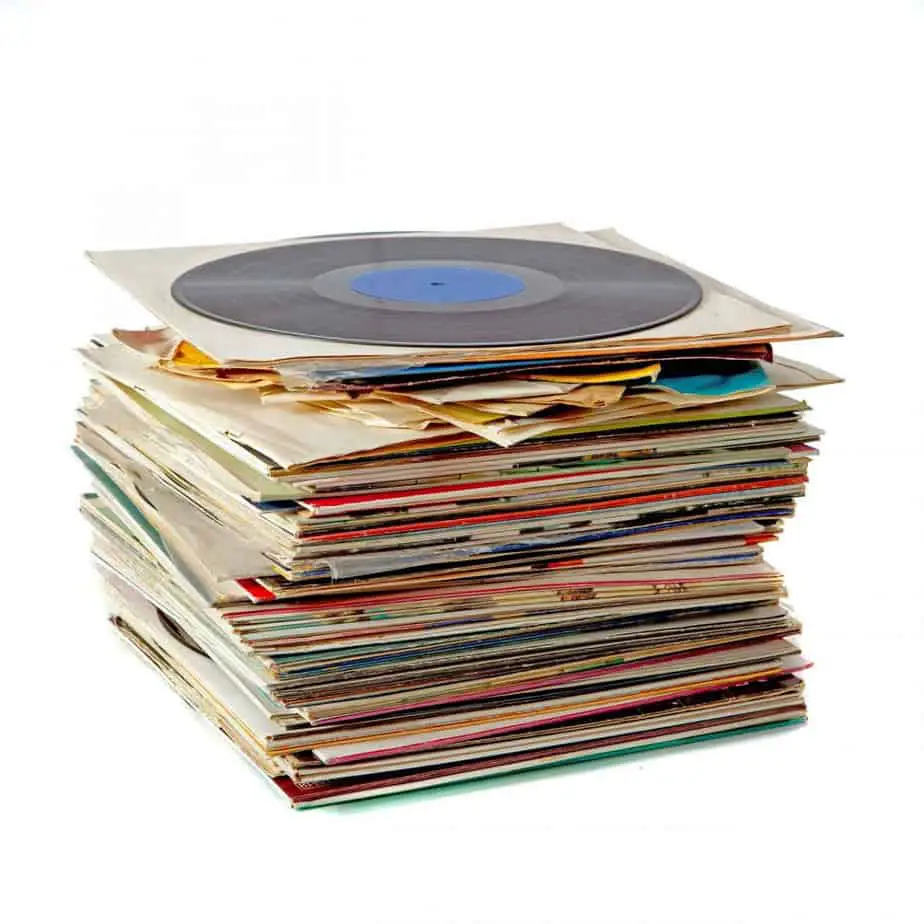
    A 7-inch vinyl record can have two songs—one song on either side of the player. One unknown fact is that a lot of people call 7-inch vinyl records 45s. 

    Well? The standard is that majority of 7-inch vinyl records will play at 45rpm. However, some 7-inch vinyl records have a speed of 33.3rpm.

    It’s best to conclude that rpm does not equate to the size of the vinyl record. The 33.3 rpm 7-inch vinyl records prove this exception to be true. 

    If you want to change the song on a 7-inch vinyl record, turn the vinyl record and play the other side. It’s fast and effective.

    Are You Interested In What Other Like-minded Individuals Are Asking On The Internet? Here Are Some Extremely Helpful Faqs.

    1.Do all record players use the same size vinyl? If they don’t, how do you know what size to use? 

    No, not all record players use identical-sized vinyl records. How do you know what size to use? You’ll have to check the manufacturer’s speed on the specific product or version.

    Different record players will have different speed settings. These settings will determine which size or vinyl record rpm to use. If you don’t have a manual to guide you, you can always check online or on vinyl community forums. 

    The vinyl records community is helpful on numerous platforms. However, you can find most of this information with a simple Google search.

    2.Are there different sized vinyl records?

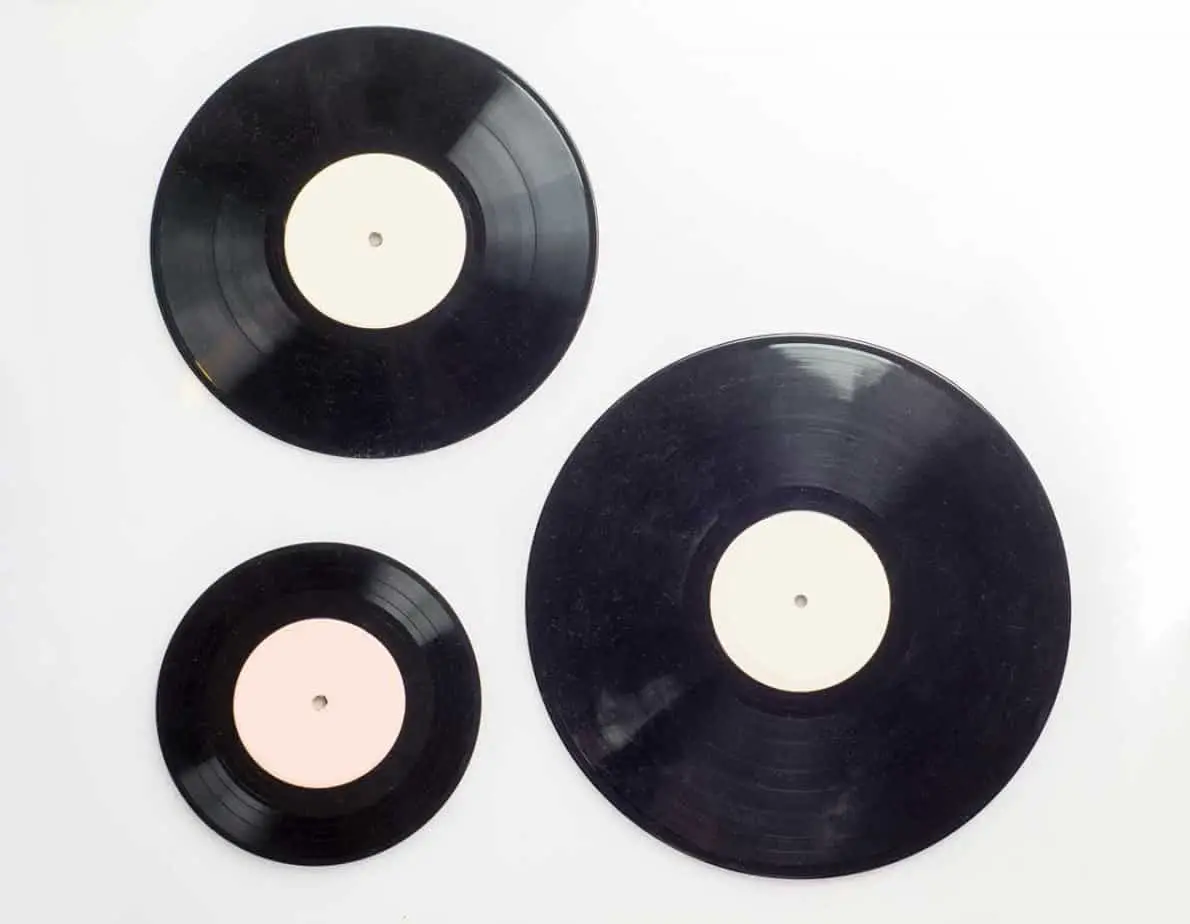
    Generally, vinyl records come in two sizes:

    7-inch vinyl records, which can play at a speed of either 45 rpm or 33 rpm. 7-inch records only contain two songs. You can find each of these songs on either side of the vinyl record.

    12-inch vinyl records. You can play this vinyl record at a speed of 33 rpm. Moreover, they also contain an entire album. You can find the songs on this vinyl record on either side of the record. 

    Please note that for you to play a 7-inch vinyl record, you will need an adaptor. Moreso, if the 7-inch has a 1.5-inch hole. The 12-inch vinyl record does not require an adaptor, and you can play it comfortably. 

    3.How can you tell that a vinyl record is a 33, 45, or 78 rpm?

    Fortunately, vinyl records come with a label that informs the user of the speed of the vinyl record. It may seem easy just saying that a record is a 7-inch or a 45, but if you’re new to the industry, it’s good to know that the vinyl records come with a label.

    Another method you can use to check on the rpm of a vinyl record is by putting it on the record player and letting it play. Remember that no harm will fall upon the vinyl record while it’s rotating at the wrong speed. 

    By switching between speeds, you can figure out which rpm and size a vinyl record falls. This method may seem a bit longer, but it will still get the job done. You can think of it as a trial and error method. 

    Try till you get it right. Nevertheless, most vinyl records, whether old or new, will come with a label. Be sure to check the label, confirm the rpm, and play the music that you love. 

    Sources 

    1.Jenna Miles, The Beginner’s Guide to Vinyl Records: How to Build, Maintain and Experience a Music Collection in Analogue (Massachusetts: Adams Media,2017) 256.

    2.Victrola, A Guide to Vinyl Record Sizes, Victrola, https://victrola.com/blogs/articles/a-guide-to-vinyl-record-sizes Accessed July 28th, 2021.

    3.Rich Tozzoli, Here’s What You Need to Know About Vinyl, Yamaha https://hub.yamaha.com/audio/vinyl/heres-what-you-need-to-know-about-vinyl/ Accessed July 28th, 2021.

    4.Audio Technica, What Do I Need to Know About 45 RPM Records? Audio Technica, https://www.audio-technica.com/en-us/support/audio-solutions-question-of-the-week-what-do-i-need-to-know-about-45-rpm-records/ Accessed July 28th, 2021. 

  • What You Need To Know About Turntable Headshells

    What You Need To Know About Turntable Headshells

    Are turntable headshells universal? Headshells may play a minuscule part in record players, but you wouldn’t be able to listen to music from your turntable without them. This article will give you the headshell guide you need to understand and care for your turntable.

    This article will guide you on the following aspects regarding headshells:

    1. What is a headshell?
    2. What materials are headshells made out of in the turntable industry?
    3. What are the properties of a headshell?
    4. Can you clean the headshell?
    5. Can you interchange headshells?
    6. Are headshells universal?

    With answers to all the questions above, this article will also provide you with additional information that you need for your turntables. Be sure to keep reading this headshell guide to learn more on how to care for your turntable. 

    The Ultimate Turntable Headshell Guide 

    What Is A Headshell?

    A headshell is a connecting piece that holds both the cartridge and stylus in place while also connecting these two pieces to the tonearm. You could think of the headshell like a rubber band or some perfect duct tape that can quickly come off. 

    What Materials Are Headshells Made Out Of In The Turntable Industry?

    In the turntable industry, most turntable headshells consist of aluminum. However, you may find that newer versions of turntable headshells consist of unique alloy material. 

    The purpose of this alloy material is to make sure that the connection is uniform and structured. It’s also a good material for preventing imprecise resonance.

    In other instances, headshells consist of magnesium. Magnesium is lighter than aluminum, which may come across as an added advantage; however, magnesium becomes softer when mixed with other alloy materials. 

    Not only that, but some headshells consist of carbon. Specifically, they consist of carbon-reinforced polymers (CRFP). The CFRP produces a rigid and fiber-enforced type of plastic that manufacturers use in the headshells.

    Lastly, some headshells consist of wood. Wood is a natural material that is held together by an organic polymer called lignin. 

    What Are The Properties Of A Headshell?

    Turntable headshells consist of the following parts: 

    • two 2.5mm bolts. A 1.5″ spacing separates these two bolts.
    • Some turntable headshells will have screw-in weights. These weights can weigh between 2-4g.
    • A standard H-4 Bayonet mount. The bayonet mount comes with a standard barrel. This barrel can either have a length of 8mm or 12mm. It also comes with four connective pins that are attached to four color-coded headshell lead wires. 

    What’s The Relationship Between The Turntable Headshells And Tonearms?

    The turntable headshell connects the cartilage and the tonearm. The tonearm, on the other hand, supports the headshell. But why is the tonearm important at this point to mention?

    Well, there are two types of tonearms:

    • Straight tonearm 
    • The curved tonearm, aka the S-shaped tonearm

    Why is this important? Well, the standard H-4 Bayonet mount on headshells will fit any S-shaped tonearm. It won’t apply to the straight tonearm.

    Straight tonearms have different types of mounts available in the market. However, S-shaped tonearms are more common. You will likely find that majority of turntables use S-shaped tonearms. 

    Why? In my experience, many people believe that the curved tonearm produces a much more superior sound. 

    Allegedly, the tonearm will fit much better in the smaller areas of the record. The result? There’ll be less of a tracking error while the turntable is playing. 

    This assumption is yet to be proven, so it’s best to take it at less value. Both straight tonearms and curved tonearms will achieve the same result, and that is to listen to your favorite record at your convenience. 

    Can You Clean Turntable Headshells?

    Yes, you can clean your turntable headshell. Like any other part of the turntable, it is prone to dust or even micro dust. Cleaning your headshell could also play a part in managing your cartridge and stylus. But how do you clean it?

    The quick and easy solution to cleaning your headshell is alcohol wipes. However, they might not work if your headshell is in a corroded state. If your headshell is in a corroded state, then experts recommend using DeoxIT.

    DeoxIT is a product used to treat corroded connectors and other metal surfaces. You can buy one on Amazon at an affordable price, or you can check your local hardware store. 

    They will most likely have the product stocked. If not, check your local store. You have nothing to lose but your headshell. 

    Ensure to use a thin cotton bud to clean the connector and be gentle during the cleaning process. 

    You don’t want to damage the connective wires in the headshell. 

    One final and odd thing to add to the cleaning of headshells is to please (please) do not lick the headshell. Your spit will not save your headshell from corrosion, nor will it miraculously clean it. Keep your saliva to yourself. 

    Are Headshells Interchangeable?

    Yes, headshells are interchangeable. Remember that one of the parts of a headshell is a standard H-4 Bayonet mount. If you have another turntable with a similar mount, the entire process is relatively easy and fast. 

    However, if you have different mounts, it’s unlikely that you will change the headshells. Be sure to check your mounts whether you are purchasing a new turntable or a used turntable.

    When you’re purchasing a used turntable, be sure to remove and examine the headshell. You want to check if the previous users overused the turntable. An overused turntable whose cartridge and stylus have undergone wear and tear. 

    Are Headshells Universal? 

    Unfortunately, headshells are not universal. Different turntable manufacturers will have different tonearms and different mounts that make the headshells specific to their turntables. 

    So it’s pretty likely that if you have two different types of turntables with two different mounts, the headshell will most likely not fit into place. If you’re to turntables and record players, you may not know this fact, and you’ll stumble trying to change your headshell should you need to change it. 

    Headshells are just as important as any part on a turntable. They require constant care and maintenance. Be sure to use the right products when cleaning your headshell and take note of the mounts on your headshell. 

    You don’t want to have a worn-out headshell.

    Lastly, please don’t lick the headshell; you’ll do more bad than good by sticking your tongue in there. It’s not for your sake but for that of your headshell. 

    Are You Interested In What Other Turntable Owners Are Asking? Here Are Some Helpful Faqs.

    Audio-Technica AT-VM95E/H Turntable Headshell/Cartridge Combo Kit Green

    1.When purchasing a turntable, does the headshell make a difference?

    Yes, headshells make a massive difference in how your turntable will function and the sound it will produce.

     The better manufactured the headshell, the pricier the turntable. However, it also depends on whether you’re looking for a collector’s turntable or not. If not, double-check your budget and buy a turntable within your means. 

    2.Does the type of headshell matter?

    There lies no scientific proof that different headshells produce different results. So technically, the headshell doesn’t matter—however, the type of mount matters. But still, the material used to make the headshell will count for something. 

    Nevertheless, the shape of the headshell won’t count for much, whether it’s a straight headshell or a curved headshell. It’s just a wive’s tale that an S-shaped headshell gives the best results. 

    3.How do you choose a headshell?

    You can choose your headshell based on your personal preference, budget, and overall sound it produces. Choose a headshell that fits your style or the style you want to see on your turntable, the amount of money you want to invest in it, and the results you get from it. Headshells are entirely interchangeable. 

    Sources

    1.Jenna Miles, The Beginner’s Guide to Vinyl Records: How to Build, Maintain and Experience a Music Collection in Analogue (Massachusetts: Adams Media,2017) 256.

    2.Wikipedia, Headshell, Wikipedia, https://en.wikipedia.org/wiki/Headshell Accessed July 28th, 2021.

    3.Pspatialaudio, The (Removable) Headshells, Pspatialaudio, http://pspatialaudio.com/headshell.htm Accessed July 28th, 2021.

    4.Record Head, The Basics of your turntable cartridge and stylus, Record Head, http://recordhead.biz/stylus-and-cartridge-basics/ Accessed July 29th, 2021.

  • How To Properly Use WD-40 To Clean Vinyl Records

    How To Properly Use WD-40 To Clean Vinyl Records

    If you hear scratching on your vinyl record while playing, that’s not a scratch on your vinyl record; that’s dirt. Here’s how you can use WD-40 to clean your vinyl record safely and efficiently. 

    For audiophiles out there that want a fast and reliable method of cleaning your vinyl record, you’re in the right place. Here’s how you use WD-40:

    1.Spray the WD-40 on a lint-free cloth

    2.Thoroughly clean the vinyl record with the sprayed cloth

    3.Let it sit and dry for a couple of 3-4 minutes.

    4.You’re done!

    This article will go on to give you an in-depth explanation of this process. Not only that, but it will also provide additional information on cleaning vinyl records. Keep reading for more information on the maintenance and care of your vinyl records.

    WD-40 - 490224 Multi-Use Product with SMART STRAW SPRAYS 2 WAYS, 14.4 OZ [2-Pack]

    Here’s How To Properly Use WD-40 To Clean Vinyl Records

    First things first, what is WD-40?

    WD-40 is a type of petroleum solvent. It is volatile and evaporates to leave behind a lubricant that is non-volatile. Volatile refers to a substance that quickly evaporates even when exposed to average temperatures. 

    The volatility of WD-40 is one of the reasons that make this product a great vinyl record cleaning alternative. 

    So how do you use it to clean your vinyl records? Here’s how it starts.

    1. It All Starts With A Clean Record

    Before you can play a vinyl record, you have to clean it first. After playing it, you have to clean it again. Hence the reason for the first step, it all starts with a clean record. 

    Vinyl records tend to gather dust, dirt, and any other unwanted matter on their surfaces. When playing the vinyl record or storing the vinyl record, exposure to unwanted contaminants occurs. 

    It’s good practice to clean your vinyl records after every use, hence why this step is first on the list. It’s good to start on a clean record.

    There are two types of cleaning methods for vinyl records:

    • Wet Cleaning
    • Dry Cleaning

    Wet cleaning refers to the cleaning process of using a fluid and a brush or a record cleaning machine. In comparison, dry cleaning involves the use of a dry brush. 

    WD-40 uses the wet cleaning process, and instead of a brush, it uses a lint-free cloth. The wet cleaning process has three other cleaning processes:

    • one step cleaning process
    • two-step cleaning process
    • three steps cleaning process

    The one-step cleaning process involves using one cleaner to clean the vinyl record, while the two-step cleaning process involves using two steps to clean the vinyl record. The three-step cleaning process follows the same pattern. 

    Since you are using one product, the WD-40, it is safe to say that you will be using the one-step cleaning process. Let’s get to it. 

    2. Place The Record On A Flat Surface

    Record collectors prefer to place the vinyl record on top of a turntable mat with a towel or an absorbent cloth underneath it. You want a working surface that will not damage the record at all costs.

    It’s unnecessary to have a turntable mat but make sure your record is sitting safe, pretty, and ready for a cleaning session.

    3. Spray The WD-40 Onto A Lint-free Cloth. 

    You want to make sure that whatever touches the record will not damage it as well. Lint-free cloth won’t leave any unwanted strands of cloth behind, and it’s a safe material when cleaning vinyl records. 

    In my experience, lint-free cloth is a great tool when using the WD-40. 

    4. Spread The WD-40 Carefully Onto The Surface Of The Record. 

    Start cleaning the WD-40 on the lint-free cloth onto the surface. Be gentle and be sure to clean both sides of the vinyl record. You want to make sure that you spread the product evenly on the surface and the vinyl record is free of unnecessary damage.

    Would you please not put your back into it? It needs some good cleaning but not enough force to split it in half or crack it. 

    5. Let It Sit For 3-4 Minutes

    Remember that WD-40 is a volatile solvent. It evaporates and leaves behind a non-volatile lubricant. It doesn’t need to be left under the sun for it to dry. 

    Leave it on the flat surface you’ve been working on, and after 3-4 minutes, you can check on your vinyl record.

    6. You’re Done!

    You can now safely store or play your vinyl record with complete confidence that your vinyl record is clean and working efficiently. 

    What Does WD-40 Offer To My Vinyl Records?

    WD-40 offers two things after use:

    • Dirt removal
    • Lubrication

    WD-40 removes any dust, dirt, grime, or unwanted substances that were on the surface of your vinyl record. It also lubricates your vinyl records. Vinyl record owners reported smoother revolutions playback improvement. 

    Some users may deem it controversial, but WD-40 does the job. Moreover, it does not have any substances that may affect vinyl or PVC (polyvinyl chloride – the primary substance that vinyl consists of).

    Vinyl erodes in the face of ammonia and alcohol. WD-40 contains none of the decaying substances. It cleans and protects vinyl before and after use. 

    Furthermore, the WD-40 formula has stayed the same since 1953. The formula remains a trade secret, but users can see its constituents. It’s safe to say that WD-40 is a consistent product that will probably not change its formula in the future, and it makes for a tremendous vinyl cleaning tool. 

    Disclaimer On The Different Types Of WD-40

    WD-40 comes in numerous types of cans. It’s a multi-use product, so it’s not shocking that it has specialized product versions. Experts recommend using the blue can version of WD-40 for cleaning vinyl records. 

    WD-40 - 490224 Multi-Use Product with SMART STRAW SPRAYS 2 WAYS, 14.4 OZ [2-Pack]

    Are You A Vinyl Record Owner? Here Are Some Helpful Faqs To Help You Maintain And Clean Your Vinyl Records With WD-40.

    1. Is It Okay To Clean Vinyl Records With WD-40?

    Yes, it is. WD-40 is a great vinyl record cleaning product. It does not contain any ammonia or alcohol, and it is a volatile solvent. After use, it will remove the dirt or dust, evaporate and leave behind a non-volatile lubricant.

    Users have reported that it increases playback improvement. WD-40 is an excellent alternative to vinyl record cleaning products. All you require is a lint-free cloth, the WD-40, and time. 

    The entire cleaning process is fast, easy, and efficient. As long as you do it correctly and the vinyl record does not suffer from damage during cleaning, all is well. 

    1. What Is The Best Way To Clean Vinyl Records? 

    The wet cleaning method is the best method to clean vinyl records. Its because the wet cleaning method applies to both new, used or old vinyl records. 

    If you’ve bought used or old vinyl records, then the wet cleaning method is ideal. It will help jumpstart the maintenance process, and you will have a much easier time cleaning the vinyl records in the future. 

    The industry has numerous cleaning products to choose from if you’re in the market for one. However, if you’re looking for an alternative answer, the WD-40 is a great choice. Not only does it remove dirt or grime, but it also lubricates the vinyl record. 

    1. Does WD-40 Ruin Plastic?

    No, WD-40 does not ruin the plastic. Vinyl consists of PVC or polyvinyl chloride. 

    PVC suffers damage from consistent exposure to ammonia or alcohol. WD-40 does not contain ammonia or alcohol in its formula. 

    For this reason, it’s one of the best alternative vinyl record cleaners. So if you’re in the market for a vinyl record cleaner, in my experience, WD-40 is a great choice. 

    Related Articles:

    Sources

    1.Jenna Miles, The Beginner’s Guide to Vinyl Records: How to Build, Maintain and Experience a Music Collection in Analogue (Massachusetts: Adams Media,2017) 256.

    2.Mike Saurus, Unusual uses for WD-40, Instructables Workshop, https://www.instructables.com/Unusual-Uses-for-WD-40/  Accessed July 20th, 2021.

    3.Wikipedia, WD-40, Wikipedia, https://en.wikipedia.org/wiki/WD-40  Accessed July 20th, 2021.

    4.AZO Materials, An Introduction to Vinyl, AZO Materials, https://www.azom.com/article.aspx?ArticleID=987  Accessed July 20th, 2021.

  • Can You Bring Vinyl Records On A Plane? (Heck Yeah, You Can!)

    Can You Bring Vinyl Records On A Plane? (Heck Yeah, You Can!)

    Can you bring vinyl records on a plane? Many vinyl owners are curious about that answer, and fortunately, this article is here to answer your question as candidly as possible. 

    Yes, you can pack vinyl records and travel with them on a plane. Why can vinyl records pass through the checkpoints?

    1. TSA does not mark vinyl records as restricted goods.
    2. Vinyl records are not considered explosive luggage.
    3. There is no history of civil fines associated with vinyl records and air travel.

    This article will give you in-depth information on traveling with your vinyl records on planes. If you’re about to travel soon and your vinyl records will be part of your luggage, you’re in the right place. Be sure to keep reading for further information.

    Can You Bring Vinyl Records On A Plane?

    Many vinyl owners have posed this question multiple times. You can consider internet forums and Reddit as valuable sources, but everyone has different experiences at the TSA. 

    Some TSA officers may handle things differently from one another. It’s always best to get the correct information from the horse’s mouth. Keep reading for more crucial information.

    In my experience, I haven’t had any issues bringing vinyl records on a plane. Crossing the checkpoints was a breeze. TSA had no qualms or double-checked the luggage with a suspicious eye or something along those lines. 

    Is there a specific number of vinyl records you can carry on a plane?

    As long as you’re not carrying an entire record store, a good and reasonable amount that meets your luggage weight should be fine. 

    Remember that both hand luggage and checked-in luggage have a weight limit. So as long as you do not exceed that limit, you’re good to go. 

    The Faa Airplane Luggage Restrictions And Airline Restrictions

    Since this article has delved into the topic of luggage restrictions, it’s best to give more details on how exactly it works. The FAA, aka The Federal Aviation Administration, is the government body that has set specific weight and size dimensions for plane luggage. 

    The FAA will only allow you to have one carry-on luggage. It could be a backpack, briefcase, handbag, etc. The choice is up to you but make sure you have enough room for your vinyl records. 

    Regarding the weight and size dimensions, it’s all up to the airline you’ll be flying with, alongside your vinyl records. 

    Different airlines have different weight and size limitations for both your carry-on and checked luggage. Before you delve deep into your suitcases or bags, make sure you check what weight and size limitations you’re working with for your trip.

    So far, American Airlines and United Airlines have the most accomodating carry-on weight limit, sitting at 35 lbs.  

    Nevertheless, it’s not like you’re carrying an entire record store from one place to another, right?

    Do You Pack Records As Carry-on Luggage Or Checked Luggage?

    Whether you decide to carry the vinyl records as your hand luggage or checked-in luggage, there won’t be any issues. Vinyl records are not considered harmful, and so you can package your vinyl records in either of the two types of plane luggage. 

    Rest assured, you won’t have any issues with the TSA, so if you do decide to carry the vinyl records as part of your carry-on or hand luggage, it’s all fine and dandy. 

    What If You Need Some Extra Assurance That Vinyl Records Can Be Part Of Your Luggage On A Plane? 

    Well, dear reader, to add to this article, I decided to inquire on whether or not vinyl records you can pack vinyl records as part of your luggage on a plane. 

    After sending my dm ( direct message) on Twitter, I got a response from a TSA representative. The message read that vinyl records are A-okay for flights. 

    If you check the TSA website and search what you can and cannot bring, vinyl records don’t show up. Hopefully, this research attempt will assure you of your future travels with your vinyl records. 

    Here are some helpful tips to help you keep your vinyl records safe away from any risk of breaking

    1.Put the records in a box and then put them in a suitcase. By doing this, you are creating your little section where all the vinyl records are together in one immovable location. It also ensures that the vinyl records don’t pose any harm to each other.

    2.Use your clothes as a type of barrier. Standard packages will have bubble wrap to protect the items inside the packages. Well, you can substitute your clothes for bubble wrap. Ensure that you organize your clothes in a travel-friendly manner. You want to form a safety barrier in the suitcase and also have all the necessary items for your trip in place. It’s killing two, maybe even three, birds with one stone. 

    3.Remember that point about airline weight limitations? Well, it would be in your favor to weigh the suitcase before heading out to the airport. You can even buy one online. They are affordable, and knowing the weight of your suitcase makes things a lot easier. 

    Flying is stressful, and without the proper preparations, it can be the most considerable pain in the neck. Flying with your vinyl records isn’t going to stress you out as long as you do it correctly. 

    Are You Interested In What Other Vinyl Owners Are Asking? Here Are Some Helpful Faqs On Vinyl Records And Air Travel.

    1.Is traveling on a plane with vinyl records, or should I ship the vinyl records to my house?

    Honestly, both methods can work. The method of transport should not constrict you from taking your vinyl records from point A to point B. It is still possible for you to travel with your vinyl records on a plane, and you can find a shipping company and have them delivered separately. 

    If you don’t have a huge vinyl collection and shipping would be too costly, don’t worry and travel with your vinyl collection. 

    2.Is there a probability that TSA would confiscate your vinyl records?

    No, there is a zero percent chance that TSA would rid you of your beloved vinyl records. The reason being, TSA doesn’t want to keep your stuff. Another reason is that TSA does not have an issue with you carrying vinyl records.

    Vinyl records are neither harmful nor toxic in any way, shape, or form. So you are unlikely to have your vinyl records lawfully taken from you. Plus, TSA wouldn’t even take the vinyl records. 

    What would happen then? They would ask you to leave them with another party or find another means to transport them. The probability of this scenario happening is low as well. 

    Don’t panic. Your vinyl records will surely go through the checkpoint.

    3.What’s the best way to carry vinyl on a plane?

    A lot of vinyl owners may have this concern. Is it better to pack them as carry-on luggage or checked-in luggage? If you have maybe one or two (if you’re stretching it, then three should suffice), then having them as part of your carry-on luggage should be fine. 

    However, it would be best to have them as your checked luggage if you have more vinyl records. Not only that, but if you’re looking to start your vinyl record collection, it would be best to ensure the safety and priority of your vinyl records. 

    What better way to do that than by having them as part of your checked luggage? Please note that this is a recommendation. 

    Sources

    1.Retroonly, How to Transport Vinyl Records on a Plane, https://retroonly.com/how-to-transport-vinyl-records-on-a-plane/ Accessed July 27th, 2021.

    2.CNN News, TSA’s naughty list: What you should not take on a plane this holiday season, CNN News, https://edition.cnn.com/travel/article/tsa-prohibited-items/index.html Accessed July 27th, 2021.

    3.Luggage Pros, Carry-on Items, Luggage Pros https://www.luggagepros.com/pages/carry-on Accessed July 27th, 2021.

    4.FAA, Dangerous Goods, FAA https://www.faa.gov/hazmat/ Accessed July 27th, 2021.

  • This Is The Temperature In Which Records Warp

    This Is The Temperature In Which Records Warp

    At what temperatures do records warp? Warping is one of the signs of poor vinyl record keeping. But what temperature levels cause the warping process? This article is here to give you the answers to help keep your records alive and well. 

    Here’s a general rule of thumb that you can use to keep your records in the proper storage conditions:

    1. Below 0°C, records will turn brittle and start to break.
    2. At 140°F, warping will occur
    3. Over 100°C or 212°F melting will occur on vinyl records.
    4. At room temperature, 65°F or 70°F is an ideal storage temperature.

    For more information, be sure to keep reading. This article will delve deeper into the science behind records and how they are affected by heat. 

    At What Temperature Do Records Warp?

    Record warping is a pain in the neck for a lot of record owners. What causes warping? There are two reasons why record warping occurs:

    Intense heat exposure 

    Improper record keeping (You should store your records vertically and not flat)

    Way Basics Vintage Vinyl Record Cube 2-Shelf Storage, Organizer - Fits 170 LP Albums (Tool-Free Assembly and Uniquely Crafted from Sustainable Non Toxic zBoard Paperboard) Espresso

    In my experience, records tend to warp at around 140°F. Any higher than that, probably at the boiling point of water, the record will melt. Another interesting thing about heat and records is that you will require heat to restore the record after warping. 

    Records can be pretty fragile things, and like anything else that’s not maintained or stored correctly, they will break or wrap. 

    What’s The Science Behind Vinyl Records And Heat?

    It seems easy to share a number on the temperature scale, but it would be more interesting to share how the process works from a scientific perspective. 

    Firstly, it’s best to understand the consistency of records. 

    What Makes Up Vinyl Records?

    When purchasing records, you’ll come across records made of different types of materials. These materials are the most commonly used in record manufacturing:

    1.  Shellac

    The earliest version of records consisted of shellac. The earliest record versions date back to the 1800s. It’s that far back. Manufacturers would create records from cardboard and fiber then finally coat the records with shellac resin. 

    Shellac records or 78s are the most fragile records. They break easily and can turn quite brittle if not well maintained. 

    1. PVC 

    PVC is short for polyvinyl chloride, and it’s a form of plastic. PVC makes up 12% of the total demand for plastics. Records made of PVC are known as vinyl records. These types of records are the more evolved version of shellac records. They are more durable than shellac; however, they are prone to wrapping when exposed to heat. 

    Here are some of the properties of PVC:

    • It has a melt temperature of 212 – 500 °F (100 – 260°C).
    • PVC has a heat deflection temperature (HDT) of 92 °C (198 °F).
    • The softening point of PVC is between 176°F and 183°F (80°C-84°C)
    • The chemical formula of PVC is (C2H3Cl)n (just a little side note for those interested readers.)

    Apart from the chemical formula, the numbers mentioned look eerily familiar. PVC-made records are the most common type of record. PVC is cheap and readily available. 

    The fact that vinyl records are cheap and accessible makes it easier for both manufacturers and buyers. It also means that you most likely will have vinyl records in your collection. 

    1. Colored vinyl 

    As the name suggests, it refers to vinyl records in different colors. Mostly popular in the 1970s, they are still vinyl records. What differentiates them is the color on the surface of the record. 

    What Are The Parts Of A Vinyl Record? 

    Did you know that records consist of different parts? If not, don’t worry. Here are the parts of a record, and it comes with an image to boot:

    • Lead-in groove
    • Recorded grooves
    • Dead Wax/End groove
    • Center label
    • Spindle hole

    When you expose a record to high temperatures, you will notice warping along the recorded grooves. The center label doesn’t consist of PVC, so you’ll find that it won’t warp like the outer layers of the record. 

    Is It Bad To Leave Vinyl Records In The Heat?

    Yes, it is terrible to leave your vinyl records in heat. High temperatures cause warping in records, and eventually, the records will melt. Sometimes, warping is reversible, but it can get to the point of no return, and the record is no longer usable. 

    Shellac records are incredibly fragile, and if stored or placed in unhealthy conditions for the record, it won’t take long for them to break. 

    PVC or vinyl records are more durable than shellac records. However, they are weak to increased temperatures. They will warp if the temperatures exceed a certain level. Not only that, but they are also capable of melting. 

    Vinyl collectors advise keeping your records in a clean, cool, and dry place that won’t negatively affect the record. 

    Are You Interested In What Other Like-minded Individuals Are Asking? Here Are Some Incredibly Helpful Faqs. 

    1. Is the warping and melting of records two different things?

    Yes, warping and melting are two different things. Warping is the bending of records due to an increase in temperatures. Warping is also a reversible process in some cases. Melting, as the word suggests, the record turns from a solid to a liquid form. 

    Warping also has a different temperature than melting. Warping occurs at 140°F (60°C), while melting occurs at 212°F (100°C). Remember that once the record has melted, you cannot restore or reverse it. The heating process will completely ruin the record, and a new one will have to take its place. It’s sad, but it is what it is.   

    2. Is it recommended to ship records in the summer?

    Summer is a glorious time of the year for some people but not others. Thanks to online stores and delivery, everything is a lot more convenient. But that doesn’t mean that delivering records during summer will be the easiest thing for record owners this summer.

    If you’re planning to order records at any time during summer, it would be best to stop and take several seats back. There are no specialized solutions to delivering records in the summer that won’t protect the records from warping or even melting. 

    Deliveries take time, and sometimes, the package can be left outside your doorstep for hours before you remember that your new records are in-bound. 

    Its recommended not to order and have records delivered during summer. The outcome may cost you time, money, and joy. It’s not worth it. Choose to either have an in-store pickup or wait till summer’s out and with a click of a button, you can order your favorite records. 

    3. Will the heatwave warp my records?

    Yes, leaving your records exposed during a heatwave will cause them to warp. As long as you store your records in a cool and dry place, your records are unlikely to warp. That’s the name of the game.

    However, if you leave your records exposed to the heat or the storage environment is not conducive to the record’s material, they will most likely warp.

    Records are fragile pieces of plastic. The Center for Climate and Energy Solutions shared that the average temperature in a heatwave is 90°F. This temperature is past the peripheral point where PVC starts softening. 

    A little longer at that temperature and warping will not be a dream anymore. It will be a harsh reality for both you and your records. In my experience, it should take half an hour for the warping to start if your records will remain at that temperature for that specific amount of time. 

    Leaving it any longer may melt the records. 

    Related articles

    You might be interested in some other articles that I wrote about warped Vinyl Records and how to store them. Take a look here:

    Sources

    1.Jenna Miles, The Beginner’s Guide to Vinyl Records: How to Build, Maintain and Experience a Music Collection in Analogue (Massachusetts: Adams Media,2017) 256.

    2.Record Player Expert, Vinyl Temperature Guide, Record Player Expert, Accessed 29th July 2021.

    3.Yu, Jie & Sun, Lushi & Ma, Chuan & Qiao, Yu & Yao, Hong. (2015). Thermal degradation of PVC: A review. Waste Management. 48. 10.1016/j.wasman.2015.11.041. 

    4.Saliu Adelakin Durosinmi, Mechanical and Structural Changes of PVC when Subjected to Heat, Arcada,

    5.Center for Climate and Energy Solutions, Heat Waves and Climate Change, Center for Climate and Energy Solutions Accessed 29th July 2021.

    6.Vinidex, Polyvinyl Chloride, Vinidex Accessed 29th July 2021.

  • Can Records Be Stored Horizontally?

    Can Records Be Stored Horizontally?

    Storage is one of the routine maintenance practices for your vinyl records; the way they are stored directly affects their functionality and life shell (2).

    You should never stack your vinyl records horizontally because stacking them on each other causes scratches and warping the records over time.

    This article will discuss the difference between vertical and horizontal storage, why you should not store records horizontally, why they should be stored vertically, and how to keep your vinyl records.

    Can Records Be Stored Horizontally? – Vertical Or Horizontal Storage?

    Vertical storage style has always been the best record storage practice, while horizontal storage style damages records over time.

    The storage style of your records matters a lot; they determine the life shell of your vinyl records and their sound quality. 

    If you are storing less than five records, then you can try the flat storage style. If you own more than five records, make sure to keep them vertically. In my experience, The weight on the vinyl records at the bottom of a horizontal storage style causes many damages. 

    There are many reasons you should always consider vertical storage style, from saving the vinyl records from bearing unnecessary weight to avoiding warping or mishappening of your vinyl records and crack. 

    Dangers Of Horizontal Storage Of Vinyl Records

    There are a lot of dangers attached to storing your records horizontally. They are not risks or probable outcomes but direct and definite consequences of holding records horizontally, which I have encountered in the world of vinyl collection. Here’s some of them:

    1. Warping – When you stack your records on top of each other, distortion is inevitable. Warping means your vinyl records will start to bend to the weight and become deformed, taking another shape entirely. Warping can cause your vinyl record to become unplayable permanently; it will no longer be flat but have a bowl-like form, which definitely cannot be played. Many record owners have tried flattening it out again (1), but there is only a slim chance of that working out, and in the end, you might have to throw it out.
    2. Skipping – In some rare cases where warping has not started yet, cutting takes place. The weight applied to your vinyl records will cause them to miss while playing them when they have endured the weight for too long. While playing, some parts might get cut off or not play at all; this is caused by applying weight on your vinyl records. 
    3. Scratch from Pressure – The pressure generated from the weight on the records at the bottom of the stack is high, and your vinyl records cannot hold pressure. They are fragile materials that cannot withstand too much pressure on them. This pressure ultimately begins to cause scratches on the vinyl records, which continue to get deeper until they are no longer playable. Scratches happen when your vinyl records are in sleeves; by forcing them out from under the stacks. Therefore, the sleeves that are supposed to protect them from scratches cannot do their jobs but damage the records because of their storage conditions. 
    4. Heat Generation – Storing your records on each other does not allow air to go in between them to keep them aerated. Getting oxygen is also essential for your vinyl records because heat causes them to be damp, and this is also a perfect condition for molds to grow. When the heat gets too much, moisture accumulates, causing mildew growth and rendering them unplayable. 
    5. Cracking – The worst thing that can happen to your vinyl records is getting snapped. Cracking often occurs when you store your vinyl records horizontally, especially on an unstable surface. They crack easily from the pressure, and sometimes when you are pulling them out. 

    Why Is Vertical Storage The Best?

    There are several reasons why vertical storage of your vinyl records is the best for you. Below is just a few:

    • When you store your records vertically, you do not need to worry about warping because there is no pressure on them, and nothing can make them bend. They remain flat and always ready to be played.
    • There will no longer be any weight on them, and this means no scratches. There will be no force to pull out a record since they are not stacked anymore. Your record sleeves can do their jobs of protecting the vinyl records from getting scratched and won’t damage them either. 
    • Elimination of mold growth due to proper aeration between your records occurs. They now get a fair and adequate air supply, no more dampness or moisture accumulation that grows mold.
    • There is no risk of getting cracked or broken anymore, and this can only now occur when you are handling them, but not while in storage. 
    • This storage improves your vinyl record’s shelf life; they can be stored vertically for years without damage. They will not depreciate or sound quality because they are correctly stored. 

    How To Store Your Vinyl Records

    Proper storage of your records goes beyond horizontal or vertical storage styles; you must take several steps for an adequate repository for fragile vinyl records (3). I have broken them down into five quick and easy steps:

    1. After playing your record, the first thing to do is to clean your vinyl record. Cleaning can be done with vinegar and distilled water solution, cleaning the vinyl record properly, rinsing out the mixture, and drying the vinyl records. There are other cleaning methods, but ensure that you follow one of them appropriately, using the correct tools and measurements. Improvising some of them might cause severe damage to your records. 
    2. After cleaning them and drying them correctly, make sure you put your records back in their sleeves. Your vinyl records must always be in their sleeves, except you are playing them at the moment. Keeping them in their sleeves prevents the accumulation of dust and dirt on them, another risk factor to vinyl health. Sleeves save your records from getting scratched or cracked by mistake due to bad handling. 
    3. Your records must be in vertical positions; this means they should be upright in their shelves or boxes. To avoid warping, skipping, cracking, and other damages to them, you have to store them vertically. 
    4. Never store your vinyl records horizontally for any reason, the risks are way too much to deal with, and some are permanent and cannot be fixed or reversed. Frequently you might not get those vintage records anymore, so ensure to treat them nicely to avoid damages.
    5. Play your records the right way. Do not directly touch the surface of your records; handle them by the edge only. Skimming the surface of your record can cause scratch or transfer of oils to them, which affects your sound quality. Always wait for your song to come on, do not handle the needle while playing to search for songs; this can cause severe damage when placed on the wrong grooves. 

    Frequently Asked Questions (FAQ)

    Can I Store Less Than 20 Records Horizontally?

    The best storage practice is the vertical style, and to be on the safe side, make sure you store your records in a secure manner irrespective of the number of records.

    It should not matter how many records you have before following the best storage guideline. Store your record vertically only, do not let them get stacked on each other because there will be adverse effects over time, and they might not be reversible.

    How Long Can I Store Records Vertically?

    There is no time limit for vertical storage; you can store your records uprightly forever.

    Vertical storage keeps your records fresh for as long as you have them; you can store them vertically for as long as you want. Ensure they are in a place with the right amount of air, free from external risk factors, and carefully handled when you want to play them. Doing this protects them for as long as you own them.

    How Long Does It Take For Records To Get Warped?

    Warping takes a very long time, but it can take less than a month when there is a heat source or improper aeration from lousy storage.

    Warping from horizontal storage is a very long process, but it occurs fast when a heat source is applied to the record or generated from the inadequate air supply. Store your records vertically, away from the heat source, and ensure an adequate supply of air.

    Summary 

    Vinyl records can be stored horizontally, but they come with substantial risk factors when they become a long-time habit and when the records are more than five. Vertical storage poses no threats irrespective of the number of records. If you have further questions, kindly leave a comment below.

    Sources

    1. McCrigler, Brittany, et al. “How to Repair a Warped LP Record.” iFixit, 2014, https://www.ifixit.com/  Accessed 13 July 2021.
    2. Rigby, Paul. “How to store your record collection in 8 steps.” The Vinyl Factory, 2015, https://thevinylfactory.com/ Accessed 13 July 2021.
    3. Storage, Life. “5 Best Practices You Need to Learn about Record Storage.” LifeStorage, 2017, https://www.lifestorage.com/  Accessed 13 July 2021.
  • How To Clean A Record Player’s Dust Cover

    How To Clean A Record Player’s Dust Cover

    The purpose of a record player’s dust cover is to protect your turntable from dust and debris. Keeping it clean, shiny, and ever-ready for use (2).

    The steps in cleaning your turntable’s dust cover are:

    • Take off the dust cover.
    • Create a cleaning mixture.
    • Submerge microfibre cloth.
    • Wipe the surface.
    • Clean off the mixture.
    • Leave the dust cover to dry.
    • Polish surface.

    This article will look at the steps involved in cleaning a dust cover, the best restoration products for dust covers, and how to lighten scratches on dust covers.

    How To Clean A Record Player’s Dust Cover – Part 1: Dust Cover Cleaning Steps 

    Your turntable dust cover protects your record player; however, it also gets covered in dust or debris (3). It can get worn out, scratched, and need restoration because a dirty dust cover can ruin your record player and vinyl record. 

    Items Needed:

    1. Dishwashing liquid.
    2. Clean microfibre cloths.
    3. Plastic polish.
    4. Warm water.

    Step 1: Remove the dust cover.

    When you want to restore your dust cover, the first thing to do is take off the dust cover from the turntable. This step is not compulsory, and based on my experience with turntables, it is better to clean the dust cover while attached to your record player. However, if you find it difficult, taking off the dust cover is your first step, but it should be done with extreme care to avoid damaging the hinges.

    Step 2: Create Cleaning Mixture.

    The next thing to do is create your cleaning mixture. Using two cups of warm water and ¼ tablespoon of dishwashing liquid, mix the contents until it forms enough lather. The measurements above are not strict about following measures, so you can use any bar you desire. In my experience, this measurement has been the most effective on any brand of the dust cover.

    Step 3: Submerge Microfibre Cloth.

    After creating your soap mixture, your microfibre cloth comes into the scene. Place your soap mixture on a flat surface to avoid spilling, then submerge your microfibre cloth in it. Do this until it is damp; it should not be soaking wet to avoid dripping the mixture into your turntable or vinyl grooves. It should also be moist enough to clean your dust cover.

    Step 4: Wipe Surface.

    Using your damp microfiber cloth, wipe the entire top and bottom surface of your dust cover. Ensure to submerge the microfibre in the soapy mixture if it gets dry, do this to remove dirt, debris, or dust from the outside without leaving scratches on the plastic. Put the fragile nature of your dust cover into consideration when wiping, so you don’t apply too much pressure that can lead to permanent damage.

    Step 5: Clean Off Mixture.

    When you are sure that you have entirely wiped every surface of your dust cover with the soapy mixture, the next thing is to clean off any additional residue or dust stuck onto the plastic. Using another clean microfiber cloth, submerge it in plain water without soap until it is damp, and wipe off the dust cover’s entire top and bottom surface to remove the soap mixture. Do it several times carefully until you completely wipe off the soap residue from the surface of the dust covers and any part of your turntable the soap might have touched.

    Step 6: Dry Dust Cover.

    After the fifth step, leave your dust cover to dry completely. It is important to note that the surface must be dry before carrying out the next final step. Carrying out this step on a wet dust cover will create unpleasant results and sticky grime on your dust cover.

    Step 7: Polish The Cover

    The next and final step is the polishing part of the whole process. After your dust cover gets dried, apply your plastic polish on the entire surface of your dust cover in overlapping circles, using another clean microfiber cloth. This time, you will wet your microfiber cloth with the plastic polish and not submerge it. The work of your plastic polish is to make it shiny and attractive like it was when you purchased it.

    Part 2: How to Lighten Scratches on Dust Covers

    If you have a plastic or acrylic turntable dust cover, scratches are inevitable. They make your dust cover look old, unattractive and can store dirt in their grooves. In cases where you have blemishes on your dust covers, the following steps can help remove scratches while also polishing your dust covers:

    Tools Needed:

    1. Clean and dry cloth.
    2. Toothpaste.
    3. Car wax.
    4. Polish. 
    5. Warm water.

    Step 1: Wet Your Dry Cloth.

    The first step to carry out is wetting the dry clean cloth with your warm water. This process removes any dirt or specs of dust on the fabric that you might have missed. Ensure to wet it enough to be damp or moist and not too wet to the point of dripping.

    Step 2: Apply Toothpaste to the Cloth.

    After getting the cloth damp enough, apply the toothpaste to the moist cloth. Any brand of toothpaste works, but from my experience, using toothpaste that is not gel works better and faster. 

    Step 3: Rub Cloth on Your Dust Cover.

    The next step is rubbing the cloth on your dust cover’s top and bottom surface. Ensure to rub it multiple times on the body, covering all edges and parts of it. Rub it gently, too, so you don’t break it or cause more damage.

    Step 4: Rinse Off Residue.

    After getting satisfied with the previous step, rinse off the residue of the mixture from the dust cover. Ensure to use clean, warm water to rinse off the substance and leave it to dry correctly. 

    Step 5: Apply Car Wax and Polish.

    Finally, apply your car wax and polish to the dust cover, rubbing them on all corners and edges of the body. When you are satisfied with this part, you leave it to dry out a bit, and your dust cover will be as good as new.

    Part 3: Best Dust Cover Restoration Products

    There are many products used to restore dust covers, both acrylic and plastic (3). Below are some of our best picks:

    Novus 7100 Plastic Polish Kit – 8 Ounces is a plastic polishing kit used to polish dust covers made from plastic. It helps protect, clean and polish your plastics, making them free from dirt, dust, and scratches. When you use it frequently, it serves as protection against future scratches. Click here for more price information.

    Chemical Guys BUF612 TORQX Random Orbital Polisher is a polishing kit that removes scratches, swirls, and defects from your dust covers. It works fast, comes with pads that can be switched quickly, and can handle any level of scratches on your body. They also come with the appropriate cloth for carrying out your cleaning steps and can be used for plastic and acrylic covers. Click here for price information.

    Gloss Poly Wax is a car wax used to remove scratches from dust covers. They protect your surfaces from damage and have synthetic polymers. You will get a removal towel and hand wax pad on purchase to help make waxing easier. Click here for price information.

    Frequently Asked Questions (FAQ)

    How Do I Avoid Getting Fibers on My Turntable?

    The best way to achieve this is to ensure that each time you take off your cloth dust covers, brush your turntable with a carbon fiber brush.

    In cases where the fibers from your dust covers are becoming too much, it is probably time for you to change it. However, you can always dust them properly away from the record play before covering them after each use.

    Can I Use a Cloth and Plastic Dust Cover at Once?

    One turntable dust cover is enough, but you can use both plastic and cloth dust covers if you want extra protection for your turntables.

    You can use both dust covers to protect your turntable at once, but they are not necessary at all. It is a personal preference, but they are not compulsory and do not hold any technical significance. 

    Summary 

    Cleaning your dust cover is very important and should be done frequently depending on how much you use your turntable. Do this to keep your record players safe and free from damaging external factors. For further questions and information, drop a comment below.

    Related Articles

    Sources

    1. Technica, Audio. “Audio Solutions Question of the Week: How do I Clean My Audio-Technica Turntable’s Dust Cover Without Scratching It?” Audio-Technica, 2018, https://www.audio-technica.com/en-us/  Accessed 12 July 2021.
    2. Zinski, Jaimie. “How to Polish a Dust Cover on a Turntable.” HomeSteady, 2017, https://homesteady.com/how-12020337-polish-dustcover-turntable.html  Accessed 12 July 2021.
    3. Siu, Jason. “Top 10 Best Plastic and Trim Restorers.” AutoGuide, May 2021, https://www.autoguide.com/ Accessed 12 July 2021.
  • Can You Skip Songs On Vinyl Records? (We’ve Got The Answer)

    Can You Skip Songs On Vinyl Records? (We’ve Got The Answer)

    Skipping songs on a vinyl record can be considered a skill set. It requires precision, confidence, and semi-accuracy that not many people have. Nevertheless, this article will help you master the trick behind skipping songs on a vinyl record. 

    In my experience, here’s how you can get to your favorite tracks on an album:

    1.Release the needle
    2.Remove the protective casing over the needle 
    3.Push the needle toward the record
    4.Lift the needle on top of the thick indentations on the vinyl record
    5.Lower the needle and mission complete.

    Not only will this article provide you with the trick behind skipping songs on a vinyl record, but it will also give you bonus information in caring for your vinyl records. If you’re interested in this and more information, be sure to keep reading.

    Can You Skip Songs On A Vinyl Record?

    Quite frankly, yes, you can skip songs on a vinyl record. It’s a process that requires a steady hand an even steadier disposition. Be patient. You may not ace it the first time.

    A viny record manual does not exist, but a record player manual does. However, that doesn’t come with the knowledge required to skip songs. Nevertheless, this article will be the answer to your problem. 

    First things first are to look at the different types of vinyl records.

    What are the different types of vinyl records, and how do you skip songs on them? 

    There are two types of vinyl records:

    1. 45 RPM records
    2. 33 RPM records

    The 45 RPM records contain two songs, while the 33 RPM records contain an entire album. Be sure to check which type of RPM or revolutions per minute type of album you have at hand. 

    The RPM refers to the speed at which your vinyl record will play the songs. This fact matters a lot down the line, but let’s elaborate further on the main parts of this article. 

    How Do You Skip Songs On A Vinyl Record?

    1. Release the needle

    A needle is also known as a stylus. It is at the tip of the metallic arm on the record player. You gently place the needle on the vinyl record, and it’s one of the primary sources of sound.

    It does the sound generating by touching the grooves while the vinyl record is in motion. 

    Depending on the type of record player you do have, it’s essential to release the needle. With this, you can move the needle on either side to choose your desired song. 

    1. Remove the protective casing on the needle

    Needles consist of two types of materials:

    • Diamond
    • Sapphire 

    The needles can also be either elliptical or spherical shaped. Because of this design, most needles will come with a protective casing, also known as a stylus guard. 

    If you don’t have one for your record player, it’s good practice to have one to help maintain your stylus or needle and protect it from unwanted external factors.

    Make sure that you remove the stylus guard or protective casing. You will be using the record player shortly. 

    1. Push the needle toward the record

    It’s almost time to put theory into practice. Push the needle toward the record, and let’s move on to the next step. Be sure not to push the needle down. 

    Some record players will come with a safety lock. Make sure to release the safety lock before pushing the needle toward the record. You must conduct the process carefully and correctly.

    1. Lift the needle on top of the thick indentations on the vinyl record

    On the 33 RPM vinyl records, these indentations are much more prominent. The indentations represent the songs in the album. Remember that there are songs at the front of the vinyl record and the back of the vinyl record.

    Slowly but surely, move the needle on top of one of these indentations.

    Lower the needle and let it play your song. Voila! Mission accomplished. You have successfully skipped a song on a vinyl record.

    If you want to skip the song on the 45 RPM vinyl record, both songs are on different sides of the vinyl record. It means that you have to flip the record over, and you have achieved what you once sought out. 

    1. Lower the needle and mission complete

    After completing all these steps carefully and hopefully with a steady hand, you can listen to the song of your choice. The record player will continue to play the rest of the songs as usual. 

    The disclaimer behind skipping songs on vinyl records

    Skipping songs on vinyl records may come across as easy without the exception of having a steady hand while doing it. However, there is a risk involved in this process. 

    Skipping a song on a vinyl record increases the likelihood of damaging the vinyl record or the record player. You may accidentally press on the needle or stylus or probably even drop the stylus. 

    The risks are unknown and are in your hands. Experts recommend forgoing the skipping process to eliminate the risk. Vinyl records and vinyl record players are pretty fragile. 

    Therefore, if you have no choice but to skip a song, do it slowly and carefully. Take your time and exert patience while doing it. You want to make sure that you do not damage the stylus or the vinyl record itself. 

    May the odds be in your favor.

    Are You A Vinyl Record Owner Interested In What Other People Are Asking? Here Are Some Helpful Faqs To Get You Started.

    Can You Fast-forward A Vinyl Record?

    Unfortunately no. You cannot fast forward a vinyl record. Vinyl records exist in two types of speeds:

    • 33 RPM typically (12-inch records)
    • 45 RPM typically (7-inch records)

    These speeds mean that you should play these two types of vinyl records at their specified speeds. Any faster or slower would not play the songs on the vinyl record as intended.

    Not only that, but as a vinyl record owner, you need to take better care of your equipment. 

    With great power comes great responsibility and even more fragile needles. Thus, play your vinyl records at their specified speeds. It won’t hurt to stick to the design rules of vinyl recordsHokk. 

    Can You Play Specific Songs On Vinyl Records?

    Yes, you can play specific songs on vinyl by carefully positioning the needle on one of the thick indentations on the vinyl record and lowering the needle. 

    You can easily switch between songs on the vinyl record. The only downside to this process is that you may not get it right if you don’t have a steady hand. 

    Positioning the stylus or the needle is the hard part of this process. The trick is to get it as accurate as possible. Be sure not to push the needle down or try any risky maneuvers to get it right. 

    You can consider using hand-eye coordination without applying any unnecessary forces to the parts in question. 

    Not only that, but you can also consider not skipping songs at all. Experts recommend not skipping songs on vinyl records because skipping songs increases the risk of damaging either the stylus (aka the needle) or the vinyl record. 

    Remember to take care of your equipment. 

    How Do You Figure Out Where A Song Starts On A Vinyl Record?

    Honestly, it takes a lot of practice to know where a song starts. On a 33 RPM vinyl record, the thick indentations on the vinyl record represent the different songs on the vinyl record. 

    For you to skip songs on a vinyl record, the indentations are the key to your lock. However, it requires practice and patience to get it right. 

    Sources

    1.Jenna Miles, The Beginner’s Guide to Vinyl Records: How to Build, Maintain and Experience a Music Collection in Analogue (Massachusetts: Adams Media,2017) 256.

    2.Victrola, Getting Started: How to Use a Record Player, Victrola https://victrola.com/blogs/articles/getting-started-how-to-work-a-record-player Accessed 17th July 2021.

    3.Record Player Expert, Skipping tracks on Vinyl, Record Player Expert https://recordplayerexpert.com/ready-why-its-not-a-good-idea-to-skip-tracks-on-vinyl/ Accessed 17th July 2021.

    4.Victrola, Understanding the Difference: Turntable vs. Record Player, Victrola https://victrola.com/blogs/articles/understanding-the-difference-turn-table-vs-record-player Accessed 17th July 2021.

  • Why You Should Never Use Windex To Clean Vinyl Records

    Why You Should Never Use Windex To Clean Vinyl Records

    The internet is full of suggestions and mystery recipes on what to use to clean vinyl records. One such suggestion is using Windex glass cleaner, which quite frankly is a nightmare waiting to happen. Here’s why you should never use Windex to clean vinyl records. 

    These are the reasons why vinyl record owners should not turn to Windex glass cleaner to get the dust off of their beloved vinyl records:

    1. Windex contains ammonia and alcohol

    2. The product is a glass cleaner and not a specialized vinyl record cleaner

    3. Professionals recommend not using Windex on your vinyl records.

    This article will not only give in-depth explanations on the list mentioned above. It will also cover other harmful substances to your vinyl records and give you bonus information on cleaning vinyl records. Keep reading for more information. 

    Here’s Why You Should Never Use Windex To Clean Vinyl Records

    In my experience, a lot of people attested that Windex was their go-to vinyl record cleaner. They swore by it and what it offered to your vinyl records afterward. 

    Long story short, they started to notice their vinyl records slowly turning grey. That color change is never a good sign for any vinyl record owner. Here’s why. 

    1. Windex Contains Ammonia And Alcohol

    If you pull up Windex online, you can quickly get the contents of the product. Windex contains 4.0% isopropyl alcohol and 0.05% of 28% of ammonia. 

    These numbers aren’t the same on all Windex products; some have a lesser percentage while others have a higher percentage. The truth of the matter is that they still contain ammonia alcohol. 

    But why are ammonia and alcohol the big bad in this story? 

    Alcohol and ammonia dissolve your vinyl records’ essential compounds and subsequently damage your vinyl records to an irreversible state. 

    Slowly, you will start to notice your vinyl records turning into an unwanted shade of gray. 

    Towards the last leg of your vinyl record’s lifespan, it will slowly start to corrode to the point of no return. You will be the Avengers, and Windex will be Thanos. You saw how that went the first time. 

    Alcohol and ammonia are the main reasons why Windex is a poor cleaning choice. It’s also why it’s the first reason on the list. Windex’s primary contents do not provide the proper cleaning mechanism. 

    2. The Product Is A Glass Cleaner And Not A Specialized Vinyl Record Cleaner

    If you’re starting your vinyl collection and someone recommends this product to you, be sure to confirm the actual purpose of the product. 

    Sure some products work great in other industries. You cannot apply that logic to Windex. 

    The product manufacturer laid out the contents of the product, its purpose, and its intended surface. That is enough reason to keep your vinyl records and your window cleaner miles away from each other. 

    It will not end well. The vinyl record industry has numerous specialized vinyl record cleaning options to choose from, both affordable and expensive. Look into them and see if they will satisfy your needs. 

    3. Professionals Recommend Not Using Windex On Your Vinyl Records.

    Experts in the vinyl record will confirm that Windex is not a good cleaning product for your vinyl records. Used as a glass window cleaner, it’s great. Your windows will shine like never before.

    However, using it as a vinyl record cleaner, it’s best to move away from that logic and consider much better and safer options. It’s not only good for you and your hobby but also your state of mind. 

    No vinyl record owner would like to wake up to corroding vinyl recorders. It’s sad, honestly. 

    Here Are Undeniable Record Cleaning Methods To Avoid

    1. Cleaning Using Wood Glue

    A couple of years ago, a video went viral on YouTube of someone cleaning their vinyl records with wood glue. Yes, you read that right, wood glue. 

    In the video, they ask users to add the glue while the record is on the turntable. The glue dries overnight, and you peel it off the following day to reveal a new and easily cleaned vinyl record.

    This method may seem like magic, an overnight cleaner with a fun and satisfying peeling session at the end? 

    Unfortunately, it’s not as fun as it sounds. The wood glue method would eventually damage your vinyl record. 

    Not only that, but you have to add the glue to the vinyl record while it’s on the turntable, and the vinyl record must spin while you do this. 

    How do you spare the rest of the record player? 

    The wood glue method is inefficient, messy, and poses a much higher risk. Experts recommend staying far from this substance and turning to other effective methods. 

    Not only that, but experts advise you to clean your vinyl record before using it on a record player and after using it. After completing this phase, you can properly store it. What if you wanted to use it in a couple of hours?

    The inefficiency of this method persists.

    2. Dish Soap

    Dish soap may have come up multiple times in forums and chats as a substitute vinyl record cleaner. Again, some people can attest to some brands and their efficiency. 

    Its best practice to sit down and look at the list of products present in dish soap brands. Not only that, but brands change their formulas over the years. 

    A dish soap brand that was great five or six years ago may not be the exact product today. Brands evolve with time, and changing their formulas may be a thing of the norm for them. 

    Because of this risk, experts advise steering clear from dish soaps if their formula will react badly to PVT (the main component of vinyl records) and if the formula changed with time.

    Still, there are other specialized products in the market to help you clean your vinyl records. A silver lining exists for vinyl record owners.

    Summary Of Cleaning Vinyl With Glass Cleaning Products

    1. Is It Okay To Clean Vinyl Records With Windex?

    No, it is not okay to use Windex glass cleaner as a vinyl record cleaner. Windex contains amounts of ammonia and alcohol. Regardless of the amount, these substances are harmful to vinyl records. 

    Ammonia and alcohol cause vinyl records to corrode. The vinyl records also become incredibly damaged and cross the point of no return. You can never restore the vinyl records.

    Experts also advise keeping your vinyl records and Windex glass cleaner far from each other. It’s too toxic. 

    2. What Shouldn’t You Use To Clean Vinyl Records?

    Experts advise staying away from Windex, wood glue, dish soaps, and anything else containing ammonia and alcohol. Or even anything that can negatively affect PVT, the main component of vinyl records.

    These substances will cause harmful effects to your vinyl records. Moreover, if you can consult a record collector, be sure to consult on what they use to clean vinyl records. Check with other reputable sources on what the good and the bad of vinyl record cleaning are in the industry.

    Research is a core part of the process. You cannot dismiss it. 

    3. Can You Use Any Other Glass Cleaner On Vinyl Records?

    Ammonia and alcohol are one of the most common ingredients in glass cleaners. Inevitably, you cannot escape the glass cleaner ghost. It will haunt and corrode your vinyl records. 

    Be sure to check the ingredients of a glass cleaner. Despite the amount of ammonia and alcohol, it will damage your vinyl records as long as it’s present. 

    Take care of your vinyl records, and glass cleaners are not the way to do it. 

    Related Articles:

    Sources

    1.Jenna Miles, The Beginner’s Guide to Vinyl Records: How to Build, Maintain and Experience a Music Collection in Analogue (Massachusetts: Adams Media,2017) 256.

    2.Brenntag, The Various Chemicals in Glass Cleaners, Brenntag, https://www.brenntag.com/en-us/industries/household-industrial-institutional/chemicals-in-glass-cleaner/ Accessed July 18th, 2021.

    3.Wikipedia, Windex, Wikipedia, https://en.wikipedia.org/wiki/Windex Accessed July 18th, 2021.

    4.Marc Henshall, How not to clean vinyl records, Sound Matters, https://www.yoursoundmatters.com/how-not-to-clean-vinyl-records/ Accessed July 18th, 2021.

  • Turntable Cable Lengths – An Audiophile’s Ultimate Guide

    Turntable Cable Lengths – An Audiophile’s Ultimate Guide

    Whether you are setting up a temporary or a permanent stereo system, knowing the basics about how your components communicate is essential to getting the best quality sound. This fact couldn’t be more true when it comes to the delicate signals produced by a turntable. So, knowing the proper gauge and turntable cable lengths are critical to maximizing your audio experiences.

    Understanding the correct turntable cable length involves using the equations to calculate voltage drop. Depending on the turntable and whether or not a pre-amp exists within will significantly affect the length of cable necessary before noticeable audio signal degradation.

    Okay, so you don’t really need to be an electrical engineer to figure this out, even if it may appear as such. Never fear; I am going to walk you through it, step by step. So, by the end of this article, you’ll sound like a geeky audio engineer spewing formulas and numbers until your heart’s content. Let’s take this for a spin, shall we?

    Turntable Cable Lengths – Start Here

    As I mentioned, we need to apply some math if we are to figure out just how long a cable is required (and what gauge) for optimal audio performance. However, before we dive right in, I should note the difference between two types of signals you likely have heard of: PHONO and LINE.

    PHONO SIGNAL

    Back in the day, when vinyl records were being invented and innovated, there was an issue with how much audio you could fit on a record. So, the Recording Industry Association of America (RIAA) introduced a standard (still in use today). This standard they created boosted the higher frequencies while lowering the low ones. In essence, it allowed more audio to fit on a record. However, when reproduced, it sounded weird, so the record players needed a mechanism to undo the standard for playback. The RIAA preamp was born, and this internal device amplifies the frequencies, reversing the compression standard imposed to fit more audio on the vinyl. (source)

    The signal is called PHONO before it reaches the preamp. Many turntables offer both PHONO and LINE outputs.

    The voltage of the PHONO signal is very weak and delicate at only 0.004 to 0.005 volts compared to the 0.3 volts found on the LINE signal. (source)

    LINE SIGNAL

    The audio signal produced post preamp in a turntable with LINE output is the amplified and corrected frequency version of the PHONO signal produced by the record cartridge. As mentioned, the LINE signal is amplified and runs at the industry nominal standard of 0.316 volts, with a peak of 0.447 volts. (source)

    When To Use PHONO Or LINE

    If your turntable has a built-in preamp, then you use the LINE output to your amplifier’s AUX input. Do not plug a preamp line like LINE into a PHONO input. If you have a PHONO input on your amplifier, ensure that a)you’re using the PHONO output from the turntable and b) if the turntable has an output selector, ensure it’s selected PHONO before plugging into your PHONO input on your amplifier.

    Also, it’s wise to do the wiring when everything is turned off unless you like frying your speakers (And your ears).

    Voltage Drop

    Okay, so we’re almost ready to discuss cable lengths. First, you need to understand why length matters. The reason length matters is because of a phenomenon called voltage drop. 

    Here’s how voltage drop works. So, you have a braided cable wire, and that wire is a specific size. The wire gauge or AWG rating measures its thickness.

    The wire gauge, or thickness, determines how much metal area there is in any slice of the wire at any given time. As such, it determines the amount of electricity that can safely pass through each slice of the wire as the electricity travels along. If there is too much electricity and not enough wire, the wire will heat up and catch fire to the wire’s housing. If there is too much wire and not enough electricity, the electricity will weaken over distance and time as it disperses and slowly fades into the surroundings. Some even escape the wire as electromagnetic fields, further weakening the electrical charge. 

    Over distance, this loss of charge, or voltage drop as it is called, will continue until there is no electrical signal left in the wire. Now, in a common audio line voltage of 0.316 volts, the voltage drop will be relatively negligible in a setup where the turntable is only a foot or two from the amp. But if your turntable doesn’t possess a built-in pre-amp, then you need to send the tiny signal (0.0004 volts) from the cartridge to your preamp. That tiny signal is going to be the victim of voltage drop if you try to go too far with the cabling. The preamp should sit basically right beside the turntable with the shortest possible cable length.

    So the question is now, how long can you send a PHONO signal down a wire before voltage drop really messes with your audio signal. And just how long can that cable be before we have a problem?

    Voltage Drop General Formula

    VD = IR cox0 + IX sin0

    Where:

    VD = Voltage drop, the line to neutral, in volts 

    I = Line current in amps (the line load)

    R = Circuit Resistance, ohms

    X = Circuit Reactance, ohms

    Cos0 = decimal power factor of the load

    Sin0 = decimal reactive factor of the load

    Obviously, we’re going to need to know a few more things, and also we’ll need a scientific calculator. We already know cos and sin, as they are programmed into the calculator. We also know the voltage, but that doesn’t appear in our formula. We need to know the amperage, resistance and reactance.

    To get the rest of our numbers, we can either get a decent multimeter and start metering things out, or look in the manual for your particular record player as well as cartridge and get the rest of the data.

    In reality, no one is going to want to go to all the effort, so I’ve created some general rules, which you will find below.

    Rules For Turntable Cabling Length And Gauge

    I’ve got four basic rules I follow for my turntable cabling. Here is what has worked for me:

    • Phono cables like those used in your tonearm to feed the cartridge should be at least AWG 33. There are reported issues with 34 and smaller, but it depends on the particular manufacturer. The insulation ought to be isolating because the weak signals are easily affected by surrounding electrical fields. The wires need to be small due to weight restrictions that can affect the quality of playback, so we keep them thin to keep them light.
    • Phono out like from the back of your turntable generally follow the same rules as for standard audio cabling in terms of gauge. I like to use the usual RCA’s at 14 AWG for this, but there’s a catch:
    • External phono cables at 14 AWG should not be longer than 3 feet.
    • Line cables at 14 AWG should not be longer than 100 feet.

    According to Techwalla, most RCA cables built with decent quality or “reasonably well with shielding” as they say, can effectively run up to 200 feet.

    High-quality cabling might get you more distance, but you might need a step-up transformer amplifier to extend the signal. 

    Isn’t A Bigger Cable Always Better?

    It isn’t just in the movie Star Wars where we find Rebels. In the world of electricity, the rebel is called resistance. No, not The Resistance, just resistance. Resistance is measured in ohms, represented by the Ω symbol.

    Just to give you the quickest rundown on how it works: Electricity, represented by a bunch of flying electrons, travels down the conductive path that is the wire. However, the wire is a solid, and not a gas, so although great for conductivity, there are also a lot of atoms in the way, which the electrons have to fly around. Think of it like this: the wire is a road, but because it’s a road it’s a natural traffic jam.

    The more traffic on the road, the more the jam gets worse. That slows down the traffic more and causes the flying electrons to slow and watch the traffic, carefully rubbernecking while their counterparts are honking their horns because they are late to lunch. 

    So, our wire has this ‘traffic’ built-in that causes the flying electrons to slow down. The slow down causes other electrons to get mad, which heats things up until someone melts the wire.

    Anyway, if you are a Douglas Adams fan, I hope you enjoyed the metaphor, if not, then I apologize. The point is that all wires have resistance. The smaller the wire, the less the size road so the resistance is greater. The larger the wire, the larger the road, the more room for traffic, the less resistance.

    However, when you have a very weak electrical signal, then a really big road is somewhere the signal can get lost, confused, and eventually pull over to the side of the road to contemplate its own existence. In other words, too large a cable and the signal dissipates faster from dispersion. 

    It applies to very weak signals like those coming from a cartridge. That and cartridge cable needs to be as small and lightweight as possible or it can affect playback, anti-skate, and more.

    At the end of the day, follow the guidelines from the manufacturer for your particular equipment and you’ll do just fine. If you can’t find those, stick to my rules above and in most cases, you’ll have great sound.