Blog

  • Best Way to Remove Static from Vinyl Records: 7 Easy Tips

    Best Way to Remove Static from Vinyl Records: 7 Easy Tips

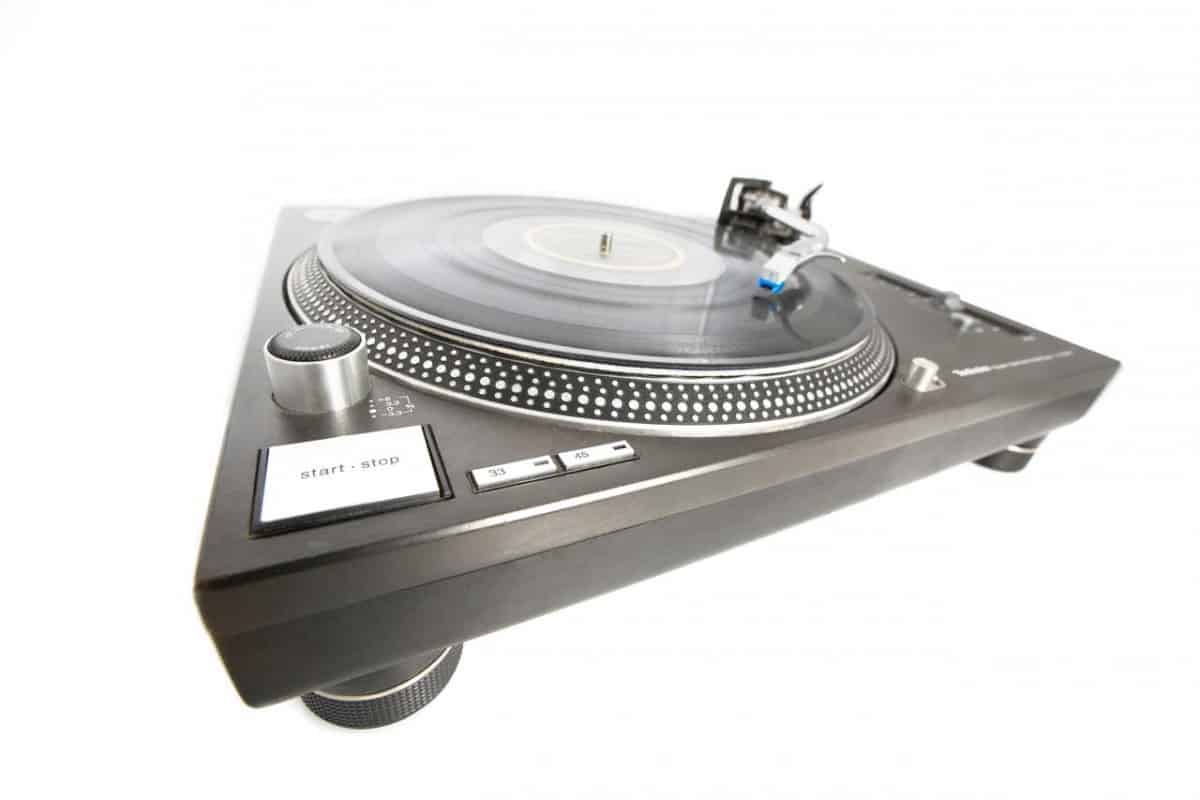
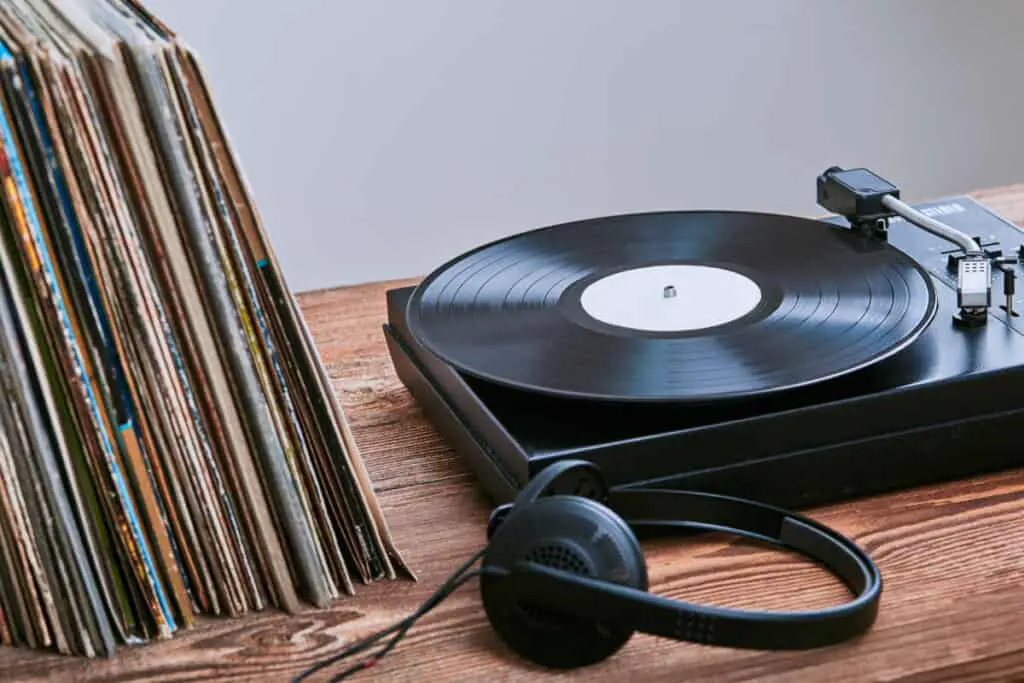
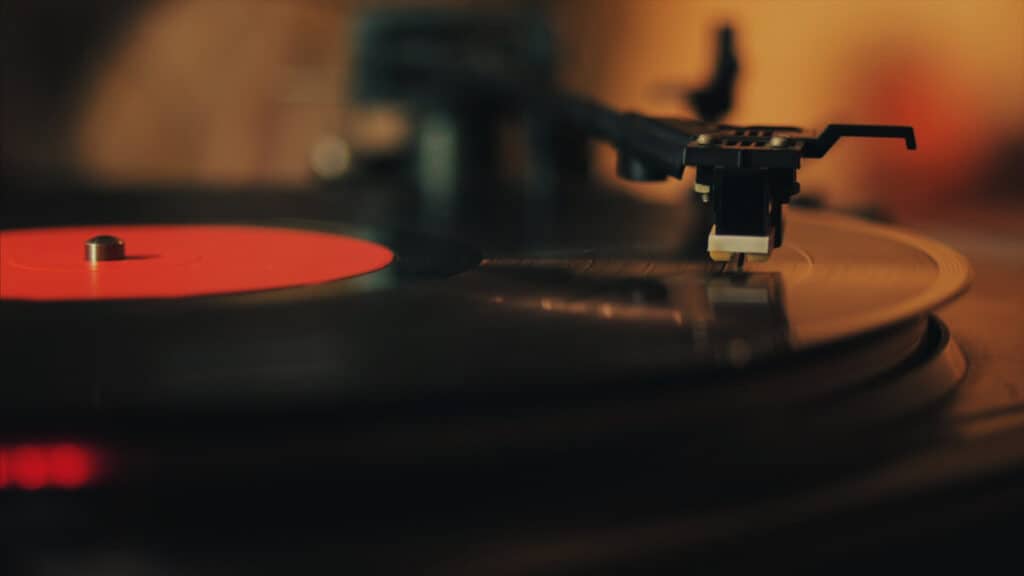
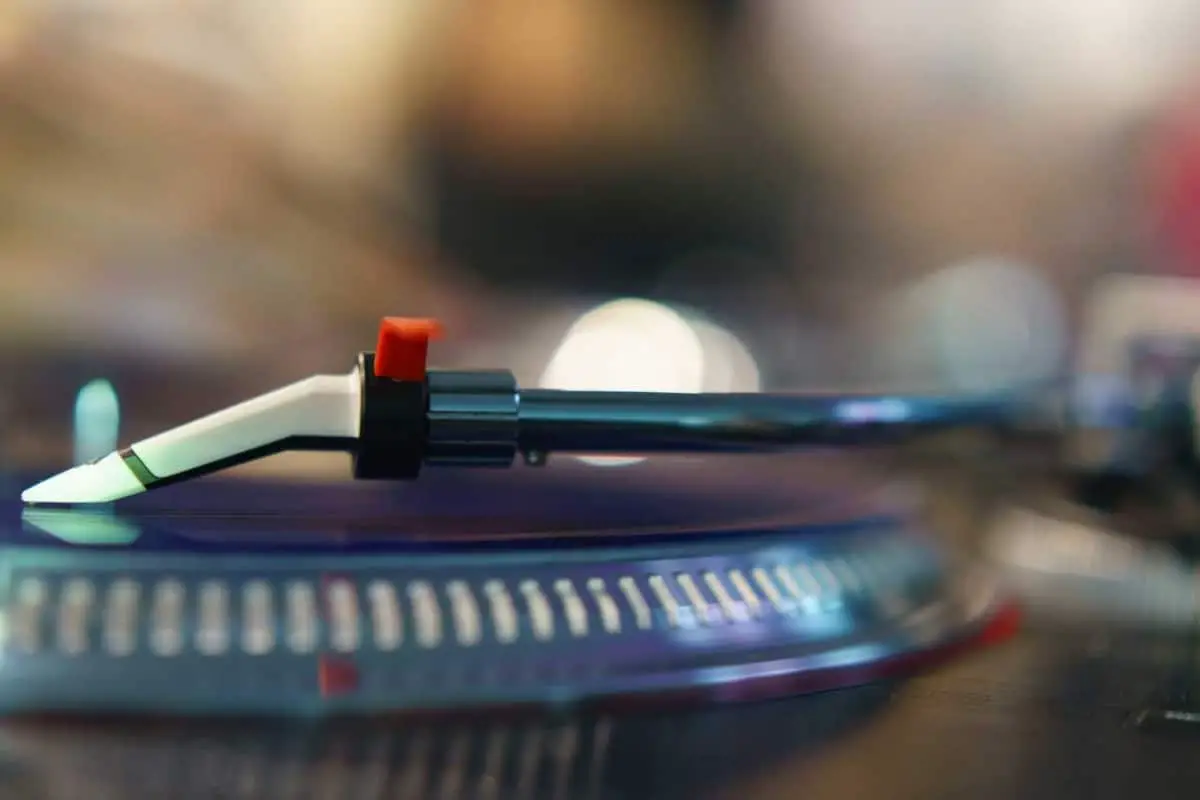
    Listening to music on vinyl records is amazing, with a nostalgic sound quality that some prefer to digital recordings. However, when records develop static it interrupts the experience you get and makes it sound like your TV is on the wrong channel.

    The best way to remove static on records is by carefully cleaning the record. Storing records in sleeves helps prevent static noise, while spraying antistatic on a cloth and gently wiping down the record can help to get rid of any static remnants. There are also vinyl record safe brushes that combat static.

    These are great ways to get rid of static on records, but how should you best store your vinyl records to combat static? How should you clean them? How should you get rid of static noise in detail? What products can you use?

    Tips for Removing Static

    Removing static off of records is an easy task to do, you simply need a couple of supplies and time in order to do it. If you have a little bit of cleaning time in your day, consider using that time to go deep clean your record player and your vinyl records.

    If you keep up on cleaning your record player and records once a month, or anytime you hear static noise, then your records will be in great shape for a long time. But, cleaning your record player is tricky because you do not want to harm the needle. So, how do you clean your record player and vinyl records?
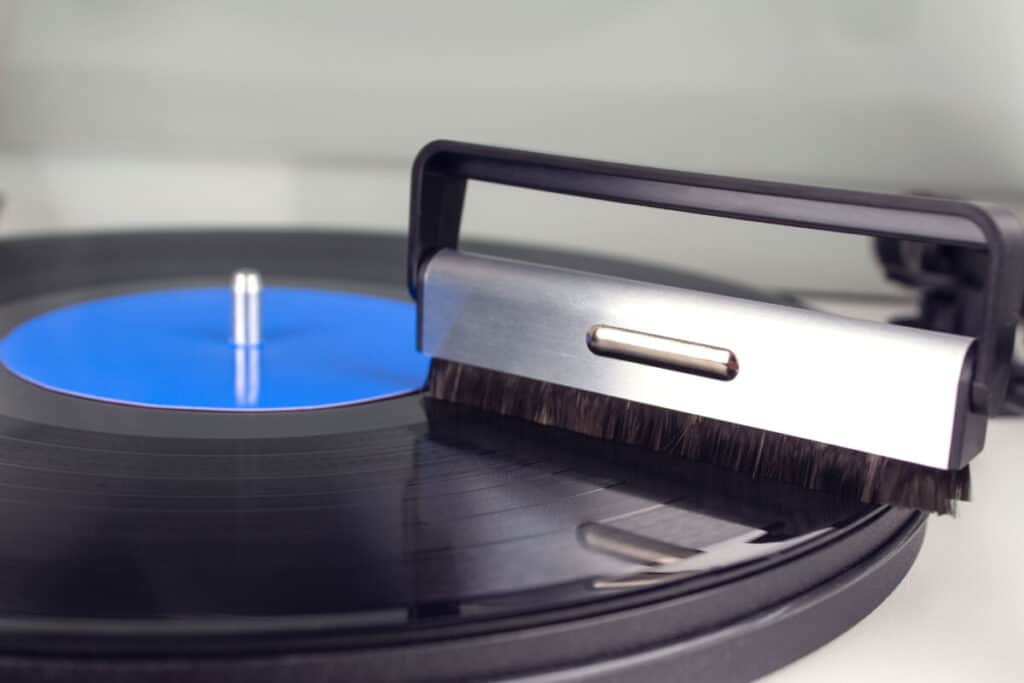
    Brush Your Record

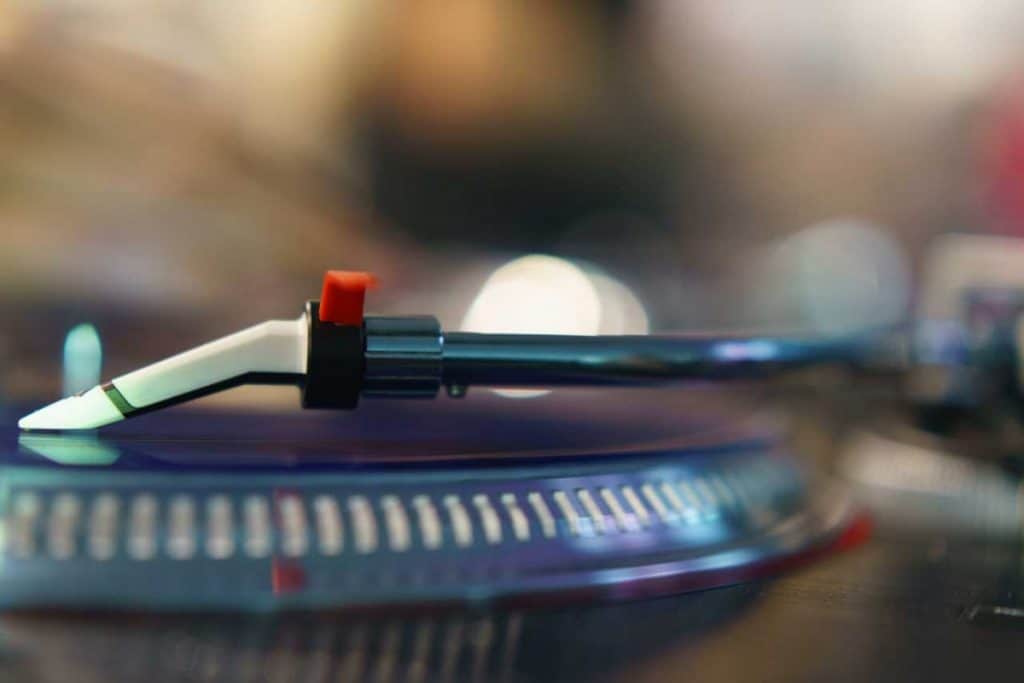
    There are antistatic brushes that are made out of carbon fiber bristles. This helps remove static noise from your record by physically removing static off of your record. The bristles also help get into the grooves in the record and lose them up and brush them out.

    Dust and dirt get into the record from static electricity drawing them in and keeping them there, then over time, it builds. The brush neutralizes the charge of the static electricity and gets rid of some built-up dirt and dust. These brushes can be as low as $10 and they are great additions to your record player collection. But, they do not deep clean as other products do.

    Clean Your Record

    Clean your vinyl record products. The needle, the player mat, and the record should all be cleaned regularly. Look at your instructions that come with your record player and use their recommendations for cleaning.

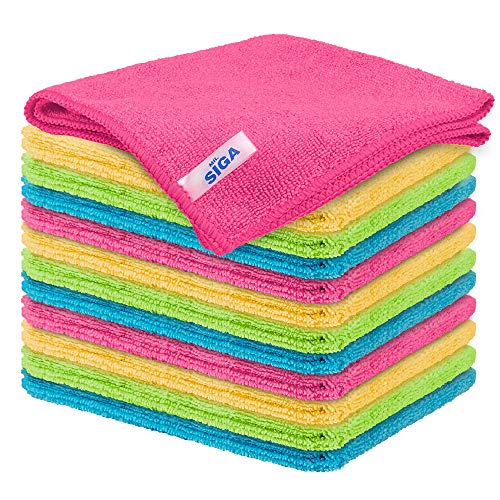
    Before washing your record, brush it and get rid of the loose dirt and dust that have built up on it. This will prep your record and get it ready for cleaning. After you’ve done that, get yourself a record solution for cleaning records. These come as sprays for easy cleaning, so simply spray your record down and gently wipe it with a microfiber towel. This towel is very soft and gentle which will work perfectly for your record.

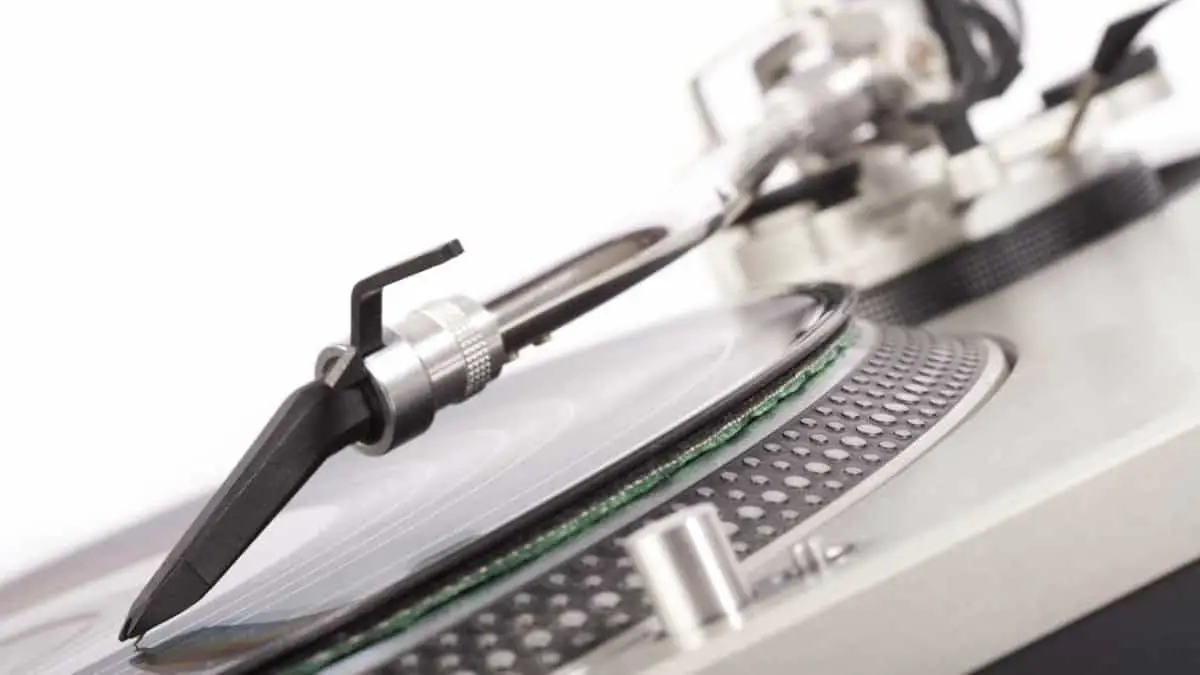
    You’ll also want to clean your player mat and needle. The needle is difficult to clean because you want to be very careful as to not harm or move the needle out of place. For cleaning your needle you can either use a needle cleaning brush that comes with your record, a clean paintbrush, or a Mr. Clean Magic Eraser.

    Record players can come with a little brush that you can use on the needle to clean it. Simply brush the needle in the same direction that the record goes when it is playing. Do not go side to side or backward. You do not want to damage your needle with scratches going in the wrong direction because it can ruin the sound quality. If you have a clean paintbrush that is small, you can use it the same way you use the record needle brush.

    The other option is using the Mr. Clean Magic Eraser. This is very easy for people because chances are you have one of these in your home already. All you need to do is cut off a little piece and place it under your needle. Then, let your needle slowly lower itself down onto the eraser. The needle will push on it a little, then lift up. Do this a couple of times and your needle will be clean. The eraser is good at picking up small pieces of dirt and dust and traping them. Using this method can be fast, and convenient for you!

    You can gently wipe down the platter mat, but a great way to clean it is to sweep it with the antistatic brush that you use (gently) on your record. This product or a clean paintbrush will wipe away any dust and leave your mat clean for your records to be played on.

    Anti-Static Spray

    This spray is great for removing static off of your records and for cleaning. After brushing your vinyl records, spray them with an antistatic spray and wipe them down with a microfiber towel. This spray will help remove static and help prevent static from building on your records. Using this once a month will keep your records in great shape.

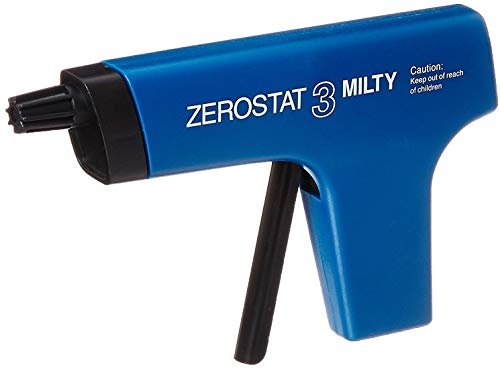
    Use an Anti-Static Gun

    This gun is very simple to use. Simply point it at the record and press on the trigger. It removes static electricity very efficiently. It cannot clean your record and remove dirt and dust, but it takes away static better than other products do. This is a simple and fast solution to getting rid of static on your vinyl records.

    Antistatic Tonearm

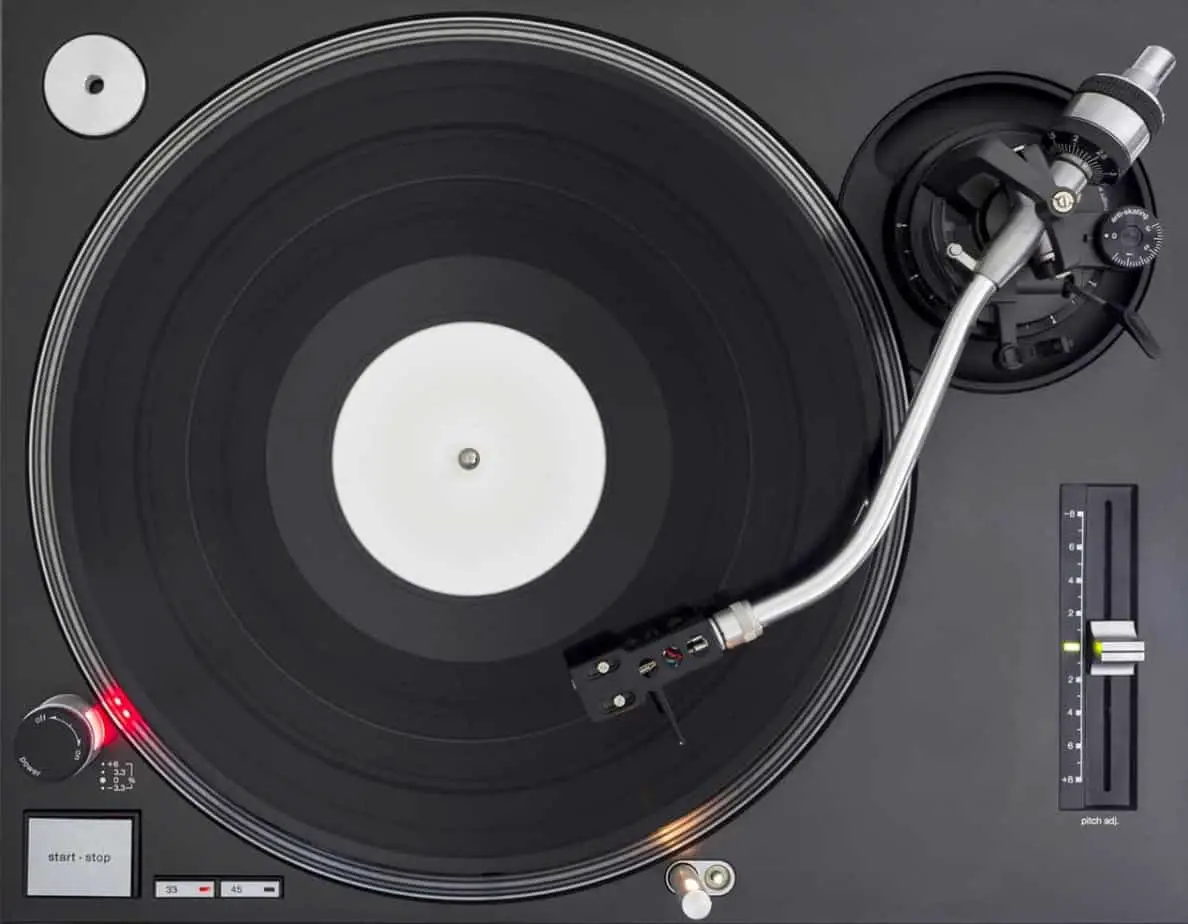
    This product was made after the record brush’s success. It is basically a thin little antistatic brush that hangs over your record as it plays. This product gets rid of static as soon as it arrives, and it keeps your sound crisp because there is no build-up from static.

    Store Your Record Correctly

    To prevent static from building up on your vinyl record, store your records well. Investing in protective sleeve covers for your records will be a great help in the long run. You can prevent scratches as well as dust build-up. It is great for easy storage too. By keeping your records in protective sleeves you can store them next to one another without them scratching each other.

    Use a Good Platter Mat

    If your record is not set on a good platter mat then it can be a cause for static on your records. Getting a good quality platter mat for your records is a great way to help minimize the amount of static on your records. Ones of good quality help to generate less static charge so that you do not need to deal with static noise.

    Products to Remove Static on Vinyl Records?

    There are many great products for removing static off of records. Getting an antistatic spray, antistatic brush, microfiber towel, antistatic tonearm, vinyl record sleeves, and antistatic gun. These will get rid of static and help preserve your vinyl records to last a long time.

    Antistatic Spray: Antistatic spray is great for cleaning your vinyl record and for getting rid of static. On Amazon, this product sells for $10.95 and it has great reviews.

    Antistatic Brush: An antistatic brush is great for keeping your records clean for removing static. It is not a deep cleaning product, but it is great for keeping up on your records and making sure they are in good condition.

    Facmogu LP Cleaning Brush Vinyl Record Cleaner Anti-Static Soft Turntable CD Album Cartridge Clean

    Microfiber Towel: These cloths are great for all cleaning needs. They do not have lint build-up on them so keeping them clean and without fuzzies on them is easy. They trap in dirt and dust and they are great for dusting, cleaning, and polishing. When you spray your vinyl record with antistatic spray, use this cloth to gently wipe down and remove any build-up on the surface of the record.

    MR.SIGA Microfiber Cleaning Cloth,Pack of 12,Size:12.6" x 12.6"

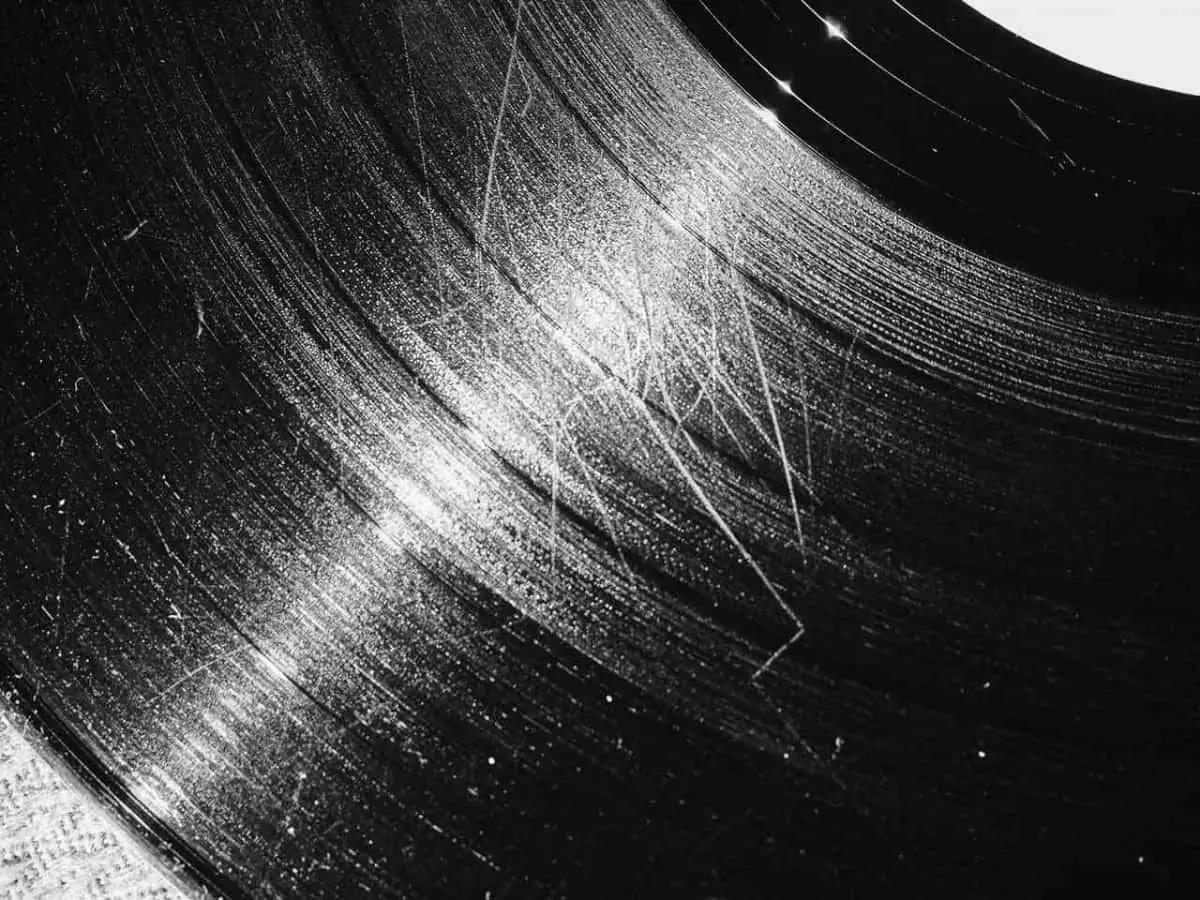
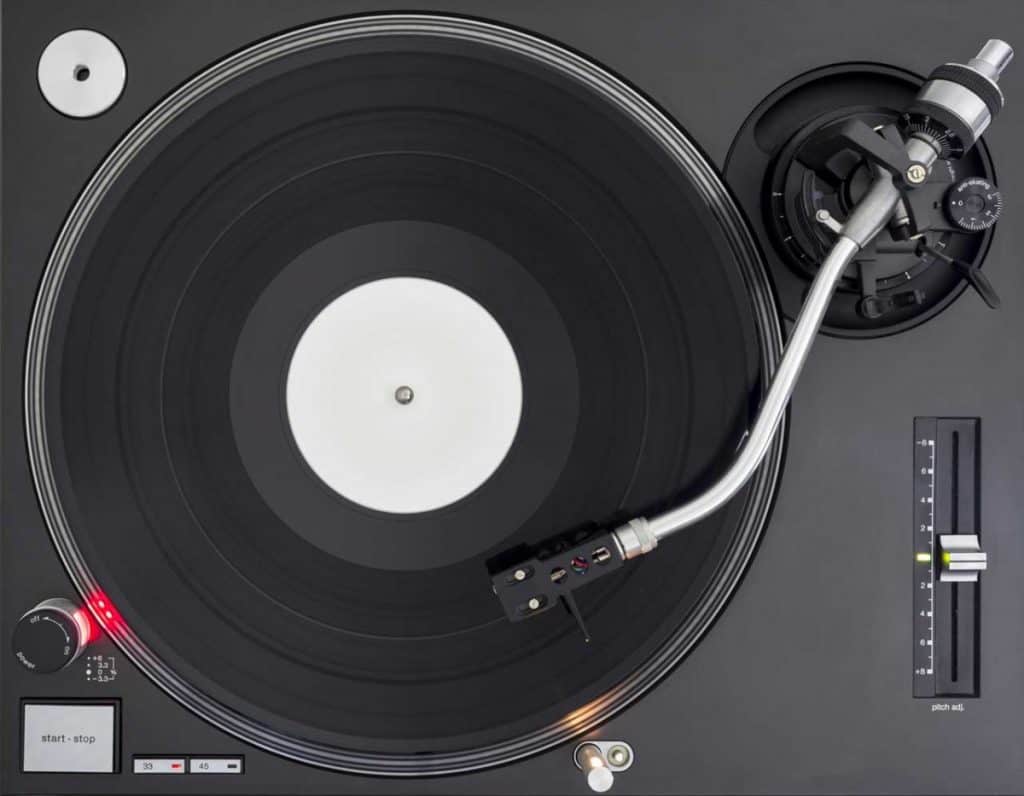
    Antistatic Record Cleaning Arm: This device is great for constantly keeping your records clean while using them. The arm hangs over the record and the brush gently touches the record to remove static electricity. By removing the static you get better sound and you get cleaner records. The static on vinyl records attracts the dust and dirt in the air so by removing the static you remove a lot of dirt and dust as well.

    Vinyl Record Sleeves: Getting protective sleeves for your records is important in keeping them in prime condition and for keeping out dust and dirt. You can get a 100 pack of vinyl sleeves for $16.13 on Amazon. This is a low cost for keeping all of your precious, expensive, valuable, and collectors’ records safe and protected.

    Antistatic Gun: Antistatic guns are great for getting rid of static on vinyl records. It does not clean them, but it does get rid of static very fast. The static stays off better when using anti-static guns rather than other methods. If you want it, it is a great tool for efficiency in removing the static off of vinyl records.

    Milty 5036694022153 Zerostat 3 Anti-Static Gun, Blue

    Record Cleaning Kit: Getting an all-included cleaning kit is great if you have a record player and vinyl records. That way, you can buy a kit that has all you need instead of buying each item individually that you want and having the cost go up. This kit that is linked from Amazon has 5 pieces included. It includes the cleaning solution, a stylist brush, a velvet brush, a nylon microfiber brush, and a storage pouch for it all. Out of over 3,000 ratings, it has 5 stars, so customers who have bought this product love it. If you want a cheap kit, this one costs $21.99, but normally it is $29.99.

    Vinyl Buddy Record Cleaner Kit 5 Piece Ultimate Cleaning System - Velvet Brush - Nylon Microfiber Brush - Stylus Brush - LP Cleaning Solution - Storage Pouch

    How to Take Care of Your Records?

    To take care of your records you need to use the products listed above and treat your vinyl records and your record player with care. Clean it monthly and make sure you are protecting your vinyl records in protective sleeves. Getting a scratch on your record is horrible and it can ruin the record. By treating your records and equipment with care you will avoid this issue and make your vinyl records last a long time.

    The best way to take care of vinyl records is to keep up on cleaning them. Clean your records after they have been put on your record player and place them in the protective sleeve. Be gentle when you wipe down your records and store them in safe places where they will not get damaged.

    If you like to hang them up on your wall for display or if you like to show them on bookcases or shelves, then clean them before use. By being out in the open they can easily collect a lot more dust and dirt than your records that are stored away in sleeves, so by cleaning it before playing you can get rid of the dust and static. This will help the record to sound clearer and not static. You can get any of the supplies listed and linked above for your records and use them when you pull your records off the wall for playing.

    How to Remove Static Noise Out of Your Speakers

    If your speakers have static noise, then check out any wires that could be connecting to them. When a wire is broken it can make the quality of the speaker sounds bad and can cause static noise. If you do not notice a problem with them, then look at your location and move the speakers from any other cords. If you have your phone connected to your speaker, disconnect your device and see if your phone is the issue.

    If your speaker has coverings that are dirty, then clean those out to improve the sound quality. If you have tried these tips and possibly others, then chances are your speaker is broken, possibly a broken wire or loose connection. You can take your speaker to an electronic store to see if they can diagnose the speaker with a problem, and offer a solution.

  • The History of Record Players, Turntables, and Vinyl Records

    The History of Record Players, Turntables, and Vinyl Records

    Music is a staple for all of human civilization, and it plays a large role in culture and history. In the scope of all of human history, it is astounding that we have only been able to record sound for the last century. It is nearly impossible to imagine a time of not being able to listen to your favorite song at will, and it is obvious we have come a long way from live music being the only way to enjoy it.

    Record players were invented in 1877 by Thomas Edison. After Edison’s invention of the phonograph, other inventors improved his design to make the machine more effective. In the 1950s when vinyl records were mass-produced, record players became the main method of listening to music.

    The history of record players is fascinating, and there is much to be known about it. Although every individual has experience with the record player, there are few that know about its rich history. If you want to learn more about the history of record players, turntables, and vinyls, then you will want to continue reading below.

    The Phonautograph

    Although Thomas Edison is credited with the invention of the record player, it is important to note that he was inspired by other inventions.

    One of these includes the phonautograph, which was invented by Edouard-Léon Scott de Martinville, twenty years prior to the phonograph. Without the phonautograph and knowing that recording sounds were possible, Edison would have found it difficult to invent the phonograph.

    Edouard-Léon Scott de Martinville had the idea of recording sound. In layman’s terms, he viewed recording sound the same as photographing a word. Although no one had done it yet, he knew it was possible.

    Scott began to work on his creation, and by 1857, an association for new technologies, SEIN, became interested in his concept. Scott began working with them and eventually others to make the phonautograph. By 1860, Scott had successfully made a machine where self-recording was possible.

    The Phonograph

    Due to the phonautograph that was invented by Edouard-Léon Scott de Martinville, it was known that recording sounds was possible. However, playing back these sounds had not yet been done. Sounds were visualized and produced on paper, however, they could not yet be heard. It was not until twenty years after the invention of the phonautograph that sounds could be played back.

    In 1877, the phonograph was invented by Thomas Edison. The invention was a cylinder that was wrapped in tin foil and that was turned by hand with a crank. The machine consisted of two different needles, one that was for recording sounds to the tin foil, and the other that was used for replaying the sounds originally recorded. Although the tin foil was far from ideal, it was the best option currently known. Indentations were made into the foil, and it was effective at its purpose. Over time it underwent revisions that made it even more worthwhile.

    It was not until Edison reversed his original process that he was able to hear the words he recorded play out loud. Edison first recorded the nursery rhyme “Mary Had a Little Lamb”, which was an impressive feat for its time. In 1878, he became officially patented with the invention. The patent was well deserved, as Edison carved the way for future record players.

    Despite how important this invention was, it was not Edison’s most profitable discovery. The phonograph was not nearly as popular as Edison expected. Edison suspected that the phonograph would do well and was surprised when it did not. He was proud of his invention, however, he moved on to other projects in hopes that one of them would succeed.

    Although the phonograph was not especially popular, it laid the foundation for record players. Other inventors took what Edison did with the phonograph, and perfected it in a way that made it desirable to the public.

    Thomas Edison’s invention was undoubtedly a monumental discovery. Because of him, other inventors now knew that the playback of sound was possible. After Edison’s invention did not prove to be as popular with the public as expected, others took it upon themselves to improve the machine so more people would be interested in it.

    One of these inventors was Alexander Graham Bell. Bell’s intentions were to improve the design of the phonograph and make it more effective for users. Edison and Bell had always been competitors. They oftentimes played off of each other’s inventions, and it was no different with the phonograph. Bell once wished to work with Edison on the improvement of the phonograph, but Edison stubbornly refused.

    Because of Edison’s refusal to collaborate, Bell was forced to work on the improvements himself. Bell sought a more durable machine, which is exactly what he got. The current design was using tin foil, and this was less than desirable. The tinfoil was fragile, and so Bell immediately wanted a better medium. Rather than using foil, Bell used wax, which proved to be successful in terms of durability.

    There was fierce competition when it came to the phonograph. Everyone was surprised by how Edison made it possible to playback sounds, and so they were all trying to perfect the machine. This made is as to where multiple credible inventors were competing against each other at the same time. Because of the phonograph, Edison had created a culture of competition amongst fellow inventors. It was only a matter of time before one of them hit the mark and would further escalate the capabilities of the record player.

    The Gramophone

    According to the Library of Congress, Emile Berliner is credited with the invention of the gramophone. Berliner was fascinated by Edison’s invention of the phonograph, and also by the graphophone. He used a combination of the techniques that were used for these machines and also used his own unique methods to create what is now known as the gramophone.

    By 1896, the gramophone was available for purchase. The Berliner Gramophone Company of Philadelphia was created, and its goal was to sell and distribute the product.

    However, on September 29, 1897, a tragic fire occurred at the laboratory of the gramophone company. All the gramophones were burned, and all the equipment had to be replaced. This was an unexpected setback for the gramophone, and it was difficult for the company to recover.

    Although the fire was a setback for the gramophone, the company eventually recovered. The gramophone become a success and was eventually sold throughout the world. The gramophone caught the attention of many, and Berliner began to face many competitors. Despite multiple lawsuits revolving around the gramophone, its invention remained influential. Due to Berliner’s gramophone, the record industry was transformed.

    When Were Vinyl Records Popular?

    Records existed long before the classic vinyl. What we know today as a vital part of the record player did not always exist. Instead, other types of records were used until the vinyl was discovered.

    Before vinyl records, shellac records were used. However, shellac records were only able to hold two songs. One song could be recorded on each side, which made records in general very ineffective. Those who were passionate about music made it work, but they longed for a more practical way of listening to music.

    Thankfully, Peter Carl Goldmark came to the rescue in 1948. Goldmark invented the Long Play records, which allowed more music to be held on records than ever before. Not only did he allow for more music to be held on a single record, but he also increased the overall sound quality. Vinyl records quickly replaced the original shellac records, and thus began the popularity of records.

    The Downfall of the Record Player

    Record players transformed how music lovers could listen to music. They were now able to listen to music whenever they wanted with ease, as long as they were in their home. However, individuals could not yet listen to music when they are on the go. Although they could listen to music in the comfort of their homes, there still was room for improvement when it came to listening to music in various locations.

    The downfall of the record player came when the Sony Walkman was invented. On July 1, 1979, the Walkman demonstrated how it was a breakthrough technology.

    The compact size of the Walkman made it possible for individuals to listen to music wherever they were at. They quickly replaced the need for record players as cassette players could be used anywhere. Record players were more inconvenient as they were so large and could only be used in homes.

    The Sony Walkman dominated the 1980s and 1990s. Everyone had one, and those of all ages could use them. Not only the younger generation used them, but individuals of every generation could. The cassette player became a way for all lovers of music to bond, as they could be used anywhere and everywhere.

    After the Walkman, the CD started to gain popularity. CDs were invented in 1979 just like the Walkman, but they did not become available to the public until 1982. The CD was extremely effective, even more so than the Walkman. During the 1990s, CDs began to climb in popularity. Once more people learned about them and realized how much music they could hold, they stopped using cassette players. By the 2000s, CD players replaced cassette players. This was of no surprise, due to how much storage is available on CDs.

    The CD player overtook both record players and cassettes. Rather than having cassette players, cars became furnished with CD players. No matter where you were, you could find a place to play your CD, and that continued to be the main form of listening to music until online music was invented.

    Record Players Today

    In most cases, once newer technology is invented, the old one never comes back. It goes extinct, because the more advanced machines overpower the old ones, and there is no reason to downgrade. New technology is always up and coming, and individuals try to not live in the past. They want to continue moving forward and it is not common to go back and use old technologies.

    This is true for nearly every source of technology except for the record player/turntable. After nearly everyone had gotten rid of their original record player, individuals started to miss it. After thirty years of using more advanced technologies to listen to music, individuals started to long to listen to their classic vinyl records. They wanted to once again hear its classic sound, and it became a source of nostalgia for the older generation.

    Although the older generation wanted to use record players/turntables because it was what they grew up with, the rising generation had an alternative motive. For them, vinyl records were new and had the classic vintage aesthetic that is becoming increasingly popular. The younger generations did not live in an era where record players were popular, but thanks to its now high marketability, they can feel as though they did.

    Nearly every artist today releases a vinyl version of their album. Artists know their vinyls are in high demand with younger generations, so they use this to their advantage. Now they can sell their albums digitally, on CDs, and on vinyl records. This allows them to get three times the amount of sales that artists used to. According to The Manual, 2020 was the first time in years that vinyl records outsold CDs. This is a surprising time in history, as no one would have ever expected that vinyl records would be able to maintain being such an influential part of history.

    While younger generations still use more updated forms of technology, it is no question that they enjoy record players. They listen to them almost as often as individuals did in the ’50s. Record players and vinyl records making a comeback prove how influential their creations were, and makes it difficult to doubt that they will never go out of style.

    Related Articles

  • How to Convert Vinyl Records to Digital: 9 Easy Steps

    How to Convert Vinyl Records to Digital: 9 Easy Steps

    Whether you are new to vinyl or you have been spinning the old turntable for years, you’ve probably grown to love the vintage sound that comes with a good record player. However, there are many reasons why it might be more convenient to convert your vinyl to digital.


    To convert a vinyl record to a digital audio file, you’ll need a turntable, a phono preamp (if not built into your turntable), and an audio recording program. Once you have the required hardware and software, you’ll need to hook up to your computer and play through your records or singles. After recording, you can go through and break up your audio into tracks.

    Below, we’ll go into detail about each step to converting your vinyl records to digital. We’ll also talk about various products you may need to go through this process.

    1. Purchase the Right Hardware

    If you’re into vinyl, you probably already own a turntable. That’s the first step in digitizing your vinyl. But not all turntables were created equal; some are built better for needle dropping. There are three components you will need to start with your recording process. 

    1. A turntable
    2. A phono preamp
    3. Connection to your computer. 

    Many modern turntables come with a built in preamp and USB output. These are ideal for converting vinyl and make the process much easier. A widely recommended turntable for this is the AT-LP60XUSB. The price sits at around $250. It makes the digitizing process easier because everything you need is built in already. 

    Another option that is recommended is the Sony PSH500. The price point for this one sits closer to $400, but it produces a more professional quality digital copy of your records. With the higher quality though, it’s made for professionals, so it’s a bit less user friendly than its previously mentioned competitor.

    If you aren’t looking to spend on a new turntable and you already have a functional one, you can make nearly any turntable work. 

    First, you’ll have to check your turntable for a built-in phono preamp. Check your output signals. You should have either LINE or PHONO. If you have the PHONO output, there is a built-in phono preamp. The preamp will convert your sound so it can be hooked up to a typical stereo system. You can then record your vinyl on the stereo system, which can later be converted to a digital file.

    If you don’t have a LINE output, you can buy a separate phono preamp to attach to your turntable. These can range from $15 to $150+ based on quality. LINE output is typically weaker than PHONO output, so it is best to get a phono preamp.

    Another route to get even better sound quality is to get an external ADC (Analog Digital Converter). These record a better sound than the USB turntables and they do a better job at capturing the classic sound than your computer recording software will do. 

    If you have a computer with a 3.5mm audio jack (AUX), you can also use a “Y” cable that has the AUX jack on one side and the two RCA on the other side and hook straight up to your computer. 

    2. Download Audio Recording Software

    When it comes to audio recording software, your dedication to the hobby determines what route you need to go here. There are more professional apps that are user friendly, but they can get pricey. Those who are quite serious about converting their records to digital might want to consider a program like Pure Vinyl or Vinyl Studio. They are designed for needle dropping and are user friendly. Pure Vinyl costs $129. Vinyl Studio offers a standard package for $29.99 and a pro version for $49.99.

    At $99.95, Studio One is another great option. If you are into music in general and you’re looking for a recording and mixing application, Studio One is a good option. It is a little more on the expensive side, but it’s a very high-quality recording software.

    If you just want to save a few of your vinyl on digital and you are looking to save, Audacity might be the way to go. While it isn’t optimized for converting records, it works well and doesn’t cost anything to try out.

    3. Clean Your Records

    A record player runs a needle across grooves in vinyl, so if your records have been sitting out in a dusty area, perhaps on display or if they’ve been handled a lot, you will want to clean them off really well before recording to be sure the sound is as clear and true to the original as it can be. Making sure your records are free from other debris and dust will prevent skipping as well and give you better audio. 

    Cleaning your records well will take time. There is a variety of supplies you can get to clean your records and we’ll go over them below:

    • Warm water and gentle Soap: This is best to just get general grime off. You don’t want to use a sponge or anything with a rougher side because that could damage or scratch the vinyl. Mircrofiber will work best.
    • Microfiber Cloth: If your vinyl has been collecting dust on the shelves, it is best to use a microfiber cloth to remove it.
    • Record Brush: A record brush is made to clean records without damaging them. This is best for dust, grime, or dirt to gentle brush off, no scrubbing. These brushes, are also great at eliminating static on your vinyl.
    • Cleaning Kits: On Amazon and various Vinyl websites, you can order vinyl cleaning kits that uusally have the brush, cloth, a cleaner, and a stylus brush.
    • Record Cleaning solution: You can make a good cleaning solution at home if you don’t want to buy one. You just need some rubbing alcohol, distilled water, and some soap. Mix 1/4 cup of rubbing alcohol with 3/4 cup of distilled water and two drops of soap.

    When it comes to cleaning your records, do it slowly and carefully, you don’t want to break or scratch the records. When using a cloth or brush, use gentle and slow strokes. It is also good to wipe in circular motions. After you are done cleaning it, let it dry completely before storing it. When storing your record, make sure it is put away correctly in its sleeve and safely on a shelf or in a storage bin.

    4. Connect the Devices

    Your connection may look quite simple or be more involved based on your equipment. As we talked about earlier, depending on what kind of turntable you have will determine what you need to link it up.

    If you have the preamp on your turntable, you can easily connect it to a stereo system and record the vinyl onto a CD. You’ll have to insert a blank CD and hook your turntable up to the stereo system with a phono cord. Then you are able to start recording. Once you have finished, you should be able to pop your CD into your computer and create a folder for all the music on your computer.

    Another way to connect is with a “Y” cable. On one end is an AUX cord that connects to your turntable and the other end has two RCA cables that connect to your computer. This will convert the files directly from the turntable to the computer. You can get these for about $8.

    If you want to connect with an ADC, you’ll need to connect your turntable to the ADC and then connect the ADC to your computer. The ADC will convert the sound your turntable is producing into files to put onto your computer.

    The easiest setup will be the USB turntables. This turntable you buy has a USB port on the side. So that while your record your vinyl, they will immediately be converted into files on the USB drive plugged into your turntable. Once you have finished recording, you can easily plug in your USB drive into your computer and upload the files.

    5. Prepare Your Software

    Once you have selected your software and downloaded it, it is a good idea to test out your program before you begin the lengthy recording process. Get familiar with its functions and learn its interface. 

    This will look differently on each program, but you’ll need to add metadata for each album. If your program is specifically designed for needle dropping, it will have inputs for the album title and other information about your music. If you are using a more generic recording program, you’ll still have places for names, but it won’t be as optimal for naming albums and tracks.

    Make sure everything is set up correctly by testing a few minutes of recording. You may have to choose inputs on your program for where the audio is coming from. If your program can’t find any sources, you may want to check that everything is plugged in correctly and switched on. 

    6. Record Your Albums

    Before you begin your recording session, do a little test run. Record one song or a little bit of a song on the software and then check how it sounds. If it doesn’t great, adjust some cords, clean the record, and make sure everything is plugged in correctly. Then try again. Once it sounds as good as it’s going to get, you are free to record the whole thing.

    Your conversion to digital will take time. If your album runs for 42 minutes, it will need to record for 42 minutes. The best thing to do is let your album run and check on it every once and a while to make sure it is still running. Don’t leave it alone for too long, otherwise, you might come back to find it stopped recording a long time ago.

    If it happens to stop recording or malfunctions while it is recording, make sure to stop the recording process completely. Delete the track that had been recording. Reset everything and double-check that everything is plugged in correctly. Then start the whole recording process over again. This will make sure you record everything with the best quality without having to figure out where it stopped and where to start again.

    7. Split the Tracks

    After you have finished recording an album, you’ll be able to see a visual waveform of the music on your recording software. You’ll want to look for moments the waves fall flat, that will be the moment in between songs. However, you should double-check where the song ends by listening to each of the tracks and then marking the point where one song ends and the other begins. Then you can split your songs there. This will make it easy to download each individual song, instead of having to listen to the whole album every time you want to listen to one song from it.

    8. Export Your Music

    After recording all the vinyl and splitting them into specific tracks, you can then export your music into a downloadable file format. To do this, you’ll have to download the file as an mp3, a .wav file, or others depending on the software you used to record your tracks. It is best to keep all the music in folders named after the albums. Make sure to save a copy of your tracks on your music software in case you lose them on your computer. Then you’ll always be able to download your vinyl music if you need to. You can also go above and beyond and save a copy of your music files on a USB so if your computer loses everything, you’ll still have a copy.

    9. Enjoy Your Digitized Vinyl

    Now for the best part! Download your files onto your device of choice and listen to your wonderful vinyl all the time wherever you go. There are many methods for digitizing vinyl and make sure to choose the one that works best for you and the sound you want.

  • Great IKEA Hacks for Storing Vinyl Records

    Great IKEA Hacks for Storing Vinyl Records

    With the 80’s making a surging comeback, vinyl records have become trendy as of late. With artists releasing albums on vinyl and record shops popping up in every city, there is a growing conundrum: stacks of thin, perfectly square vinyl records with nowhere to store them. In this article, we will turn to Ikea to help us find the most chic ways to house our vinyl.

    Kallax Shelves- A Vinyl Staple

    Kallax shelves are those square cube shelves that look like a physical version of the graph paper you used in seventh grade, and Ikea practically invented them. Kallax shelves usually have pretty equal dimensions, 13×13 inches and about 15 inches deep, making them the perfect place to store vinyl records, which typically have similar dimensions at 10 inches on average. This sizing is pretty consistent, although you can find cubes to house vinyl with smaller or larger dimensions.

    The style of kallax units can vary greatly, with some units being low to the ground and small enough to fit comfortably in a corner where they won’t be the center of your home. These smaller units look elegant in any space and are light enough that they can be hung on the wall for a modern ‘floating’ shelf. On Ikea, kallax ranges from four shelves to twenty five. Have a lot of vinyl? A larger unit is a nice thing to place against the wall with small potted plants, framed pictures, and of course vinyl in the windows. Check out the largest unit available here.

    IKEA KALLAX shelving unit, 30 3/8x30 3/8"", White

    If you are not a fan of the homogenous look of kallax shelves with all the same dimensions, don’t despair! Ikea offers a tall kallax shelf with different sized cubes for a more modern, eclectic look. That way, you can house your vinyl in a neat space that also lends a nod to the look that you are trying to create. Check this shelf out here.

    Ikea offers three color choices for kallax: black-brown, light effect light gray, and white. If you like a more classic style, black-brown might be a good choice, while gray and white make good accents to a minimalistic space.

    Overall, kallax shelves are really a perfect option for housing vinyl due to their seamless, compact feel and accommodating dimensions.

    IKEA KALLAX Shelf, Black-Brown

    Types of Kallax Inserts

    A great way to turn a standard kallax shelf into a cozy piece of home furniture is to put storage boxes inside the shelves. Not only will this add a unique accent to your home that is difficult to replicate, but it will add a splash of color that will make the unit look like a work of art. Additionally, some people might be worried about their vinyl getting bumped and falling off the shelves. Kallax inserts ensure that they rest easy as their possessions are not only stored but protected.

    Ikea offers many different types of storage boxes. One is a the Lustigkurre basket, an intricately woven seagrass basket that has a braided wheat pattern. While a bit pricer at $12.99 per basket, these are a great way to beautiful any space. With dimensions of 12 ½x13x12 ½, they are also a perfect place to house vinyl records.

    Another option is the Bullig box, a slightly smaller basket made of woven bamboo. According to the Ikea website, they press and treat the bamboo to give it its gorgeous natural brown color. These baskets are $9.99 a piece, and have slightly smaller dimensions at 9 ¾x12 ½x9 ¾, making them a great option for housing smaller vinyl. These baskets are great if you’re trying to create bohemian living space.

    If you appreciate a more vintage style or will be storing your vinyl in an office space, the Rejsa box might be a good addition to your kallax unit. This grey-green metal box is in the style of an old school filing cabinet. It has a place for a label on the front, so if you like to keep your vinyl separate according to artist or genre, the Rejsa box might be a good way to do that. The dimensions on these is 12 ½x13 ¾x12 ½ inches and $17.99, but because of the durable material, you would likely be getting your money’s worth!

    If you’re looking to save money or fill up a particularly large kallax shelf, the Fysse box is perfect. A fabric box that comes in one color- dark grey- this insert is a great choice for people looking to simplify their home. One box is only $2.99, and the dimensions are 11 ¾x11 ¾x11 ¾, making it suitable for all but the largest vinyl.

    Things You Can Do With Kallax

    While the kallax unit may simply look like a glorified book shelf, there are many different ways to organize the units that will fit into your everyday life. The most common option is to make it a beautiful center feature for your home. This unit has numerous windows of different sizes in which you can house vinyl, seashells, flower pots, and even artwork! To get ideas of how you can turn your kallax unit into an eye-catching display, see this blog.

    TV stands are functional and creative ways to optimize space while also showing off the spines of your colorful vinyl. Ikea’s Lappland unit is a good example of this, with a space made for a television and kallax shelves surrounding it. The Kallax/Lack unit has one horizontal and one perpendicular shelf, and an open space on which a TV can be placed. It is slightly cheaper than the first option, and forms clean, simple lines with its kallax boxes. These boxes make a great space to adorn with decor or to store vinyl. Personally, we believe there is no better way to adorn your TV than with a bunch of colorful vinyl!

    Another thing you can do is make your kallax unit into a piece of furniture: a bench, a window seat, or even a couch. Window seats are a lovely option if you like to listen to records in a bedroom or office space. It is also a great, space-saving way to store your vinyl while also basking in a comfortable window view. Kallax window seats make for a perfect reading (or listening!) nook. Ikea doesn’t sell window seats online, but you can make one yourself by adhering a cushion to size on top of a small kallax unit such as this one. We will go more in-depth about these options in the sections below.

    Storage Benches- A Minimalistic Approach

    Multifunctional units- every home designer’s dream! We think we’ve talked sufficiently about the merits of kallax for maintaining a minimalistic lifestyle, but it’s about to get better: not only are storage benches a great addition to an office or mud room, they are a classy way of storing your vinyl as well. Depending on the style and the way you like to design your house, storage benches can be sparse or luxurious, with hidden space or open display windows. If you like to display your vinyl for all the see, we recommend something like the Panget, a beachy white and blue cushioned bench with space for storage on the bottom. If you’re looking for the kind of storage bench that you’d place at the end of the bend, you might look at the Inndyr bench, a dark grey cushion that is an elegant edition to any home. This kind of bench is a great place to store vinyl if you’d like to keep it out of view.

    Under-the-bed Storage

    When storing vinyl under or around your bed, your best bet is to find a bed frame with a kallax unit underneath it, which is the perfect size for displaying upright vinyl records. However, there are also some great general storage options at Ikea that make it easy to store anything from vinyl to spare sheets. The Brimnes is our favorite option, and has several long storage boxes underneath and kallax style boxes along the side that accommodate vinyl records nicely. This is a great choice if you live in a small space or if you simply want to keep your vinyl records close at hand.

    Looking for a holiday gift for a college student who loves vinyl? This is a great option. Not only are they able to protect their precious record collection, they can also organize them nicely in the Brimnes.

    Filing Cabinets

    We know what you’re thinking…boring! But trust us, this old school style is making a comeback. Even lockers are being implemented into home decor for a uniquely chic look. Check out this article if you’re curious how! Ikea sells many varieties of filing cabinets, including the Idasen, which is the perfect size for storing vinyl records. Choose a finished blue, white, brown, or classic egg shell colored cabinet from Ikea, or go thrifting and refurbish your own filing cabinet.

    This is also a great way to store records if you have a large collection. It makes them very easy to access and organize quickly.

    Smaller Shelf Units

    While some people may wish to show off their vinyl, other may not have the budget (or the space!) to do so. Ikea offers a variety of smaller shelving units that can meet the needs of someone with less to spend and more minimal tastes. The Hyllis is a three tiered steel shelf that could easily blend into any space. At only $9.99, it also accommodates any budget. With dimensions of 23 5/8×10 5/8×29 1/8 inches, this shelf is best for storage larger vinyl upright or smaller vinyl stacked. For an even smaller shelf, Ikea’s Dynan cabinet is a simple white storage unit that is small enough to fit into a closet. The dimensions are 15 3/4×10 5/8×21 1/4 inches, making it perfect for vinyl.

    Traditional Book Shelves

    Bookshelves! How did we not mention them before? Traditional bookshelves are an obviously sensible option for storing vinyl, even alongside your books and other newsprint. While most of the other storage methods are more clean and modern, nothing screams vintage chic like a wooden bookshelf. One of our favorites is the Laiva, a black-brown bookcase that has shelves wide enough to fit vinyl records and is very budget-friendly at $19.99.

    Another option for a traditional bookshelf is from the IKEA Billy collection. The Billy bookshelf collection has three different types of bookshelves depending on the exact dimensions you need for your record room. The bookshelves also come in three different color options. Color options include white, tan/natural, and black. The different size options for the Billy collection are listed below in the chart.

    To view the product on the IKEA website, click the hyperlink of the name to be directed to the website.

    Name and Description Dimensions Price
    BILLY (tall and thin)15 3/4x11x79 1/2 “$39
    BILLY (tall and medium)31 1/2x11x79 1/2 “$49
    BILLY (short and medium) 31 1/2x11x41 3/4 ” $29

    Wall Shelves

    For someone who loves to showcase their record collection, wall shelves are great tool to use. They can be used to hold the entire collection, or to show off certain records. This is also a great tool to use if there are little hands in your home that love to touch the records. Having them hung high on the wall will keep them out reach of young hands, but easily accessible for yours.

    One option we like for either a small collection or showcasing one record is the BERGSHULT / PERSHULT. With the panels coming up on either side, it sleek enough to emphasize the record(s) without taking away from the aesthetic that the record offers to the room and decor. This would be a great option for someone who has a couple favorite records they want to have on display as decoration and easy access. Having a couple of these hanging on the wall near the record player would really pull the room together and emphasis that it is the record-playing room.

  • Why Your Record Player Is Playing High Pitch And How To Fix It

    Why Your Record Player Is Playing High Pitch And How To Fix It

    Why is my record player playing high-pitched? If you have a vinyl record at home, you have probably asked this question a few times now. Of course, the high-pitched sound produced by your vinyl record can ruin your music experience. 

    Your vinyl record is producing a high-pitched sound due to two reasons:

    • The belt is in the wrong position
    • The turntable is spinning too fast

    Even the belt’s slightest slip will cause a high-pitched sound. So, a fast turntable plays a role in causing this problem. (source)

    Your record player is sensitive equipment, so the changes in its parts can cause a huge effect. If your record player is playing high pitch, you need to fix it when you notice the problem. 

    Why Does Vinyl Sound Higher Pitch?

    Like in any other sound source, the sound produced by your vinyl record results from air vibrating. So, if your record player produces sound at a faster rate than the record is recorded initially, the vibrations will hit the listeners’ ears faster than the original rate as well. Such is why a vinyl record is playing more quickly than the actual speed sounds higher in pitch. 

    So, if you wonder, “why is my record player playing high-pitched,” the answer is straightforward. Doubling the speed that musical notes play at raises the pitch of every note by an octave. Meaning if your turntable is spinning too fast, it causes the vibration to increase in speed. The notes of the music playing also raise, causing it to sound pitchy. (source)

    Another culprit behind your record player playing high-pitched sound is a slipping belt. If the belt moves away from its correct position, the speed of the turntable will be off. As a result, your vinyl record will sound high-pitched. 

    A turntable’s belt is a rubber band. That said, two problems can cause it to slip from its position:

    • The belt is stretched out too much
    • It is riding up too far on the spindle

    No matter which of the two is the problem with your belt, the best thing to do is replace it. The reason is that the turntable belt will not get in the wrong position if it is not stretched too far. 

    But there are still other measures that you can take if you want to try and fix a stretched belt. 

    Moreover, belts last a long time, so you will have to replace them if you notice that they are too loose, stretched, or crack. But these issues will not happen for at least a few years after you bought your record player. 

    But once your record player’s belt shows some issues, you should not think twice about replacing it. Some manufacturers offer belt upgrades, which ensure that your belt does not have irregularities. (source)

    Why Is My Record Player Playing High-Pitched, And How Do I Fix It?

    One indication that your record player is spinning too fast is if it makes high-pitched sounds. Sometimes, the increase in speed is not instantly noticeable, so you need to train your ears to observe if your record player is playing high pitch.

    If you feel that something is off with your record player, the best thing to find the problem is to test its speed. You have to methods to do that:

    Strobe Discs

    Strobe Discs is an application that you can download from the internet. All you need to do is to download and print off the disc with markings. Once the printed copy is ready, carefully place it on your platter. 

    You will need to purchase a strobe light to test the speed of your record player using this method. Additionally, the lines on your strobe disc will be set depending on your country. For North America, the lines will be set for 60Hz. Meanwhile, Europe has a strobe disc line set for 50Hz. 

    After preparing the materials, turn on your record player and let it get to speed. Next, direct the strobe light at the spinning probe disc. If your turntable is spinning at the right speed, the strobe lines will look stationary instead of moving even when the disc is spinning. (source)

    Once you ensure that the turntable is spinning at a slightly faster speed, you can proceed to solve “why is my record player playing high-pitched.”

    Mobile Applications

    Another thing that can help you answer is, “why is my record player playing high-pitched.” These applications are cheaper, more accessible, and easier to use than a strobe disc. However, some may argue that they are not as accurate as the previous method.

    If you want to test your turntable speed, you can get your phone and download an application like the one called “RPM Speed & Wow.” 

    All you need to do is open it and set it on the stationary platter to use this app. However, it is essential to note that the counter on the phone should be at zero before you start. 

    Now, turn on your record player and let it get on its full speed. Then, observe your phone until it displays the RPM of your equipment. (source)

    Fixing The Speed Of Your Turntable

    By now, you already know the answer to “why is my record player playing high-pitched.” So, the next thing you need to do is bring it back to the correct speed. 

    The speed of your record player has something to do with the belt. So, you will need to focus on that when regulation the spin speed. If you are a beginner, you can opt to have professionals sort things out for you. But if you feel like you can do the fixing yourself, here are some things that you can do:

    Boil The Belt

    Take a look at the belt of your turntable. If there are no cracks and the belt only seems a little stretched, you can bring it back to its original size. 

    To do it, fold the belt in half, measure the size, and note the measurement. Then, put the belt in a container where you can soak it. Boil some water and add it to the container where the belt is. 

    Finally, leave the belt to soak for approximately five minutes. Once the soaking time is done, take it out of the water and dry it. 

    Next, fold it in half and measure the size again. By now, the belt should be a little shorter than before you boiled it. 

    Furthermore, put the belt back in place, turn on your record player, and observe whether it no longer plays a high-pitched sound.

    Check If Your Record Player Has Adjustment Screws

    As mentioned, the answer to “why is my record player playing high-pitched” is due to the loose or incorrect position of the belt. Fortunately, some turntables have adjustment screws. If your record player is one of those, you can turn the adjustment screws counter-clockwise to slow down its spin.

    After adjusting the screws, play your record player and see if the high-pitch sound is gone. 

    Make Sure That The Belt Is Not Rubbing Against Anything

    If you did the steps above and non seem to work, the last thing you can do is make sure that the belt is not rubbing against anything. Take a look at the motor and platter to see if there are any blockages. 

    If the record player continues to make a high-pitched sound, take the belt off and add a few drops of oil or lubricant to the rotor shaft. By then, you should be able to have a solution to “why is my record player playing high-pitched.” (source)

    Related articles:

    A Quick Explanation Of Pitch Control For A Turntable

    Sources

    1. Paul G. Nataraj, You Sound Like A Broken Record, University of Sussex, https://core.ac.uk/reader/159011500/ Accessed September 7, 2021. 
    2. Ammar El-beik And Wokingham, Why Does A Recording Increase In Pitch When Sped Up?, Science Focus, https://www.sciencefocus.com/science/why-does-a-recording-increase-in-pitch-when-sped-up/ Accessed September 7, 2021. 
    3. Andrew Murphy, Belt Drive And Direct Drive Turntables: Everything You Need To Know, What Hi-Fi, https://www.whathifi.com/advice/belt-drive-and-direct-drive-turntables-everything-you-need-to-know/ Accessed September 9, 2021. 
    4. How Can I Measure The Speed Of My Turntable?, Fluance Serious Performance, https://support.fluance.com/s/article/How-to-accurately-check-your-turntable-speed/ Accessed September 9, 2021. 
    5. Andrea Martignano, RPM Speed & Wow for Android, Cnet.Com, https://download.cnet.com/RPM-Speed-Wow/3000-2141_4-78136121.html/ Accessed September 9, 2021. 
    6. Martin Do, et. al, Vinyl Player 2.0, Google Scholar, https://www.ece.ucf.edu/seniordesign/fa2017sp2018/g15/documentation/Final_Report.pdf/ Accessed September 9, 2021. 
  • How Tracks Change On A Vinyl Record (How Do You Change The Track On Vinyl)

    How Tracks Change On A Vinyl Record (How Do You Change The Track On Vinyl)

    How do you change the track on vinyl? Many people who own vinyl records ask this question often. Changing tracks on a vinyl record is not something that most owners do. However, that does not mean that it is impossible. 

    You can change tracks on a vinyl record by using the cueing lever to lift the tonearm while still spinning. Count the grooves from outside in, which correspond to the track numbers. Once you find the track, lower the tonearm on the groove to play it. (source)

    How Do You Change The Track On Vinyl

    The way you treat your vinyl records will determine their lifespan. Vinyl records are delicate, so if you are not careful with handling them, their sound quality will degrade in no time. That said, you need to know how you change the track on vinyl. It is essential to note that you need to be extra careful when changing tracks on your vinyl. The reason is that it involves lifting and lowering the stylus. 

    Moreover, the stylus has a crystal often made of either two types of crystals:

    • sapphire
    • diamond

    These crystals are a lot harder than the material of your vinyl record. For this reason, carelessly changing the tracks can lead to irreversible damage.

    Find Out Where The Track You Want To Play Is On The Vinyl

    It is easy to identify where the beginning of each song is on a vinyl record. You need to look at the separating gap between every track. 

    Check the tracklisting on your record sleeve. The number of the tracks corresponds to the rings on the record surface. By counting the rings from the outside of the record surface going in, you will be able to easily find where exactly you need to place the turntable’s stylus. 

    That way, you will be able to play a particular song without waiting for it to play on the record on its own. 

    Lift The Tonearm Using The Cueing Lever

    For this step, you will need to lift the stylus from the surface of the vinyl record while it is still spinning. If your record player has a cueing lever, it is ideal to use it whenever you need to lift or lower the tonearm. 

    Stopping the record while the stylus is in contact with the groove will cause the stylus to skate across the surface. Such can be detrimental to the quality of your vinyl record. So, you should lift the stylus with the record still spinning to spread the contact over more than just one area, preventing any possible scratches. 

    If your record does not have a cueing lever, you will need to use your hand to lift the tonearm. Rest your hand on something steady right beside the platter. Then, use one finger to lift the tonearm as carefully and as steadily as possible. 

    Move And Lower The Tonearm To Your Desired Track

    You are close to learning how do you change the track on vinyl. 

    Now, move the tonearm at the top of the line of your desired track. Moving the tonearm at the exact spot will require a little practice. But once you are used to it, changing tracks will be easy for you. 

    After placing the tonearm and lining up the stylus on your desired track, the next thing you need to do is to lower the tonearm. Again, you can use either your hand or the cueing lever for this step. 

    Once you successfully lined up and lowered the tonearm to your desired track, it will start singing instantly. But that will only happen if you can line up the stylus to the groove perfectly. 

    However, lining up the stylus is not something you can perfect on the first try. 

    You may even catch the last few seconds of the preceding song before the stylus finds your chosen track. 

    But you will figure things out in time. For now, an essential thing that you need to do is to line up and lower the stylus to the record groove most carefully and correctly. (source)

    How Do You Figure Out Where A Song Starts On Vinyl?

    Now that you know how do you change the track on vinyl, the next thing you need to figure out is where exactly on the record does a track starts. 

    Vinyl records have grooves that are sound waves. You can say that these grooves are similar to fingerprints of the sound waves captured inside the vinyl record. The three-dimensional grooves cut in the record the behavior of sound waves as they move through the air. 

    Moreover, a turntable or a record player is needed to play these recorded sound waves. As your vinyl record sits on top of the record player, the stylus moves through these grooves. 

    The stylus has a tiny sapphire or diamond crystal mounted at the end of the stylus. This crystal will vibrate in the grooves, generating electrical signals. The signals are then fed out of the amplifier, allowing you to hear the music playing. 

    However, finding the start of a particular track on a vinyl record is not clear. Without any markings or labels, it seems like you have to do trial and error to find the beginning of a song. But in reality, that is not the case. 

    Identifying the beginning of every song from the tracklist is relatively easy. You only need to count the more prominent lines among the grooves, starting from the outer part of the vinyl record going inside. These noticeable lines are the beginning of each track. (source)

    Is It Bad To Skip Tracks On Vinyl

    How do you change the track on vinyl? Now that you know the answer to this question, you may be aware that some record owners say that skipping tracks on vinyl is not a good practice. According to some, skipping tracks can be detrimental to the lifespan of the vinyl record. 

    You can indeed damage a vinyl record by skipping songs. But not if you know how to skip tracks properly. 

    If you pick up the tonearm carelessly, swing it across the vinyl record, and plop it down with force, you would ruin your vinyl record in no time. The reason is that a vinyl record is delicate enough that the force it receives when you plop the stylus down will scratch and jag it. 

    In addition, your hands are never really steady. For this reason, it is easy for the stylus to slip up and gouge the grooves. You might even break the needles on the cartridge. If you are not careful enough on changing tracks on a vinyl record, you will start hearing pops and ticks because the record is slowly getting gouged. 

    But if you know how do you change the track on vinyl properly, you will be able to do it while preserving the sound quality of your disc. 

    That said, never pick up or abruptly drop the stylus of your vinyl record, especially when the song is fading out. Instead, be careful in doing so and find a steady surface that can support your hand as you lift the stylus. That is the key to avoiding scratching your vinyl record when you skip songs. (source)

    Sources

    1. How Do Record Players Work?, Live Science, Accessed September 10, 2021. 
    2. James Kelly, Playing the Record Lathe: Vinyl Record Cutter as Musical Instrument, De Montfort University, Accessed September 10, 2021.
    3. Samuel J. Sauls & Craig A. Stark, Audio Production Worktext: Concepts, Techniques, and Equipment, Accessed September 11, 2021.
    4. 10 Things NOT to do to Your Vinyl Records, Bernard F. Lopez, Disco Music, Accessed September 11, 2021.
  • A Quick Explanation Of Pitch Control For A Turntable

    A Quick Explanation Of Pitch Control For A Turntable

    What is pitch control on a turntable? If you own some vinyl records and a record player, you probably heard of the term pitch control. However, it is vital to understand the exact definition and the importance of this term.

    Pitch control on a turntable is an option that allows users to deviate from a standard speed. By controlling the pitch, you will be able to choose between three RPMs:

    • 33rpm
    • 45rpm
    • 78rpm

    Moreover, pitch control allows you to choose the tempo of your record. (source)

    It is essential to understand what pitch control on a turntable is. Additionally, by knowing how to control your turntable’s pitch, you can easily adjust it to the correct speed when it goes too slow or too fast. 

    What Is Pitch Control On A Turntable?

    Many record player owners are familiar with the idea of pitch control. On the other hand, some people know the idea but are not entirely familiar with its exact explanation. So, what is pitch control on a turntable?

    A turntable pitch control is a mechanism that allows you to control the speed of the equipment. For record players, changing the playback speed will inevitably change its pitch. Slow playback speed means lower pitch, while a fast speed means high pitch. So, you can say that pitch control and speed adjustment are the same mechanisms of record players.

    Moreover, vinyl records play at different speeds, depending on the composition of the song. The typical speed that a vinyl record plays at is 33, 45, 78 RPM, or rotations per minute. 

    However, it is important to note that vinyl records with 78 RPM are rarer than the standard 45 RPM and 33 RPM these days. 

    Moreover, there are times when a turntable will have a playback speed that is too fast or too slow. If such a problem happens to your record player, you can use the pitch control option to correct the speed. Knowing what pitch control is and how to change a turntable’s pitch will allow you to improve the audio quality produced by your record player. (source)

    How Do You Set The Pitch On A Turntable?

    Now that you know pitch control on a turntable, you will be able to fix your record player in case its speed becomes too fast or too slow. Setting the pitch of your record player is not a topic often talked about. However, the process is relatively easy.

    If you are unsure where you should start, four simple steps can help you change your record player’s pitch.

    1. Test the speed of your record player

    Before tuning the speed of your turntable, you first need to know how fast or slow the playback is. To do this task, you can perform two methods:

    • compare the vinyl record sound to the digital playback
    • perform a stroboscopic disk check

    Compare The Record Player Sound With Digital Playback

    Comparing the vinyl record and digital audio is the easiest way to determine if your player needs pitch control. Get a digital copy of the song you are trying to play on the turntable to do this test. You can use any music streaming application, such as Apple Music, Spotify, and iTunes, to access a digital record of that particular song. 

    Next, prepare your vinyl record and turntable for playback. Now, play the turntable and digital audio side by side. Listen carefully for lower-sounding pitch and slower sound throughout the song. 

    It is important to note that you will base the correct pitch and speed on the digital version of the song. So, if you find that the vinyl record’s pitch is off, that indicates that your record player is playing slow. Since you know pitch control on a turntable, you should be able to fix the issue quickly. 

    Perform A Stroboscopic Disk Check

    Comparing the vinyl record to a digital playback of a song is easy. However, the human ear can only pick up so much. For this reason, you should perform a stroboscopic disk check for a visual approach. 

    Nobsound 50/60Hz Stroboscopic Speed Strobe Light + Tachometer Disc for Turntable LP Record Player (Power Supply Version)

    This method involves using a cardboard disc with equally spaced markings around the edge. You place it on the record player and turn the equipment on. If the turntable’s pitch is correct, the markings on the edges of the cardboard should appear as an unmoving circle. But if your turntable’s pitch is off, the markings will appear like they are spinning along with the turntable. (source)

    1. Give your turntable a good clean

    After the speed test, the next thing you want to do is give your turntable a good clean. For this process, you will need:

    • carbon fiber brush
    • microfiber cloth
    • lubricant

    Use the brush to remove dust buildup and static charge on a record. After some thorough brushing, you can use a microfiber cloth to clean your record deeply. Finally, lubricate the moving parts of the turntable to ensure that they move smoothly. 

    This way, the record player will function well as you change its pitch. Since you already know pitch control on a turntable, tuning the equipment will be relatively easy. (source)

    Related Article:

    1. Check the belt

    A loose belt can cause your turntable to make a high-pitched sound. If you know pitch control on a turntable, you should also be aware that a change in the pitch can result from problems with the belt.

    If you find out that your turntable is spinning slower than it should, you may have to check the belt to see if it became stretched out and loose. The culprit behind a record player that is too slow is a loose belt most of the time. The reason is that a loose belt no longer has enough grip on the pulley, affecting the equipment’s audio quality. 

    If the belt has indeed become loose, you can either shrink it back to size or replace it.

    In boiling the belt, you need to have a container to soak it in hot water. Next, boil a cup of water and pour it into the container. 

    Finally, let the belt soak for about five to eight minutes. Moreover, if boiling the belt did not work for you, the quickest solution is to replace it altogether. Belts for turntables are quite inexpensive and easy to replace. For this reason, you will not have a problem changing the belt of your record player. 

    Related articles:

    1. Perform fine-tuning adjustments

    After finding out that your turntable has an incorrect speed and replaced the belt, but nothing happened, the last thing you can do is adjust the tuning. 

    To perform some fine-tuning adjustments, you may need to look for your record player’s manual. But if you cannot find your manual anymore, you can look for a similar record player online and access its manual. 

    First, you will need to find the adjustment screws of your turntable. You can sometimes find them right under the platter, but some turntables have their screws underneath. 

    Once you find the adjustment screws, you need to ensure that the turntable is on a flat and leveled surface before making any adjustments. 

    If you need to slow down the turntable, you need to turn the screws clockwise. On the other hand, turning them counterclockwise will slow down the platter.

    Moreover, you need to understand that fine-tuning adjustments are a trial and error process. Meaning, it is quite a challenge to get your turntable to an entirely accurate playing speed. But always make sure you run your record player on speed tests in between adjustments. This way, you will be able to fine-tune as needed. If you understand pitch control on a turntable, you should be able to fine-tune it without hassle. (source)

    Sources

    1. Ben James, The Turntable DJ, Google Scholar, https://books.google.com.ph/books?id=vTk2IFj6g68C&pg%/ Accessed September 11, 2021. 
    2. Stroboscope, Wikipedia, The Free Encyclopedia, https://en.wikipedia.org/wiki/Stroboscope
    3. Kat Bein, How To Clean And Care For Your Turntable Stylus, Discogs.Com, https://blog.discogs.com/en/how-to-clean-and-care-for-your-turntable-stylus/ Accessed September 11, 2021. 
    4. Martin Do, et. al, Vinyl Player 2.0, Google Scholar, https://www.ece.ucf.edu/seniordesign/fa2017sp2018/g15/documentation/Final_Report.pdf/ Accessed September 11, 2021. 
  • What Happens When Vinyl Records End? (A Quick Answer)

    What Happens When Vinyl Records End? (A Quick Answer)

    What happens when vinyl records end? Numerous questions may intrigue many curious audiophiles or even non-vinyl listeners due to the very impeccable construction of the vinyl record player. However, fret not as we will try to uncover the answers beyond these queries.

    Vinyl records will leave their needles simply threading throughout the vinyl surface without the auto-stop feature, resulting in a white noise-like sound and an endless spinning. Those with the auto-stop feature will keep spinning for a few rounds before stopping completely. (1)

    This article will talk about what will happen when your vinyl record ends, the damage it will deal with, and how to prevent it. Let’s get started!

    What Happens When Vinyl Records End?

    Vinyl records are amazing inventions, such that their very shape and form dictate their output, unlike other forms of data storage options. For example, USB disc drives do not visually exhibit changes when an alteration is made to the data inside, as it does with cassette tapes and compact disks. This non-changing form is because all these other forms of data are digital, while vinyl records are analog.

    Being “analog” technology has many implications, like how an analog clock needs to have its arms physically moved to show the time or how old telephones require people to spin the dial around; they will require more physical effort to operate than other digital formats. 

    In other terms, not only are they analog, but most are manual as well. We can also think of this philosophy for the vinyl disks and record players.

    From pressing play to pausing and even stopping, vinyl disks most of the time are manually operated. With that in mind, what happens when vinyl records end?

    For Vinyl Records Without Auto-Stop, It Means Endless Spinning

    So far, in this article, we have talked continuously about the analog story of vinyl records, and you can quite see a pattern here. For example, vinyl records, especially those without tonearm lifts or cueing levers, will require the users to lift the tonearm first before stopping the vinyl record altogether. 

    That is right; you will need to raise the tonearm first before you can stop the vinyl record player from preventing unsolicited damage.

    This pattern repeats repeatedly; for example, when trying to play vinyl records, you must first know the speed appropriate for your specific disk. To a veteran audiophile in the vinyl industry, this is nothing more than just a minor inconvenience, or at its best, is considered as part of the experience. To the newbie, however, this seems like a convoluted process. 

    Hear me out; my point here is not to tell you that the record players and vinyl, in general, are too complicated. My point here is that the very experience of the vinyl itself includes these somewhat mundane interactions that, at the bottom line, contribute to a holistic vinyl listening experience. 

    So what happens when vinyl records end? Because a vinyl record with no auto-stop has no inherent mechanisms to stop itself, it will never stop spinning. 

    The truth is, it doesn’t even know that the vinyl record on its platter has ended already. Unlike compact discs that are programmed to return to the main menu when it ends, vinyl records have none, unlike the cassettes with physical mechanisms indicating the end of the tape.

    The set of instructions a vinyl record has is simple:

    • Turn the platter.
    • Read on what the needle detects.
    • Convert the data into audio information.

    This audio information then undergoes conversion into audible music. 

    For Vinyl Record Players With Auto-Stop, They Automatically Stop

    The world of vinyl and vinyl records has shifted dramatically over the past few decades. Although we have made our point earlier about these nuanced complexions as a part of the vinyl experience, still, some find it more convenient to have automatic options. 

    For example, some turntables nowadays contain a cueing mechanism that will lift the tonearm immediately after pressing stop, eliminating unnecessary steps.

    We can also apply the same story to what happens when vinyl records end. With the invention of the auto-stop mechanism, also known as the auto shut-off mechanisms of vinyl records, your needle will no longer be grinding on your vinyl records even after it has already ended. Believe it or not, this used to be a common problem way back when auto-stop was still a figment of the imagination. (2)

    Auto-stop works differently than you think; for instance, auto-stop needs to be turned on first, a feature easily enabled by flipping the switch to the ON position (most commonly placed at the back of the record player). So if you think that it is enabled automatically, you might want to double-check. 

    The ON and OFF switch also provides the owners a sense of agency or autonomy within their turntable’s features and functions in the instance they want the whole experience.

    One crucial thing about auto-stop is that it does not halt immediately after the vinyl record ends. For example, it will at least take eight to ten rotations of the platter (approximately 30 seconds) before the auto-stop comes into play. This thirty-second transitional phase is not a limitation but a feature, as some vinyl records contain audio that some audio producers may only place at the end of the record itself. (2)

    However, some people may still prefer the old but gold automatic turntables, which I respect tremendously. It is not easy to take care of a vinyl record using completely manual features.

    Now, back to the story as to what happens when a vinyl record ends, well, there seems to be a dark side as well. It simply does not end with just endless playback, but some damage as well.

    Is It Bad To Leave A Record On The Turntable? What Happens When Vinyl Records End? Your Vinyl Record Players May Get Damaged

    Before we go out and discuss the damage in leaving your turntable turning after a vinyl record ends, we must first get something straight so as not to spook you and make you feel guilty. In the instance that you might have left an ended vinyl record turning overnight, you can assure yourself that doing this once may have incurred damages but probably not to a significant degree. 

    However, leaving your vinyl record players turning even after your vinyl has ended may leave substantial consequences.

    Suppose you have read our previous articles (or we still will inform you anyway). In that case, the needles in your turntables consist of highly durable material, most of them made with diamond or sapphire. This impeccable durability would mean that only a significant few can damage your vinyl record player’s needle.

    So if it is that durable, what is the matter then? Well, we are not that necessarily worried about your vinyl’s needle. What we are more concerned about is your vinyl record.

    So what happens when vinyl records end? Well, if you leave them there turning overnight, they might get scratched by the needle of your vinyl record itself.

     Also, a lot can go wrong as well.

    If the needle gets stuck, it may end up creating deep grooves, which can interfere with the vinyl record’s tracks, rendering the record damaged or unusable. 

    Another probable event that may occur is that it will induce unnecessary stress on your turntable, resulting in broken gears and mechanisms. (3)

    Leaving your turntable overnight should be no issue, as long as it is threading on actual vinyl tracks. However, when the record ends, the damage will start to appear. (3)

    Frequently Asked Questions

    Can Your Turntable’s Needles Scratch The Vinyl Record?

    As exemplified earlier, yes, it can. This risk of scratching is why it is essential not to leave your turntable threading on an ended vinyl record. The same can also be said when buying substandard needles.

    Does Auto-stop Affect Audio Quality?

    Theoretically, it shouldn’t. Auto-stop mechanisms are safety technologies not made to interfere with the audio output. However, installing them can help ensure longevity.

    Does Leaving My Record On Overnight Damage My Stylus?

    I do not believe that it damages the stylus. The term I would better fit this is “wear.” Yes, it will wear off the stylus, but there shouldn’t be an issue as long as you are using it well.

    Sources

    1. https://recordplayerexpert.com/what-happens-when-a-vinyl-record-ends/
    2. https://support.fluance.com/s/article/How-does-Auto-Stop-work-1480438536372
    3. https://retroonly.com/is-it-bad-to-leave-a-record-player-on-all-night/
  • How To Lubricate A Technics Turntable

    How To Lubricate A Technics Turntable

    “How do you lubricate a Technics turntable” is a question that needs a thorough answer. This particular turntable is expensive, so enthusiasts take care of it the best way they can. That way, they will be able to maintain the quality of their record player. 

    To lubricate a Technics turntable, you need to:

    • Remove the platter and clean any residual grease
    • Apply about a pea size of lubricant inside the spindle hole
    • Place the platter back to the turntable and let it run for 1-2 hours to distribute the grease. (source)

    A record player is no doubt an expensive piece of equipment. So, apart from lubricating it, you also need to know how to take care of it properly. 

    How Do You Lubricate A Record Player?

    A turntable is a type of equipment that requires mechanical precision for it to work correctly. If one of its parts is not working the way it should, the entire record player will mess up. 

    “How do you lubricate a Technics turntable” is a question that needs a thorough answer. This particular turntable is expensive, so enthusiasts take care of it the best way they can.

    One of the problems that can mess up a record player is not enough lubrication. If the moving parts of the turntable become dry, they will not spin smoothly, which may decrease its sound quality.

    So, how do you lubricate a Technics turntable and other turntable types in general? 

    Lubricate The Bearing

    Lubricating the platter bearing is essential to maintain the right speed of your record player. Proper lubrication of the platter bearing can even affect the turntable’s overall lifetime. On the other hand, the turntable will acquire damages, which can render it useless. 

    Moreover, the lubrication on the turntable bearing can disappear by playing the equipment regularly. It can also get dirty as the metals rub against each other. 

    That said, you need to regularly check up if the turntable’s axle has enough oil. The ideal thing to do is to renew the lubrication after three years of continuous turntable use. 

    Apply a pea-size amount of lubricant to the platter bearing. Then, turn the record player on and allow it to spin to distribute the oil evenly. 

    Lube Up The Cartridge

    How do you lubricate a Technics turntable and any other turntables? Apart from lubricating the platter bearing, it is essential to note that the cartridge also dries out over time. 

    The stylus or diamond is grooving continuously with the record. For this reason, it suffers from degradation in the long run. If your record player has a high tracking force, the faster it will be for the stylus to wear out. 

    Additionally, the rubber of the cartridge suspension loses its lubrication over time. If that happens, the rubber hardens and becomes less sensitive. As a result, the playback quality of the record player decreases. (source)

    To prevent this issue from happening, you need to lubricate the cartridge correctly. For this step, you need to: 

    • remove and clean the u-clamp
    • inspect if there is any hard, cracked rubber or dents
    • check if the outer rim has become slippery
    • remove any residual grease or dirt buildup in the axle hole
    • apply a dab of grease on the bottom of the idler wheel hole, making sure not to grease the rubber surfaces (source)

    How Do You Lubricate A Technics Turntable?

    Lubricating your Technics turntable is similar to how you lubricate other record players. You need to clean the parts carefully, ensuring no dust, dirt-buildup, or grease left. 

    However, it is essential to note that you should never use any cleaning agent that contains alcohol, thinner, or benzine. In addition, you should avoid wiping the platter bearing with a chemical dust cloth. The reason is that chemical-based and harsh cleaners can ruin the surface or your turntable, impeding its audio quality. 

    After cleaning the turntable and the platter bearing, the next thing you need to do is to lubricate it. So, how do you lubricate a Technics turntable?

    For every 2000 operation hours of your Technics turntable, you need to apply two to three drops of lubricant. Then, just like any other record player, turn your Technics turntable on and let it spin for approximately one to two hours. This way, the oil that you applied will distribute evenly. (source)

    Maintaining Your Technics Turntable

    There is a considerable increase in the popularity of turntables. But since most of the record players you can find in the market were created a long time ago, they can be expensive to acquire. 

    Technics SL-1210MK2 Professional Turntable

    But no matter how expensive your record player is, keeping it in good shape is not difficult or costly. The key to keeping your record player in its best shape regardless of continuous use is regular maintenance. Meaning you need to keep your turntable cleaned and tuned. Proper care will also help your record player to have a long cartridge life. 

    If you happen to have a Technics record player, it is not enough that you know how to you lubricate a Technics turntable. Instead, you also need to know how to take care of your record player to maintain its quality. 

    1. Apply support for your record player

    Whenever you walk across your room, your footsteps tend to cause a jarring effect on your record player. To prevent it from happening, you need to choose the right platform for your turntable. 

    It would be best if you prevented your turntable from vibrating to avoid messing up its parts. The reason is that letting your record player shake will interfere with its signal. This way, you will be able to keep the equipment from having distorted sound. 

    1. Clean the stylus using a carbon fiber brush

    Your turntable will skip and have a distorted sound if the stylus acquires dirt and dust buildup. For this reason, you must have an excellent stylus brush made of carbon fiber. You can also use mild cleaners to maintain the excellent quality of your stylus. 

    In addition, it is ideal for replacing the stylus after every 3000 hours of use. This way, you will be able to maintain the good audio quality of your record player.

    1. Replace the turntable’s belt every few years

    If you have a belt-drive turntable, it is not enough that you can answer, “how do you lubricate a Technics turntable.” But you also need to be familiar with when you should replace certain parts.

    For instance, you should know when it is time to replace the turntable belt. 

    It would be best if you replaced the belt the moment you begin to see it slipping on its pulley lower than usual. Hearing the belt slipping whenever you open your record player indicates that the belt already requires replacement. 

    1. Calibrate the anti-shake, tracking force, and height settings correctly

    Proper calibration is vital to help you avoid an increase in record wear and skipping of needles. 

    Moreover, it is essential to check all the parts of your record player to maintain the best quality that it can offer. But you need to know how many superior arms for the tonearms matter. It is regarded as one of the essential parts of your record player. 

    1. Align your anti-skate counterweight 

    The anti-skate counterweight of your record player makes sure that your stylus is sitting perfectly in the grooves’ center while the record is spinning. Proper alignment is crucial as it can heavily affect how your stylus sits inside the grooves of your record. 

    It is not enough that you know how do you lubricate a Technics turntable. Instead, it is equally important that the anti-shake counterweight is aligned correctly, si the stylus does not move away from the record grooves. (source)

    Related Articles

    Sources 

    1. Maintenance Rules, Pro-ject Audio Systems, Accessed September 9, 2021. 
    2. Henry Haven Windsor, Twelve Record Changers, Popular Mechanics, Accessed September 9, 2021. 
    3. Manuals Brands Technics Manuals Turntable SL-3200 Operating Instructions Manual: Adjustment Of Arm-Lift Height; Adjustment For Automatic Return Position – Technics SL-3200 Operating Instructions Manual, Manuals Lib, Accessed September 9, 2021. 
    4. How To: Tips On How To Take Care Of Your Turntable, Techaeris.Com,/ Accessed September 9, 2021. 

    • How To Lubricate A Technics Turntable

      How To Lubricate A Technics Turntable

      “How do you lubricate a Technics turntable” is a question that needs a thorough answer. This particular turntable is expensive, so enthusiasts take care of it the best way they can. That way, they will be able to maintain the quality of their record player.  To lubricate a Technics turntable, you need to: Remove the

      Read More


    • A Step By Step Guide To Cleaning Your Technics 1210

      A Step By Step Guide To Cleaning Your Technics 1210

      Technics make a fantastic bunch of turntables. But maintaining your turntable is essential to keeping it in good condition. The 1210 model is no different in its requirements for maintenance. However, knowing the correct way to perform a cleaning service is vital to proper turntable maintenance. The process for cleaning a Technics 1210 is no

      Read More


    • The Differences Between Technics 1200 and 1210

      The Differences Between Technics 1200 and 1210

      Technics 1200’s are known as some of the best direct-drive turntables in the industry. The record player has dominated the industry for decades, leading as a benchmark to follow for competition. But what is the difference between the SL-1200 and the slightly more expensive SL-1210 models? Let’s find out. The Technics SL-1200 and the SL-1210

      Read More


  • Are Scratched Records Able To Play? (We Find Out)

    Are Scratched Records Able To Play? (We Find Out)

    Are your vinyl records damaged goods, or are scratched records able to play? A scrape on your thousand-dollar phone, a scuff on your brand new car, an abrasion on your prescription glasses, scratches mean damage, and no one wants damaged goods. It may be tempting to think about the scratches on your vinyl records, and for that, I do not blame you. 

    Just like how a minor groove on your phone screen does not render your phone useless, a small scratch should not be a problem, therefore a scratched record should be able to play.  However, it is crucial to know that the damage will determine if your vinyl is playable or not.

    Is my scratched vinyl record playable or not, or can I at least mitigate the damage? In this article, we will answer these questions through and through, so sit back and relax.

    The Scratches And Vinyl

    Are scratched records able to play? Before we directly tackle that query, we must first understand the role of “scratches” in vinyl records.

    It is simply incomprehensible how we can manage to bring albums and more albums of songs within the palm of our very hands. And to think how we do not even ponder about this fantastic technology and take it for granted! However, there was a time when we needed to carry compact disks, clunky cassettes, or even vinyl to play quality music.

    Even with cassette tapes and most compact disks going obsolete, vinyl records are still alive and well! Who would have known that such a “relic” is still one of the best ways to listen to music to date! However, boy, are they susceptible to physical damage!

    Vinyl records have a “love and hate” relationship with scratches. First of all, the very existence of vinyl records comes from its precise architecture of scratches, known as its grooves. 

    These grooves form an intricate pattern that collectively is read as sound signals by the needle of your vinyl record player and converted into the music that you hear. Quite the beautiful journey, isn’t it? (1)

    From the humble origins of being a boring groove to its stunning end as an Obra Maestra musical piece, it is quite a wonder. However, despite the scratches known as “grooves” creating such beauty, scratches themselves can also ruin it. Improper handling, falling, improper storage, and more situations can result in vinyl scratching.

    Some would say, “Who cares? Aren’t vinyl records made out of grooves in the first place? Do scratches even matter?” Well, yes, it does matter.

    Because vinyl records are so reliant on the specific structure of the grooves, they are highly susceptible to mutilation due to even slight changes in the physical form of the grooves. These “physical changes” can manifest as bending, but it often presents itself in the form of scratches.

    Are Scratched Records Able To Play?

    As we have established already, vinyl records are vulnerable to scratches or even just minor changes to their physical structure. However, does a simple scratch spell death, or do they inhibit unnoticeable audio artifacts? Are scratched records able to play?

    Scratches Are A Big Deal

    We will use the compact disk as a potential viewpoint to answer this question in a more relatable light. Despite the two’s vast differences, the compact disk and vinyl records hold many similarities. For example, both are in the shape of a disk, save data, and were also used as mediums to store audible information.

    We all know too well that compact disks scratch very quickly, even swifter than a vinyl record. It is not too common to see a used, unscratched compact disk. However, they still retain their data and are still very usable.

    Just like that, a vinyl record can still hold its integrity even when scratched. Especially when the scratches are minor scuffs, vinyl records will mostly retain their listenability. However, like how a scratched compact disk will have odd skips and pauses, a vinyl record will undoubtedly have audible artifacts.

    Since vinyl records are analog technologies and not like the compact disk, the scratch will not only manifest itself as minor skips and pauses, but it can even cause your vinyl record to jump and skip whole tracks! Even with the most minute of scratches, do not expect uninterrupted listening. (2)

    Are scratched records able to play? Perhaps, that may be the case—however, any scratch, big or small, will have impacts on your vinyl record. The only thing you can do is hope.

    After all, a big scratch aligning with the grooves will not have as much damage compared to a scratch running directly across multiple rows of the vinyl record’s tracks. Like a train with a broken rail, it would not be playing smoothly.

    Some Will Still Play; However, There May Be Skipping Involved

    Alright, you have dropped your vinyl record, succumbing the record to scratches. “Certainly, there will be no audible damages, right?” You said to yourself wistfully.

    You pop your vinyl record player open, hope for the best, and find track one playing well. Track two, track three, and track five seem to be playing well also. However, where did track four go?

    Your worst nightmares are confirmed, and it looks like there are damages to your vinyl record. Why is this a thing, and how does this happen? Well, let us talk about that, shall we?

    I know you are tired of hearing this concept. Still, I must repeatedly assert that the physical architecture and structure of the vinyl record will heavily impact its integrity. Having unnecessary scratches or scuffs will result in audible damage. 

    Are scratched records able to play? Well, it depends on the severity of the scratch. However, as said earlier, mutilations and distortions are expected even with the slightest and shallowest scratches.

    The needle on your vinyl record player’s cartridge follows the structures, i.e., the grooves on your vinyl records. When there are scratches on your vinyl record, instead of following the predetermined path that will play each section of the record in an orderly manner, the scratch will create an additional pathway for the needle to go through. 

    When this happens, instead of transitioning from track three to track four, the tonearm’s needle passes through a shortcut and skips to track five directly. 

    Scratches Do Not Mean Bad Blood With Your Needle

    Certain things may make your heart burst into action: your smartphone dropping,- or that loud popping you hear when your needle hits a scratch. We all know that needles are very expensive and that popping sound from the vinyl record’s scratch may be the end of it. 

    Hold your horses first, amigo, as that is certainly not the story. If you do not know, most needles placed on your turntables contain diamond or sapphire, both very durable metals that do not break with just a scratch. Vinyl is a much less durable material than diamond or sapphire, so you shouldn’t be worrying too much about that. (3)

    However, it would be best not to forget that even diamonds and sapphires suffer from casual wear and tear. Keep them safe and handled well!

    Frequently Asked Questions

    How Do Vinyl Records Get Scratches?

    Vinyl records get scratched due to mishandling, stacking, dropping, improper storage, and even dust and sand. 

    How Do I Keep My Vinyl Records Pristine And Scratch-Free?

    To keep your vinyl records scratch-free, make sure always to have a clean, well-maintained, designated storage area for them. Additionally, do not touch the grooves. It may be tempting, but handling them with your bare hands may cause scratches.

    Are Scratches Permanent?

    Scratches are permanent, and there are no foolproof ways to repair them. Make sure to handle them properly always.

    Sources

    1. https://www.vinylrecordlife.com/how-vinyl-records-get-scratched-and-how-to-avoid-it/
    2. https://retroonly.com/do-scratched-records-still-play/
    3. https://toprecordplayers.com/does-playing-scratched-records-damage-the-needle/