People love listening to music on vinyl because of its high-quality sound and robust listening experience. A record’s audio data is wholesome and provides arguably the most authentic listening experience. But all that can easily be undone by distortion, so you’ll want to find a solution quickly when your record player gets affected.
A record player may sound distorted due to inner groove distortion, a dirty/worn-out stylus, or inappropriate cartridge weight and height. Potential fixes for this problem include switching to ideal cartridge height and weight, cleaning the records and the stylus, and replacing the stylus.
In the rest of this article, we’ll review the above causes of distortion in a record player in greater detail. We’ll also look at potential fixes for this problem, so be sure to stick around to the end. Let’s dive in!
Clean Your Records and the Stylus
A seemingly insignificant amount of dust can create distortion even if the record is perfectly fine. Check to make sure the stylus is dust-free and clean it if necessary.
While you’re at it, address the real culprit: the records. Start by brushing off excess dust with a carbon fiber record brush and then wipe off the remaining grime with a soft cloth and record cleaning fluid. Want more details on how to clean your records and your turntable? check out these articles:
A common distortion issue that many vinyl owners face is inner groove distortion. As the name describes, this is when you experience distortion towards the end of the record, on the inner grooves. This issue is an inherent manufacturing flaw for vinyl records. Luckily, it’s becoming less common as manufacturers update their methods.
Inner groove distortion has a lot to do with the way the music is compressed on vinyl records. The circumference of each groove decreases as you get closer to the end of the record. This increasingly smaller space means that the music has to be compressed more compactly later on in the album.
When comparing the first song of the side to the last, the circumference of the grooves decreases significantly. Your stylus also does not have the same amount of time to trace the grooves in the last song as it did in the first song.
Some record manufacturers attempt to avoid this issue by spreading the music out as much as possible. Even if the record is short enough to fit on one record, some manufacturers opt to spread the music out over two records. This method works to avoid those tricky inner grooves as much as possible, giving you the best listening experience.
You can tell if you are suffering from inner groove distortion with a simple test. Where is the distortion occurring? If the first song on the album sounds perfect, but the last song produces distortion, then inner groove distortion is likely the culprit.
For more information on inner groove distortion, you can check out this informative video on YouTube from Fluance Audio:
A Dirty/Worn Out Stylus
The stylus is arguably the most common cause of distortion in record players. This part of a record player is mostly affected by the dirt it picks up as it tracks record grooves. With enough time and regular use, dirt can build up on the stylus tip and compromise its ability to accurately track the groove, ultimately causing distortion.
The stylus can also be compromised by wear and tear. While this is less common due to the typical durability of the stylus, it’s still worth looking into. To do that, use a jeweler’s magnifying glass to check for any flat spots on the stylus. If you notice any, wear and tear is likely the cause of the distortion.
Inappropriate Cartridge Weight/Height
Getting the right cartridge weight is important for the balance of the tonearm. If your cartridge is too light for your record player, the tonearm won’t be able to rest properly on the record. On the other hand, a cartridge that’s too heavy will rest too firmly on the record, potentially damaging its grooves with every minute of playing time. Either way, you’ll experience distortion.
The height of your cartridge impacts the tonearm’s Vertical Tracking Angle, a crucial determinant of the Stylus Raking Angle. The latter angle describes how your stylus makes contact with the record, and impacts the sound it ultimately produces. For the best sound quality, you need to maintain a consistent cartridge height.
How To Fix Distortion on a Record Player
Whether you’re suffering from inner groove distortion or another type of general distortion, there are a series of checks and upgrades you can make to your system to improve the sound quality. Let’s take a look at what you can do for your stylus and cartridge to make sure they’re reading each record perfectly.
Upgrade or Align the Cartridge
Checking your cartridge for overdue upgrades and misalignments is a great first step to battle distortion. Depending on the age and mileage of your current cartridge, you may choose to upgrade altogether and purchase a newer, higher-quality option.
If you choose to purchase a new cartridge, there are a few things to keep in mind as you install it in order to give you the highest-quality listening experience.
First, keep in mind that the height of the cartridge is important for producing the best quality sound. The height of the cartridge will be influenced by your record player’s tonearm. This component may or may not be adjustable, depending on the make and model of your device.
If your record player doesn’t have an adjustable tonearm, you’ll need to recreate the height of the original cartridge. The manufacturer will provide specifications for replacement cartridges so you can find one that’s compatible with your device.
Switch to Ideal Cartridge Weight
Another important factor to check when replacing an old cartridge is the ideal weight for your record player. Different makes and models will have different ideal cartridge weights, measured in grams.
Manufacturers usually specify the ideal weight for each record player, so be sure to check your user manual or product specifications for that. If you find that you’re using the wrong weight, replace your cartridge.
For more information on replacing your cartridge, you can check out this tutorial on YouTube:
Replace the Stylus
If you have an older stylus that has seen a lot of use, it might be time to get a new one. Take a close look at your current stylus. If it’s visibly worn down, you can trust that it isn’t reading your record as well as it could, and that an upgrade is overdue.
It can be advantageous to replace your cartridge and stylus at the same time. If you’ve had your record player for a while or had purchased it used to begin with, consider upgrading both components together. This dual upgrade will give you the best chance at improved sound quality without having to replace your whole record player.
What Happens If Nothing Worked?
If nothing worked and you’re still experiencing distortion after attempting the above fixes, it might be time to replace the record. Records aren’t immune to wear (particularly the grooves), and overplayed ones can cause distortion.
With enough groove wear, the stylus may slide off the grooves when you attempt to play the record. If this happens, this is a clear sign that the record has been played out and needs replacement.
You can also check if a particular record is the culprit by swapping it for a newer one. If the distortion disappears when you play a different record, chances are your record player isn’t the problem; a worn out record is.
Summing Up
If you’re experiencing distortion when listening to your favorite record, it could be due to inner groove distortion, a worn-out record, a dirty/worn out stylus, or inappropriate cartridge weight and height.
Depending on the cause, you can fix the distortion by switching to the recommended cartridge height and weight, cleaning the records and the stylus, or replacing the stylus. If nothing works, check the record for wear and tear and replace it if necessary.
Music enthusiasts and audiophiles alike enjoy listening to vinyl records for a superior listening experience. One of the biggest drawbacks of vinyl records is that you can’t just carry them around when you travel. A good alternative is a USB turntable, which allows you to listen to your favorite LP by plugging the turntable into your laptop. And it’s easy to digitalize your vinyl collection with a USB Turntable.
The best USB turntable for most people is the Audio-Technica AT-LP60X-GM. It offers high fidelity audio quality while offering a simple design for seamless use. Its automatic arm will ensure the integrity of your records, and its two-speed control will allow you to play a wide range of albums.
I’ll walk you through what you should consider before purchasing your first USB turntable. After that, I’ll give you our top five USB turntable recommendations for different occasions. Keep reading to find out which USB turntable is best for you!
Things To Consider When Buying a USB Turntable
You need to understand what to look for in a USB turntable before investing your money in one. Luckily, you won’t have to invest a whole lot of time into researching what makes a good USB turntable since we’ve already done that for you!
Before buying a USB turntable, you should be somewhat familiar with the following factors:
Preamp
Speed controls
Upgradeable cartridge
Arm rotation
Let us walk you through what each of these does and what you should know about them.
Preamp
The preamp will amplify the sound coming from your table so that you can play audio from your turntables in speakers or any other sound system. Many turntables come with a built-in preamp so that you don’t have to worry about converting the signal when you plug it into an external speaker.
As a fundamental part of USB turntables in the modern era, we have stuck with turntables that come with a preamp in this guide. You don’t have to worry about amplifying the signal if you choose one of our recommended USB turntables below.
Speed Controls
Vinyl records are pressed at different speeds, which are measured in rotations per minute (RPM). Most records these days are pressed at either 33 ⅓ RPM or 45 RPM. Some older records may also be pressed in 78 RPM, although those are not that common these days.
You will want a USB turntable that is capable of adjusting between 33 ⅓ RPM and 45 RPM at least so that you can listen to a wide variety of albums. All USB turntables in our guide can play records at 33 ⅓ RPM and 45 RPM, so you don’t have to worry about buying the correct RPM record for your turntable.
Upgradeable Cartridge
Whether you’re a record amateur or a seasoned pro, you will want to get a turntable that will give you the option to upgrade in the future. Being able to swap out the needle or cartridge will allow you to improve the sound quality of your USB turntable and also replace these parts if they get worn out after years of use.
Upgrading a turntable cartridge is not that complicated, so don’t worry if you feel like you do not have the know-how to do these improvements yourself. You can watch the following YouTube video to get an idea of how easy it is.
Automatic vs. Manual Arm Turn
If you’re new to the world of vinyl records and turntables, you may not know about the difference between automatic and manual turntables. This refers to how the needle, or stylus, is placed on the record to begin playing and lifted off the record to stop playing.
Whether the machine does it automatically or whether you have to do it yourself determines if it is a manual or automatic turntable.
You may think that this is a minor issue and one that is simply based on convenience or preference, but you should think carefully about which type of turntable you will choose.
If you are a beginner and are just starting to grow your record collection, you will almost certainly want to go with an automatic arm-turn turntable. This will allow the machine to carefully play your records, thus eliminating the risk of accidentally damaging them.
You may lose some sound quality due to the extra automation, but it’s probably worth it to prevent causing some real harm to your records.
If you already have some experience with record players and want to get the best possible sound quality, then you should go with a manual turntable. You will have to do all the work of raising the stylus and placing it on the record, and then lifting it off the record when done, but the sound quality will be second-to-none.
We have included a mix of automatic and manual USB turntables in our guide below. Be sure to decide which type of turntable you want and pay attention to the type of arm turn to make sure you get the right kind!
Audio-Technica is one of the most respected brands in the music and sound production world. Known for offering superior quality at a small premium, any Audio-Technica turntable is synonymous with quality.
The Audio-Technica AT-LP60XUSB-GM is a perfect USB turntable for music lovers and casual hobbyists alike. Its simple design with abundant features allows for a seamless listening experience without sacrificing audio quality.
Bottom Line: Any Audio-Technica USB turntable is guaranteed to be a good choice, but if you’re not sure where to start, then this is the right choice. The convenience of this machine, along with its high quality, makes it the clear winner for the overwhelming majority of high fidelity music enthusiasts, so unless you are a seasoned pro, you will not be disappointed with this machine.
Pros
Die-cast aluminum platter designed to minimize vibrations and reduce audio distortions.
Integrated switchable phono preamp for easy connection to external audio output sources.
Dual speed control plays 33 ⅓ and 45 RPM records.
Upgradeable stylus.
A fully automatic arm that allows for easy play.
Compatibility with Audacity Mac and PC software to easily convert records into digital files.
Cons
The built-in Audio-Technica cartridge is not upgradeable.
Ripped audio files may not be of the best quality.
If hi-fi listening is your hobby, you might want to look for a record player that is designed for audiophiles. While this turntable won’t allow you to make killer mashups or adjust the tempo, it will play some of the highest audio quality available today.
The sleek and minimalist design will also ensure this looks great on your coffee table or on a stand in your living room or music room. While not necessarily the type of turntable you will want to carry around, it will definitely be a welcome addition to your house and could be great for people who love to entertain.
Bottom line: This USB turntable is on the pricier side, so only get this if you are a certified audiophile. You will appreciate the turntable’s superior audio quality, as well as its easy digitalization features.
Pros
A built-in preamp that allows for seamless use of external speakers.
It comes with some of the most advanced speed controls in the industry, allowing you to play 33 ⅓, 45, and 78 RPM records.
A fully replaceable cartridge, which allows for a high degree of customization.
The semi-automatic arm allows for superior sound quality while still retaining a degree of automation.
Cons
Pricier than other turntables of similar audio quality.
Few turntables are as easy to use as the Sony PS-LX310BT. This turntable was specifically designed for effortless use, allowing even the most inexperienced beginners to enjoy an enhanced listening experience.
This turntable is so effortless, in fact, that you don’t even need a cable. The Sony PS-LX310BT comes with built-in wireless support, allowing you to connect it to your computer via bluetooth or to bluetooth speakers.
Bottom line: If you’re interested in developing a hi-fi listening hobby but don’t have any experience with it yet, this is where you want to start. In addition to being extremely easy to use, this machine is a great balance of audio quality and price.
Pros
Integrated preamp for seamless use of external output sources.
Speed controls allow you to play 33 ⅓ and 45 RPM records.
Upgradable stylus for improved audio.
Fully automatic turntable.
Cons
The built-in cartridge is not upgradable or replaceable.
The lack of a manual arm slightly affects the audio quality.
This is the most affordable USB turntable of all five in this guide. Not only is it a relatively cheap option, but it is also the most environmentally-friendly one. The House of Marley turntable features eco-friendly and lightweight materials like bamboo without sacrificing audio quality.
This turntable also happens to have one of the most creative designs out there. By incorporating Bob Marley quotes and features, you can rest assured that this is a unique machine that can help you add personality wherever you decide to place it.
It’s recyclable materials also make it one of the lightest USB turntables out there. This could make it a great option if you’re looking to purchase a highly portable machine.
Bottom line: If you’re just a casual vinyl record enthusiast and are not looking to invest a whole lot into your USB turntable, this is the best option for you. Plus, you’ll be helping the environment by purchasing a turntable that is made from mindfully sourced materials.
Pros
Built-in preamp for superior audio quality and easy use of external speakers.
Speed controls make it compatible with 33 ⅓ and 45 RPM records.
Upgradable stylus for improved audio quality.
Made from lightweight and eco-friendly materials like bamboo, recycled plastic, and recycled aluminum.
Cons
Manual stylus, which means you will have to be careful when playing records to avoid damaging them.
Cannot upgrade the built-in cartridge.
Key Takeaways
USB turntables are great ways to listen to high-quality audio with the convenience of being able to hook them up to your computer via USB cable. We hope this guide helped you choose the best kind of turntable for you based on your needs.
When buying a USB turntable, remember to pay attention to:
Whether the turntable comes with a built-in preamp.
The turntable’s speed controls will allow you to listen to different records.
Whether the turntable will allow you to upgrade or replace the cartridge.
Whether the turntable is automatic or manual.
How to convert your vinyl to a digital format
One of the main reasons for buying a USB turntable is that you want to digitalize your entire vinyl collection or just a few vinyl records. It can be intimidating for the non-techie, but don’t sweat. The process is pretty straightforward, and I wrote an entire article about all the necessary steps. Which you can find here: How to Convert Vinyl Records to Digital: 9 Easy Steps
Sonos speakers are classy, easy on the eyes, and have terrific sound quality. If you consider yourself an audiophile, there’s probably nothing more exciting than pairing the uncompressed sound of a turntable with the power of a Sonos speaker. But how do you connect a turntable to your Sonos product?
Here’s how to connect a turntable to Sonos:
Learn about the different options Sonos offers.
Check if your turntable has a phono preamp.
Purchase any required extras (such as cables or preamps).
In this first step, we will talk about the different Sonos options and how to connect Sonos speakers to your turntable (regardless of whether you have a phono preamp). If you have a turntable that doesn’t have Bluetooth modality and a phono preamp, we will discuss that a little later. Let’s dive in!
1. Learn About the Different Options Sonos Offers
If you’re scouring the internet for information on how to connect your Sonos product to your turntable and finding very little information, there’s a reason for it. Sonos sells a plethora of different products that can pair with a turntable. As you’ve probably found, each one connects a little bit differently. Not only do they connect differently, but they function differently as well.
Below, we’ll discuss the main Sonos products that pair with a turntable. We’ll discuss what makes them different from the other options and how to connect them to a turntable with or without a preamp.
Sonos Amp
The Sonos Amp and Sonos Connect: Amp have line-in ports to connect your turntable to your other speakers. In general, amps take an electrical signal and “amplify it.” You may be interested in this product if you want an undistorted sound through all of your speakers. It gives you more control, as you can adjust the bass, treble, and loudness.
Amps are not speakers but means by which you can control the speakers you already have. They essentially power the speakers you have on your wall or your ceiling. If your home has Sonos speakers in each room that connects wireless or over your wired network. The Sonos amp will help connect your turntable to connect the rest of the speakers.
You will need an RCA cable which you can find on Amazon here its not included with your Sonos Amp, plug one end into the turntable (or the turntable preamp if yours doesn’t have a preamp built-in).
Plug the other end of the cable into the corresponding ports in the back of the Sonos Amp (IN).
Place a record on your turntable and play it.
Using the app, connect the amp to other speakers by going into the settings tab and looking for “Line In” devices.
The Sonos amp will typically work with speakers that need no more than 2*125 watts. If you already have your favorite pair of active speakers then you can easily integrate them into the Sonos ecosystem by connecting them to a Sonos Amp.
Sonos Amp is also often used for speakers connected to the ceiling or wall in your home. Now, you can enjoy the unfiltered record sound through all your speakers!
Sonos Five
The Sonos Five is an excellent choice if you want the power of a speaker and still need something that has a line in connection for your turntable.
This high-quality speaker has a 3.5mm input built into the back of it and comes with an auxiliary cable so you can hook it up to your TV, CD player, old iPod, or turntable. Unlike the amp above, the Sonos Five is a speaker, so you can plug your turntable in directly and start playing music in addition to connecting to other speakers on your Sonos network.
To connect your Sonos Five:
Plug an RCA-Y cable (not included with Sonos Five) into the corresponding port on the back of the Sonos Five. This should be the side that only has one connector. If you don’t have an RCA-Y cable I recommend this one from amazon.com
Connect the other side of this cable (which should have colors and two connectors) into the back of your turntable where the colors match up (or into a phono preamp if yours doesn’t have one directly built-in).
Place a record on the turntable and start playing it.
If you’d like to connect it to other speakers on your Sonos network, you can go into the app and find the “Line In” option under settings. This way, you can hear the pure sound of your favorite record on the high-quality Sonos Five and any other speakers on your network.
Sonos Port
Like the amp, the Sonos Port isn’t something that will directly play your music aloud. Instead, the Port is kind of like a control tower for all the speakers within your home. It doesn’t power anything like the amp but puts all speakers onto the same network. It’s just like a Wi-Fi router that unifies all smart devices.
With Sonos Port, You can enjoy endless possibilities for multiroom listening and get the Sonos experience on your existing stereo, receiver, and turntable. You can also stream music, radio, audiobooks, and more from your favorite services.
The Sonos Port works with turntables just like both products mentioned above. Essentially, you use this product to connect your turntable to the network.
To do this, you will:
Plug one end of the audio cable (not included with the Port) into the back of the Sonos Port. I recommend this RCA cable available from Amazon.
Connect the corresponding connectors into the turntable (or phono preamp) in the L/R inputs.
Play a record on your turntable.
Open the app and select the settings.
Find the “Line-In” option and connect this to the rest of your speakers (or the speakers you would like to use).
Now, your turntable will be a part of the more extensive network of speakers in your home. The added benefit of this with your Sonos app is that instead of just one speaker playing your music, you can have the cumulative sound of all of them playing it!
Sonos Speakers
There are many different types of Sonos speakers, and you can connect via any of the options above using the “Line-In” option on your settings.
But what if you don’t have any of the above products?
Unfortunately, no ordinary Bluetooth speaker will connect to your turntable unless you have a modern Bluetooth-enabled turntable. The above products work because they connect through some means to the turntable through a cable and can then connect via the Sonos app to other speakers (which is what makes Sonos so cool!). If you’re struggling to connect a Bluetooth speaker to a normal turntable, you should consider purchasing the Amp, Port, or the Five.
If you’re still unsure which product is best for you, the audiophiles at Smart Home Sounds Ltd. have an in-depth video on selecting the right Sonos product for you:
They also go through a few different setups to inspire your next purchase.
2. Check if Your Turntable Has a Phono Preamp
You’ve probably noticed that I’ve referred to different turntable features already one important feature is the phono preamp. Some turntables have one built-in; others require an external phono preamp. The PCMag Encyclopedia describes a phono preamp as a “circuit that amplifies and equalizes.” This thirty-minute YouTube video by the Audiophile mangoes in-depth about different phono amplifiers and their purpose:
For our purposes, we’ll summarize that a phono preamp is an important part of your turntable system. It supports the sound, and it’s needed to connect a Sonos speaker or a line-in chord.
Turntable With a Phono Preamp
If your turntable has a phono preamp built-in, then congratulations!
You won’t need a secondary system to plug into your Sonos speakers. Instead, you’ll just plug the line-in chords directly into your system.
If you are on the lookout for a new turntable and your goals would be much better suited to one with a phono preamp already built-in, we will give you a few suggestions for turntables with preamps already in them. Be wary, though. Some audiophiles still purchase a phono preamp separate from their built-in one to get the sound quality they like.
Here are a couple of turntables with excellent built-in phono preamps:
This turntable comes with a built-in preamp. It also comes in a few lovely colors. Audio-Technica products are known for being stylish and have tons of positive reviews on Amazon. This turntable would make a great addition to your audio setup, regardless of your aesthetic.
The Fluance vinyl turntable is sleek, attractive, and highly regarded. This one has a built-in phono preamp as well. It makes connecting it to your Sonos speakers a straightforward endeavor. The finish and hardware on Fluance turntables are particularly reminiscent of those old, classic vinyl players, which pay an homage to the past!
If you want to dig deeper into the subject then you can take a look at this article about the best turntables for Sonos.
Turntable Without a Phono Preamp
If you have a turntable without a phono preamp built-in, you aren’t alone. In fact, most turntables are built without one. This just means that your phono preamp will need to come from an outside source, which you’ll first connect to your turntable and then connect to your Sonos speakers.
Why would someone make a choice to buy a turntable without a phono preamp if they’re so important, though? Because many audiophiles already have their favorite phono amp that they want to use.
If an additional device with cables isn’t a big deal to you, then this doesn’t matter as much. Some people prefer the certain look of a turntable rather than the features, or it could have something to do with nostalgia.
Regardless, there are tons of low-cost and high-cost turntables that’ll need a phono preamp to connect to Sonos speakers. Once you have your phono preamp, setting it up is fairly simple.
3. Purchase Any Required Extras (Such as Cables or Preamps)
As mentioned above, there may be a few other things you have to purchase, particularly if you don’t have a turntable with a built-in phono preamp. Be on the lookout for RCA cables, which you need to connect your turntable to the phono preamp.
A phono preamp is essential for the quality sound of your turntable. If sound quality is important to you (as it is with most vinyl listeners), you’ll want to make sure you find one that doesn’t filter out the sound of your records. Here are a few preamps I like:
This phono preamp is simple, straightforward, and no-fuss. The sleek, gray design doesn’t prompt much attention, which is perfect if you’d like to keep the simplistic look for your audio setup. The quality of this phono box is why it’s listed on Amazon’s Editor picks!
The Fluance PA10 is deemed High Fidelity for a reason. With over 85% of users rating it five stars, this phono preamp is a pick you can be confident in. The wood finish looks great with most entertainment centers, but it is a little larger than most preamps.
This is a Tube phono preamp, but this might be a huge plus based on your style! Tube phono preamps use analogue tubes and valves to amplify the signal that turntables emit when they play vinyl records. Meanwhile, solid state preamps use silicon transistor components to amplify the same signal.
Audio Cables
Most preamp setups will require an RCA cable or some other audio cable, which is usually included in the box. However, some may not come with it. When purchasing a preamp, look for information revealing what pairs with your turntable and what cables need to go between the preamp and the turntable.
Conclusion
Sonos speakers have terrific sound quality that won’t muffle the unfiltered sound of your turntable.
Here are a few things you need to remember:
You will need a “middle man” (such as the Sonos Five, Sonos Port, or Sonos Amp) if you are trying to connect your turntable to a Sonos Bluetooth speaker unless you have a Bluetooth turntable.
If you don’t have a phono preamp built into your turntable, you need to get one to connect to the Five, Port, or Amp.
You can use the app to connect your turntable to any speakers on your Sonos network.
Sonos makes wireless sound system solutions that are perfect for vinyl lovers. If you have a Sonos system, you’ll need to find the best turntables to go with it. That way, you can get the most out of your high-quality sound system.
The best turntable for Sonos is the Audio Technica AT-LP60X. This turntable is the best option for most people because it has a low price and offers the best sound quality in this price range. This model is great for new vinyl collectors too. It comes in different colors to match your room.
There are a few cases where I wouldn’t recommend the Audio Technica. These include:
You want a longer-lasting turntable with a great design and don’t mind paying more for it. In that case, choose the Pro-Ject T1 Phono SB Turntable (available on Amazon.com and on Turntable Lab.
This article will discuss a few important factors to consider when buying a turntable for your Sonos system. I’ll then go over all of my favorite picks to see what situations they work the best in. I’ll also explain why the Audio Technica AT-LP60X is the best pick for the majority.
Factors To Consider
The turntable will need a built-in preamp to work with your Sonos system. All of the models on this list do have this feature. In order to connect your turntable to SONOS, you need at least one of the following SONOS system.
Bluetooth isn’t the best option for Sonos, in my personal opinion. However, some Sonos speakers (Sonos Move and Sonos Roam) utilize Bluetooth and can be a great opinion if that is what you are looking for. So make sure you check before you start shopping!
You want to consider these three main factors before purchasing a new turntable:
Great sound quality
A great design
The overall cost
Most Sonos products aren’t costly, so it wouldn’t make sense to buy a high-end, premium record player to go along with your sound system. As long as the turntable scores well in the three features mentioned earlier, it’ll work well with your Sonos.
Let’s now go over these features:
Great Design
Turntable
Number of Color/Style Options
Materials Used
Audio Technica AT-LP60X
6
Plastic, die-cast aluminum platter
Fluance RT81 Elite High Fidelity
3
Solid wood plinth, aluminum platter
Pro-Ject T1 Phono SB Turntable
3
Alloy steel, steel platter
U-Turn Audio
2
Solid hardwood plinth, acrylic platter
1 BY ONE Belt Drive Turntable
1
Wood, plastic, and metal platter
First, make sure that you love the design of the turntable! The appearance of the turntable should pair well with your Sonos. Sonos speakers are modern and sleek. That means you probably don’t want a bulky, vintage turntable.
Many of these turntables come in different colors, styles, and materials. You’ll want to consider how the turntable will look in your room, then choose the one that goes well with your aesthetic.
This list gives you plenty of different options to choose from.
Great Sound Quality
Turntable Model
Distortion Level
Audio Technica AT-LP60X
Moderate at high volumes
Fluance RT81 Elite High Fidelity
Low
Pro-Ject T1 Phono SB Turntable
Low
U-Turn Audio
Very low
1 BY ONE Belt Drive Turntable
Moderate
Of course, you want a turntable that offers excellent sound quality so that you can enjoy listening to your favorite vinyl. The turntable should provide you with high-fidelity (uncompressed) sound, playing music as close to the original as possible. Other formats can decrease the sound quality.
However, there are many different ways to measure sound quality. What you enjoy listening to is largely up to your personal preference. Some people are willing to invest more money in a turntable for better sound quality. In contrast, others want something more affordable and don’t care about the sound quality.
You want to have as little distortion coming from the turntable as possible. That way, you get a faithful translation of the music coming directly from the source. Vinyl allows you to listen to a song exactly how the artist intended it to sound.
Overall, you want a turntable that provides minimal distortion when listening to songs on your Sonos. Some cheaper models have little distortion at quiet volumes, but the distortion becomes more noticeable when you crank up the volume.
Overall Cost
Lastly, you’ll need to consider the overall cost. The best overall pick on this list is very affordable compared to the other options. However, you might be willing to pay more to get the features that the other turntables offer.
You should always set a turntable budget before you start shopping. Turntables can cost as much or as little as you want — so you have plenty of room to set your budget. If you don’t set one, it can be easy to overspend.
When you pay more, you’re likely to receive a turntable that comes with more features, such as Bluetooth or WiFi capabilities. You also get better sound quality and sturdier materials.
Once you buy the turntable, you usually don’t need to invest more money into it as long as you take care of it. The only other expense may be purchasing a few cables to connect the turntable. However, these cables are usually very cheap!
When buying a turntable for your Sonos, you don’t need to choose an expensive model. A typical Sonos system is rather inexpensive, so you don’t need to buy a premium turntable either — unless you want a fancy model.
In short, you should only pay what you’re comfortable with. Many new vinyl collectors start with cost-efficient record players and upgrade to a more expensive option in the future. You should first figure out what features you want on your turntable.
Best Overall: Audio Technica AT-LP60X
The Audio Technica AT-LP60X is the best Sonos turntable for most people. It’s not overpriced, and it has a good sound quality and a cool design. Many users feel that it’s one of the best-sounding turntables in this price bracket. That’s why the Audio Technica AT-LP60X is the best overall pick.
However, you’re not going to get perfect sound quality at this price point. The turntable will distort slightly at higher volumes, but you shouldn’t notice it very much. Overall, it’s ideal for casual vinyl listeners. Still, that doesn’t mean that it’s bad quality or that you won’t love it. It’s also perfect for use with Sonos!
The model comes with two operating speeds and an anti-resonance platter. It also improves tracking for more accurate listening and a reliable dust cover. The device is straightforward to set up with Sonos, too, so you can listen to your favorite vinyl in no time at all!
Audio Technica is one of the most popular modern turntable manufacturers today. The company always makes high-quality turntables, with improvements between each upgrade. This model offers a quiet motor and improved build quality compared to its predecessor. Finally, it comes with a built-in preamp, which you need to work with your Sonos.
Bottom Line: You get all the features you need at a fantastic price — making the Audio Technica AT-LP60X turntable the best for most. You’ll also enjoy all of the color and material options that they have available.
Pros
Great price. This model costs a fraction of the price of other turntables with identical features.
Good design. The turntable is very sturdy, has excellent tracking, and has a dust cover.
Decent sound. The Audio Technica AT-LP60X offers the best sound quality compared to other products in this price range.
Cons
Distortion at high volumes. When playing loud music, you may notice some distortion or a drop in sound quality.
Product Specifications
Number of Operation Speeds
Dimensions
Weight
2
14.7 x 14.1 x 3.8 inches (37.33 x 35.81 x 9.65 cm)
8.11 pounds (3.67 kg)
Best HiFi Option: Fluance RT81 Elite High Fidelity
The Fluance RT81 Elite has a fantastic design — It’s very smooth and modern, making it fit well with anyone’s home. The wooden base is a nice touch too. Many people love the walnut wood finish, which is what gives the Fluance great durability too.
The best feature of the Fluance RT81 Elite is the high fidelity sound. The sound is very clear and accurate, allowing you to enjoy your favorite songs to their full potential with your Sonos.
You also receive two operation speeds, additional vibration control, an adjustable counterweight, and even gold plated line outputs! All of these benefits factor into excellent audio quality. There’s so little distortion that you probably won’t even notice it!
Bottom Line: The Fluance RT81 Elite has the best HiFi sound in this price range. It comes with a solid wood plinth, making it very sturdy. You won’t ever feel the table the turntable is on vibrate. It’s a turntable for those seeking the best HiFi experience.
Pros
Outstanding design. The Fluance RT81 Elite is beautifully designed and contains quality materials, such as solid wood.
Amazing sound. You receive excellent HiFi sound with less distortion.
Reasonable price. The price is great for the quality that you receive.
Cons
Manual tonearm. You’ll need to move the arm back to its base yourself when the vinyl ends.
Product Specifications
Number of Operation Speeds
Dimensions
Weight
2
13.75 x 16.5 x 5.5 inches (34.92 x 41.91 x 13.97 cm)
6.39 pounds (2.89 kg)
Best Design: Pro-Ject T1 Phono SB Turntable
When it comes to a design that can match your Sonos sound system, the T1 Phono SB Turntable is the one to get. This turntable is straightforward to set up and works exceptionally well with Sonos. You get good sound quality, and the cartridge comes precision aligned — you can just plug it in and start rocking.
You have plenty of stylish options for the base. You can choose between 3 different finishes, each of which looks and feels completely unique. For example, you could choose the classic Satin Walnut, which uses natural wood, or opt for the High Gloss Black design.
Plus, Pro-Ject is another very well-known brand of high-end turntables. Their turntables are a bit more expensive than the other options on this list, but you receive a premium product.
The design is simple but modern. You’ll need to assemble the turntable yourself, though it’s a very simple process to complete. You’ll just need to make sure you set aside 20 minutes or so to get the job done.
Finally, the tonearm comes with precision sapphire bearings, giving you a pleasant listening experience. You won’t have trouble with distortion or the needle jumping around. It’s a sturdy turntable that won’t vibrate on your table.
Bottom Line: T1 Phono SB Turntable comes in several colors and finishes, making it the best choice for those who want the best design to match their Sonos. It’s the most expensive option on this list, but you do get superior sound quality.
Pros
Outstanding design. The design of the T1 Phono SB Turntable is definitely the best! It’s sleek, lightweight, durable, and has many options to choose from.
Good sound quality. You get reduced distortion, and your music will sound great.
Cons
Cost. This model comes with a premium price tag, so it’s not for everyone.
Product Specifications
Number of Operation Speeds
Dimensions
Weight
3
19 x 15.7 x 10 inches (48.26 x 39.87 x 25.4 cm)
17.42 pounds (7.90 kg)
Best Sound Quality: U-Turn Audio Orbit Special
The U-Turn Audio (Orbit Special with Built-in Preamp) also features a great design but has outstanding sound quality. The acrylic platter is clear and helps the turntable blend into the rest of your surroundings. You also have plenty of finishes for the base, including natural wood.
However, the best feature on this player would have to be the sound quality. If this is your first turntable, you’ll notice a striking difference between it playing your vinyl collection and the music you stream from your phone. It’s a high-end record player that offers an exceptional music listening experience. Plus, the model sounds great with Sonos.
The acrylic platter gives the player a better speed constituency, which helps reduce distortion. The external belt also removes noise from the motor, giving you the best possible sound quality. If you want the best turntable for Sonos, this model is for you.
Bottom Line: The U-Turn Audio is another premium product with a high cost. However, it also provides you with some of the best audio quality possible through a record player connected to a Sonos speaker.
Pros
Perfect sound quality. The sound quality that comes from this player is clear and precise. You won’t notice any distortion or motor noises at all.
Sleek design. The turntable has a very natural design that suits any room theme.
Cons
Cost. The U-Turn Audio is very pricey, and not everyone will want to spend that much for a turntable that connects with their Sonos.
Product Specifications
Number of Operation Speeds
Dimensions
Weight
2
20.87 x 17.17 x 9.92 inches (53.00 x 43.61 x 25.19 cm)
12.5 pounds (5.66 kg)
Best Wireless Connectivity: 1 BY ONE Belt Drive Turntable
The 1 BY ONE Belt Drive Turntable comes with a preamp and offers Bluetooth connectivity. Some Sonos models work well with Bluetooth. However, please check that your Sonos is Bluetooth-compatible first. Check out this article that I wrote: How To Connect a Turntable to Sonos? Let’s Find Out!
It’s not very expensive, looks nice, and plays vinyl records at two speeds.
Many people also love that it comes with a USB port, allowing them to digitalize their records and save them on their computer.
It connects well with Sonos products too. However, a cost-effective model will not give you perfect audio quality. You may notice minor levels of distortion here and there.
Pros
Bluetooth connectivity. Bluetooth is helpful to have for some Sonos products. You can also connect your wireless headphones or other devices to it.
Good price. This model isn’t as expensive as the premium options on this list, making it more affordable for more people.
Cons
Moderate distortion. You’ll hear distortion from time to time. This model isn’t for those who want the best sound quality possible.
Product Specifications
Number of Operation Speeds
Dimensions
Weight
2
16.5 x 13.6 x 4.9 inches (41.91 x 34.54 x 12.44 cm)
12.8 pounds (5.80 kg)
Key Takeaways
To summarize, the Audio Technica AT-LP60X is the best turntable to use with Sonos. It suits the most significant number of people and comes at a fair price. However, if you want to buy a more expensive model to go with your Sonos, you have plenty of choices!
I’m confident that you’ll love listening to music on any turntable from this list. If you take the time to consider what you want and the three main factors, you’re sure to choose the one that suits you the best! Check out the Audio Technica AT-LP60X on Amazon.com or on Turntable Lab now.
Most folks, including myself, love servicing our electronics as a hobby; after all, the key to listening to exceptional music is maintaining your turntable. Unfortunately, suppose you have never serviced your turntable, especially a technics 1200 series turntable. In that case, you may be wondering how you can access the internal parts of your record player. So after thorough research, I compiled the following five steps to removing a technics 1200 platter.
The Technics 1200 series needs to be serviced or repaired like every turntable. And the only way you can access the motor or any other part is by removing the platter. But removing it can be a bit challenging, especially when stuck, so you should be ready to whack the spindle with a screw driver’s head.
The Technics 1200 was one of the most influential turntables series loved by everyone. This turntable became quite popular among DJs after being released in the early 1970s. (source) Unfortunately, removing its platter is not as straightforward as other brands, but it is possible. So in this article, we’ll show you how to remove a Technics 1200 platter.
What Is The Technics 1200 Series?
The SL-1200 is one of the most influential turntables of all time. Developed by Shuichi Obata’s team in 1971, this model was released in 1972. The hip-hop DJs adopted this series in New York in the 1970s. The DJs loved this unit and started using it to perfect their scratching techniques after they discovered its motor would continue spinning at the right speed even after wiggling the record back-and-forth. (source)
The SL-1200 is a direct drive turntable series initially manufactured between 1972 and 2010, before resuming in 2016. The SL-1200 series are direct drive record players under Panasonic Corporation. In fact, the “S” refers to “stereo,” and “L” stands for “player.” Initially launched as high-fidelity turntables, these units were quickly adopted by the disco club and radio DJs.
The SL-1200s popularity increased thanks to its unique high-torque motor design, making them ideal for starting tracks and pushbutton cueing. The SL-1200 is quite popular among audiophiles. And thanks to the high-torque motor system, DJs could mix records accurately and consistently. As high fidelity was the manufacturer’s primary goal, having exceptional control over the music and the quality made it stand out. (source)
These turntables were quite common in recording studios; over 3 million units were sold. This turntable is the most reliable and durable record player ever produced. Plus, most of the 1200 turntables made in the 1970s still get used to date. (source)
Why Are The Technics 1200 Series Popular?
The Technics Sl-1200 Was A Solution For Most Of The Issues Associated With Turntables
The SL-1200 series was a solution for most of the issues associated with the design of turntables. It was a special project designed by Shuichi Obata and his team. Their main goals were correcting the speed errors and minimizing unwanted resonance and acoustic feedback. The team achieved this by making a heavy base using non-resonant composite sandwiched between a rubber base and a cast iron upper plate.
The rubber-damped feet help minimize acoustic feedback that can be a significant issue when using it next to some loudspeakers. This problem made it hard for disco and radio DJs to mix and perfect their trade. But with the SL-1200 series, DJs didn’t have to ever worry about this problem; in fact, this unit made it easier for them to give an excellent performance. (source)
The Platter Comes With A Thick Rubber Coating
The lower side of the platter has a 1.2mm thick rubber coating that helps reduce the ringing; plus, the platter comes with a 2mm rubber mat. But most DJs replace the rubber mat with a slip mat for mixing purposes. Unfortunately, the platter is prone to resonance at 250Hz, mainly when used next to a powerful sound system. (source)
It Comes With A Direct Drive Design
Instead of the belt drive, this turntable comes with a direct drive design. It is a direct-drive design known for lowering flutter and wow, guaranteeing a turntable with minimal bearing and motor noises. The manufacturers managed this by making the platter part of the turntable’s motor mechanism. (source)
It Guarantees You A Consistent And Accurate Spinning Speed
The SL-1200 uses Frequency-Generator-Servo systems to guarantee a consistent and accurate spinning speed. Plus, it is immune to dynamic and stylus drag that triggers high-speed variances. (source) But despite being a reliable and highly durable unit, it is bound to break down once in a while and needs to be serviced. Therefore, you need to learn how to remove the Technics 1200 platter. (source)
How To Remove A Technics 1200 Platter
Unlike most low-end turntables, the Technics 1200 series are an exceptional line of turntables equipped with the best parts in the market. But for your turntable to function correctly, you have to be ready to service it regularly and make sure it’s covered when you’re not using it.
After all, Technics 1200’s platter can get stuck at times, and the fact that it’s made from plastic can prevent you from using too much force when removing it. So here are five steps to removing a Technics 1200 platter:
Step 1: Remove The Dust Cover
The turntable cover is one of the most exceptional parts of the turntable that protects your device from dust. The cover prevents an accumulation of dust on the vinyl played, the record player, and the inner parts of your device. Unfortunately, some folks have complained that it does affect the quality of the sound; therefore, they don’t use it when playing a vinyl record. (source)
Since it is not attached to the turntable in any way, the first thing you should do is lift the dust cover and place it in a safe place. If there is any vinyl record on the turntable, you should remove the stylus from its groove and put it on the side. Remove the vinyl from the record player and then unplug it from the mains. Unplugging it from the mains can help protect you and your device from an electrical shock.
Step 2: Remove The Mat
The Technics SL 1200 turntables come with a 2mm rubber mat that helps prevent resonance. So before accessing the platter, you should first remove the rubber mat. As aforementioned, some DJs tend to replace the rubber mat with a slipmat. The slip mat makes mixing in the clubs more manageable and more fun. (source)
Therefore, if you purchased a second-hand Technics 1200 from a DJ, you should remove the slip mat to access the platter. After all, most DJs tend to replace the rubber mat with a slipmat, making their work easier.
Step 3: Lift The Platter Of Your Direct Drive Turntable
Removing the platter can be pretty straightforward for most well-maintained 1200 turntables. Remember, the platter comes with two access holes which you can use to lift the platter off. (source) All you have to do is place your index fingers in the two access holes and lift the platter and place it aside. This method works for most turntables, including some 1200 record players.
The platter may sometimes be stuck to the spindle thanks to the accumulated dirt and dust, making it hard for you to pull it off. And since applying some force can be detrimental to your machine, you should be cautious.
When too much dust accumulates on the center spindle, the platter can stick, and since it’s made using plastic, you should try and avoid using too much force when pulling it out. Instead, you should try the following methods:
Method 1
After removing the rubber mat, the first thing you should do is insert your index fingers in the access holes.
Try pulling it out while pressing the center spindle with one of your thumbs.
Apply a little force, and it will come off if it is not tightly stuck.
And then lift the platter using your two hands.
If the platter wasn’t stuck, this method could work, but if it doesn’t, you should try the following method. (source)
Method 2
If the above method doesn’t work, you should try lifting it while whacking it with a mallet or a piece of wood.
You can also lift the platter using your left hand while hitting the spindle and pulling it outside using your right index finger for this method to work.
All you have to do is place your index finger in one of the access holes and whack the center spindle using the head of the screwdriver while pulling it out.
You will feel the platter lifting with every strike. And within no time, the platter will be off, and you’ll be ready to start servicing your turntable. (source)
Method 3
If you have a bad hand and can’t pull it out or hold the platter using your index finger while hitting it, you can place a flat head screwdriver on one edge of the platter and lift it a bit.
Next, whack the center spindle using a mallet while pressing the screwdriver downwards to push it out.
You can do this on one side and then switch to the other side if it doesn’t work, repeat this procedure, lift the platter off, and place it aside. (source)
If you try any of the above methods, you will feel the platter lifting until it loosens and comes off. These methods work with every Technics turntable. Plus, the platter won’t get damaged while you’re forcing it out.
Step 4: Service Or Repair The Turntable
After removing the platter, the first thing you should do is remove the muck formed on its spindle. Remember, the muck is the reason why the platter got stuck in the first place, and you had to whack the spindle to remove the platter. Next, you can clean the inner parts of the Technics SL-1200 turntable and, most importantly, examine the motherboard and the magnets placed below the platter.
Therefore, if the main goal for removing the platter was repairing your fast-spinning turntable or a damaged motor, then you should do that before reassembling it. If it’s a second-hand turntable, then the first thing you should do after purchasing it is service it. After all, you don’t know if the previous owner serviced it or damaged any component.
The latest Technics SL-1200 models come with a coreless direct-motor assembly, and it has no magnet ring attached to them. So make sure you know the difference between the 1200 turntables manufactured after 2016 and the older models. (source) After all, any error done while repairing this turntable can be very costly.
Step 5: Reassemble The Technics 1200 Platter
You can place the platter on the turntable after you have finished servicing it and confirmed that everything is back to normal. But make sure the center spindle is in the right hole before pushing it downwards. After removing the muck accumulated on the center spindle, removing the platter can be easy. Finally, you can reinstall the rubber mat or slip mat and plug it into the mains.
Place your favorite record on the turntable, place the stylus on its grooves and listen to some music. Ensure your turntable functions correctly before replacing the dust cover and storing it in a safe place. Suppose the turntable starts malfunctioning after reinstalling the platter. In that case, you will have to repeat the above process and reinstall it correctly.
Why Do I Need To Learn How To Remove The Technics 1200 Platter?
Thanks to the muck and dirt that collects on the center spindle, the platter can get stuck if not well-serviced. The silt can still collect on the spindle even if you keep your device covered using a dust cover. Plus, with the platter made using plastic, you may need to try and avoid using too much force when pulling it out or using the wrong method when removing it.
Prevent Further Damages
Too much force can result in the platter getting damaged. Remember, the platter is plastic, and too much power can break or crack, which is not suitable for your turntable. Too much pressure can damage the center spindle hole or the spindle itself, so you have to be strategic and remove it correctly. You can easily remove the platter without damaging your turntable with the correct method.
You Need To Service The Turntable A Couple Of Times Every Month.
Even with the dust cover, some microscopic dust and dirt can still accumulate on the surface of the rubber mat and inside the record player. So you may have to maintain it after every few weeks, primarily if you use it more often. First, you need to remove the platter and the rubber mat to access the motor. You can service it and then reassemble your turntable and, finally, test it.
Repair It
If the motor is spoiled or is spinning too fast or slow, you may have to troubleshoot the cause of the problem. And this means removing the platter and examining the motor and the motherboard, repairing it, and then reinstalling the platter.
Upgrade The Turntable
If you purchased an old model second-hand Technics SL-1200 turntable, you might need to upgrade some of its parts. You may need to replace the motor or work on the motherboard and update it before testing it. These upgrades will mean removing the platter and working on your turntable.
FAQs
How Do I Remove A Technics Sl-1200 Platter?
You can pull it up with your fingers on the access holes until it moves. You can try tapping the center spindle using a piece of wood while pulling it. You can whack it using the rubber or plastic handle of your screwdriver, and it will pull out.
Should I Use Too Much Force When Whacking The Center Spindle?
Simply tapping the center spindle won’t do the trick at times; you may have to use a little force. So instead of tapping it, you should whack it while pulling it out. Don’t be too afraid to tap the center spindle a little hard; after all, you need a little force for the platter to come off.
Are Technics SL-1200 Worth It?
Considered by most audiophiles as the best, many regard the SL-1200 as a legend by most radio and disco DJs. The turntable was designed to correct some of the main issues associated with turntables in the 1970s. And thanks to its unique design, it is one of the few turntables the DJs use to perfect their scratching techniques.
Conclusion
Despite being popular among the DJs removing its platter can be tricky, especially if some dirt has accumulated on its spindle. In order to remove a Technics 1200 platter that has gotten stuck, you need to insert your left or right-hand index finger in the access holes and whack the center spindle using the screwdriver’s head. You can try and tap it a little harder for the platter to come off.
Most people prefer to do a complete setup for their turntables receiver and all. However, what if you don’t have a receiver? How do you ground your turntable without one? We’ve created a complete guide to help you ground your turntable without a receiver.
In a setup that has a receiver, the receiver houses the amp. However, if you get rid of the receiver, you’ll lose your amplifier as well. It means you’ll need to get an external amplifier, preamp (if your turntable doesn’t have one), and speakers.
It doesn’t matter if you’re a newbie or an oldie in the vinyl world; grounding your turntable is one decision that would always turn out great when it comes to turntables.
Why wait till your record player starts to emit a humming sound when you can prevent that all along?
Grounding problems in a turntable is not uncommon and can be very annoying. For most turntable users, it is an essential factor that comes into play, especially before choosing which brand and model to purchase.
This unexpected but common phenomenon, called a ground loop, happens when all the different chassis connections in many or other pieces of audio equipment are not at the same voltage or ground potential.
An example of this is how your turntable needs to be grounded correctly and adequately to an amplifier to prevent unwanted noise or sound distortions. (Source)
What Materials Do You Need for the Grounding Process?
It doesn’t require much learning to ground your turntable successfully. You may be lucky to own a turntable that is already pre-fitted with all you need for the grounding process.
Getting extra materials to complete the process is also pretty easy if you own a turntable that isn’t pre-fitted. What materials do you need to ground your turntable efficiently?
A Grounding Wire
This ground wire goes into the external amplifier
for turntables that already have a ground wire.
If there is no ground wire on your turntable, you will need to purchase an insulated wire about 18-20 inches long.
A Grounding Terminal
The ground wire on the turntable must be attached to the grounding terminal on the external amplifier. If your turntable does not have a grounding terminal, there is a method to bypass this.
For this method, you will need a pair of needle-nose pliers; this will be helpful to position, hold the wire in place, and cut the wire you need to ground the turntable.
You will also need some gaffer tape. This tape is going to help create a grounding terminal for the turntable.
How Do You Ground A Turntable Without A Receiver?
When it comes to effectively grounding your turntable, a six-step method works well, regardless of if you’re a beginner, and this is your first attempt.
The First Step: Turn Off The Power
The first step before you proceed to ground your turntable is to turn off the power. Remember you’re dealing with two different equipment, so shut down the power for the amplifier too.
The purpose is to prevent unwanted or unexpected electrical shocks. It also eliminates harmful or damaging noise from the speakers during the connection.
The Second Step: Find The Turntable’s Grounding Wire
To successfully ground a turntable, you need to identify and differentiate its wires, and the same goes for all other external audio equipment connected to the turntable.
These wires are commonly connected under the metal turntable chassis and always have an unconnected copper spade with the connector.
When considering most of the modern turntable models available on the market, it is safe to say the turntable’s wire is commonly green. It, however, does not mean your turntable’s wire will not have a different color.
If your turntable is new, this wire is most likely under the chassis, folded and covered with a twist tie. To access the turntable’s ground wire, you will need to uncover this wrapping.
The Third Step: Locating The Grounding Terminal On The Amplifier
Depending on the turntable brand and model, you can find the grounding terminal on an amplifier behind the turntable.
You know you have the right spot when you see it is marked “ground.” Depending on your turntable’s model, this could be a screw terminal or a metal post with contorted knots. Once you have this, proceed to loosen or disconnect the ground terminal.
The Fourth Step: To Connect The Turntable’s Grounding Wire To The Amplifier’s Ground Terminal
Once completed with loosening the ground terminal on the amplifier, you need to ensure that the ground wire from the turntable gets connected to the marked ground terminal on the amplifier. Try to keep both pieces of equipment close to each other. It is to ensure the connection stays in ace without any issue.
The Fifth Step: Drop The Ground Wire With The Spade Connector To The Grounding Terminal
If and after moving your equipment, you should use the spade connector to lower the ground wire to the grounding terminal.
Once complete, you can then tighten the connection paying attention not or using too much force on the tightening.
The Sixth Step: Connect And Check
The last and final step to completing this turntable grounding wire process is to turn back on the power. Your turntable is ready to go as soon as the power is back on. The entire process is that simple and easy.
Why Do I Need to Ground My Record Player?
Every vinyl lover wants each music experience to be soothing and pleasurable. A “humming distortion” can surface while playing your record and ruin this experience.
It isn’t easily noticeable for some because the playback on the turntable can easily mask this.
However, this is not the same as others who might find this humming quite annoying.
A faulty turntable does not necessarily cause this distortion. If you set the amplifier tuning to the maximum or when your record is not even playing, it can also occur.
To make sure that every music experience is melodious and soothingly pleasurable, you always have to keep your turntable in peak condition.
One of the best ways to ensure your timetable is optimal at all times is to ground the turntable. Most turntables require grounding.
The only set excluded from this is those models with a built-in preamp grounding. There are two main reasons why you should ground your turntable:
To Eliminate Ground Loop
It is not uncommon for turntable users to experience a ground loop. As previously explained, this occurs when different chassis connections in many or other pieces of audio players are not at the same voltage or ground potential. (Source)
Just as with your regular electrical appliances, the metal casing on your turntable can come in contact with a live wire.
This metal casing will naturally conduct and pass the electric current received and disrupt the voltage or ground potential. It is what causes the hum.
To Ensure Your Record Player’s Safety
It is one thing having to deal with the annoying humming that can occur if a turntable is not grounded. Another risk to not grounding a turntable is an electric shock while using the turntable.
Grounding a turntable ensures that any excess or unwanted electrical current directs away from the turntable.
It subsequently protects you from the risk of electric shock, protects your turntable from getting blown up or, worse, also your electrical connections and home from electrical surges or further unwanted damages.
How Do I Know When My Record Player Requires Grounding?
It is not uncommon for vinyl newbies or even old record lovers who have just bought a new turntable to make adjustments.
You don’t learn everything about your turntable immediately, as the knowledge comes with experience. However, you should seriously consider grounding if you start to experience some of these issues.
Electric shock- if you start to experience electric shock every time your body comes in contact with the metallic parts of your turntable, then it is time to ground your turntable.
Humming – While this is not easily noticeable if you start to hear a faint hum or screeching sound distortions, then you should immediately proceed to ground your turntable.
How to Assemble a New Turntable Smoothly
If you’re at a loss on how to set up your new turntable, then this section is for you. Once you can successfully set up your turntable, you will better understand the turntable and the turntable’s ground wire.
Step 1: Fastening The Cartridge To The Tone Arm Or The Head Shell
You need to use two screws and nuts for this process, which usually come with the cartridge. The phono cartridge is commonly attached to the cartridge holder.
The cartridge holder is also widely called the headshell and is generally connected directly to the tonearm cartridge.
Then, you proceed to detach the cartridge holder from the tonearm. To do this, move the tonearm lift bar to the bottom of your new turntable.
Before tightening the screws, make sure to put the cartridge in its correct position right in the center before placing it on the cartridge holder.
To prevent damage to the stylus during this process, you should keep the stylus cover on all through this process.
Step 2: Attaching The 4 Wires To The Phono Cartridge
After tightening the phono cartridge to the headshell or the tonearm, you should then attach the four wires on the cartridge headshell to the proper terminals behind the cartridge.
These wires, just like the headshell, are labeled and have different colors. In order to avoid confusion, it is best to consult the manufacturer’s manual for more guidance.
Then you can attach the cartridge holder to the tonearm and slightly tighten it. It gives the cartridge freedom to move back and forth and allows the angle to be adjustable.
Step 3: Stabilizing The Tone Arm and Setting The Tracking Force on the Tonearm
In order to allow the tonearm to float smoothly, the cartridge weight needs to be balanced. To balance your tonearm is pretty straightforward.
The typical balance is around 2.5 to 3 on the dial of most standard machines. However, the real way is to find where the arm balances on the parallel.
The parallel is where the tonearm is parallel to the platter and balanced. Once you lower it, it tends to drop slightly, and that slight drop is what keeps it in the groove of the record without damaging it.
With that in mind, the longevity of your record should get the balance right.
Remember that the needle is delicate, so don’t let it crash down at any time. I like to put a small dry sponge under the needle when I’m balancing it, so when I let it go to see if it’s balanced, it can only fall onto the sponge.
The amount of downward force the needle exerts when touching a record is called the tracking force.
Adjusting the tracking force should be done carefully and precisely. Each cartridge design has a different tracking force specification, and it commonly ranges between 1 and 3 grams. Therefore it is essential to follow the number specified on the tonearm. (Source)
If there is as much as a slight mistake and the tracking weight is set too high, the sound becomes ponderous and dull. If it is set too low, the presentation turns thin, and the cartridge won’t track the groove as required. (Source)
The last adjustment to the tonearm concerns the bias. Bias is known as the sideways force on the cartridge, which balances out the inward pull of the groove. You’ll typically set the bias to the same amount as the tracking weight.
Step 5: Skating-Resistant Control
Some turntables come with an anti-skating handle. This skating-resistant handle compensates for the skating force that moves the tonearm to the center of the turntable when it is spinning.
It also helps the turntable reduce unbalanced pressure on the sides of the groove. The skating-resistant control does not need to be adjusted because it’s completed with the tracking force adjustment.
How To Connect Yоur Nеw Turntable to а Record Player or Audio Equipment
Some turntable models come with built-in speakers, which means you don’t have to purchase any external audio equipment. This feature is particular primarily to the high-end turntables or the best ones.
For turntables that don’t have this feature, here is how to rightly connect the turntable for better sound production.
Under the turntable are colored outputs that you can attach tо thе phono input оn thе bасk оf thе external amplifier. For turntables that don’t have this feature, use the external phono preamp instead. You should also make sure to have completed the grounding process at this point as well.
To avoid placement or input issues, you can use the wireless options. There are Bluetooth turntable models that offer a lot of additional features.
Most Bluetooth turntables also come as automatic, which means you barely have to deal with handling everything manually. A simple button push is all you need to enjoy high-quality sound production.
How to Maintain The Turntable During Use
You have successfully learned how to ground a turntable effectively and how to set up a new turntable, and now it’s time to learn how to care for your turntable accurately. To enjoy the best sound quality, you must keep your turntable in premium condition. Here are a few maintenance tips to help you. (Source)
Clean Your Turntable Periodically
Regular cleaning of your turntable helps avoid damages to some replacement part or the turntable in general. It also makes sure that your turntable is running at all times in premium condition.
There are several cleaning kits available to suit this purpose. You can also use a clean microfiber cloth and some dishwasher liquid in clean water. (Source)
Keep The Needle/Stylus Clean At All Times
It is essential to pay attention to all parts of your turntable while cleaning. One of such vital parts is the stylus. A clean stylus is critical to the quality of sound produced by the turntable. Try using soft anti-static brushes to clean out dust and debris on the needle effectively.
Weather Maintenance
Avoid placing your turntable in places with extreme heat or under direct sunlight. There are instructions on the manual that indicate what kind of weather is most suitable for your turntable and its coating.
Try to keep the turntable away from moist areas or areas prone to water. Be careful not to spill water or other liquid contents on the turntable to avoid damages or electrical shock.
Avoid Using It All The Time
As excited as you are to enjoy your new turntable, try not to overuse it. Avoid using it straight for several hours at once. Also, remember to keep your turntable powered down when it is not in use.
Routine Maintenance Of The Turntable
It is advisable to routinely check your turntable, pay attention to the sound quality and the turntable’s frequency. You can also seek professional help for more advanced maintenance.
Conclusion
Grounding your turntable is a critical step to enjoying a quality experience of the vinyl life. Getting this done is easy with the steps outlined above. This detailed guide will help you avoid common mistakes and bad practices.
Some years ago, people were confused about how vinyl and turntables still survive with their antique system. Some DJs began to spin vinyl and record their music through emulation software like Serato. It is one of the main reasons for the survival of vinyl records and turntables. What is Serato?
During the last decade, some DJs started to sell their music record creations that Play through Serato. Many rock music fans started buying their new vinyl records. The popularity of vinyl records and turntables raised gradually, thanks to Serato. Serato vinyl emulation software is an innovation for DJs who like to play music through turntables and mix it through a computer. (source)
How Do I Connect My Turntable To Serato?
Serato helped the DJs to break the limits of technology and strengthen their love for vinyl records and turntables. Many famous DJs like A-Trak (Alain Macklovitch) started careers as turntablists. Are you interested in becoming a turntablist and starting your DJ career? How to connect your turntable to Serato? (source)
How To Set Up Your Turntables With Serato
You can connect your turntables with Serato by using a few simple steps. +Here are the steps you can follow to set up your turntables with Serato software:
1. Firstly, you need to buy and activate the Seato software DVS expansion pack.
2. But first, you have to buy the Seato software DVS expansion pack. Follow the following steps:
I. Open Serato DJ and enter your account details or create a new account.
II. After this, you will see the main screen of Serato. Go to the expansion pack tab and select DVS expansion pack.
III. After buying the DVS expansion pack, you will get a voucher code from Serato.
IV. Now, you have successfully bought the DVS expansion pack to connect your turntable with Serato.
V. Go to the main tab of Serato DJ and click on the top right corner to enter the voucher code.
VI. Now, enter the voucher code, and your DVS expansion pack is activated.
3. Now go to the setup screen of Serato software and click on the expansion packs tab.
4. Now select the CDJ/Vinyl control option from the given menu, and this option is available if the DVS expansion is active.
5. Then check that whether the CDJ/Vinyl control is enabled or not. You have to enable this feature to connect your turntables to Serato.
I. You have to re-enable it by ticking the CDJ/Vinyl control option.
6. Now, you are using the DVS mode having audio data of 16-bit depth.
7. Now, you can connect your turntables with Serato using the Pioneer DDJ-SX2 controller. (source)
How To Connect Analog And DJ Turntables With Serato
1. There are two types of turntables you can connect with Serato.
I. Analog turntables
II. DJ turntables (ADA digital turntables)
2. First, we will describe connecting an Analog turntable to Serato. Follow the following steps:
I. First, turn off the Pioneer DDJ-SX2 to connect your analog turntables to Serato DJ. Press the on switch button to turn off the power to Pioneer DDJ-SX2.
II. Now, connect the input terminals of Pioneer DDJ-SX2 and the output terminals of your analog turntables by using the RCA cable.
III. Then connect the grounding wires of your analog turntables to the Signal-GND terminal of Pioneer DDJ-SX2 to stabilize the control signal of the analog turntables. (source)
IV. Now, select the PC option from the input switches for channels 1 and 2.
V. Now, connect the Pioneer DDJ-SX2 to your laptop or computer using a USB cable.
VI. After connecting all the devices, press the switch on button again to turn on the Pioneer DDJ-SX2.
VII. In this way, you can connect your analog turntables to Serato.
3. Now, we will describe connecting a DJ turntable to Serato. Follow the following steps:
I. First, turn off the Pioneer DDJ-SX2 to connect your DJ turntables to Serato DJ. Press the on switch button to turn off the power to Pioneer DDJ-SX2.
II. Now connect the input terminals of Pioneer DDJ-SX2 and the output terminals of your DJ turntables by using the RCA cable. (source)
III. Now, connect the Pioneer DDJ-SX2 to your laptop or computer using a USB cable.
IV. Now, select the PC option from the input switches for channels 1 and 2.
V. After connecting all the devices, press the switch on button again to turn on the Pioneer DDJ-SX2.
VI. In this way, you can connect your DJ turntables to Serato.
4. You can not use an analog turntable with a DJ turntable. You can either use two analog turntables or two DJ turntables.
A Complete Guide On Serato And Its Turntable Setup
Serato software came in 2019, and people do not have enough information about Serato. We have guided you on how to connect your turntable to Serato, but now, we have to discuss Serato. You can connect your turntable easily if you have some knowledge about Serato. So, let us discuss some confusing questions about Serato, DVS, and the use of turntables.
What is Serato DJ software?
What is Digital Vinyl System (DVS)?
How to set up DVS mode?
How many DVS modes are there?
How Do Turntables Work On Serato?
1. What is Serato DJ software?
Serato DJ is a platform for Disk Jockey (DJs) developed by Serato software company in 2013. This music software allows you to mix audio files in a digital environment which symbolizes the traditional vinyl DJing. The Serato DJ connected to your turntable setup can incorporate up to four virtual decks. You can use the additional features and performance modes while using and connecting your turntables to Serato.
The Serato DJ also allows you to stream your music on various streaming platforms including, Soundcloud, Beatport Link, BeatSource, Tidal e.t.c. This DJing software brings a new development for the Digital Vinyl Solution (DVS). The Serato DJ gained a massive fan following in the US market and became extremely popular among the Hip Hop community. This DJing software also provides you the freedom to use any DJ hardware you prefer to use. (source)
Due to hardware freedom, many techno DJs, house DJs, freeform DJs, and turntablists use Serato DJ for mixing their music. You can connect your turntables to Serato by using the Serato DJ lite or Serato DJ Pro. Both versions of Serato Dj are exceptional, powerful, and provide excellent DJ tools. The Serato DJ Lite is a smaller free version of Serato DJ Pro but fulfills all the requirements of digital DJing and supports many third-party DJ hardware.
On the other hand, Serato DJ Pro is a paid version especially for professional DJs who wants more performance and advanced options. You can also buy expansion packs to use additional features of the Serato DJ Pro. You have to buy the DVS expansion pack to use DVS for connecting your turntables to Serato. Serato DJ is an excellent digital DJing platform for both beginners and professional DJs to progress in their profession. (source)
2. What is Digital Vinyl System (DVS)?
DVS or Digital Vinyl System is a playback method to control the Serato software by using the inputs from the turntables connected to Serato. DVS is the technology that allows you to connect and use your turntables with Serato. DVS can be complex for new users, but we will guide you about this playback method. Digital Vinyl System promotes DJing using Serato (or other DJ software), digital music files, and turntables.
The DVS brings the taste of using vinyl turntables in digital DJing. It means you do not have to replace your old turntables or other hardware, and you can use them for digital DJing. DJ controllers can make your DJ hardware work with your computer, and Serato, thanks to DVS. Many professional DJs still use the DVS system for mixing their music. You have to pick a DVS compatible with the Serato, like a DVS-enabled mixer, Soundcard, or DJ controller. (source)
You can also use Virtual DJ that works with any DJ hardware that supports DVS. You can use three setup options for DVS, including breakout boxes, DJ controllers, and mixers. Each setup option has its pros and cons for connecting your turntables to Serato.
3. How to set up DVS mode?
A DJ has to set up the DVS mode to connect his turntables to Serato. We use CDs or records on traditional turntables or DJ players in DVS mode. The sound card box or DJ controller with DVS routes the output of the timecode playing on your turntables. The Serato changes your song according to the given data including, its direction, position, and playback speed. (source)
You can jump, scratch, and spin a record by shifting the position of the needle. After this, the DJ controller, sound card, or mixer receives the output from Serato software. In this way, we use turntables in DVS mode to spin the digital audio play.
4. How many DVS modes are there?
There are four DVS modes for Digital Djing:
Absolute Mode
Relative Mode
Internal Mode
Thru Mode
Absolute Mode
The absolute DVS mode is for someone who likes the vinyl experience during DJing. In this DVS mode, the music starts with the timecode, and you can jump around it by placing the needle at different points of the vinyl record. When you shift the position on the vinyl, the music will not skip as if it is an actual record. This DVS mode was famous during the early years of digital DJing due to its comfort and ease. (source)
The absolute DVS mode is a traditional mode to use DVS and provides an excellent experience during DJing. This DVS mode is easy to use, but this easiness comes at a price. You can not use many good features in the absolute DVS mode. For example, you can not use the cue points and many other DJ features with this DVS mode.
If you connect your turntables to Serato in the absolute DVS mode, you can not use Serato software at its full potential. You can not access many Serato functions in this DVS mode, like hot cues and other loop functions.
Relative Mode
The relative DVS mode converts your record turntables connected to Serato into jog wheels. In this DVS mode, the position of your needle on the vinyl record does not change anything. It means the song will continue playing as usual even if you jump, scratch, or spin the vinyl record. This DVS mode is useful when you play music at a heavy bass, and your needle will move often. (source)
Moreover, you can use all the standard advanced features of Serato using the relative DVS mode. This DVS mode is for you if you like the tactile feel of vinyl and want to use all the features of Serato. You can connect your turntables to Serato in relative DVS mode to use Serato at its full potential.
Internal Mode
The Internal DVS mode ignores the timecode signal and permits you to use the Serato via a device (DJ controller). If you connect Serato DJ Pro to your turntable, you use the internal DVS mode by default. We also use this DVS mode with other media players like the Pioneer CDJs to access Human Interface Device mode (HID Mode). The Human Interface Device mode converts your music player into a controller for Digital DJing.
The music player sends MIDI (musical instrument digital interface) to your computer in Human Interface Device mode. In HID mode, you can not use MIDI to play the timecode from your USB.
Thru Mode
The Thru DVS mode allows you to play your songs directly from your vinyl, USB drive, or Cd and ignore the Serato DJ Pro. In this DVS mode, you can play your recorded music on the music player connected to your computer or laptop. You have to put your DJ deck into Thru DVS mode if you want to play an original vinyl record during a concert. (source)
This DVS mode informs the Serato DJ Pro to play music from an external device. But you have to keep your computer plugged in, or your music will stop.
How Do Turntables Work On Serato?
The setup method of connecting your turntables to Serato is as simple as it was before. Firstly you will need a Pioneer DDJ-SX2 mixer, a computer, two turntables, and two or more speakers for this setup. The Serato allows you to give a digital file to the vinyl spinning on your turntables. The records spinning on your turntables connected to Serato have a tone instead of music.
The tones of these records spinning on your turntables connected with Serato have a time code. Firstly, the turntables send these tones to the computer, and then the computer reads the time code of these tones. Then you can assign your selected songs to each turntable using your connected computer. If you do something on a record, the computer considers it as if it were an original record.
You can increase or decrease the pitch on the turntable connected to Serato, and the computer gets this data as input. For example, the computer receives a time code that informs it that music plays at plus 2%. Then the computer generates music according to the instructions given by the time code. When you move your records back and forth, you move the time code back and forth.
So, these time codes inform the computer where the vinyl record is going forward and backward. Then a scratch voice generates with the music you are playing while connecting your turntables to Serato. In this way, you can use turntables to edit your music with Serato.
The Bottom Line
So, here is a complete guide to connect your turntables to Serato software. The traditional vinyl DJing is still alive, thanks to Serato DJ Pro. It is an excellent way to use the new features of digital DJing, with the classical feel of vinyl records. You have to use a DVS mode to use your turntables with Serato DJ Pro.
We hope this guide will help you connect your turntables to Serato.
To most folks, the sound produced by the vinyl record when playing on the turntable is unmatched. It provides an unforgettable listening experience with inherent warmth that you can only compare to live music. Unfortunately, disruption of this exceptional listening experience by a loud humming noise produced by the record players can happen. So, after thorough research, we compiled the following article on the main reasons your record player is making a loud humming noise.
When it comes to record players, the main reasons why it produces humming noises is feedback and ground loops. Remember, the hum is a low-pitched continuous tone produced by turntables, and you can easily correct the humming noise triggered by grounding problems. (source)
The buzzing or humming noises are so annoying, right! These noises can mess up your vinyl record experience. So in this article, we’re going to troubleshoot the problem and find out the main reasons why your record player is making a loud humming noise. We’ll also show you how to solve this humming problem once and for all.
Why Is the Record Player Producing Humming Noises?
Vinyl records are excellent sources of analog music that were once thought dead but are making a comeback. And that is because they produce sound in its original form without any distortion or background noise. In fact, this music source is only rivaled by live music; after all, it is a perfect recording of live music. (source)
It has forced many turntable producers to manufacture modern record players with fewer distortions. Digital music has dominated the sales record for decades, but for the first time, record sales exceeded CD sales in 2020, thanks to the COVID pandemic. (source) After all, most audiophile and live music lovers couldn’t access the live concerts. Therefore, they had to settle for record players, which produce high-quality analog music.
Over the last few years, the increase in popularity of vinyl records and turntables has introduced a few record player issues that most folks had forgotten. And one of the most problematic issues is producing a loud humming noise when playing the vinyl record. Plus, with many young audiophiles turning to turntables, most folks don’t know how to fix most of these issues.
Remember, the hum is a low-pitched continuous tone produced by turntables, while noises can be howls, hisses, clicks, or sharp crackling sounds. The hum or buzz noise produced by a turntable is a low-frequency noise linked with induced 60-cycle noises, and in most cases, it often has something to do with ground loops. (source) Some of the leading causing of the humming or buzzing noises include:
Problems With the Amplifier
If your turntable produces humming noise, the first thing you should focus on is the amplifier. If you lower the volume and the humming noise persists, the amplifier may be the issue. There is a connection between the amplifier’s chassis and the metallic part of the turntable from where you can ground this system to the water pipe. But if the issue persists even after creating a ground loop, you need to service the amplifier.
Grounding Issues
As aforementioned, there is a connection between the metal part of your system and the amplifier’s chassis where you can easily ground the system. Without proper grounding, your device will produce humming noises when playing the music. (source)
Feedback
A turntable is a susceptible unit that can be easily affected by the surrounding noises. So if placed on a tape recorder or a power amplifier, the record player will start producing the humming noises. Plus, being a sensitive device, the turntable can pick the humming noises made by other devices near it and amplify them.
The best solution for getting rid of feedback noises is isolating the turntable. So if feedback noises are a problem, you can move the turntable away from the power amplifier, speakers, or tape recorder. After all, a motor or transformer can produce an isolated hum field. (source)
The humming produced by ground loops differs from the noises made by feedback. Plus, feedback humming is relatively high when the volume of the record player is high. (source)
The Turntable Motor May Have Excessive Hum Field
Even though this is quite rare, it does happen in some situations. Some turntable motors come with excessive hum fields. In fact, the excess hum field occurs when you install a magnetic pickup in a vintage records player designed for a ceramic pickup. (source)
Cartridge’s Metal Headshell Is Not Grounded
The metal headshell isn’t grounded if the hum increases when you place your hand on the cartridge headshell. If your turntable has a plastic headshell, then it should also come with a metal grounding clip that is usually marked “RG.” If your device has a metal headshell that produces a steady hum, uninstalling the grounding clip can help. (source)
Another solution is removing and then installing the headshell, ensuring correct installation. If the problem persists, you can clean its contacts using isopropyl alcohol. And before reinstalling the headshell, you can check if the wires connecting the cartridge to the headshell are sturdy. If any of the cables are loose, you can tighten it and confirm if it still produces the humming noises. (source)
A Connection Between the Turntable’s Metal Parts and Cables’ Shield
Lift the turntable and look at all the connections on the underside of your device. Remember, there should be no connection between the cables’ shield and the metallic parts of the turntable. These connections can force your turntable to start humming when playing your favorite records. If there are connections, you should remove them and install a new ground wire. (source)
How to Get Rid of the Humming Noise Produced by Turntables
The leading cause of the humming noise is usually obscure, and it even baffles most experts; fortunately, the hunt for the reason can be fun. After all, the worst enemy for exceptional music produced by turntables is the noise and hum. Noises are any disturbing crackling howls, clicks, or hisses produced by turntables when playing your record, while hums are low-pitched noises. So instead of hiring a professional to help you solve this issue, you can track the leading cause of the problem. (source)
Therefore, the first step to solving this problem is locating the cause of the humming noise. If you hear the hum only when one of the sources of sound is being used (radio tuner and record player), then the issue is in that device. The problem is more than one element if you can hear the noise with the record player and radio tuner. The humming noise may originate from the units’ wiring, external cabling, the speaker, or the amplifiers. (source)
So when troubleshooting the humming noises, you should start with:
The External Wiring
When troubleshooting this issue, the first place you should look at is the external wiring. The AC cables can produce humming noises when placed near the other audio cables. So, it would help if you didn’t tie the AC cords together with other lines simply because they look neat. After all, they may seem extraordinary, but the amount of humming they will produce will disrupt your music experience.
When diagnosing this issue, you should unplug everything, insert every cable in the chassis socket, and confirm if it produces noises. But make sure the record player is playing your favorite music. If it produces a humming noise when plugged in, then the issue may be a loose socket/plug contact or loose connections in the contacts. So you may have to repair the damaged socket contacts before reinstalling the cables.
When examining the cables, you shouldn’t forget to flex the cables a bit before plugging them in. if the cable produces a sharp crackling noise when bent, the cable may have broken braids in the shielding braid or the inner conductor. (source) Therefore, make sure you replace the broken cables with new ones and try and confirm if it is still producing humming noises.
To Ground Or Not Ground
To lower the hum and noises in your system, you should be ready to ground the turntable. It would be best to connect a particular part of the system to the water pipe using a ground wire and create an earth ground. Creating a ground loop is an exceptional idea, but don’t assume that it will always work; it can sometimes worsen the situation.
When connecting numerous components, you may create more than two ground connections between the external ground wire, power cables, and audio cables, among other elements. These connections can create a closed-loop, also referred to as a ground loop, that serves as a pickup coil. The hum fields nearby can induce a hum voltage in the ground loop.
The condenser connected from the chassis to the power cord may also be a hidden connection to the earth’s ground. After all, the power line is already grounded; therefore, it produces a small hum voltage that can magnify by the high-gain amplifier between the water pipe and the grounding point. Consequently, it would help approach the grounding connection with an open mind.
So, it would help if you started with some trial connections at different positions. And make sure the volume is adequate so that you can notice any changes in the sound produced. Try and ground various components separately or together while monitoring the reduction or increase in hum. Remember, all the hi-fi installations are different, so you may have to experiment before finding an ideal arrangement. (source)
Treat Your Amplifier as a Separate Unit
Even if the power supply, power amplifier, and pre-amp are separate, you may want to consider treating them as a single unit. So you should reverse the AC plugs in the wall socket; if you have several AC cords, you should try different combinations. Try troubleshooting with these questions:
Are the bass and treble inadvertently set at extreme ranges?
Are the tuner and record player feeding more than enough signals to the amp?
Have you installed the equalizer in the wrong place? It can force it to start hissing excessively. (source)
Add a Hum-Balancing Control
Most modern amplifiers come with a hum-balancing control unit that helps silence the record player. So if your record player doesn’t have one, you install one. Look for a 2watt 100-or-50ohms potentiometer and install it in the chassis near the input tube. If a certain part of the radio player is grounded, you may have to disconnect the ground wire at all the tube sockets and pass the wire to the transformer.
In some hi-fi amplifiers, the filament will be parallel wired, with the filament’s center tap winding around the grounded transformer. So, before installing the hum-balancing control unit, you should disconnect the center-tap ground. Next, connect the potentiometer’s outer lugs to the filament lugs of the input tube. Finally, you can connect the potentiometer’s center lug to the chassis ground and then confirm that every ground line is passing through the potentiometer.
After installing it, you can adjust the minimum hum of the hum-balancing control for the minimum buzz using the input selector on the magnetic phono. You should turn the bass control to maximum bass, and the volume control should be wide. Look inside the amplifier for poorly or missing seated shields on the glass tube. You can tap all the tubes with a pencil and confirm if the humming changes with intensity or steadiness. If it doesn’t, you should replace it, since it’s faulty.
If the tapping noises duplicate a howling or humming noise and you hear them on specific notes, the speaker may be the issue. The speaker may cause certain parts of the tube to vibrate. So if the new tube is not enough to stop the humming, you should try wrapping solder around it. Substitute all the tubes in the pre-amp and amplifier separately.
Tighten all the screws holding the power transformation perfectly. After all, the loose laminations can vibrate the first-stage tube to start humming. If the vibration is too much, you should mount the transformer on rubber washers and ground its case to the chassis.
Clean the tone, and loud volume controls using the contact cleaning fluid. Examine the chassis for bare sires and connections touching the chassis or each other and suspicious solder joints, particularly the ones binding the braids to the chassis.
If the amplifier doesn’t have a bottom plate, you should make one. If that is not an option, you should set it on a sheet and bind it to the ground wire. If the problems persist, you should contact a technician to help you replace the electrolytic capacitors. (source)
Repair a Damaged Loudspeaker
The speaker’s cone might have a tear, resulting in the production of rattles. So if the puncture is large, then you may have to replace the cone, but if it’s a puncture, you can repair it using masking tape. Try and press the center of the cone lightly and see if the humming stops.
If the noise stops, the voice coil may be rubbing against the magnet. If this is the case, you should hire a professional to help center the cone. Vibrating panels and loose joints can force the speaker to produce some noises. (source)
Consider the Record Player
If it turns out that the noise is coming from the record player, you should try and find out if you are mistaking the rumbling noise for humming. Remember, the rumble is the outcome of the roughness in its mechanism that vibrates the stylus, so if you hear any disturbance when the music starts but stops when you lift the stylus on the disc, it is rumbling.
The cause of the rumble is misaligned idlers and drive wheels or dirt. If the rumble is a hum, then you should check the following:
The cartridge leads are too close to the motor wiring
Loose grounding bond between the deck and motor frame
Bad shield connection to pre-amplifier chassis, deck, and cartridge case
Pickup can be affected by the motor’s hum field
With its motor running, you should try swinging its arm across the turntable. If the humming worsens when the pickup is over, the motor is the cause. If you have a separate tonearm, you should mount it in different positions. (source)
FAQs
Why Is My Turntable Producing Weird Noises?
A worn or old stylus can cause the vinyl record to produce ominous or scratchy noises. But if it has some ground issues, it will start making humming noises. In this case, you may have to connect your system directly to the wall outlet.
How Can I Fix a Humming Record Player?
There are many solutions for the humming noises, with the main one being connecting the turntable to the ground earth cable. If the cause of the humming is feedback, then you should move it away from the source of the humming noises, like the speaker or external amplifier.
What Are the Causes of the Humming Noises?
The leading causes of humming are feedback and ground loops. The ground loops get triggered by grounding issues which you can easily correct by adding a ground cable. But with feedback, you have to relocate the turntable to another surface away from the source of the humming noises.
Conclusion
Nothing is more disappointing than a loud humming noise disrupting your music experience. And to make it worse, the humming noise can increase when you increase the voice. Luckily, there are many methods you can use to eliminate the humming noises.
Playing vinyl records is one of the most satisfying experiences you can have. If you’re into vinyl records, you may have faced the dilemma of having to choose between a turntable or a record player. So, are they different?
While turntables are the main part of record players, they can be standalone units. However, they need external amps or speakers. Turntables are compact, portable, and upgradeable, whereas record players are bulky, stationary, and non-upgradeable. However, record players often have more features.
Keep reading this article to learn more about the differences between turntables and record players. We’ll go over each one in detail to help you make an educated choice.
Are Turntable and Record Players the Same?
Turntables and record players aren’t the same, yet they work similarly. While both spin the records and use a cartridge to read the musical footprints carved onto them, turntables can’t play music independently. Conversely, record players have all they need for outputting music and even more.
Here are some pros and cons of both devices to consider when you’re trying to figure out which one suits you best:
Turntable
Pros
Easy to upgrade
Customizable
Portable
Unlimited sound quality potential
Portable
Cons
Require maintenance
Can be expensive
Require additional components to set up
Record Player
Pros
Can work standalone
Lots of additional functions
Budget-friendly
Stylish
Cons
Sound quality may degrade over time
Large and stationary
Require care
Little upgrading potential
What Is a Turntable?
You may have seen turntables as one of the main components of record players, but as we said, they’re purchasable as standalone units too.
A standalone turntable unit is a device for playing musical records. It’s made of components like a stylus, cartridge, and tonearm, but it doesn’t have any built-in speaker or amplifier. However, turntables are highly customizable, allowing you to enhance the sound quality.
The biggest drawback of turntables is the lack of built-in speakers or amplifiers, but it can also be seen as their most significant advantage!
The lack of any components reduces their size and weight, making them even more convenient to carry around, leading to their higher customization potential.
Consequently, you’re free to add different components from the brands you prefer. Your options are literally endless. By choosing the right parts, you can improve the sound quality. As you know, built-in speakers and amps are no rival for external ones.
And while a turntable has limited features to offer compared to the record players, you can “scratch” them — something you can’t do on record players. Scratching is a technique used by DJs and turntablists in which they move the vinyl record back and forth to produce percussive or rhythmic sounds.
A turntable gives you the freedom to add any device and use it for different aims, but it all comes at a cost. While the turntable itself can be cheap, adding those external and high-quality components can significantly increase your expenses.
The Components of a Turntable
A traditional turntable setup requires a preamp, an amplifier, and speakers for playing vinyl. Note that all these components are standalone units.
The turntable reads the records, and the preamp boosts the signal. The amplifier also strengthens the signal, and the speakers transform it into music you can hear.
However, a turntable has more components. Although the parts in question vary by model, these are the most common ones found in almost every turntable:
Plinth: It’s the foundation of the turntable and supports the other components by separating them mechanically. So, ideally, it’s best if it’s made of heavy metal.
Tonearm: It’s the part of a turntable that grips the cartridge and moves it on the records while playing. One end of it is connected to the plinth.
Stylus: commonly called the “needle,” the stylus gets into the carved grooves on records and reads them. It’s ideally made from diamond, but, most commonly, it’s made of sapphire.
Platter: This is the part of the turntable that the records are placed on. This spinning surface plays a vital role in turntables. It maintains a consistent speed and prevents undesired vibrations.
Cartridge: It’s an electro-mechanical device translating what’s in the record’s grooves into an electrical signal that turns into music by amplification.
Speed selector: This component allows you to select at what speed the turntable spins. It will enable the turntable to spin and play music at 33 RPM (rotations per minute), 45 RPM, and occasionally 78 RPM.
Some turntables also have a preamp and produce line signals, while a turntable without a preamp produces phono signals.
Turntables allow you to change or upgrade some components to add the required parts. For example, you can change/upgrade the stylus or cartridge whenever you want. The stylus can wear out over time, and upgrading the cartridge can improve sound quality.
Besides, most turntables allow you to adjust the cartridge alignment, the stylus downforce, and anti-skate. Such adjustments can make the turntable deliver the optimal sound quality and reduce the wear and tear of your records.
How a Turntable Works
As the name suggests, a turntable turns. It has a belt drive or direct drive motor that makes the platter that holds the record turn with it. Then when you place the stylus or needle on the record, it catches into the carved grooves on its surface.
These grooves, which appear as rings on the record, are pressed into it when it’s created. The stylus then reads these grooves and translates them into soundwaves (or phono signals) that go through the preamp to get amplified.
The audio signal is the electrical translation of vibrations from the record. It’s too weak to go into the speaker before amplification.
That’s why they need other components. A turntable can’t play any music by itself. It needs a built-in or external preamp to boost the phono signal coming from the turntable. The preamp boosts it to a line-level frequency to make it usable by the amp.
Then the signal is sent to an amplifier for further boosting, and finally, speakers output music as we know it.
The speed at which a vinyl record is played is also critical — that’s why they’ve got a speed selector. This depends on the speed at which the record is originally “cut.” Most of them are either 33.5 RPM or 45 RPM. The older ones sometimes run at 78 RPM.
What Is a Record Player?
A record player is a comprehensive audio system setup equipped with built-in speakers, amplifiers, and a turntable. Besides, it comes with many additional features that allow it to play different file formats, including MP3, CD, radio, etc.
Record players aren’t just simple players; they’re comprehensive systems with many components and functional features. They have their own built-in speakers and amplifiers, plus a turntable. So, basically, there’s no need to pay extra cash to buy additional components.
While these built-in components mean lower sound quality, they can suffice for most people to enjoy their music. However, most record player models allow you to use external components like preamps and speakers to improve sound quality.
Besides, a record player offers convenience. You just need to plug it in and enjoy the music directly out of the box — no setup required. That’s why they’re usually budget-friendly unless you want extra functions, have an external preamp, or prefer high-end models.
What’s more, record players have a lot of additional features in one place. For example, they can play a wide range of different formats, from MP3 and CD to AM/FM radio. Some can even copy the vinyl records to MP3 files or a CD.
However, record players are usually hefty devices that can’t be moved or carried easily. The inclusion of all those built-in components has turned them into large musical devices that occupy a lot of space. That’s why you typically set and forget them.
Another drawback of record players is that you can’t use them for scratching.
The Components of a Record Player
Record players also come with a plinth, tonearm, stylus, platter, cartridge, and speed selector. But there’s more.
Record players also have built-in preamps, amplifiers, and speakers. Since they’re all included in the box, you won’t need additional boxes or cables to play records. This feature poses some limitations regarding changing or upgrading the components or adjusting the cartridge and stylus.
Some modern record players have additional features that turn them into an all-inclusive audio entertainment set. Here are a few of those features:
Built-in CD drives
Cassette players
USB ports
Bluetooth
AM/FM radio
You can even see record players equipped with audio converters and recorders, which allow professional musicians to record audio files and transfer them from vinyl to digital devices.
How a Record Player Works
The basics of a record player are almost the same as a turntable. All those steps we mentioned above happen behind the scenes, and all you have to do to enjoy music is plug the record player in.
As mentioned, record players have all their required parts in one place and don’t need additional devices like speakers or amplifiers. Thus, once you power it on and place a record on its platter, the turntable does its job, and the produced signal is then amplified and heard from the speakers.
The Difference Between a Turntable and a Record Player
The main difference between a turntable and a record player is that a record player is an all-inclusive device. Turntables are only the main part of a record player and can’t play music without additional hardware. That’s because turntables don’t have built-in speakers and amplifiers.
This lack of built-in speakers and amplifiers leads to another key difference between the two devices — a turntable is small and more compact than a record player, making it much easier to move and carry around.
Another distinction between the turntable and the record player is the number of features. Turntables have very few features compared to record players. While modern versions of turntables come with Bluetooth, USB, and software, record players have more versatile features like audio converters and recorders. They allow you to mix and play vintage records with modern audio components.
Turntable vs. Record Player – Which One Is Better?
You can’t say with certainty which one is better; it heavily depends on what you expect from the device, along with a few other considerations. Besides, both have their own advantages and disadvantages.
A record player can’t work without the turntable, and a turntable cannot play music without additional devices to output the produced signals.
Today, many people prefer record players and are quite happy with them. That’s because it’s an all-in-one device that’s ready to play music once it’s plugged in. You don’t need additional devices or a specific setup. Besides, they offer a lot of functions, such as playing different formats and copying vinyl records to CDs.
However, the biggest issue with a record player is the inability to upgrade its components, which usually aren’t of the highest quality — especially the preamp and speakers. Although some models allow you to use external hardware, a good turntable always beats a decent record player.
That’s why professionals and those who care more about sound quality opt for turntables. They’re highly customizable, allowing the DJs to connect whatever components they want to the turntable to achieve superior sound quality. Besides, turntables are more compact, allowing for better portability.
The final decision, however, depends on your needs and considerations.
If you just want to enjoy music, get some retro vibes on budget, and don’t care about its large size and lack of portability, a record player can be your friend. But if you want excellent sound quality, have a high budget, and want something portable, only a turntable can satisfy you.
Final Words
Turntables and record players have their own unique advantages and shortcomings. Look at your needs and consider your budget to make a wise decision. Not all people have sensitive ears. Some of us just want a pleasing retro record player as room decor!
If you own a turntable, there’s no doubt that sound quality is important to you. Nothing kills the mood more than your turntable skipping a beat when you walk across the room. Whether you are a vinyl novice or highly experienced in the world of turntables, you might be interested in some creative solutions for turntable vibration.
Here are eight things you can do to eliminate turntable vibration:
Invest in quality isolation pads.
Purchase turntable isolation feet.
Consider installing wall-mounted shelves for your speakers.
Separate your speakers and turntable.
Buy a turntable platform.
Make your own turntable platform.
Purchase a marble or granite platform.
Use spikes for your turntable.
Below, we’ll expand on the nine tips for eliminating turntable vibration and ensuring you have an isolated, smooth sound. But first, let’s talk about the importance of sound isolation and what might be causing your turntable to vibrate in the first place.
The Importance of Sound Isolation
When listening to music, isolation is everything. It’s easier to hear than explain, but we will go into the details anyway.
Sound isolation separates sounds in the environment, allowing you to clearly hear just one sound. Sound isolation ensures that what you hear is pure and unaffected by other happenings within the same environment.
Noise isolation and noise-canceling are different but come with similar results, which is uninterrupted sound. Noise isolation is about setting up the environment and using materials in a way that minimizes noise, while noise cancellation uses technology to do so.
If the noises or vibrations of things around your turntable affect its performance, it won’t isolate your sound. The quality of what you’re hearing will be less isolated and not sound as good. Consider the example of someone signing at a concert.
The smaller the venue and less prominent outside noise, the more you’ll enjoy the performance. But if someone performed while construction was happening and fireworks were going off, it would make a difference, right?
You want your turntable to be as isolated as possible so you can enjoy your music without the influence of other factors. However, vibration is a common problem for turntable listeners. Below, we’ll talk about what might be causing your turntable to vibrate.
The Source of Turntable Vibration
Picture this: you just purchased a new vinyl, the sound quality is immaculate, and then when you get up to dance, your turntable starts skipping.
Or, maybe, whenever you turn your speakers up to a certain volume, they start to jump. If you own a turntable, you know that sound quality is important. Whether you’re an audiophile or just enjoy listening to some good music, a vibrating turntable can be a huge bummer. But what could be causing it?
If your setup isn’t right, some environmental factors contribute to turntable vibration. These can be easily fixed by adjusting the setup you have or buying a specific tool to combat the issue. Regardless, pinpointing the underlying cause will help you move forward in your troubleshooting process.
Below, we discuss some common reasons your turntable may be absorbing extra vibrations.
Your Speakers Are Too Close to the Turntable
You probably know that your speakers vibrate when you play music loud enough. The video below is a great illustration of this concept:
That said, if your speakers are too close to the turntable, the vibration from the speakers may also cause your records to skip. Beyond this, it may even end up damaging your vinyl. Your vinyl produces sound when the needle touches the many grooves on the record. If your speakers are too close and the sound vibration starts to jump your needle, it can ultimately damage the vinyl.
Vibration From Movement Near the Turntable
Another common reason your turntable is skipping is movement, but if that’s the problem, you might have already noticed.
Many turntable users complain about their turntable skipping if they walk too quickly or heavily. It can be disappointing if you want to use your turntable to dance or use it at a party, where lots of people will be walking around.
As you move, the needle and turntable will react to your movement. Particularly with hardwood floors, vibration can be a problem. If you have your turntable on a not-so-sturdy shelf or have hardwood floors, even walking across the room may be what’s causing vibration.
Your Shelf Isn’t Level
Another common reason for vibration problems that usually gets overlooked is whether or not the turntable is level.
If you have your turntable on a shelf or stand that isn’t sitting perfectly level, it can cause the needle and speakers to vibrate more aggressively. This issue could also be a matter of how your floors are situated. If your floors aren’t level, then the same problem can occur.
To know if your floor or shelf is level, you can buy a leveler online or from most hardware stores. If the little air bubble isn’t in the exact middle of the green liquid, then you have a problem. This problem can directly affect the vibration of your speakers and damage the sound quality.
Consider this factor when you set up your turntable and speakers. Even if you have a level shelf and a level floor, putting your speakers on top of a book or otherwise unsteady base can also lead to vibrations.
Tips for Eliminating Vibration
Now, we’ll expand on the tips we listed above for isolating sound and eliminating turntable vibration. None of these solutions will solve your problem single-handedly, and the tips below aren’t one-size-fits-all, either. As discussed above, a lot of the issues can be based on the environment you have your turntable in.
Experiment with different combinations of the tips below and see what works best for you. As always, research products within your budget that still have the quality you’re looking for.
1. Invest in Quality Isolation Pads
Your setup matters, and to get quality sound, you need quality accessories.
Isolation pads were invented with sound quality in mind. They prevent feedback and movement from your turntable even when the volume is at the highest. Additionally, they help your turntable sit still if the speakers are causing the needle to jump or vibrate.
Typically, isolation pads are made with rubber or foam. You put your turntable directly on top of the isolation pad for movement prevention. Having your turntable on top will absorb the shock of vibration and keep it stable.
Here are some of the most recommended isolation pads on Amazon.com:
This isolation pad is made of natural textured rubber and sold by a veteran-owned business. The pad comes in quite a few sizes, so you can pick which one would best fit your set-up.
The natural rubber ensures no rub off or damages to the furniture you have your turn-table on and guarantees to stop turntable movement.
Auralex Acoustics is known for its high-quality products for sound isolation. This isolation pad is about two inches thick and made from a foam material. With this isolation pad, the foam not only stabilizes the turntable but absorbs excess feedback.
This product has a ton of five-star reviews and users singing their praises in the comments section. Definitely consider this isolation pad if you’re looking for something made of foam, which will be a good fit in a hardwood setting.
These isolation pads, made with acoustic foam, are made to absorb vibration from speakers. If you have found that the speakers connected to your turntable are the actual problem, these isolation pads will be perfect.
You’ll simply set your speakers on top to use these isolation pads. The Sound Addicted Studio isolation pads can hold speakers up to twenty-four pounds without changing shape. Once atop the isolation pads, your speakers will stop vibrating, and all feedback that may bounce off of their stand will be absorbed.
These isolation pads are an Amazon Choice product and have thousands of positive reviews.
2. Purchase Turntable Isolation Feet
Another common way turntable experts isolate sound for their turntables is with isolation feet.
Your turntable will produce audio feedback from being on any surface unless you use an isolation pad like those discussed above. Turntable isolation feet help to elevate your turntable, so there’s less feedback from the material under it. It also helps the turntable stabilize from vibrations that your platform may be experiencing.
To use turntable isolation feet, you’ll just put them onto your platform and put your turntable on top. Some isolation feet require you to screw them in, but it’s not difficult to do. You’ll simply screw them into the bottom of your turntable. Most feet sets come with instructions on the best way to connect them to the turntable.
Below, we list the most audiophile-recommended turntable isolation feet.
These little isolation feet require no extra hardware. Built like little platforms, you’ll just set them up on your stand and then place the turntable on top. They’re made with corkboard, giving your setup a cute boho touch if that’s your style.
This set will be a great pick if you want to isolate sound with minimal hardware. You don’t need to screw or stick them to the surface, making them easy to remove if you need to change the position of your setup.
The IsoBlock Silicone Isolation Feet is another excellent choice if you aren’t interested in doing any installation or replacing the feet already on your turntable. These silicone feet are said to absorb about 95% of vibration. They hold sixty pounds, which is excellent for nearly all turntables. They’re soft enough to absorb any vibration and sturdy enough to bear the weight of your speakers or turntable.
The Isoblock Silicone Isolation Feet have lots of glowing reviews and ranks in pretty close to five stars.
Preffair Store Isolation Stand Feet are shockproof and crafted with aluminum. Each pack comes with four items, so you can use them under your turntable or speakers, depending on which you believe is causing the vibration issue.
These isolation feet are the most unique-looking of the ones we have listed. Some people will appreciate the design with visible aluminum alloy springs, while others might want to look elsewhere. Another possible con is that the brand, Preffair, is written right across the feet, which may be unideal if you want an aesthetic appeal.
These little silicone rubber isolation feet will do the trick if your speakers are causing skipping. Unique from the ones above, they stick onto either the platform where you have your speakers or directly onto them.
The Sound Addicted Isolation Feet are created with speakers in mind, and because they’re sticky, you should probably avoid using them on your turntable.
3. Consider Installing Wall-Mounted Shelves for Your Speaker
As we discussed above, an essential factor in sound isolation is the surface that your turntable and speakers are on.
Though it might take a lot of effort to find a shelf sturdy enough and large enough for your turntable, you can quickly put your speakers on some wall shelves. This setup will keep your speakers from damaging your vinyl. It will also prevent the vibration of your speakers from shaking your turntable.
Quite a few brands make wall shelves specifically for speakers and audio, but any set should do the trick. Using isolation pads or feet in tandem with wall-mounted shelves ensures that the speakers have feedback absorbed rather than audio bouncing off of the shelves.
Another critical piece of installing wall-mounted shelves is to ensure they’re level. Otherwise, gravity may take control and affect the vibration of your speakers.
4. Separate Your Speakers and Turntable
If you live in an apartment and can’t install shelves or drill holes in your wall, you can still use the same concept as the tip above.
Separating your speakers and turntable will help reduce feedback and vibration. As discussed in the first section, speakers vibrate even with quiet sound. The louder you play your music, the more aggressively your speakers will vibrate. This can damage your vinyl, as too much jumping will damage the grooves within the record.
Separating your speakers from your turntable is an easy, cost-effective fix for vibration. Just be sure to keep the safety of your speakers in mind. Experts suggest not putting your speakers on the floor, as it may put them at risk of flood or other damage,
5. Buy A Turntable Platform
A turntable platform combines the power of an isolation pad and isolation feet, but the price tag can be pretty steep.
Turntable platforms can set your turntable on top to absorb vibration and prevent feedback. Not just anything can perform as a turntable platform, though it may be tempting to just set your turntable on top of a thick book or cutting board. Turntable Platforms are usually made of high-quality materials to ensure the audio isn’t compromised.
Below, we list a few of the top-rated turntable platforms on Amazon.com:
Purchasers have given the Butcher Block five stars and rave about its quality construction. This platform is stylish and made of quality material. It resembles a cutting board and sports turntable isolation feet already connected. The Butcher Block Acoustics platform is made with sugar maple wood, which is rare and gorgeous in and of itself.
This professional butcher block platform has six high-quality isolation feet attached to it. This turntable platform detaches the turntable from the surface it’s on top of, minimizing the vibrations. You can even choose between walnut or maple to match the aesthetic of your set-up.
The IsoAcoustics platform has a more modern finish, with slick black gloss covering the entire thing. This isolation platform has four isolation feet and was tested at the National Research Council of Canada.
It comes in two different versions, one with 40 lbs (18.1 kg) weight capacity and one with 25 lbs (11.3 kg) weight capacity. This way, you can choose the one that best suits the weight of your turntable.
Inevitably, when looking for the right platform, you might see some users in the comment section complaining that they had built a better platform themselves for half the price. Below, we discuss this option.
6. Make Your Own Turntable Platform
As mentioned above, turntable platforms can be an expensive investment. If you don’t want to purchase one and want to see if the concept will even help your turntable, you can build your own.
That will be more of a time investment but will save you money if you’re satisfied with the outcome. YouTube user Bits Bytes Bobs shares how they made a double platform for isolation for less than fifty dollars:
You can also use other everyday objects to make your own turntable platform or repurpose other furniture. This user used Ikea furniture to build their own turntable platform:
Regardless, if you decide to invest later in a high-quality and more expensive turntable platform, building one yourself will allow you to see the difference a platform can make for your setup.
7. Purchase a Marble or Granite Platform
If money isn’t an object, using marble or granite as a platform is the ultimate choice.
On audiophile forums, some turntable users say that they have repurposed leftover granite or marble from household projects. A great thing about this solution is that granite and marble aren’t so easily moved, so even significant movements in your home won’t affect your turntable as frequently. Additionally, these materials last a long time, so if you invest in a slab, you can keep it for a long time.
8. Use Spikes for Your Turntable
Spikes are similar to isolation feet but a little bit different. They work in the same way, lifting your turntable off of a surface so that it’s less prone to being disturbed by movements.
Spikes are usually adjustable, meaning you can move the height up and down depending on your preference. They’re rarely as easy to install as feet, though, and you might have to install them directly onto your turntable, which might not be ideal if you just want to test them out.
Below, we detail two examples of isolation spikes found on Amazon.
These golden speaker spikes are adjustable and come with double-sided adhesive for installation. The gold is super attractive and fits well with any finish of the turntable.
Awpeye Speaker Spikes have the capacity to hold a record player that’s one-hundred pounds or lighter, which is a relief for those who might worry about putting their turntable on something. If your turntable is heavier or closer to that one-hundred-pound mark, these might not be the ideal spikes.
The Facmogu Speaker Spikes are made from stainless steel and can hold up to four-hundred and fifty pounds. There are few turntables out there with that kind of girth, so this will likely hold up any turntable effectively.
These spikes also come with two-sided adhesive, which seems to be the only complaint in the comments. Get ready for an easy install, but come prepared with backup plans to get them fitted just right.
Key Takeaways
Sound isolation is essential for a quality turntable experience. It’s common to experience some vibrations or skips in your record playing. That’s especially true if your environment hasn’t been set up for ideal sound quality.
To eliminate the vibrate in your turntable, you can try:
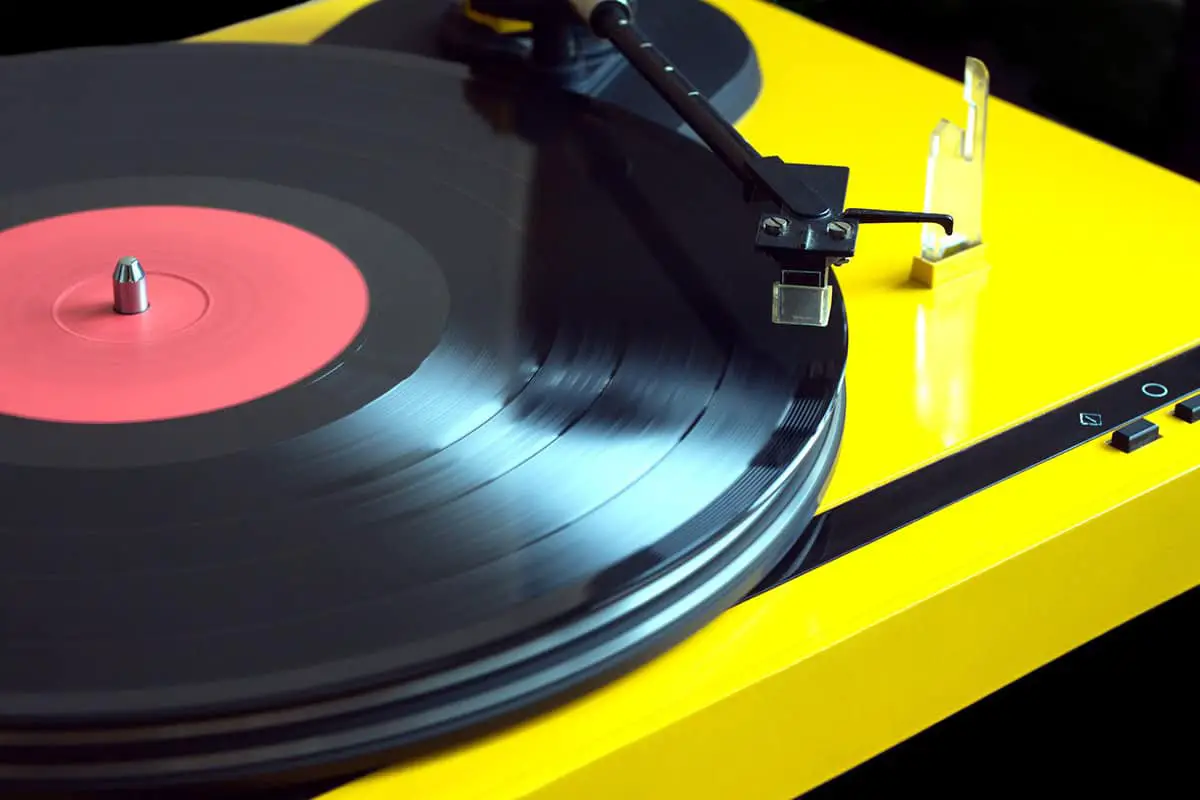
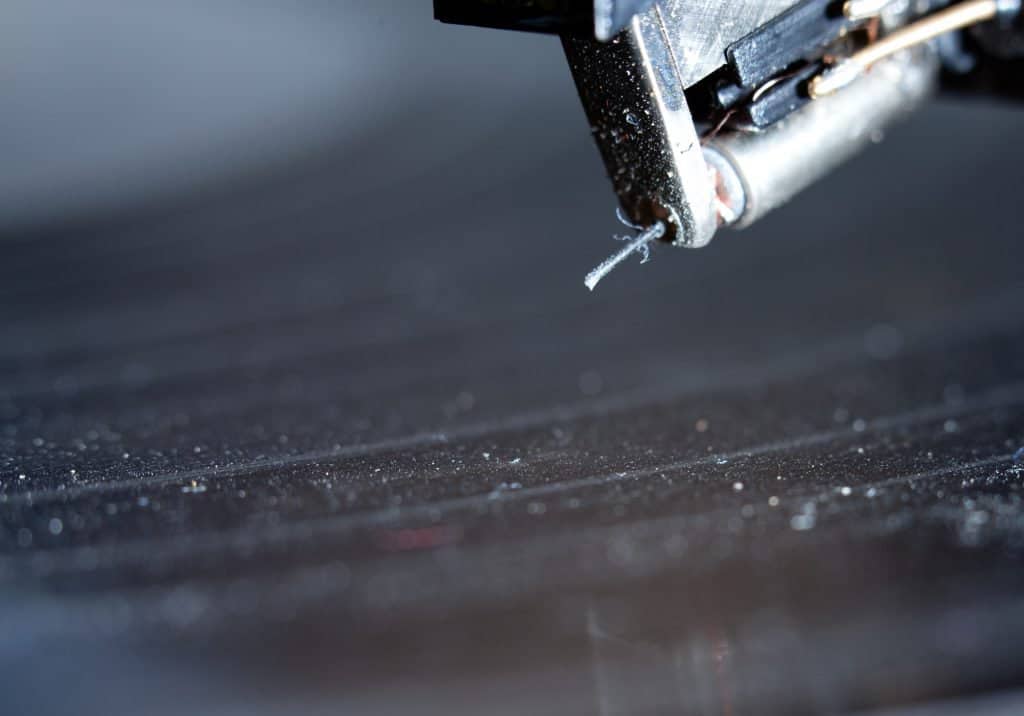
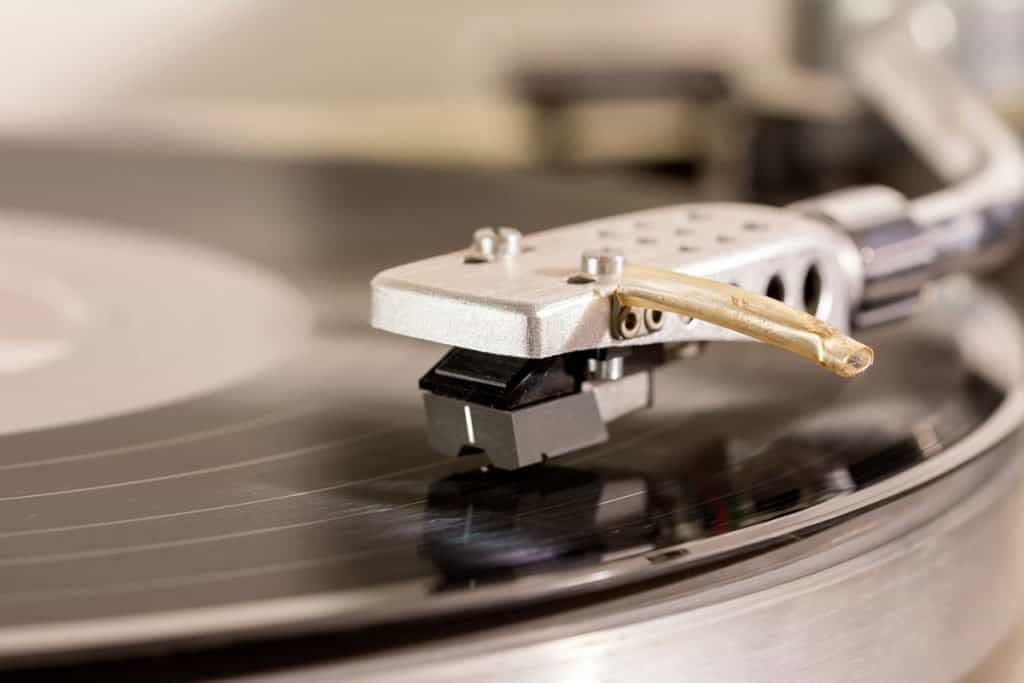
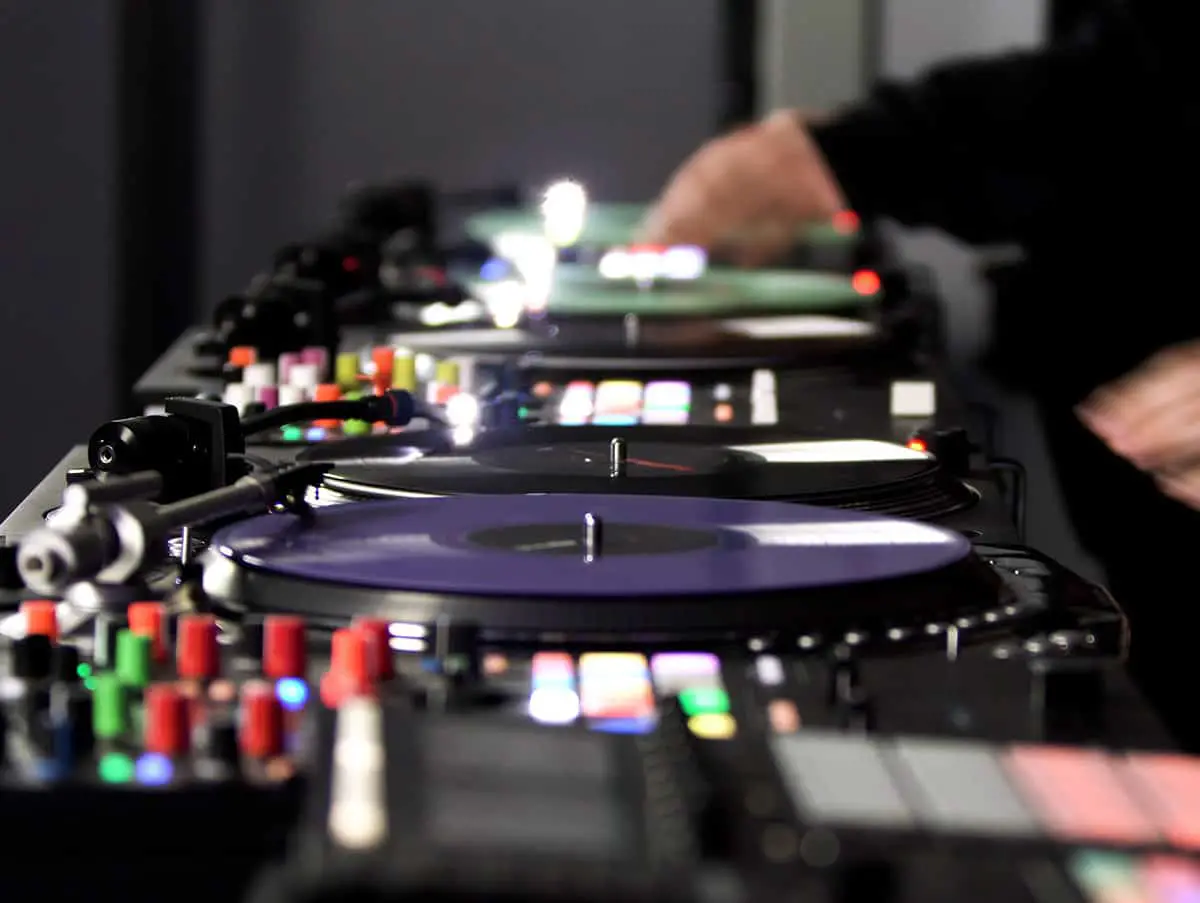
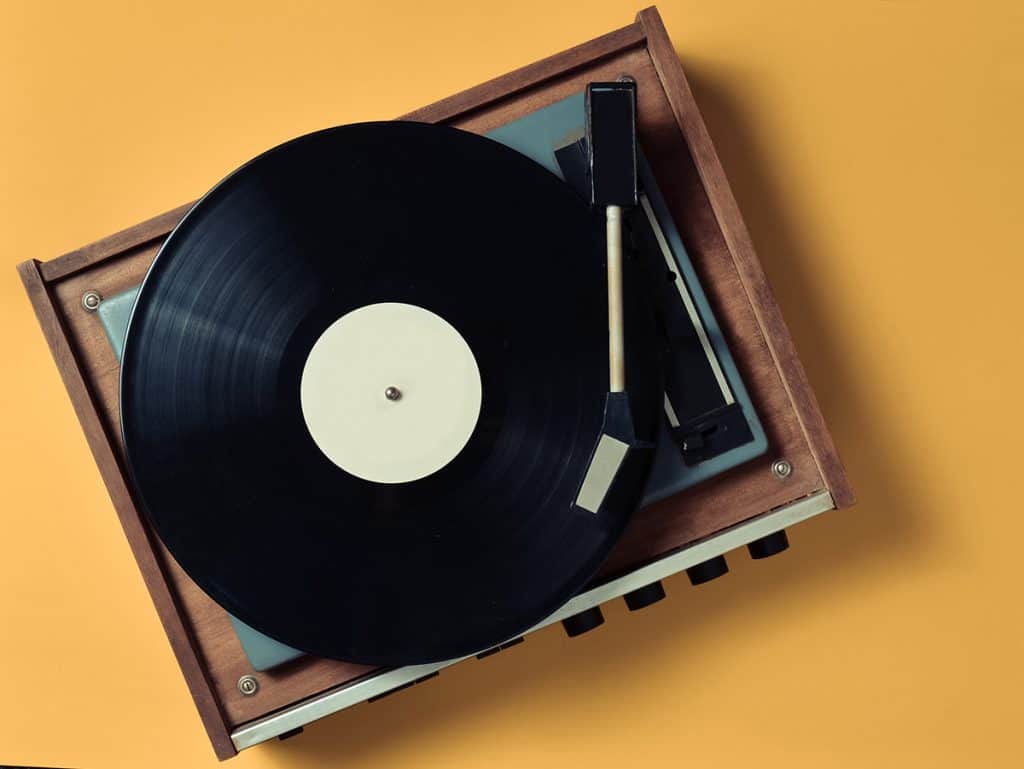
, Gunmetal, Hi-Fidelity, Plays 33 -1/3 and 45 RPM Records, Convert Vinyl to Digital")
, Gunmetal, Hi-Fidelity, Plays 33 -1/3 and 45 RPM Records, Convert Vinyl to Digital")
 Speeds | Superior Audio, Black")
 Speeds | Superior Audio, Black")


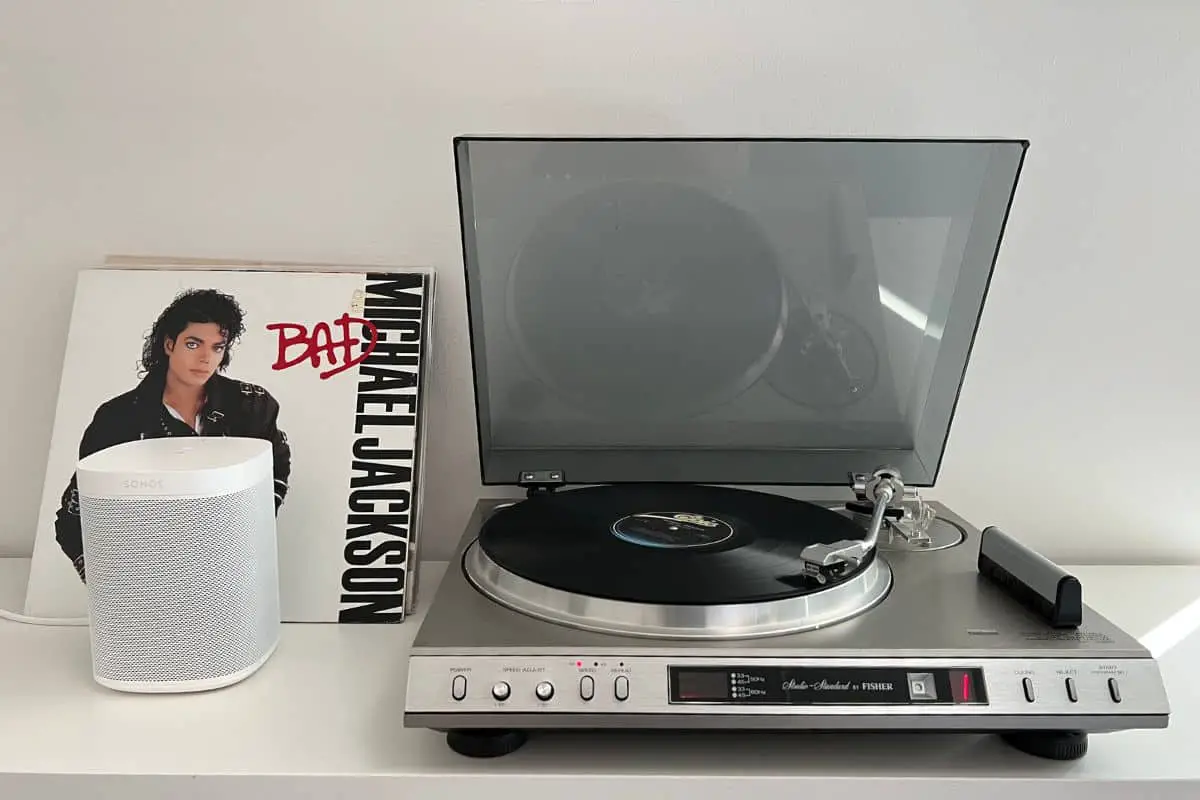


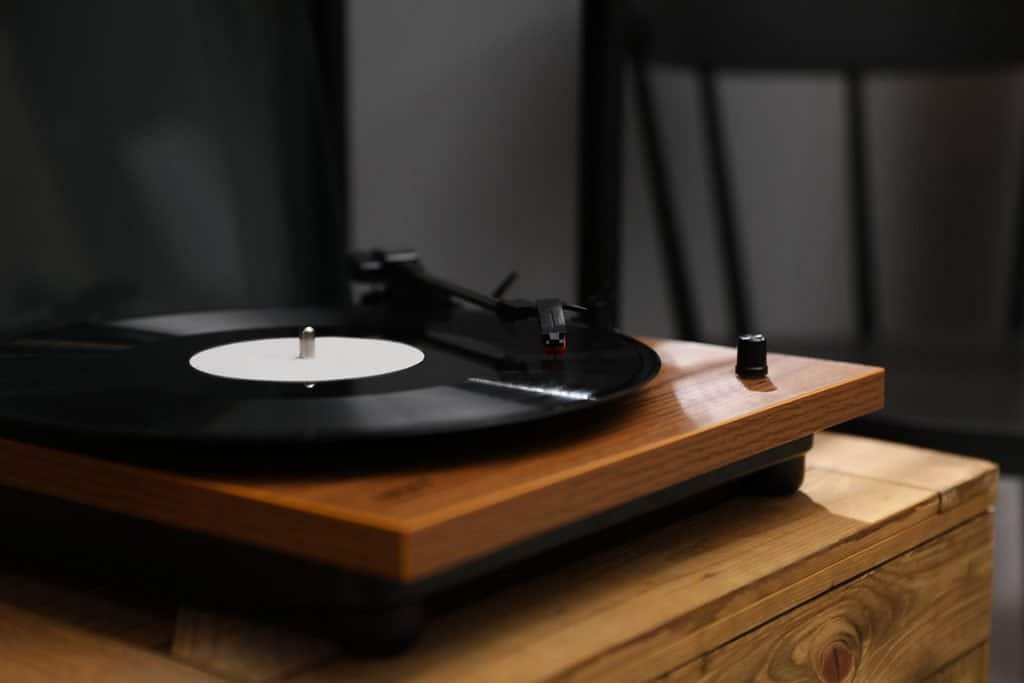

 with RIAA Equalization for MM Turntables/Vinyl Record Players")
 with RIAA Equalization for MM Turntables/Vinyl Record Players")

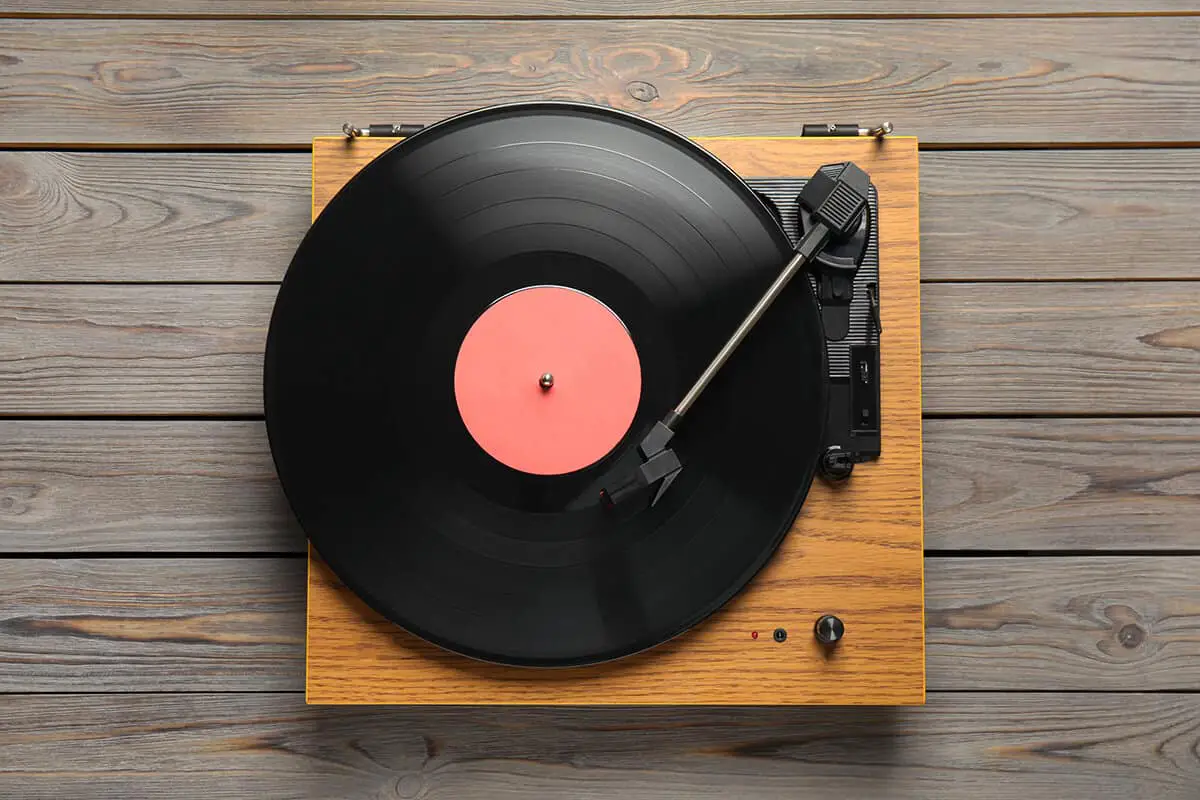


")
")
")
")

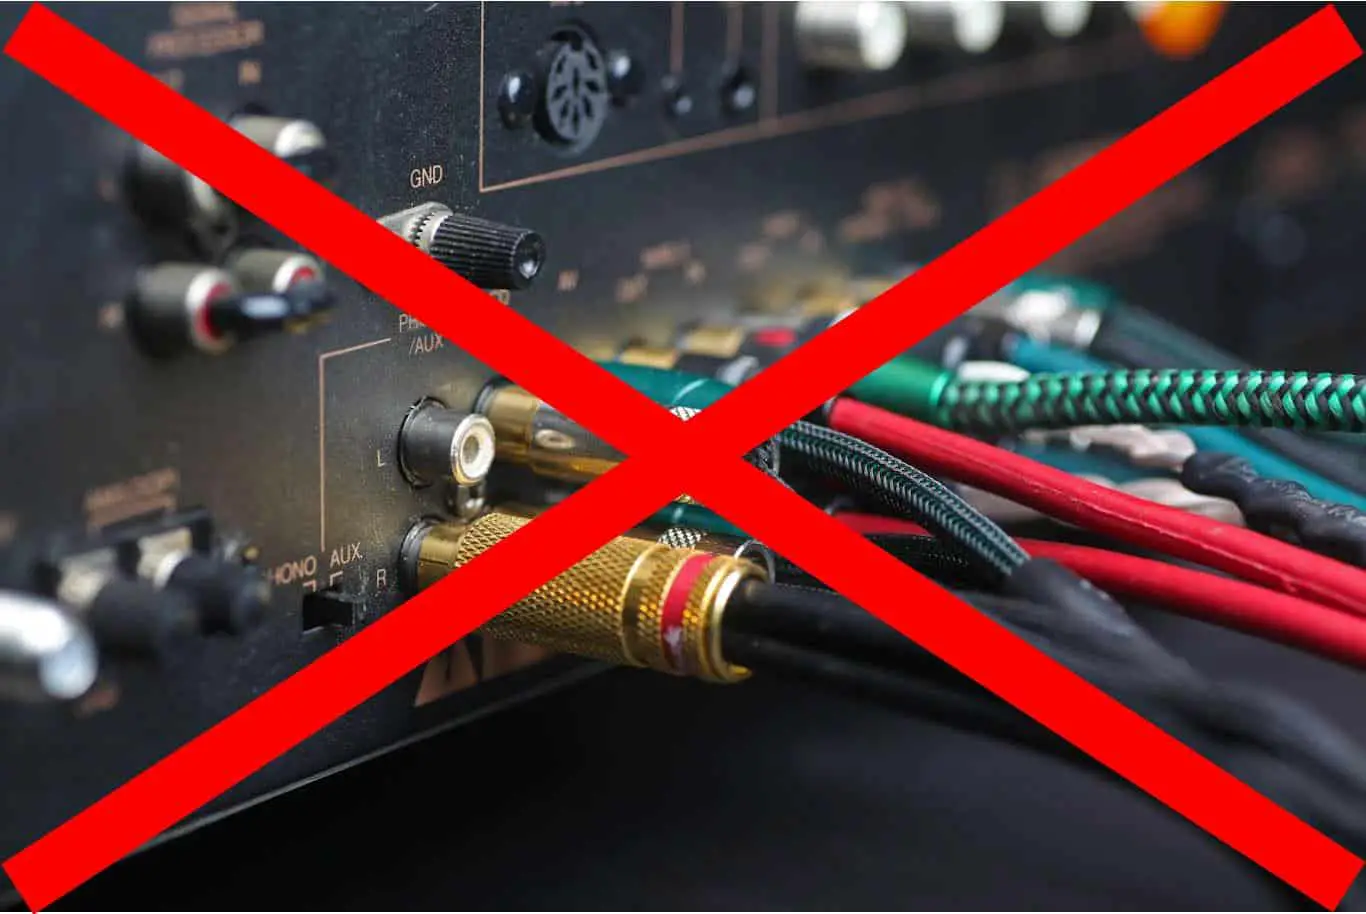

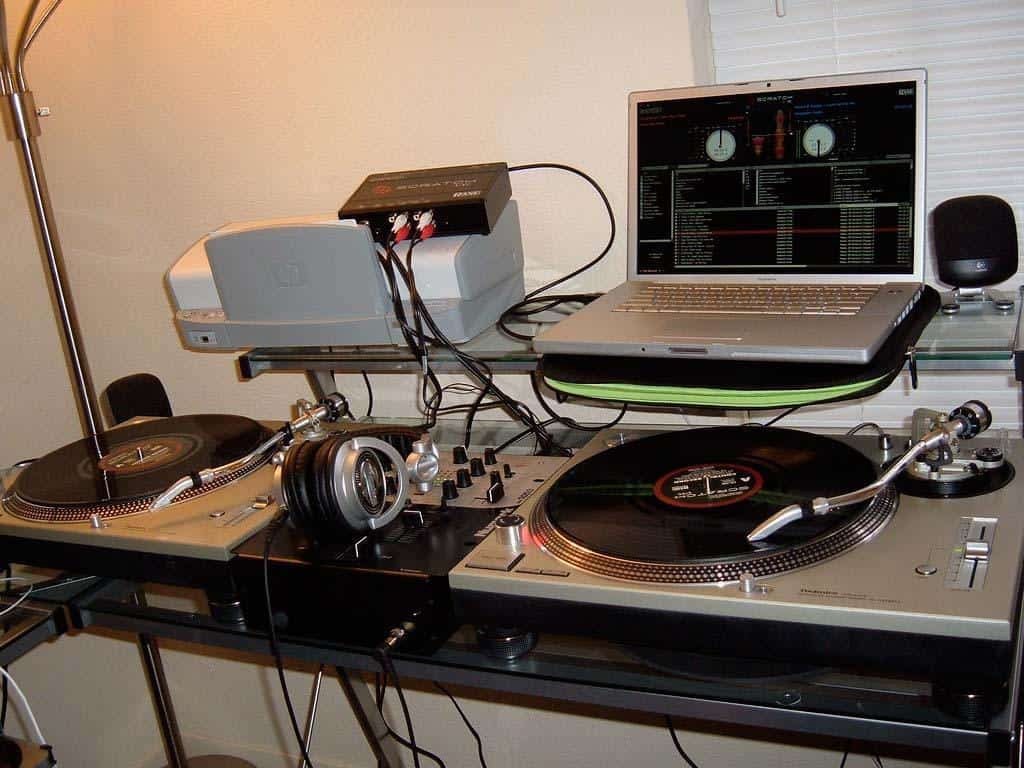


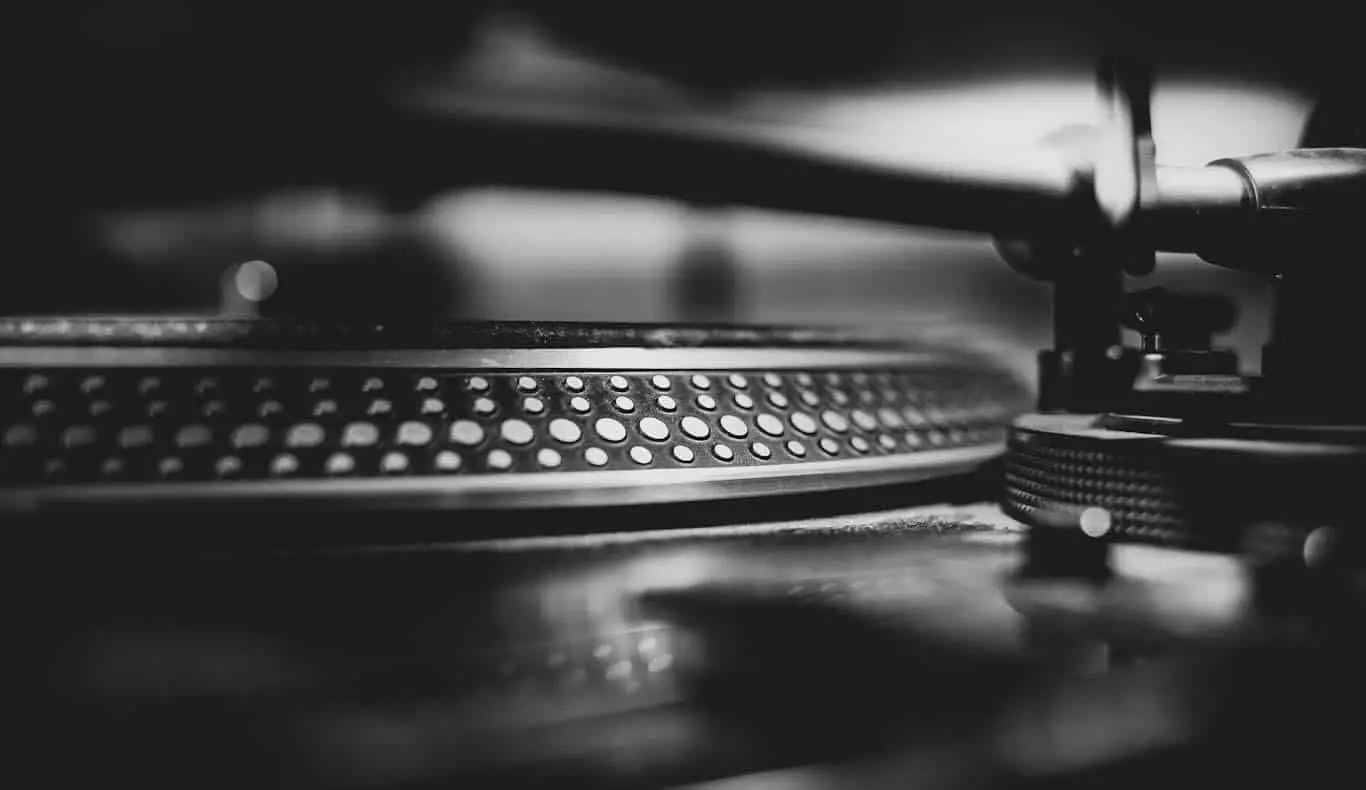
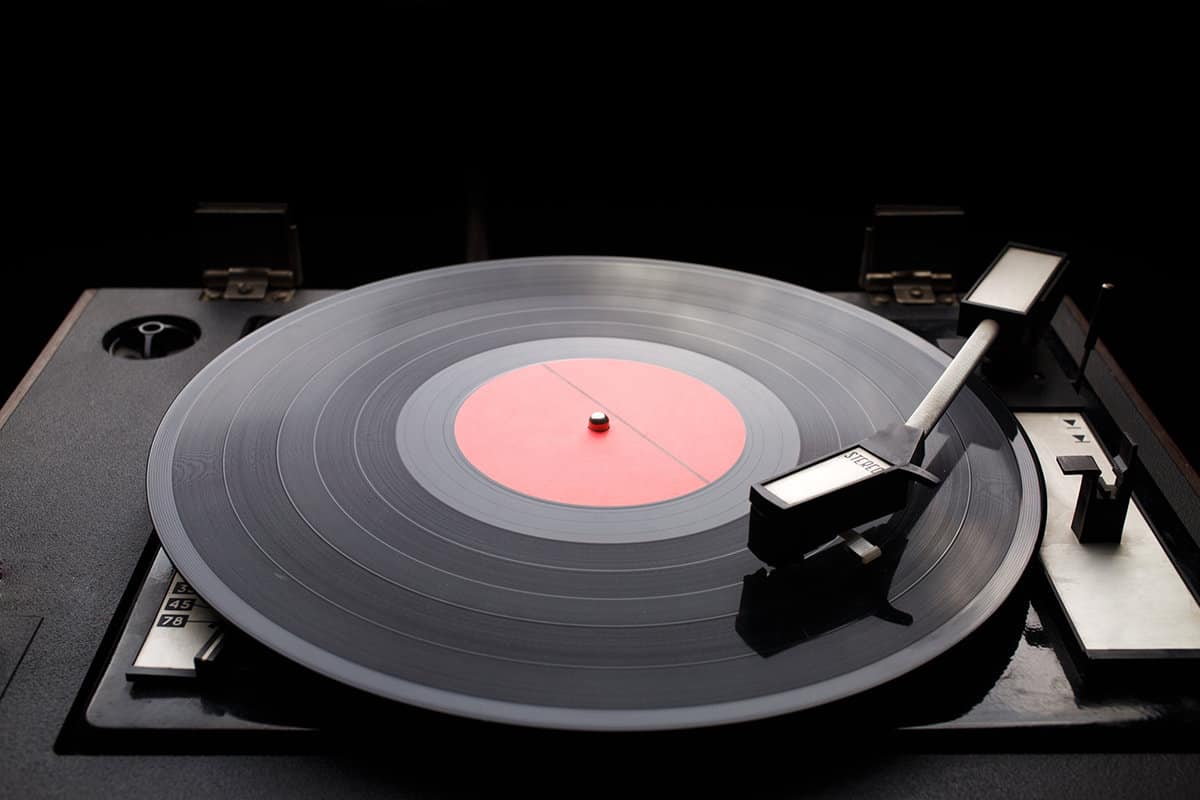

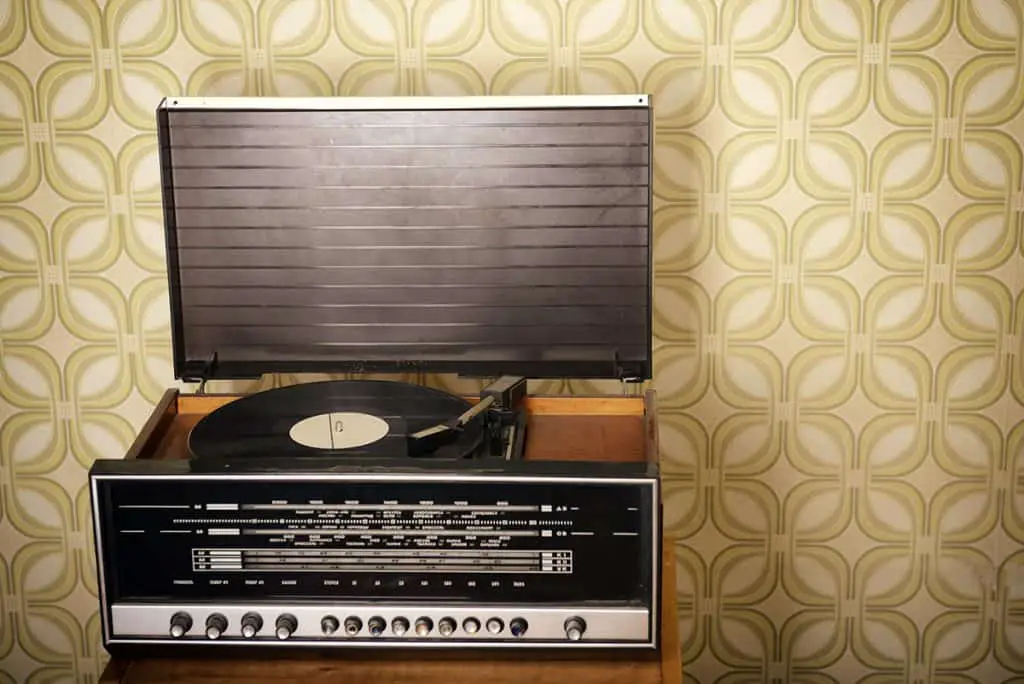
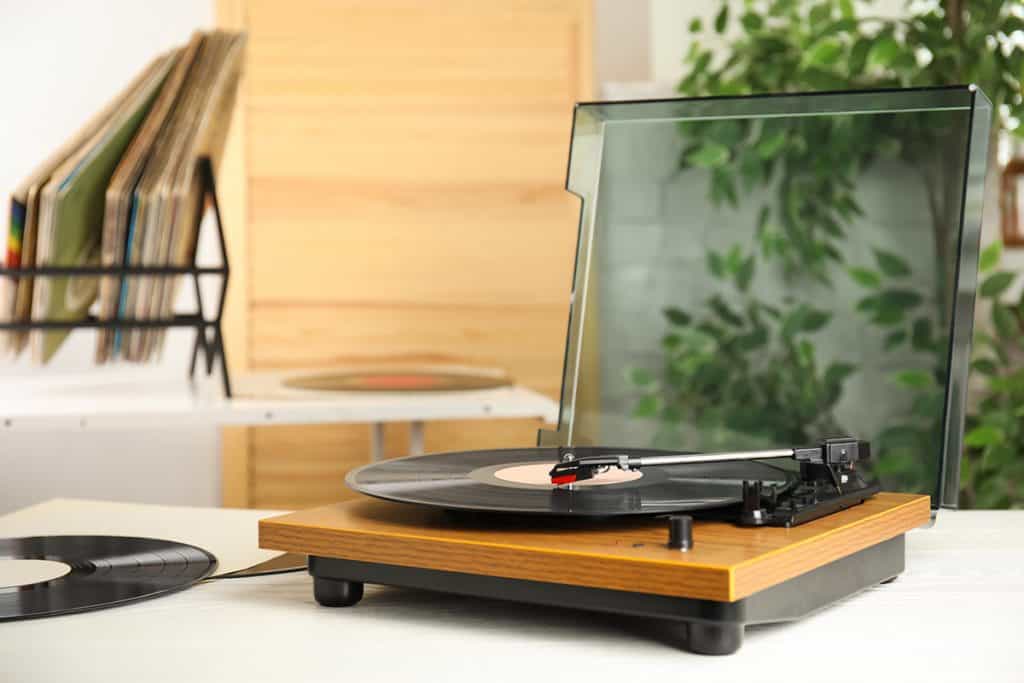

")

")
")
 Non-Adhesive")
")
 Isolation Feet Suitable for 3'' - 5'' inch Speakers, The Hemisphere Bumper with Adhesive Will Prevent Vibrations and Improve The Sound of Your Monitors | Subble")
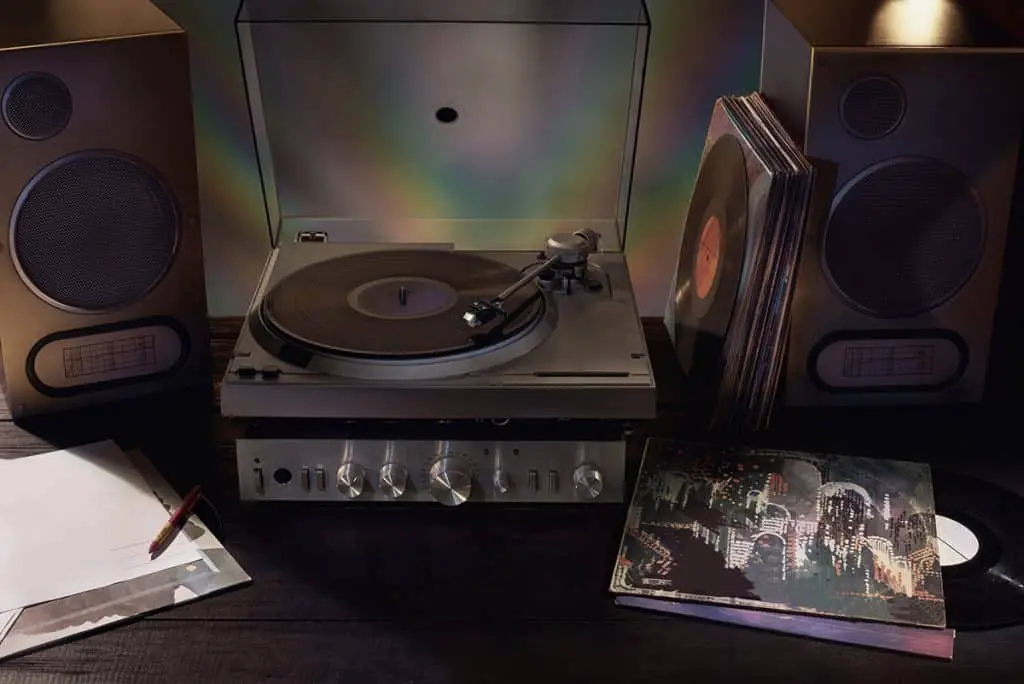
")
 Maple")
")