Category: Vinyl Records

  • The History of Record Players, Turntables, and Vinyl Records

    The History of Record Players, Turntables, and Vinyl Records

    Music is a staple for all of human civilization, and it plays a large role in culture and history. In the scope of all of human history, it is astounding that we have only been able to record sound for the last century. It is nearly impossible to imagine a time of not being able to listen to your favorite song at will, and it is obvious we have come a long way from live music being the only way to enjoy it.

    Record players were invented in 1877 by Thomas Edison. After Edison’s invention of the phonograph, other inventors improved his design to make the machine more effective. In the 1950s when vinyl records were mass-produced, record players became the main method of listening to music.

    The history of record players is fascinating, and there is much to be known about it. Although every individual has experience with the record player, there are few that know about its rich history. If you want to learn more about the history of record players, turntables, and vinyls, then you will want to continue reading below.

    The Phonautograph

    Although Thomas Edison is credited with the invention of the record player, it is important to note that he was inspired by other inventions.

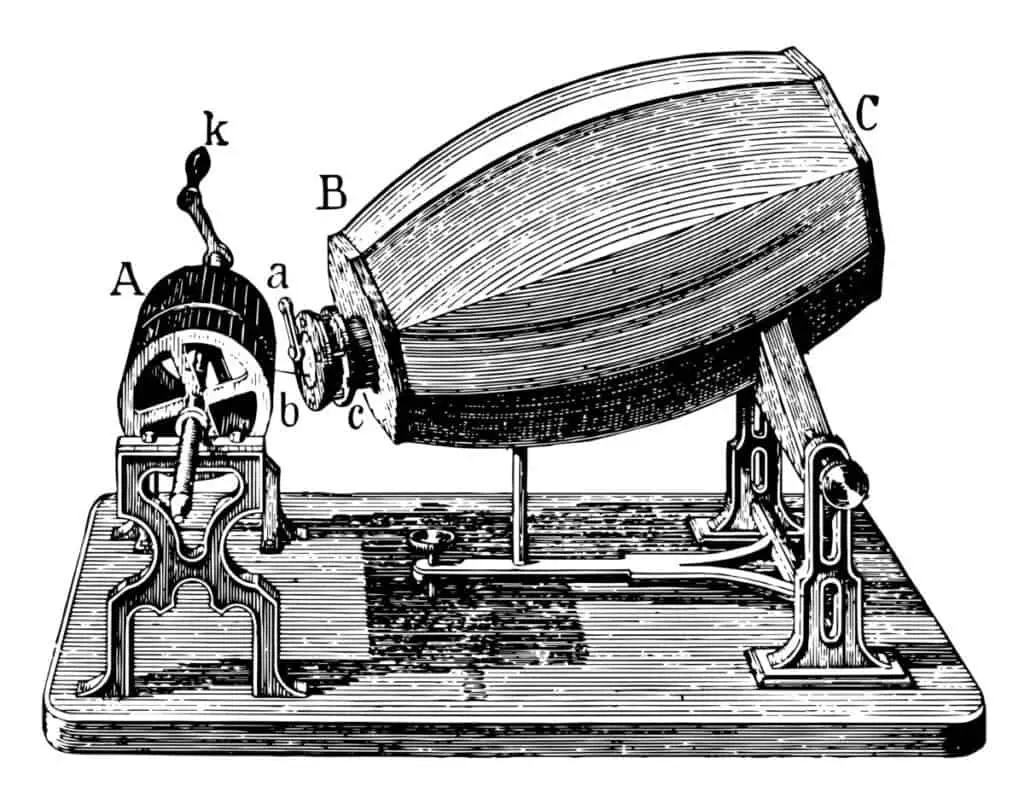
    One of these includes the phonautograph, which was invented by Edouard-Léon Scott de Martinville, twenty years prior to the phonograph. Without the phonautograph and knowing that recording sounds were possible, Edison would have found it difficult to invent the phonograph.

    Edouard-Léon Scott de Martinville had the idea of recording sound. In layman’s terms, he viewed recording sound the same as photographing a word. Although no one had done it yet, he knew it was possible.

    Scott began to work on his creation, and by 1857, an association for new technologies, SEIN, became interested in his concept. Scott began working with them and eventually others to make the phonautograph. By 1860, Scott had successfully made a machine where self-recording was possible.

    The Phonograph

    Due to the phonautograph that was invented by Edouard-Léon Scott de Martinville, it was known that recording sounds was possible. However, playing back these sounds had not yet been done. Sounds were visualized and produced on paper, however, they could not yet be heard. It was not until twenty years after the invention of the phonautograph that sounds could be played back.

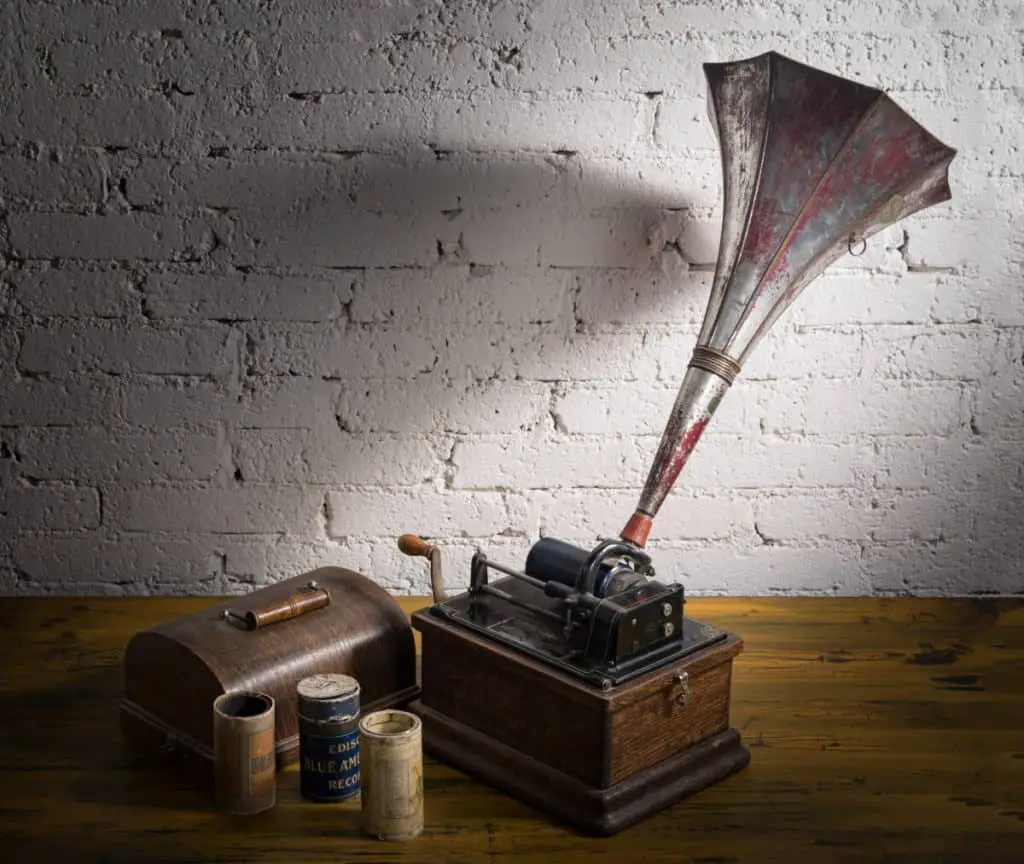
    In 1877, the phonograph was invented by Thomas Edison. The invention was a cylinder that was wrapped in tin foil and that was turned by hand with a crank. The machine consisted of two different needles, one that was for recording sounds to the tin foil, and the other that was used for replaying the sounds originally recorded. Although the tin foil was far from ideal, it was the best option currently known. Indentations were made into the foil, and it was effective at its purpose. Over time it underwent revisions that made it even more worthwhile.

    It was not until Edison reversed his original process that he was able to hear the words he recorded play out loud. Edison first recorded the nursery rhyme “Mary Had a Little Lamb”, which was an impressive feat for its time. In 1878, he became officially patented with the invention. The patent was well deserved, as Edison carved the way for future record players.

    Despite how important this invention was, it was not Edison’s most profitable discovery. The phonograph was not nearly as popular as Edison expected. Edison suspected that the phonograph would do well and was surprised when it did not. He was proud of his invention, however, he moved on to other projects in hopes that one of them would succeed.

    Although the phonograph was not especially popular, it laid the foundation for record players. Other inventors took what Edison did with the phonograph, and perfected it in a way that made it desirable to the public.

    Thomas Edison’s invention was undoubtedly a monumental discovery. Because of him, other inventors now knew that the playback of sound was possible. After Edison’s invention did not prove to be as popular with the public as expected, others took it upon themselves to improve the machine so more people would be interested in it.

    One of these inventors was Alexander Graham Bell. Bell’s intentions were to improve the design of the phonograph and make it more effective for users. Edison and Bell had always been competitors. They oftentimes played off of each other’s inventions, and it was no different with the phonograph. Bell once wished to work with Edison on the improvement of the phonograph, but Edison stubbornly refused.

    Because of Edison’s refusal to collaborate, Bell was forced to work on the improvements himself. Bell sought a more durable machine, which is exactly what he got. The current design was using tin foil, and this was less than desirable. The tinfoil was fragile, and so Bell immediately wanted a better medium. Rather than using foil, Bell used wax, which proved to be successful in terms of durability.

    There was fierce competition when it came to the phonograph. Everyone was surprised by how Edison made it possible to playback sounds, and so they were all trying to perfect the machine. This made is as to where multiple credible inventors were competing against each other at the same time. Because of the phonograph, Edison had created a culture of competition amongst fellow inventors. It was only a matter of time before one of them hit the mark and would further escalate the capabilities of the record player.

    The Gramophone

    According to the Library of Congress, Emile Berliner is credited with the invention of the gramophone. Berliner was fascinated by Edison’s invention of the phonograph, and also by the graphophone. He used a combination of the techniques that were used for these machines and also used his own unique methods to create what is now known as the gramophone.

    By 1896, the gramophone was available for purchase. The Berliner Gramophone Company of Philadelphia was created, and its goal was to sell and distribute the product.

    However, on September 29, 1897, a tragic fire occurred at the laboratory of the gramophone company. All the gramophones were burned, and all the equipment had to be replaced. This was an unexpected setback for the gramophone, and it was difficult for the company to recover.

    Although the fire was a setback for the gramophone, the company eventually recovered. The gramophone become a success and was eventually sold throughout the world. The gramophone caught the attention of many, and Berliner began to face many competitors. Despite multiple lawsuits revolving around the gramophone, its invention remained influential. Due to Berliner’s gramophone, the record industry was transformed.

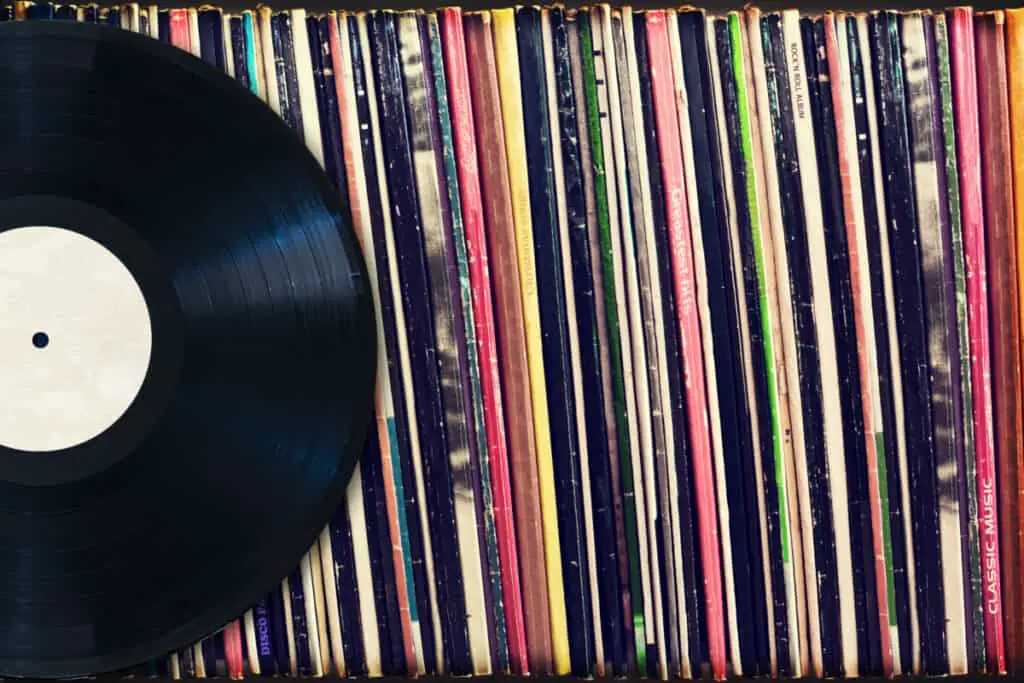
    When Were Vinyl Records Popular?

    Records existed long before the classic vinyl. What we know today as a vital part of the record player did not always exist. Instead, other types of records were used until the vinyl was discovered.

    Before vinyl records, shellac records were used. However, shellac records were only able to hold two songs. One song could be recorded on each side, which made records in general very ineffective. Those who were passionate about music made it work, but they longed for a more practical way of listening to music.

    Thankfully, Peter Carl Goldmark came to the rescue in 1948. Goldmark invented the Long Play records, which allowed more music to be held on records than ever before. Not only did he allow for more music to be held on a single record, but he also increased the overall sound quality. Vinyl records quickly replaced the original shellac records, and thus began the popularity of records.

    The Downfall of the Record Player

    Record players transformed how music lovers could listen to music. They were now able to listen to music whenever they wanted with ease, as long as they were in their home. However, individuals could not yet listen to music when they are on the go. Although they could listen to music in the comfort of their homes, there still was room for improvement when it came to listening to music in various locations.

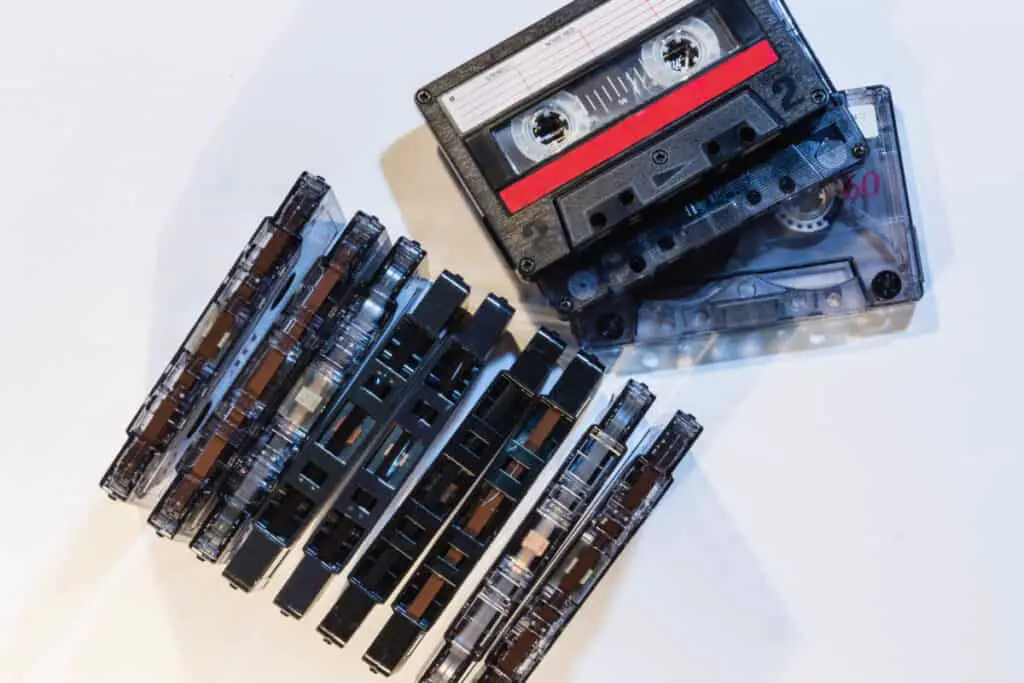
    The downfall of the record player came when the Sony Walkman was invented. On July 1, 1979, the Walkman demonstrated how it was a breakthrough technology.

    The compact size of the Walkman made it possible for individuals to listen to music wherever they were at. They quickly replaced the need for record players as cassette players could be used anywhere. Record players were more inconvenient as they were so large and could only be used in homes.

    The Sony Walkman dominated the 1980s and 1990s. Everyone had one, and those of all ages could use them. Not only the younger generation used them, but individuals of every generation could. The cassette player became a way for all lovers of music to bond, as they could be used anywhere and everywhere.

    After the Walkman, the CD started to gain popularity. CDs were invented in 1979 just like the Walkman, but they did not become available to the public until 1982. The CD was extremely effective, even more so than the Walkman. During the 1990s, CDs began to climb in popularity. Once more people learned about them and realized how much music they could hold, they stopped using cassette players. By the 2000s, CD players replaced cassette players. This was of no surprise, due to how much storage is available on CDs.

    The CD player overtook both record players and cassettes. Rather than having cassette players, cars became furnished with CD players. No matter where you were, you could find a place to play your CD, and that continued to be the main form of listening to music until online music was invented.

    Record Players Today

    In most cases, once newer technology is invented, the old one never comes back. It goes extinct, because the more advanced machines overpower the old ones, and there is no reason to downgrade. New technology is always up and coming, and individuals try to not live in the past. They want to continue moving forward and it is not common to go back and use old technologies.

    This is true for nearly every source of technology except for the record player/turntable. After nearly everyone had gotten rid of their original record player, individuals started to miss it. After thirty years of using more advanced technologies to listen to music, individuals started to long to listen to their classic vinyl records. They wanted to once again hear its classic sound, and it became a source of nostalgia for the older generation.

    Although the older generation wanted to use record players/turntables because it was what they grew up with, the rising generation had an alternative motive. For them, vinyl records were new and had the classic vintage aesthetic that is becoming increasingly popular. The younger generations did not live in an era where record players were popular, but thanks to its now high marketability, they can feel as though they did.

    Nearly every artist today releases a vinyl version of their album. Artists know their vinyls are in high demand with younger generations, so they use this to their advantage. Now they can sell their albums digitally, on CDs, and on vinyl records. This allows them to get three times the amount of sales that artists used to. According to The Manual, 2020 was the first time in years that vinyl records outsold CDs. This is a surprising time in history, as no one would have ever expected that vinyl records would be able to maintain being such an influential part of history.

    While younger generations still use more updated forms of technology, it is no question that they enjoy record players. They listen to them almost as often as individuals did in the ’50s. Record players and vinyl records making a comeback prove how influential their creations were, and makes it difficult to doubt that they will never go out of style.

    Related Articles

  • How to Convert Vinyl Records to Digital: 9 Easy Steps

    How to Convert Vinyl Records to Digital: 9 Easy Steps

    Whether you are new to vinyl or you have been spinning the old turntable for years, you’ve probably grown to love the vintage sound that comes with a good record player. However, there are many reasons why it might be more convenient to convert your vinyl to digital.


    To convert a vinyl record to a digital audio file, you’ll need a turntable, a phono preamp (if not built into your turntable), and an audio recording program. Once you have the required hardware and software, you’ll need to hook up to your computer and play through your records or singles. After recording, you can go through and break up your audio into tracks.

    Below, we’ll go into detail about each step to converting your vinyl records to digital. We’ll also talk about various products you may need to go through this process.

    1. Purchase the Right Hardware

    If you’re into vinyl, you probably already own a turntable. That’s the first step in digitizing your vinyl. But not all turntables were created equal; some are built better for needle dropping. There are three components you will need to start with your recording process. 

    1. A turntable
    2. A phono preamp
    3. Connection to your computer. 

    Many modern turntables come with a built in preamp and USB output. These are ideal for converting vinyl and make the process much easier. A widely recommended turntable for this is the AT-LP60XUSB. The price sits at around $250. It makes the digitizing process easier because everything you need is built in already. 

    Another option that is recommended is the Sony PSH500. The price point for this one sits closer to $400, but it produces a more professional quality digital copy of your records. With the higher quality though, it’s made for professionals, so it’s a bit less user friendly than its previously mentioned competitor.

    If you aren’t looking to spend on a new turntable and you already have a functional one, you can make nearly any turntable work. 

    First, you’ll have to check your turntable for a built-in phono preamp. Check your output signals. You should have either LINE or PHONO. If you have the PHONO output, there is a built-in phono preamp. The preamp will convert your sound so it can be hooked up to a typical stereo system. You can then record your vinyl on the stereo system, which can later be converted to a digital file.

    If you don’t have a LINE output, you can buy a separate phono preamp to attach to your turntable. These can range from $15 to $150+ based on quality. LINE output is typically weaker than PHONO output, so it is best to get a phono preamp.

    Another route to get even better sound quality is to get an external ADC (Analog Digital Converter). These record a better sound than the USB turntables and they do a better job at capturing the classic sound than your computer recording software will do. 

    If you have a computer with a 3.5mm audio jack (AUX), you can also use a “Y” cable that has the AUX jack on one side and the two RCA on the other side and hook straight up to your computer. 

    2. Download Audio Recording Software

    When it comes to audio recording software, your dedication to the hobby determines what route you need to go here. There are more professional apps that are user friendly, but they can get pricey. Those who are quite serious about converting their records to digital might want to consider a program like Pure Vinyl or Vinyl Studio. They are designed for needle dropping and are user friendly. Pure Vinyl costs $129. Vinyl Studio offers a standard package for $29.99 and a pro version for $49.99.

    At $99.95, Studio One is another great option. If you are into music in general and you’re looking for a recording and mixing application, Studio One is a good option. It is a little more on the expensive side, but it’s a very high-quality recording software.

    If you just want to save a few of your vinyl on digital and you are looking to save, Audacity might be the way to go. While it isn’t optimized for converting records, it works well and doesn’t cost anything to try out.

    3. Clean Your Records

    A record player runs a needle across grooves in vinyl, so if your records have been sitting out in a dusty area, perhaps on display or if they’ve been handled a lot, you will want to clean them off really well before recording to be sure the sound is as clear and true to the original as it can be. Making sure your records are free from other debris and dust will prevent skipping as well and give you better audio. 

    Cleaning your records well will take time. There is a variety of supplies you can get to clean your records and we’ll go over them below:

    • Warm water and gentle Soap: This is best to just get general grime off. You don’t want to use a sponge or anything with a rougher side because that could damage or scratch the vinyl. Mircrofiber will work best.
    • Microfiber Cloth: If your vinyl has been collecting dust on the shelves, it is best to use a microfiber cloth to remove it.
    • Record Brush: A record brush is made to clean records without damaging them. This is best for dust, grime, or dirt to gentle brush off, no scrubbing. These brushes, are also great at eliminating static on your vinyl.
    • Cleaning Kits: On Amazon and various Vinyl websites, you can order vinyl cleaning kits that uusally have the brush, cloth, a cleaner, and a stylus brush.
    • Record Cleaning solution: You can make a good cleaning solution at home if you don’t want to buy one. You just need some rubbing alcohol, distilled water, and some soap. Mix 1/4 cup of rubbing alcohol with 3/4 cup of distilled water and two drops of soap.

    When it comes to cleaning your records, do it slowly and carefully, you don’t want to break or scratch the records. When using a cloth or brush, use gentle and slow strokes. It is also good to wipe in circular motions. After you are done cleaning it, let it dry completely before storing it. When storing your record, make sure it is put away correctly in its sleeve and safely on a shelf or in a storage bin.

    4. Connect the Devices

    Your connection may look quite simple or be more involved based on your equipment. As we talked about earlier, depending on what kind of turntable you have will determine what you need to link it up.

    If you have the preamp on your turntable, you can easily connect it to a stereo system and record the vinyl onto a CD. You’ll have to insert a blank CD and hook your turntable up to the stereo system with a phono cord. Then you are able to start recording. Once you have finished, you should be able to pop your CD into your computer and create a folder for all the music on your computer.

    Another way to connect is with a “Y” cable. On one end is an AUX cord that connects to your turntable and the other end has two RCA cables that connect to your computer. This will convert the files directly from the turntable to the computer. You can get these for about $8.

    If you want to connect with an ADC, you’ll need to connect your turntable to the ADC and then connect the ADC to your computer. The ADC will convert the sound your turntable is producing into files to put onto your computer.

    The easiest setup will be the USB turntables. This turntable you buy has a USB port on the side. So that while your record your vinyl, they will immediately be converted into files on the USB drive plugged into your turntable. Once you have finished recording, you can easily plug in your USB drive into your computer and upload the files.

    5. Prepare Your Software

    Once you have selected your software and downloaded it, it is a good idea to test out your program before you begin the lengthy recording process. Get familiar with its functions and learn its interface. 

    This will look differently on each program, but you’ll need to add metadata for each album. If your program is specifically designed for needle dropping, it will have inputs for the album title and other information about your music. If you are using a more generic recording program, you’ll still have places for names, but it won’t be as optimal for naming albums and tracks.

    Make sure everything is set up correctly by testing a few minutes of recording. You may have to choose inputs on your program for where the audio is coming from. If your program can’t find any sources, you may want to check that everything is plugged in correctly and switched on. 

    6. Record Your Albums

    Before you begin your recording session, do a little test run. Record one song or a little bit of a song on the software and then check how it sounds. If it doesn’t great, adjust some cords, clean the record, and make sure everything is plugged in correctly. Then try again. Once it sounds as good as it’s going to get, you are free to record the whole thing.

    Your conversion to digital will take time. If your album runs for 42 minutes, it will need to record for 42 minutes. The best thing to do is let your album run and check on it every once and a while to make sure it is still running. Don’t leave it alone for too long, otherwise, you might come back to find it stopped recording a long time ago.

    If it happens to stop recording or malfunctions while it is recording, make sure to stop the recording process completely. Delete the track that had been recording. Reset everything and double-check that everything is plugged in correctly. Then start the whole recording process over again. This will make sure you record everything with the best quality without having to figure out where it stopped and where to start again.

    7. Split the Tracks

    After you have finished recording an album, you’ll be able to see a visual waveform of the music on your recording software. You’ll want to look for moments the waves fall flat, that will be the moment in between songs. However, you should double-check where the song ends by listening to each of the tracks and then marking the point where one song ends and the other begins. Then you can split your songs there. This will make it easy to download each individual song, instead of having to listen to the whole album every time you want to listen to one song from it.

    8. Export Your Music

    After recording all the vinyl and splitting them into specific tracks, you can then export your music into a downloadable file format. To do this, you’ll have to download the file as an mp3, a .wav file, or others depending on the software you used to record your tracks. It is best to keep all the music in folders named after the albums. Make sure to save a copy of your tracks on your music software in case you lose them on your computer. Then you’ll always be able to download your vinyl music if you need to. You can also go above and beyond and save a copy of your music files on a USB so if your computer loses everything, you’ll still have a copy.

    9. Enjoy Your Digitized Vinyl

    Now for the best part! Download your files onto your device of choice and listen to your wonderful vinyl all the time wherever you go. There are many methods for digitizing vinyl and make sure to choose the one that works best for you and the sound you want.

  • Great IKEA Hacks for Storing Vinyl Records

    Great IKEA Hacks for Storing Vinyl Records

    With the 80’s making a surging comeback, vinyl records have become trendy as of late. With artists releasing albums on vinyl and record shops popping up in every city, there is a growing conundrum: stacks of thin, perfectly square vinyl records with nowhere to store them. In this article, we will turn to Ikea to help us find the most chic ways to house our vinyl.

    Kallax Shelves- A Vinyl Staple

    Kallax shelves are those square cube shelves that look like a physical version of the graph paper you used in seventh grade, and Ikea practically invented them. Kallax shelves usually have pretty equal dimensions, 13×13 inches and about 15 inches deep, making them the perfect place to store vinyl records, which typically have similar dimensions at 10 inches on average. This sizing is pretty consistent, although you can find cubes to house vinyl with smaller or larger dimensions.

    The style of kallax units can vary greatly, with some units being low to the ground and small enough to fit comfortably in a corner where they won’t be the center of your home. These smaller units look elegant in any space and are light enough that they can be hung on the wall for a modern ‘floating’ shelf. On Ikea, kallax ranges from four shelves to twenty five. Have a lot of vinyl? A larger unit is a nice thing to place against the wall with small potted plants, framed pictures, and of course vinyl in the windows. Check out the largest unit available here.

    IKEA KALLAX shelving unit, 30 3/8x30 3/8"", White

    If you are not a fan of the homogenous look of kallax shelves with all the same dimensions, don’t despair! Ikea offers a tall kallax shelf with different sized cubes for a more modern, eclectic look. That way, you can house your vinyl in a neat space that also lends a nod to the look that you are trying to create. Check this shelf out here.

    Ikea offers three color choices for kallax: black-brown, light effect light gray, and white. If you like a more classic style, black-brown might be a good choice, while gray and white make good accents to a minimalistic space.

    Overall, kallax shelves are really a perfect option for housing vinyl due to their seamless, compact feel and accommodating dimensions.

    IKEA KALLAX Shelf, Black-Brown

    Types of Kallax Inserts

    A great way to turn a standard kallax shelf into a cozy piece of home furniture is to put storage boxes inside the shelves. Not only will this add a unique accent to your home that is difficult to replicate, but it will add a splash of color that will make the unit look like a work of art. Additionally, some people might be worried about their vinyl getting bumped and falling off the shelves. Kallax inserts ensure that they rest easy as their possessions are not only stored but protected.

    Ikea offers many different types of storage boxes. One is a the Lustigkurre basket, an intricately woven seagrass basket that has a braided wheat pattern. While a bit pricer at $12.99 per basket, these are a great way to beautiful any space. With dimensions of 12 ½x13x12 ½, they are also a perfect place to house vinyl records.

    Another option is the Bullig box, a slightly smaller basket made of woven bamboo. According to the Ikea website, they press and treat the bamboo to give it its gorgeous natural brown color. These baskets are $9.99 a piece, and have slightly smaller dimensions at 9 ¾x12 ½x9 ¾, making them a great option for housing smaller vinyl. These baskets are great if you’re trying to create bohemian living space.

    If you appreciate a more vintage style or will be storing your vinyl in an office space, the Rejsa box might be a good addition to your kallax unit. This grey-green metal box is in the style of an old school filing cabinet. It has a place for a label on the front, so if you like to keep your vinyl separate according to artist or genre, the Rejsa box might be a good way to do that. The dimensions on these is 12 ½x13 ¾x12 ½ inches and $17.99, but because of the durable material, you would likely be getting your money’s worth!

    If you’re looking to save money or fill up a particularly large kallax shelf, the Fysse box is perfect. A fabric box that comes in one color- dark grey- this insert is a great choice for people looking to simplify their home. One box is only $2.99, and the dimensions are 11 ¾x11 ¾x11 ¾, making it suitable for all but the largest vinyl.

    Things You Can Do With Kallax

    While the kallax unit may simply look like a glorified book shelf, there are many different ways to organize the units that will fit into your everyday life. The most common option is to make it a beautiful center feature for your home. This unit has numerous windows of different sizes in which you can house vinyl, seashells, flower pots, and even artwork! To get ideas of how you can turn your kallax unit into an eye-catching display, see this blog.

    TV stands are functional and creative ways to optimize space while also showing off the spines of your colorful vinyl. Ikea’s Lappland unit is a good example of this, with a space made for a television and kallax shelves surrounding it. The Kallax/Lack unit has one horizontal and one perpendicular shelf, and an open space on which a TV can be placed. It is slightly cheaper than the first option, and forms clean, simple lines with its kallax boxes. These boxes make a great space to adorn with decor or to store vinyl. Personally, we believe there is no better way to adorn your TV than with a bunch of colorful vinyl!

    Another thing you can do is make your kallax unit into a piece of furniture: a bench, a window seat, or even a couch. Window seats are a lovely option if you like to listen to records in a bedroom or office space. It is also a great, space-saving way to store your vinyl while also basking in a comfortable window view. Kallax window seats make for a perfect reading (or listening!) nook. Ikea doesn’t sell window seats online, but you can make one yourself by adhering a cushion to size on top of a small kallax unit such as this one. We will go more in-depth about these options in the sections below.

    Storage Benches- A Minimalistic Approach

    Multifunctional units- every home designer’s dream! We think we’ve talked sufficiently about the merits of kallax for maintaining a minimalistic lifestyle, but it’s about to get better: not only are storage benches a great addition to an office or mud room, they are a classy way of storing your vinyl as well. Depending on the style and the way you like to design your house, storage benches can be sparse or luxurious, with hidden space or open display windows. If you like to display your vinyl for all the see, we recommend something like the Panget, a beachy white and blue cushioned bench with space for storage on the bottom. If you’re looking for the kind of storage bench that you’d place at the end of the bend, you might look at the Inndyr bench, a dark grey cushion that is an elegant edition to any home. This kind of bench is a great place to store vinyl if you’d like to keep it out of view.

    Under-the-bed Storage

    When storing vinyl under or around your bed, your best bet is to find a bed frame with a kallax unit underneath it, which is the perfect size for displaying upright vinyl records. However, there are also some great general storage options at Ikea that make it easy to store anything from vinyl to spare sheets. The Brimnes is our favorite option, and has several long storage boxes underneath and kallax style boxes along the side that accommodate vinyl records nicely. This is a great choice if you live in a small space or if you simply want to keep your vinyl records close at hand.

    Looking for a holiday gift for a college student who loves vinyl? This is a great option. Not only are they able to protect their precious record collection, they can also organize them nicely in the Brimnes.

    Filing Cabinets

    We know what you’re thinking…boring! But trust us, this old school style is making a comeback. Even lockers are being implemented into home decor for a uniquely chic look. Check out this article if you’re curious how! Ikea sells many varieties of filing cabinets, including the Idasen, which is the perfect size for storing vinyl records. Choose a finished blue, white, brown, or classic egg shell colored cabinet from Ikea, or go thrifting and refurbish your own filing cabinet.

    This is also a great way to store records if you have a large collection. It makes them very easy to access and organize quickly.

    Smaller Shelf Units

    While some people may wish to show off their vinyl, other may not have the budget (or the space!) to do so. Ikea offers a variety of smaller shelving units that can meet the needs of someone with less to spend and more minimal tastes. The Hyllis is a three tiered steel shelf that could easily blend into any space. At only $9.99, it also accommodates any budget. With dimensions of 23 5/8×10 5/8×29 1/8 inches, this shelf is best for storage larger vinyl upright or smaller vinyl stacked. For an even smaller shelf, Ikea’s Dynan cabinet is a simple white storage unit that is small enough to fit into a closet. The dimensions are 15 3/4×10 5/8×21 1/4 inches, making it perfect for vinyl.

    Traditional Book Shelves

    Bookshelves! How did we not mention them before? Traditional bookshelves are an obviously sensible option for storing vinyl, even alongside your books and other newsprint. While most of the other storage methods are more clean and modern, nothing screams vintage chic like a wooden bookshelf. One of our favorites is the Laiva, a black-brown bookcase that has shelves wide enough to fit vinyl records and is very budget-friendly at $19.99.

    Another option for a traditional bookshelf is from the IKEA Billy collection. The Billy bookshelf collection has three different types of bookshelves depending on the exact dimensions you need for your record room. The bookshelves also come in three different color options. Color options include white, tan/natural, and black. The different size options for the Billy collection are listed below in the chart.

    To view the product on the IKEA website, click the hyperlink of the name to be directed to the website.

    Name and Description Dimensions Price
    BILLY (tall and thin)15 3/4x11x79 1/2 “$39
    BILLY (tall and medium)31 1/2x11x79 1/2 “$49
    BILLY (short and medium) 31 1/2x11x41 3/4 ” $29

    Wall Shelves

    For someone who loves to showcase their record collection, wall shelves are great tool to use. They can be used to hold the entire collection, or to show off certain records. This is also a great tool to use if there are little hands in your home that love to touch the records. Having them hung high on the wall will keep them out reach of young hands, but easily accessible for yours.

    One option we like for either a small collection or showcasing one record is the BERGSHULT / PERSHULT. With the panels coming up on either side, it sleek enough to emphasize the record(s) without taking away from the aesthetic that the record offers to the room and decor. This would be a great option for someone who has a couple favorite records they want to have on display as decoration and easy access. Having a couple of these hanging on the wall near the record player would really pull the room together and emphasis that it is the record-playing room.

  • How Tracks Change On A Vinyl Record (How Do You Change The Track On Vinyl)

    How Tracks Change On A Vinyl Record (How Do You Change The Track On Vinyl)

    How do you change the track on vinyl? Many people who own vinyl records ask this question often. Changing tracks on a vinyl record is not something that most owners do. However, that does not mean that it is impossible. 

    You can change tracks on a vinyl record by using the cueing lever to lift the tonearm while still spinning. Count the grooves from outside in, which correspond to the track numbers. Once you find the track, lower the tonearm on the groove to play it. (source)

    How Do You Change The Track On Vinyl

    The way you treat your vinyl records will determine their lifespan. Vinyl records are delicate, so if you are not careful with handling them, their sound quality will degrade in no time. That said, you need to know how you change the track on vinyl. It is essential to note that you need to be extra careful when changing tracks on your vinyl. The reason is that it involves lifting and lowering the stylus. 

    Moreover, the stylus has a crystal often made of either two types of crystals:

    • sapphire
    • diamond

    These crystals are a lot harder than the material of your vinyl record. For this reason, carelessly changing the tracks can lead to irreversible damage.

    Find Out Where The Track You Want To Play Is On The Vinyl

    It is easy to identify where the beginning of each song is on a vinyl record. You need to look at the separating gap between every track. 

    Check the tracklisting on your record sleeve. The number of the tracks corresponds to the rings on the record surface. By counting the rings from the outside of the record surface going in, you will be able to easily find where exactly you need to place the turntable’s stylus. 

    That way, you will be able to play a particular song without waiting for it to play on the record on its own. 

    Lift The Tonearm Using The Cueing Lever

    For this step, you will need to lift the stylus from the surface of the vinyl record while it is still spinning. If your record player has a cueing lever, it is ideal to use it whenever you need to lift or lower the tonearm. 

    Stopping the record while the stylus is in contact with the groove will cause the stylus to skate across the surface. Such can be detrimental to the quality of your vinyl record. So, you should lift the stylus with the record still spinning to spread the contact over more than just one area, preventing any possible scratches. 

    If your record does not have a cueing lever, you will need to use your hand to lift the tonearm. Rest your hand on something steady right beside the platter. Then, use one finger to lift the tonearm as carefully and as steadily as possible. 

    Move And Lower The Tonearm To Your Desired Track

    You are close to learning how do you change the track on vinyl. 

    Now, move the tonearm at the top of the line of your desired track. Moving the tonearm at the exact spot will require a little practice. But once you are used to it, changing tracks will be easy for you. 

    After placing the tonearm and lining up the stylus on your desired track, the next thing you need to do is to lower the tonearm. Again, you can use either your hand or the cueing lever for this step. 

    Once you successfully lined up and lowered the tonearm to your desired track, it will start singing instantly. But that will only happen if you can line up the stylus to the groove perfectly. 

    However, lining up the stylus is not something you can perfect on the first try. 

    You may even catch the last few seconds of the preceding song before the stylus finds your chosen track. 

    But you will figure things out in time. For now, an essential thing that you need to do is to line up and lower the stylus to the record groove most carefully and correctly. (source)

    How Do You Figure Out Where A Song Starts On Vinyl?

    Now that you know how do you change the track on vinyl, the next thing you need to figure out is where exactly on the record does a track starts. 

    Vinyl records have grooves that are sound waves. You can say that these grooves are similar to fingerprints of the sound waves captured inside the vinyl record. The three-dimensional grooves cut in the record the behavior of sound waves as they move through the air. 

    Moreover, a turntable or a record player is needed to play these recorded sound waves. As your vinyl record sits on top of the record player, the stylus moves through these grooves. 

    The stylus has a tiny sapphire or diamond crystal mounted at the end of the stylus. This crystal will vibrate in the grooves, generating electrical signals. The signals are then fed out of the amplifier, allowing you to hear the music playing. 

    However, finding the start of a particular track on a vinyl record is not clear. Without any markings or labels, it seems like you have to do trial and error to find the beginning of a song. But in reality, that is not the case. 

    Identifying the beginning of every song from the tracklist is relatively easy. You only need to count the more prominent lines among the grooves, starting from the outer part of the vinyl record going inside. These noticeable lines are the beginning of each track. (source)

    Is It Bad To Skip Tracks On Vinyl

    How do you change the track on vinyl? Now that you know the answer to this question, you may be aware that some record owners say that skipping tracks on vinyl is not a good practice. According to some, skipping tracks can be detrimental to the lifespan of the vinyl record. 

    You can indeed damage a vinyl record by skipping songs. But not if you know how to skip tracks properly. 

    If you pick up the tonearm carelessly, swing it across the vinyl record, and plop it down with force, you would ruin your vinyl record in no time. The reason is that a vinyl record is delicate enough that the force it receives when you plop the stylus down will scratch and jag it. 

    In addition, your hands are never really steady. For this reason, it is easy for the stylus to slip up and gouge the grooves. You might even break the needles on the cartridge. If you are not careful enough on changing tracks on a vinyl record, you will start hearing pops and ticks because the record is slowly getting gouged. 

    But if you know how do you change the track on vinyl properly, you will be able to do it while preserving the sound quality of your disc. 

    That said, never pick up or abruptly drop the stylus of your vinyl record, especially when the song is fading out. Instead, be careful in doing so and find a steady surface that can support your hand as you lift the stylus. That is the key to avoiding scratching your vinyl record when you skip songs. (source)

    Sources

    1. How Do Record Players Work?, Live Science, Accessed September 10, 2021. 
    2. James Kelly, Playing the Record Lathe: Vinyl Record Cutter as Musical Instrument, De Montfort University, Accessed September 10, 2021.
    3. Samuel J. Sauls & Craig A. Stark, Audio Production Worktext: Concepts, Techniques, and Equipment, Accessed September 11, 2021.
    4. 10 Things NOT to do to Your Vinyl Records, Bernard F. Lopez, Disco Music, Accessed September 11, 2021.
  • What Happens When Vinyl Records End? (A Quick Answer)

    What Happens When Vinyl Records End? (A Quick Answer)

    What happens when vinyl records end? Numerous questions may intrigue many curious audiophiles or even non-vinyl listeners due to the very impeccable construction of the vinyl record player. However, fret not as we will try to uncover the answers beyond these queries.

    Vinyl records will leave their needles simply threading throughout the vinyl surface without the auto-stop feature, resulting in a white noise-like sound and an endless spinning. Those with the auto-stop feature will keep spinning for a few rounds before stopping completely. (1)

    This article will talk about what will happen when your vinyl record ends, the damage it will deal with, and how to prevent it. Let’s get started!

    What Happens When Vinyl Records End?

    Vinyl records are amazing inventions, such that their very shape and form dictate their output, unlike other forms of data storage options. For example, USB disc drives do not visually exhibit changes when an alteration is made to the data inside, as it does with cassette tapes and compact disks. This non-changing form is because all these other forms of data are digital, while vinyl records are analog.

    Being “analog” technology has many implications, like how an analog clock needs to have its arms physically moved to show the time or how old telephones require people to spin the dial around; they will require more physical effort to operate than other digital formats. 

    In other terms, not only are they analog, but most are manual as well. We can also think of this philosophy for the vinyl disks and record players.

    From pressing play to pausing and even stopping, vinyl disks most of the time are manually operated. With that in mind, what happens when vinyl records end?

    For Vinyl Records Without Auto-Stop, It Means Endless Spinning

    So far, in this article, we have talked continuously about the analog story of vinyl records, and you can quite see a pattern here. For example, vinyl records, especially those without tonearm lifts or cueing levers, will require the users to lift the tonearm first before stopping the vinyl record altogether. 

    That is right; you will need to raise the tonearm first before you can stop the vinyl record player from preventing unsolicited damage.

    This pattern repeats repeatedly; for example, when trying to play vinyl records, you must first know the speed appropriate for your specific disk. To a veteran audiophile in the vinyl industry, this is nothing more than just a minor inconvenience, or at its best, is considered as part of the experience. To the newbie, however, this seems like a convoluted process. 

    Hear me out; my point here is not to tell you that the record players and vinyl, in general, are too complicated. My point here is that the very experience of the vinyl itself includes these somewhat mundane interactions that, at the bottom line, contribute to a holistic vinyl listening experience. 

    So what happens when vinyl records end? Because a vinyl record with no auto-stop has no inherent mechanisms to stop itself, it will never stop spinning. 

    The truth is, it doesn’t even know that the vinyl record on its platter has ended already. Unlike compact discs that are programmed to return to the main menu when it ends, vinyl records have none, unlike the cassettes with physical mechanisms indicating the end of the tape.

    The set of instructions a vinyl record has is simple:

    • Turn the platter.
    • Read on what the needle detects.
    • Convert the data into audio information.

    This audio information then undergoes conversion into audible music. 

    For Vinyl Record Players With Auto-Stop, They Automatically Stop

    The world of vinyl and vinyl records has shifted dramatically over the past few decades. Although we have made our point earlier about these nuanced complexions as a part of the vinyl experience, still, some find it more convenient to have automatic options. 

    For example, some turntables nowadays contain a cueing mechanism that will lift the tonearm immediately after pressing stop, eliminating unnecessary steps.

    We can also apply the same story to what happens when vinyl records end. With the invention of the auto-stop mechanism, also known as the auto shut-off mechanisms of vinyl records, your needle will no longer be grinding on your vinyl records even after it has already ended. Believe it or not, this used to be a common problem way back when auto-stop was still a figment of the imagination. (2)

    Auto-stop works differently than you think; for instance, auto-stop needs to be turned on first, a feature easily enabled by flipping the switch to the ON position (most commonly placed at the back of the record player). So if you think that it is enabled automatically, you might want to double-check. 

    The ON and OFF switch also provides the owners a sense of agency or autonomy within their turntable’s features and functions in the instance they want the whole experience.

    One crucial thing about auto-stop is that it does not halt immediately after the vinyl record ends. For example, it will at least take eight to ten rotations of the platter (approximately 30 seconds) before the auto-stop comes into play. This thirty-second transitional phase is not a limitation but a feature, as some vinyl records contain audio that some audio producers may only place at the end of the record itself. (2)

    However, some people may still prefer the old but gold automatic turntables, which I respect tremendously. It is not easy to take care of a vinyl record using completely manual features.

    Now, back to the story as to what happens when a vinyl record ends, well, there seems to be a dark side as well. It simply does not end with just endless playback, but some damage as well.

    Is It Bad To Leave A Record On The Turntable? What Happens When Vinyl Records End? Your Vinyl Record Players May Get Damaged

    Before we go out and discuss the damage in leaving your turntable turning after a vinyl record ends, we must first get something straight so as not to spook you and make you feel guilty. In the instance that you might have left an ended vinyl record turning overnight, you can assure yourself that doing this once may have incurred damages but probably not to a significant degree. 

    However, leaving your vinyl record players turning even after your vinyl has ended may leave substantial consequences.

    Suppose you have read our previous articles (or we still will inform you anyway). In that case, the needles in your turntables consist of highly durable material, most of them made with diamond or sapphire. This impeccable durability would mean that only a significant few can damage your vinyl record player’s needle.

    So if it is that durable, what is the matter then? Well, we are not that necessarily worried about your vinyl’s needle. What we are more concerned about is your vinyl record.

    So what happens when vinyl records end? Well, if you leave them there turning overnight, they might get scratched by the needle of your vinyl record itself.

     Also, a lot can go wrong as well.

    If the needle gets stuck, it may end up creating deep grooves, which can interfere with the vinyl record’s tracks, rendering the record damaged or unusable. 

    Another probable event that may occur is that it will induce unnecessary stress on your turntable, resulting in broken gears and mechanisms. (3)

    Leaving your turntable overnight should be no issue, as long as it is threading on actual vinyl tracks. However, when the record ends, the damage will start to appear. (3)

    Frequently Asked Questions

    Can Your Turntable’s Needles Scratch The Vinyl Record?

    As exemplified earlier, yes, it can. This risk of scratching is why it is essential not to leave your turntable threading on an ended vinyl record. The same can also be said when buying substandard needles.

    Does Auto-stop Affect Audio Quality?

    Theoretically, it shouldn’t. Auto-stop mechanisms are safety technologies not made to interfere with the audio output. However, installing them can help ensure longevity.

    Does Leaving My Record On Overnight Damage My Stylus?

    I do not believe that it damages the stylus. The term I would better fit this is “wear.” Yes, it will wear off the stylus, but there shouldn’t be an issue as long as you are using it well.

    Sources

    1. https://recordplayerexpert.com/what-happens-when-a-vinyl-record-ends/
    2. https://support.fluance.com/s/article/How-does-Auto-Stop-work-1480438536372
    3. https://retroonly.com/is-it-bad-to-leave-a-record-player-on-all-night/
  • Yikes! This Is What Happens If You Drop A Vinyl Record

    Yikes! This Is What Happens If You Drop A Vinyl Record

    Despite vinyl records being more than a century old, they are still highly regarded today as the highest-quality audio storage material, mainly because it is highly analog. However, with that in mind, this means that physical damage to vinyl records can heavily hamper or degrade their sound quality. Here, we try to determine what happens if you drop your vinyl records.

    Vinyl records can take a lot of stress before eventually breaking into pieces. However, it does suffer damage during falls, especially if it falls on pointed objects that may scratch the vinyl record’s surface.

    This article will discuss the implications of dropping a vinyl record and cover other elements that may degrade or damage a vinyl record.

    What Happens If You Drop A Vinyl Record

    What happens when you drop vinyl records? Does it magically just fall off and not mind the external stress, or does it just break off into oblivion? Well, the answer to that is somewhere in between.

    Unlike its predecessors, the current vinyl record is much more durable. It takes a considerable amount of force to break it. However, it does suffer damage during falls, especially if it falls on pointed objects that may scratch the vinyl record’s surface.

    Compared to modern vinyl records, shellac is a brittle substance, making them unreliable for long-term audio preservation. If you drop shellac on the floor, it will probably break. Just like that, a precious piece of audio is now lost to external damage.

    On vinyl records, the damage doesn’t come very quickly. That is the reason why you can still find antique vinyl records that still deliver on their sound quality and experience. Compare that to a five-year-old compact disc; you might notice how the compact disc is forever affected by slight scratches, with the majority of the scratches not caused by dropping but instead are just caused by sand rubbing on the surface of the compact discs.

    One of the significant factors that may affect your vinyl records heavily when dropped is when they hit pointed objects like rocks, which may cause scratches. Despite not being completely cut into pieces, these scratches may still make the listening experience unbearable. (2)

    Why Scratches On A Vinyl Record Matter (And How To Prevent Them)

    Scratches were always an enemy of physical music storage options, from the easily broken VHS tapes to the digital compact discs, and yes– even vinyl records. For vinyl records, in particular, scratches are a massive blow to the quality of the sound. This section of the article will discuss why scratches are a big deal and prevent them from happening.

    Vinyl Is Analog

    Earlier, we have discussed how the analog part of vinyl records makes it one of the best audio storage options available. Since vinyl records have music engraved on their physical structure, it does not need to be compressed. MP3s, on the other hand, will need to be compressed for music streaming to efficiently cater to a massive crowd of people listening to their mobile devices simultaneously.

    However, this unbeatable quality preservation feature of analog comes with an enormous cost: its vulnerability to physical changes. Since vinyl records rely on their physical structure to reproduce music, any alterations to the grooves will likely change music as well, especially if the alterations are scratches and the scratches are deep.

    To understand this better, let us first know how a vinyl record works. A needle creates the grooves on vinyl records, used to represent soundwaves. They are then replayed utilizing a needle (again), using a transcription process, which transforms these grooves and transforms them into signals that you can turn into audible audio. (3)

    Since scratches will change the physical form of the vinyl record, the transcribed audio will not be the same as the original recorded audio. More often than not, the artifacts of these physical alterations will be nothing more than popping sounds, which hampers the listening experience heavily.

    So what happens if you drop a vinyl record? Most often than not, you will do more than creating scratches and some physical damage. You will also hamper the overall audio quality, despite not having the vinyl record snapped into pieces.

    The Threat Of The Scratches Rely On How Severe They Are

    It is more than obvious how the depth of the scratches will have variating impacts. For example, a small hairline scratch may have a lesser effect when compared to deep grooves across the board. However, it may be best to look at each type of scratch one by one.

    A basic scratch severity test can be conducted to know the degree of the said scratch. Try running your finger through the scratch, and if you can feel it through your skin, most probably, the scratch will have a detrimental effect on the sound output of the vinyl record.

    When these types of scratches appear, you may hear a “clicking” sound in your audio, an audible artifact of the degrading integrity of the vinyl. However, other scratches like those that do not have much tactile feedback will have minor effects on the overall integrity of the audio. However, you may still hear differences in output. (3)

    With this in mind, it is imperative to keep your vinyl records from being damaged, which brings us to the next topic in question: the preservation of your vinyl record’s integrity.

    Let us go back to the main question, shall we? So what happens if you drop a vinyl record? The answer will rely on the scale of damage.

    Preserving the Integrity of Vinyl Records

    Preserving the integrity of the vinyl record is vital to maximizing the listening experience. After all, despite vinyl being not portable, expensive, and very clunky, its listening experience is enough to convince audiophiles to continue using the format. It makes the preservation even more vital than it initially seemed.

    One way to preserve your vinyl records is not to drop them. Moreover, keeping them in proper storage spaces will help increase the lifespan of a vinyl record by a significant margin.

    Many people may not know, but one of the leading causes for scratching vinyl records is improper handling and storage and not dropping. Of course, proper storage is not only defined by having the presence of a record cabinet but also by ensuring that the environmental variables are well under control. 

    For example, high temperatures can cause your record to warp its shape. Moisture can facilitate the growth of mildew and molds that will heavily degrade the vinyl record’s integrity. (4)

    However, one of the real threats to the preservation of vinyl records lies within your very hands. which means it is your very own hands. Touching vinyl for no appropriate reason or carelessly caressing it even though dust is present in your palms can affect your vinyl records significantly. Moreover, some natural excretions of human skin, such as oil and sweat, can also affect vinyl integrity.

    Frequently Asked Questions: Vinyl And Integrity 

    What Is The Leading Cause Of Vinyl Record Damage?

    Although dropping and moving vinyl can impact the record’s integrity, the leading reason for vinyl degradation is high temperatures. Moreover, worn-out needles also come second. Unnecessary touching and high humidity come in third and fourth, respectively. (4)

    If you are concerned about your vinyl record’s integrity, make sure to keep them away from extreme conditions. It will make sure that your vinyl records will serve you for years and years to come.

    How Can I Clean My Vinyl Records Without Damaging Them?

    To clean your vinyl records straight out of the gate, avoid do-it-yourself solutions. Instead, grab a lint-free cloth and wipe them. Apply cleaning solutions appropriately.

    Vinyl Buddy Record Cleaner Kit 5 Piece Ultimate Cleaning System - Velvet Brush - Nylon Microfiber Brush - Stylus Brush - LP Cleaning Solution - Storage Pouch

    How Long Do Vinyl Records Last?

    It highly depends on how one handles their vinyl records. While some may only last for a couple of years, those handled with extreme care will last well over a lifetime.

    Sources

    1. https://recordplayerexpert.com/do-vinyl-records-break-easily/
    2. https://www.vinylrecordlife.com/how-vinyl-records-get-scratched-and-how-to-avoid-it/
    3. https://victrola.com/blogs/articles/how-do-vinyl-records-work
    4. https://recordplayerexpert.com/the-biggest-threat-to-vinyl-records/
  • New Vinyl Records Vs. Old: Which Is Better?

    New Vinyl Records Vs. Old: Which Is Better?

    There is no denying that vinyl records are back in the mainstream. There are now new models of vinyl records to allow people to have a nostalgic music experience. But because old and new vinyl records are popular again, it prompted a debate, “Which is better between new and old vinyl records?”

    Vinyl records that came out in the 70s, 80s, and early 90s are better than the new ones. While new re-presses work pretty well, the difference lies in the audio quality and volume. Meanwhile, some new ones have crackles, affecting the sound that they produce.

    Some people think that new versions of vinyl records are better. However, some aspects still make vintage ones the best among the vinyl record industry.

    Which Is Better Between New And Old Vinyl Records?

    Graham Jones, the man who wrote The Vinyl Revival and the Shops that Made it Happen, explained vinyl resurgence. He said that it is more expensive to purchase re-releases today because manufacturers pressed vinyl in the ‘70s in quantities of over 5,000.

    On the other hand, the music industry only presses approximately 1,000 vinyl records, causing them to cost more than the old ones.

    Which Is Better Between New And Old Vinyl Records?

    Additionally, the materials used affect the price. Vinyl records released in the ‘80s consist of recycled materials, while new ones are made of virgin vinyl.

    The difference in materials used makes the two records sound different, too. With that said, it is easy to conclude that new vinyl records are better than the old ones.

    But it is not as simple as that. While new records use higher quality materials than old ones, people still perceive vintage vinyl records to be of higher quality. The production, mixing, and mastering methods of producing these records explain why old vinyl records are still better.

    With new vinyl records, you will sometimes hear crackles and other sound interruptions like distortion. The reason behind these weird noises lay in the manufacturing process.

    It is common knowledge that it takes effort to make vinyl sound good. But in the past, this job was more straightforward as manufacturers exerted effort on behalf of the listeners.

    Additionally, vinyl is not plug-and-play. It would be best if you learned a lot about setting it up to ensure that it will produce excellent sound.

    Some vinyl records are also mastered differently from old records. It is very rare for manufacturers of new records to mix them down analog to tape. Shipping to a record pressing plant is also very rare for these records to be shipped to a record pressing plant.

    While some plants can cut down from tape, many new records recorded from analog to tape were mixed as digital files for mastering and pressing.

    Why Are Old Vinyl Records Better Than New Ones?

    While new vinyl records are made of higher quality virgin vinyl, many collectors still prefer vintage records. Immediately, you will see that the appeal of new vinyl records is that you will get a pristine copy of your favorite music. Still, collectors and audiophiles prefer vintage vinyl records for a variety of reasons.

    1. Availability

    Sometimes, people collect vintage vinyl records due to a matter of availability. While there are many modern records, they cannot represent what audiophiles and music collectors might be looking for.

    It can be challenging to purchase vintage records right now. If you find one, it can be very expensive. For this reason, collectors buy vintage vinyl records because that is their only opportunity to buy that music in vinyl record format.

    1. Various Versions

    Right now, a surprising number of classic albums are available in LP format. However, not all of them are available in every different version they may have been available back then.

    For instance, vinyl records launched between 1958 and 1968 were usually available in both stereo and mono. Meanwhile, records released in the early and mid-1970s were available as four-channel quadrophonic pressings.

    Moreover, stereo and mono versions of the same album usually differ in terms of mixes. They also sounded a lot different from each other. For instance, mono versions might lack the backing vocals that the stereo version has.

    1. Different Or Better Artwork

    Another reason why a lot of people prefer vintage vinyl records is that their album art is better or different from the modern ones. Of course, a vinyl record is larger than a compact disk. For this reason, it has better and larger artwork. In fact, digital music sometimes does not come with album art at all.

    Apart from that, there are other reasons why vinyl records are better than new pressings when it comes to artwork.

    When an artwork gets created and stored in a file cabinet, there are times when that artwork will get misplaced or destroyed accidentally. As a result, manufacturers have no choice but to create another artwork using an existing album as a source.

    That said, the new artwork may end up with the wrong color and blurrier images compared to the original.

    Moreover, vintage vinyl record collectors often look for records with original artwork as they are better than re-created ones. In addition, the thought of having a record that has original album art seems to be satisfying for these collectors. Such is especially true now that vintage vinyl records are a little challenging to find.

    The Comeback Of Vinyl Records

    Despite the popularity of digital music sources like Apple Music, Spotify, and iTunes, the traditional medium saw resurgences. In 2020, sales of vinyl records saw a significant increase, leaving behind CDs, cassette tapes, and MP3 players.

    True enough, people associate vinyl records with middle-aged people. Still, the music industry witnessed that the driving force behind vinyl resurgence is actually Gen Z and millennial consumers. In fact, nearly half of the people who purchase vinyl records are under 35 years old.

    Considering the technological advances that the music industry now has, vinyl records should have been extinct way back then. But why are people drawn to traditional records when digital streaming is so easy and convenient?

    1. Personal Experience

    With streaming services, people can get what they want, whenever and wherever they are. However, some people feel digital music can never compete with the authentic music experience that vinyl records offer.

    For many people, putting a vinyl record on a turntable and listening to it is a more personal experience than listening to music from a digital platform.

    In addition, the quality of sound is a huge topic in terms of vinyl records. A lot of audiophiles think that analog sound vinyl is more superior to modern digital audio. Such is especially true when it comes to compressed formats that streaming platforms use.

    Moreover, there is a belief that old analog audio is warmer and fuller than digital music in terms of sound. 

    1. Vinyl Records Are Tangible

    Digital music provides listeners with almost everything except for one thing – ownership. When playing music from digital platforms, you do not own those songs.

    Meanwhile, vinyl records are physical items that you can own, hold using your hands, and collect. Therefore, records provide tangibles, which you can see and hold anytime you want to.

    1. Sound Quality

    Many people think that the old analog audio that vinyl records provide is better than digital audio. Of course, better digital playback formats, such as Free Lossless Audio Codec (FLAC), are available. However, you will have to search them out particularly and may cost more.

    On the other hand, vinyl is always available from local record stores and online sellers.

    Sources

    1. David Greenwald, Does Vinyl Really Sound Better? An Engineer Explains, Oregon Live, https://www.oregonlive.com/music/2014/11/does_vinyl_really_sound_better.html/ Accessed July 28, 2021. 
    2. Why Some Vinyl Records Sound Better Than Others – Explained, Record Player Expert, https://recordplayerexpert.com/why-some-vinyl-records-sound-better/#Original_Master_Recording_-_Analog_Tape_vs_Digital/ Accessed July 28, 2021.
    3. Maria Vole, Why Is Vinyl Making A Comeback?, Readers Digest, https://www.readersdigest.co.uk/culture/music/why-is-vinyl-making-a-comeback/ Accessed July 28, 2021.
    4. Vintage Vinyl Records – 9 Reasons Why Collectors Like Them, Rare Records.Net, https://www.rarerecords.net/record-info/vintage-vinyl-records/#sound/ Accessed July 28, 2021.
  • How Many Times Can A Vinyl Record Be Played?

    How Many Times Can A Vinyl Record Be Played?

    Nothing can compare with how delicate vinyl records are. In fact, its lifespan will end no matter how much you take care of it. It leads us to the question – how many times can you play a vinyl record?

    If you are taking care of your vinyl record well, you can play it over 100 times. But you will notice minor degradation in terms of sound. Still, you can play your record many times, depending on how well you take care of it.

    Vinyl records have a lifespan. For this reason, you need to know the factors that influence how long a record will last.

    How Many Plays Can A Vinyl Record Do?

    The world relies on digital technology today. So, it is not surprising that not everyone is familiar with old-school vinyl records. But recently, it seems like this vintage predecessor of CDs is making a comeback.

    On the other hand, you may be someone who collects vinyl records and display them on your shelf.

    But regardless of which way you lean, there is a chance that you do not entirely understand how vinyl records work.

    Moreover, one of the most common questions about vinyl records is how many times you can play them. The answer depends on how well you take care of them.

    If you take care of your vinyl record well, you can play it more than 100 times. However, it is essential to note that there will still be some minor degradation when it comes to the audio. On the other hand, a vinyl record that is poorly taken care of can be damaged in only one play.

    Even the slightest scratch can cause your vinyl record to skip when playing. Additionally, touching its surface with your bare hands can cause the record to accumulate dust, which can also destroy your record.

    That said, you need to properly take care of your record if you want it to last. Taking care of a record includes cleaning the record, proper storage, and correct usage.

    When cleaning your vinyl record, you should only use products, such as anti-static record brush and record cleaner, mainly made for it. If you use products with harsh chemicals, chances are you will scratch its surface. As a result, the number of plays that your record can do will decrease.

    Meanwhile, proper storage and usage include storing your record in its sleeve after using it. When placing your record on a turntable, put it carefully to ensure that no warping will happen.

    If you know how to handle your record properly, your record will last for up to a hundred plays. But if you are careless, you will destroy your vinyl record sooner than its expected lifespan.

    Factors That Affect The Lifespan Of Your Record

    Vinyl records consist of polyvinyl chloride. This material is proven to last for a very long time. But no matter how strong this material is, several factors can affect how long it will last.

    Cleaning Method

    Regularly cleaning your record is a crucial factor in terms of its longevity. You need to keep your record free of any dirt, fingerprint, and dust. This way, you will be able to preserve the highest possible quality.

    The grooves of a vinyl record are delicate. So, any dust, dirt, or foreign object that gets stuck within these ridges will significantly impact the record’s playback and sound quality.

    When there is a speck of dirt or dust buildup on record grooves, the vinyl record will start to skip while playing. 

    Additionally, your fingerprints are another factor that can render your record useless. If transferred on the surface of your vinyl record, the natural oil produced by your fingers can attract a lot of dirt. The dirt will then settle on the surface and grooves of your records, which results in scratching.

    Sunlight Exposure

    One of the most common factors that influence a vinyl record’s lifespan is its exposure to sunlight. Exposure to sunlight for a long time will result in high temperatures, something that your vinyl record cannot tolerate. The increase in temperature will cause your record to warp and distort.

    Moreover, polyvinyl chloride can only withstand a temperature of up to 140 degrees Fahrenheit. If the heat exceeds this temperature, the vinyl record will lose its resilience. Such will end up in deformation.

    You can reverse the warpage if it is minor. However, you cannot expect the record to have the best sound quality still.

    Humidity

    In order for you to preserve your record, you should store them in places with proper conditions. This way, they will not deprecate or tarnish.

    When storing a vinyl record, humidity is one of the significant factors that you need to look at. It is important to note that too much humidity can destroy the quality of your vinyl record.

    Humidity results in a static charge, and if your record is positively charged, it will attract a lot of dust and dirt. An anti-static record brush can reverse the positive charge. But if you keep on storing your record in places with 45 to 50 percent humidity, it will be a challenge to maintain static-free storage for your vinyl records.

    The problem for some people is that they live in cities with a naturally high humidity level. This factor is something that is out of control. Fortunately, there is one thing you can do to resolve it.

    If you live in places with high humidity levels, such as in the South, you can use a dehumidifier in the space where you are storing your records. This way, you will be able to manage humidity levels. As a result, you will be able to reduce static charge and preserve the quality of your vinyl record.

    Storing Your Records Improperly

    Properly storing your records is essential. It would be best if you placed them on your shelf or box vertically instead of horizontally. If you stack them horizontally, you will end up decreasing the quality of your vinyl records.

    Placing your records on top of each other will create pressure. This factor can result in warpage on your vinyl record, which will destroy it entirely. Additionally, the pressure built up due to horizontal stacking will crack your record, a type of damage that is entirely irreversible.

    Moreover, several methods will allow you to fix your warped vinyl record. Preventing such damage is still better than fixing it.

    For that reason, store your vinyl records vertically and make sure that nothing will cause pressure buildup on them.

    You may also be interested in this article:

    Can Records Be Stored Horizontally?

    Using A Cheap Turntable

    If you are planning to start a vinyl record collection, you should know that you need to pay a reasonable amount for a high-quality vinyl record. Never settle for inexpensive record players, as most of them have low quality and will end up ruining your vinyl.

    So, it would be best if you were willing to spend at least $1,000 on your turntable. A high-quality record player will allow you to play your vinyl record multiple times without worrying that it might get damaged.

    On the other hand, cheap turntables are often undersized and lack some features. For instance, it does not have a counterweight, so you cannot adjust the weight that the tonearm puts on the record. And since these turntables are undersized, records often hang on one side, causing unnecessary movements once you turn the machine on.

    Sources

    1. Steve Guttenberg, Do vinyl LPs wear out? The Audiophiliac takes on that myth, Cnet.Com, https://www.cnet.com/tech/home-entertainment/do-vinyl-lps-wear-out-well-bust-that-myth/ Accessed, July 30, 2021. 
    2. How Do Vinyl Records Work?, Victrola, https://victrola.com/blogs/articles/how-do-vinyl-records-work/ July 30, 2021.
    3. How Long Do Vinyl Records Last?, Victrola, https://victrola.com/blogs/articles/how-long-do-vinyl-records-last/ July 30, 2021.
  • Does Record Scratching Damage The Vinyl?

    Does Record Scratching Damage The Vinyl?

    Does scratching damage vinyl? Vinyl records are pretty fragile. Moreso, if you’re starting and don’t necessarily know what you’re doing. You might be concerned about whether or not scratching is good or bad for vinyl records. Let’s find out. 

    The answer is yes; scratching will damage the vinyl record. However, vinyl records will inevitably get damaged with time, even without scratching. 

    Here’s how you can slow down the damage time:

    1. Clean your hands before putting them on the vinyl record.
    2. Use wax paper to reduce any friction during scratching.
    3. Use specialized needles. 

    If you’re looking for a vinyl maintenance guide, you’re in good hands. This article will guide you on scratching, its effects, and what DJs are doing to reduce vinyl record damage. Be sure to keep reading for lots of helpful information. Let’s get this spinning!

    Does Scratching Damage Vinyl?

    As shared earlier, yes, scratching will damage your vinyl records. There are no two ways about it. Vinyl records consist of PVC (polyvinyl chloride), which translates to plastic. 

    They are thin round plastic contraptions that can generate sound with the right tools. They are prone to warping, melting, and scratching if you expose them to anti-vinyl record conditions. 

    It’s why some vinyl records can cost up to $2000. Vinyl records are fragile, and with time they do start to wear out. Scratching increases the wear-out time, but there are ways to mitigate it. Firstly, let’s get the definitions out of the way. 

    What Is Scratching?

    In my experience, when you’re playing vinyl records on an everyday basis, the stylus tends to move across the grooves on a vinyl record. However, when you position the stylus or needle in the groove, that’s called scratching. 

    DJs do this positioning to get that repetitive sound. Scratching is an art form. Not everyone can do it, and it is one of the fundamental skills of truly great DJing. However, it doesn’t take from the fact that it damages vinyl records. 

    What Do You Want From Your Vinyl Records?

    Before getting into the nit and grit of scratching, it’s best to outline the different record owners’ needs regarding their vinyl. As shared above, scratching is an art form to some and not to others. 

    1. Are you looking to get into the DJ scene? If so, you’ll need the tools such as pitch control turntables that DJs optimize for scratching. With this path, you’ll have to consider the scratch life of your vinyl records, but a damaged vinyl record will ultimately be the trade-off to the scratching. Art must persist. 
    2. Are you an audiophile looking for a high-fidelity sound production? If so, your vinyl record and turntable maintenance might be out of this world. You’re looking far from scratching into more classical vinyl record playing to get that specific result you’re looking for in your needs.  
    3. Lastly, Are you intrigued with the whole concept of vinyl records (maybe you’re just starting), and do you need a simple set-up? If so, you want some music to listen to from a turntable or record player. For you, as long as it doesn’t make noise for anyone else in your surrounding, it’s all fine and dandy. 

    It’s essential to note down what exactly you want from a turntable or a record player. Through that, you can understand where you lie on the scratching spectrum. 

    Not only that, but you can get the vinyl record equipment suited for you. It’s a win-win situation when you sit down and narrow down what exactly you want. 

    It’s like ice cream; sometimes, the fancy handmade ice cream is your forte, and other times, store-bought will do the job to get you through the summer. 

    Is It Bad To Play A Scratched Vinyl?

    Experts do not recommend playing a scratched vinyl whether you’re a DJ or either of the other two mentioned above. It will destroy your stylus or needle. You always want to care for every single part of your record player or turntable. 

    If you’ve noticed scratching sounds coming from a particular vinyl record, it’s high time to handle the situation. Fortunately, you can fix scratched records. Keep reading on how you can fix your scratched records. 

    Alternative Scratching Methods

    Thanks to the human brain and advancements in technology, there are different types of software that you can use to mimic scratching. That is if you’re looking to DJ. 

    The software comes with the entire set-up on your screen for you to recreate the scratching process. You could consider this method as training wheels because eventually, you’ll have to work with vinyl records physically, and that will take a lot of time, mistakes, and practice. No one gets it right the first time. 

    Can You Fix Scratched Vinyl Records?

    Firstly, experts do not recommend that everyone use this method. If you have a scratched record near and dear to your heart, do not try this method. If you do decide to try this method, it’s pretty, unfortunately, your responsibility. 

    If you would like to fix your scratched vinyl record, then try a wet melamine foam brush. How do you do it?

    Step 1: Clean the vinyl record first. You want to get rid of any dust or dirt on the surface of the vinyl record. Everyone has different cleaning methods, so use the method you feel gets the job done. 

    Step 2: Use either distilled or deionized water to wet the melamine foam brush. Make sure that you squeeze out any excess water. Remember your goal is to reduce any damage on the vinyl record as much as possible. 

    Step 3: Gently scrub the groove or the area where the scratch is present. Be careful with your vinyl record. They are pretty fragile. Would you please not put your back into it? A gentle scrub will do the job. 

    And voila, you’re done! Please note that this method won’t work all the time. The scratching noise may subside with time, but the odds are unfortunately not stacked in your favor. 

    The ultimate advice would be to care for your vinyl records to a T. Clean them before and after use, clean your stylus or needle, and ensure that anything that comes into contact with the vinyl record is dust or dirt-free.

    Helpful Vinyl Record FAQs 

    1. Is It That Bad To Touch A Record?

    If you’re a DJ, you will inevitably touch the vinyl record while playing. It’s part of the process. However, if you don’t have the DJing skills, it is not recommended to touch the viny record while playing. 

    You risk damaging the entire set-up and, most significantly, damaging the vinyl record to the point of no return. Keep your hands to yourself if you don’t have the skillset for it. 

    Also, make sure that when you are handling the vinyl record, your hands are clean. The goal is to ensure that any dirt or dust doesn’t get on the record’s surface. 

    2. How Bad Is An Old, Scratched Vinyl Record To A Needle Or Stylus? 

    On a scale of one to 10? Ten being the harbinger of doom? You could give it a ten. Needles are incredibly fragile, and without the needle, you wouldn’t be able to play any music from your record player.

    Please note that the sound that may come from the record may not be ideal. It would be best to set it aside. Either fix the record or get a new one. 

    3. If Some Turntable Needs Consist Of Diamond, How Come It Doesn’t Scratch The Vinyl Record?

    Manufacturers designed vinyl records to follow a specific path or track. If the needle goes off track, you best believe that it will scratch the vinyl record. So, as long as it doesn’t stay off the track, no scratches, but the results will not be pretty if it does go off track.

    Sources

    1. Jenna Miles, The Beginner’s Guide to Vinyl Records: How to Build, Maintain and Experience a Music Collection in Analogue (Massachusetts: Adams Media,2017) Accessed August 13th, 2021. 
    2. Discogs, Turntable 101: How To Set Up Your Turntable Correctly, Discogs, https://blog.discogs.com/en/how-to-setup-your-turntable/ Accessed August 13th, 2021.
    3. David, Learn how to scratch today: Top DJ scratching tips for beginners, DJiing Pro, https://djingpro.com/learn-how-to-scratch/ Accessed August 13th, 2021. 
  • The Proper Way To Take Vinyl Out Of A Sleeve

    The Proper Way To Take Vinyl Out Of A Sleeve

    How to take vinyl out of sleeve might be a no-brainer for some people. But for collectors and vinyl enthusiasts, it’s part of essential vinyl record maintenance. Here’s a step-by-step process of how to do it.

    Proper record handling is one of the basics when it comes to vinyl record maintenance. Getting your vinyl record in and out of the jacket is part of the process. Here’s how you do it:

    1. Wash your hands before touching anything.
    2. Carefully open the jacket 
    3. Pull out the inner sleeve
    4. Open the inner sleeve and let the record slide into your hand

    Not only will this article give you the proper vinyl record handling process, but it will also give you additional tips and tricks you can use along the way. You’re welcome to keep reading for more information on how to maintain your vinyl record collection.

    How To Take Vinyl Out Of Sleeves

    It’s a frequently asked question in the vinyl record community, and most people don’t get it right all the time. Fortunately for you, this article is here to assist you with a four-step process that will get the job done the right way. 

    But first things first, you have to understand the protective layers behind vinyl records. 

    The Protective Layers Of A Vinyl Record

    You must ensure that you protect every vinyl record with the following layers: 

    • The outer sleeve
    • The jacket
    • The inner sleeve 

    All three layers must be in place. It’s part of efficient vinyl record storage and handling. 

    The outer sleeve is usually a plastic sleeve that goes over the album. When you buy a new vinyl record, the vinyl records don’t come with an outer sleeve. What happens is that the manufacturers shrink-wrap them. It’s your responsibility to purchase an outer sleeve once you have removed the shrink wrap. 

    The inner sleeve is what is in direct contact with the vinyl record. You can also consider it as the sleeve that sits inside the jacket. Experts recommend using poly-lined inner sleeves. Collectors use these types of sleeves for higher-quality vinyl records. 

    However, just a plain paper sleeve should still do the job well. Please note that if you bought an old or used vinyl and the inner sleeve was absent, the previous owner did not store the record efficiently. 

    At this point, experts recommend thorough and careful inspection of the vinyl record for damages. 

    How Do You Remove Vinyl Sleeves?

    Now that that’s out the way, it’s high time to get to the article’s core, the sleeve removal process. Remember that everyone is different in how they handle their vinyl records. However, this step-by-step process is highly recommended and should help you properly maintain and handle your vinyl records.

    Here’s how you do it:

    1. Wash your hand before touching any part of the vinyl record

    Vinyl records are magnets to dirt or dust. Should you play the records while the dirt is on the surface, you could damage the record or even the stylus.

     For that reason, before you remove the sleeve, make sure that your hands are squeaky clean. In some cases, collectors will choose to handle their vinyl records using a pair of lint-free clean white gloves. 

    Kindly don’t assume that the use of gloves is going into an unconventional extra mile. If you love your vinyl records and are will to go the extra mile, knock yourself out. However, the point remains, keep it clean. If your hands aren’t clean, kindly keep your hands to yourself. 

    Tip 1: When handling the vinyl record, ensure that there’s no food or drink in its proximity. The goal is to create a surface of cleanliness. Having any food or drink on the work surface goes against that. 

    Tip 2: You must not touch the grooves on the record. You want to handle the record with as little contact to the grooves as possible. What can you touch? You can touch either the center of the record or the edge of the record. 

    The grooves are off the table. It’s just an essential tip before going into the handling of the record. 

    1. Carefully open the jacket

    First, you want to separate the jacket and the outer sleeve. It’s essential always to have these layers when storing vinyl records. In my experience, storing it in this layering format has brought many benefits to the overall upkeep of vinyl records. 

    The next thing to note is that you want to open the jacket towards you in an upward direction. You don’t want the vinyl record to drop and crash on the floor. 

    1. Pull out the inner sleeve

    Now that both the outer sleeve and the jacket are gone. It’s time to get the last protective layer of the vinyl record, the inner sleeve. 

    You want to separate the inner sleeve from the jacket. Pull it out without pulling out the record first. The keyword in this entire process is ‘carefully.’ 

    Inner sleeves come in two ways:

    • Inner sleeves that cover and protect the entire record.
    • Inner sleeves that have a hole and are parallel to the record’s label. 
    1. Open the inner sleeve and let the record slide into your hand

    Now that the inner sleeve is out of the jacket, you want to open it and let the record slide into your hand. You want to use your thumb and middle finger for this part. 

    You want to touch the center of the label with your middle finger, and the edge of the vinyl record should touch your thumb. And voila, you have successfully removed your vinyl record out of the sleeves. 

    Helpful Vinyl Record FAQs

    1.Should You Open The Record Sleeve Facing Upwards Or Outwards?

    The goal is to remove the record securely, so you want to open the record’s inner sleeve both upwards and outwards. Ensure that the opening is facing your direction. The record will slide into your hands, and you need to catch it by the edge. Remember not to touch the grooves on the vinyl record. 

    2. Should You Remove The Stickers On The Sleeves?

    It’s honestly up to you. If you want to keep the stickers, by all means, knock yourself out. If the sleeve isn’t damaged and can still protect the vinyl record, all is well.

    However, if you confuse the shrink wrap with the outer sleeve, the shrink-wrap may come with stickers; those will come off with the shrink wrap. However, some sleeves do come with stickers. But there should be a guideline from the manufacturer on how to handle that. Check their website for further information if you’re unsure. If you can’t see it right away, check the manufacturer’s FAQs or send them a direct message. 

    3. Where Do You Place Your Inner Sleeve Once You’ve Removed The Vinyl Record?

    The goal is to ensure that no speck of dirt or dust gets on the vinyl record. Before removing the vinyl record, clean the surface or area you’ll be placing the sleeves once you’ve removed them. 

    You also want to ensure that the area you’re working with isn’t next to a window or somewhere where the conditions are dust-prone and not conducive for vinyl record storage. 

    Once you’ve removed the sleeves, place them on that clean surface, and it should be fine. It should be as easy as pie as long as the vinyl record is safe and away from dust and dirt. 

    May the odds be in your favor. 

    Sources

    1. Jenna Miles, The Beginner’s Guide to Vinyl Records: How to Build, Maintain and Experience a Music Collection in Analogue (Massachusetts: Adams Media,2017) Accessed August 14th, 2021.
    2. Steven Williams, How to store vinyl records, Discogs, https://blog.discogs.com/en/how-to-store-vinyl-records/ Accessed August 4th, 2021.
    3. Record Sound and Research Center, Care, Handling, and Storage of Audio-Visual Materials, Library of Congress, https://www.loc.gov/preservation/care/record.html Accessed August 4th, 2021. 
    4. Vinyl Record Life, The Complete Guide to Handling Vinyl Records, Vinyl Record Life, https://www.vinylrecordlife.com/the-complete-guide-to-handling-vinyl-records-with-pictures/ Accessed August 4th, 2021.