Author: Andrew

  • How to Level Your Turntable

    How to Level Your Turntable

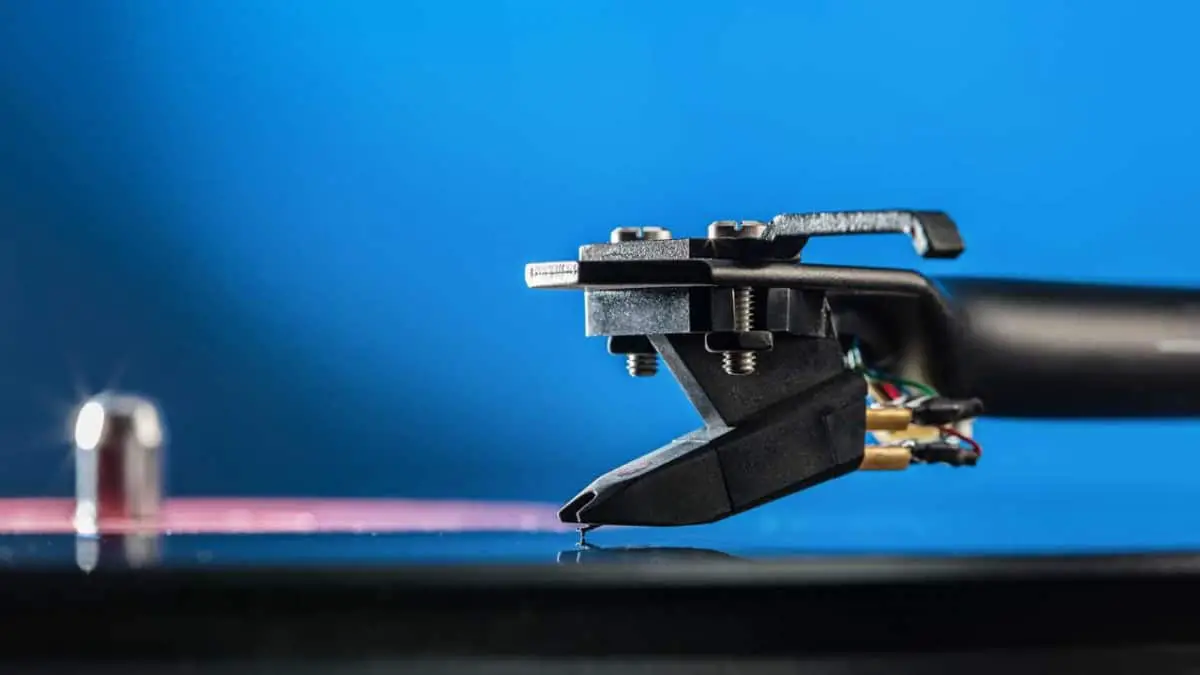
    Ensuring that your turntable is on a level surface is critical during setup; this helps avoid issues like stylus tracking problems that cause distortion, skipping, or imbalances in the channels.

    The turntable’s feet are responsible for leveling the turntable and isolating it from feedback, making it work without giving problems.

    In this article, I will be giving an in-depth guide on how to level your turntable, what isolation and balanced turntable feet do to your music output, feedback, placement, and tips to help you get the most out of your turntable.

    Part 1: How Do I Make Sure My Turntable is Level?

    To make sure your turntable is level, the following steps are important;

    1. Place it on a flat surface
    2. Use a bubble level indicator
    3. Balance the feet
    4. Do a final check

    Flat surface: 

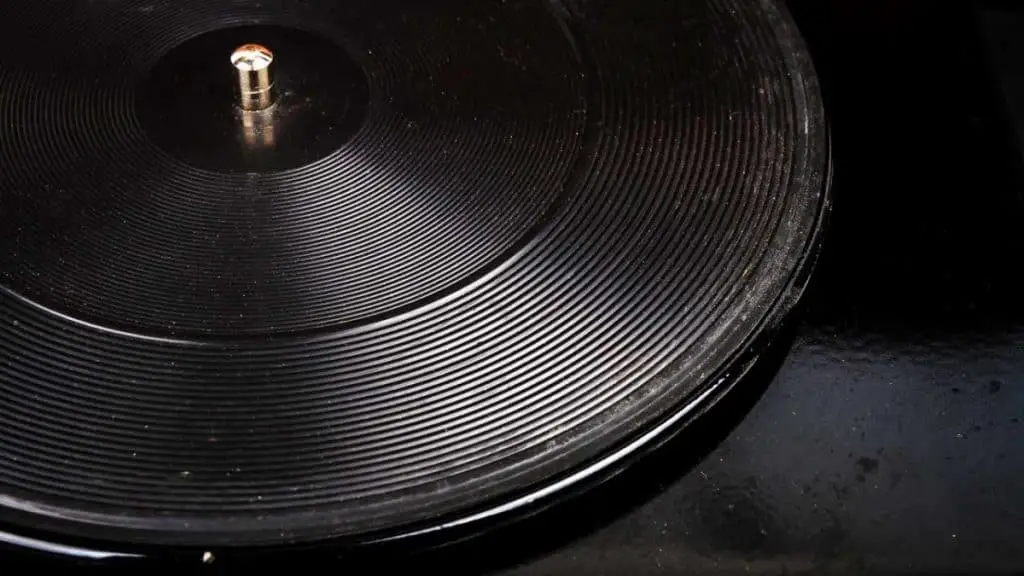
    The first step is to ensure that you place your turntable on a flat surface. This step is essential because in my experience, placing your turntable on an irregular surface can cause issues like vinyl record damage, damaged stylus, and improper isolation of vibrations. The surface of the platform used must be balanced and smooth. (source)

    Bubble level indicator: 

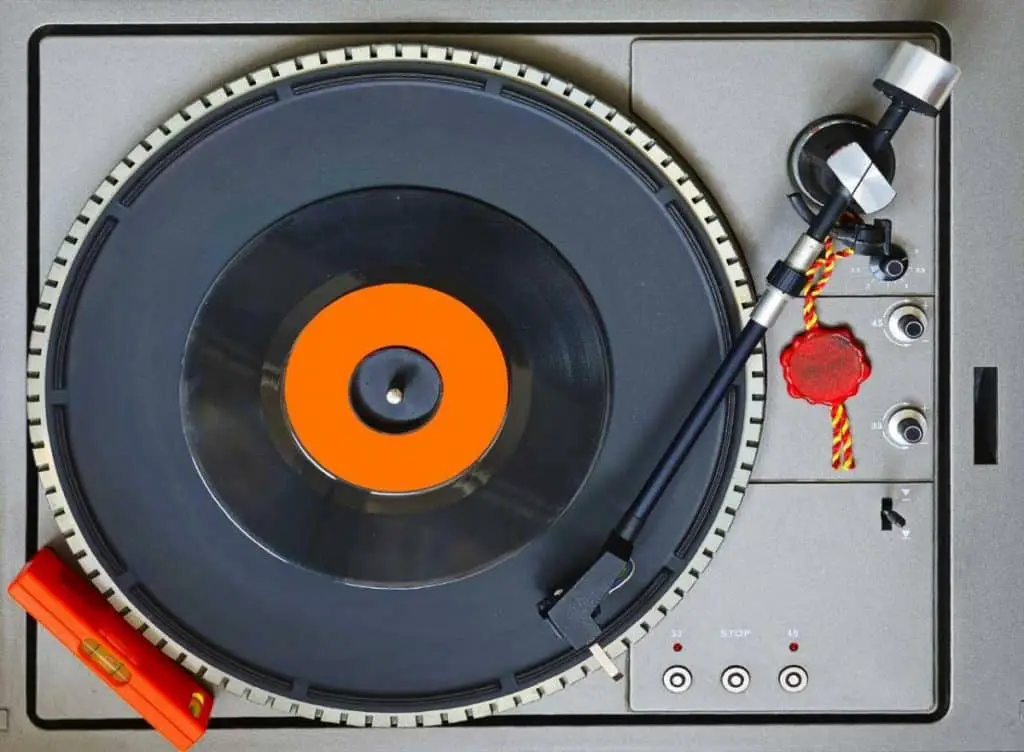
    The next step is using a bubble level indicator. I use a bubble level indicator to check if my turntable is adequately leveled. When you place the bubble level indicator on the platter, you will be able to check if the turntable is balanced or not. (source)
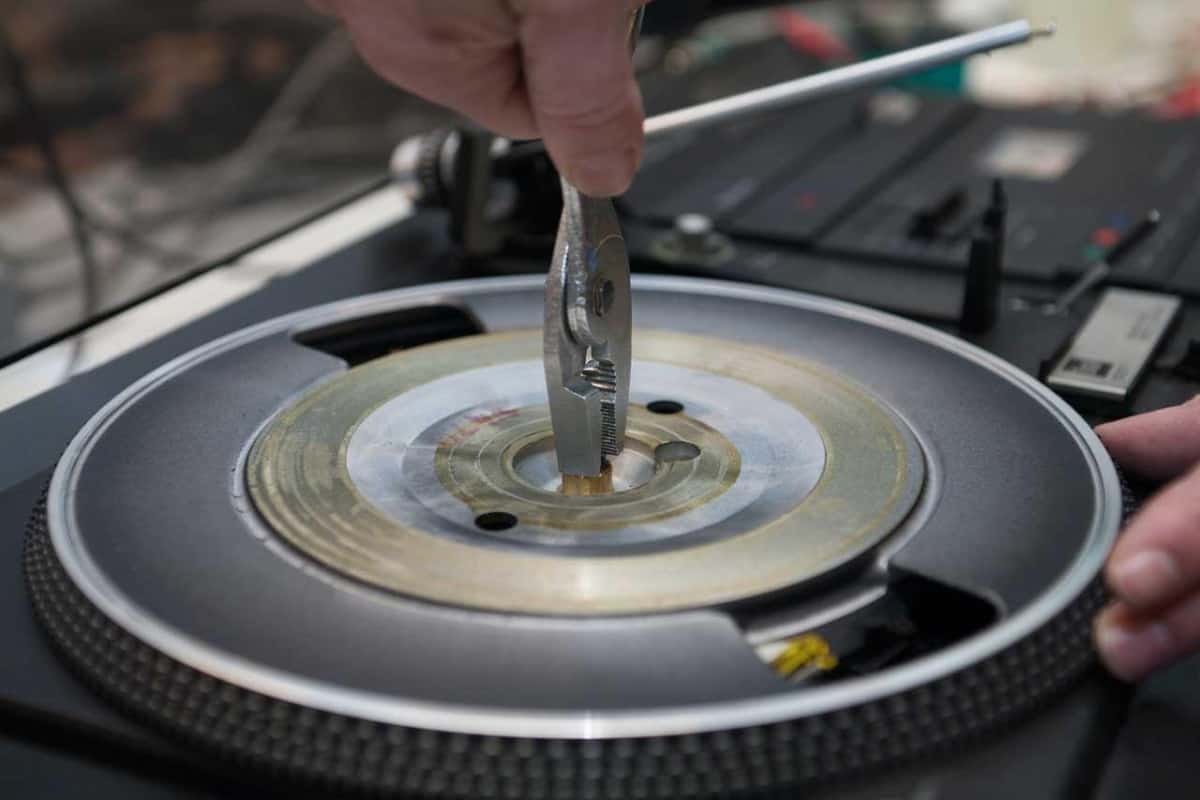
    Balance the feet: 

    This next step involves loosening the turntable feet and screwing them back in place until they are balanced. Most turntable feet can be unscrewed and screwed back, in cases where it is still unbalanced, and then you can easily adjust each of the four pegs till they align with themselves.

    Final check: 

    Finally, use your bubble indicator to check if it is at the center; after all the three above steps have been carried out. If you check your bubble level indicator, and it is at the center, you have successfully leveled your turntable, and it is now ready for use. This also means you aligned the turntable’s feet correctly, so you can always use your bubble indicator while carrying out step 3 to check which peg to screw and which one to unscrew.

    Part 2: Six Best Bubble Level Indicators For Your Turntables

    The primary tool used to level a turntable in the steps above is the Bubble Level Indicator, and it checks if your turntable is centered. The following bubble level indicators, with their price information links attached, are currently the top bestsellers and highly recommended by turntable enthusiasts:

    1. Audio-Technica AT615a
    2. Circular bullseye level inclinometers
    3. Nobsound aluminum record weight LP turntable disc.
    4. Viborg LP320B disc stabilizer HiFi vinyl weight clamp.
    5. Standard spirit bubble level.
    6. Ubei levels high precision round bullseye indicator.

    Audio-Technica AT615a 

    Audio-Technica AT615a is a high precision bubble level indicator; it has a machined housing made of aluminum, comes in 37mm diameter and 17mm height. It is primarily known for its excessive precision, which is essential in the leveling of a turntable for getting accurate results. Click here for price information.

    Circular Bullseye Level Inclinometers 

    The Circular Bullseye Level Inclinometers bubble level indicator comprises top-notch PMMA quality, manufactured with registrations around its round vial, and a waterproof feature. There are no adhesives or glue included in its product, and it is also for not just turntables but telescopes, cabinets, and other equipment. Click here for price information.

    Nobsound Aluminium Record Weight LP Turntable Disc 

    The rotation velocity of the disc has a combined power of 60 hertz and 45rpm, produced from non-magnetic aluminum material. Its spindle gap is a match for many varieties of turntables, including old and modern ones. It checks The steadiness of your turntable and helps improve sound quality by ensuring balance. Click here for price information.

    Viborg LP320B Disc Stabilizer HiFi Vinyl Weight Clamp 

    This level indicator is luxurious because of its shiny black color and attractive look. However, it is efficient in leveling turntables, improves the sound from proper balance, and helps in eliminating noise from feedback. Click here for price information. 

    Standard Spirit Bubble Level 

    This Standard Spirit is a side-to-side bubble level indicator, and it is permanently mounted to wall frames or in hand. It works by pointing out the part of your turntable that needs leveling. It comes with six ranges per pack and can double as a hanger for artworks aside from leveling your turntable. Click here for price information. 

    Ubei Levels High Precision Round Bullseye Indicator 

    This indicator accurately measures and levels your turntable’s balance, indicating when it’s wobbly or perfectly centered. It is shockproof, made from high-quality non-magnetic aluminum, and known for its accuracy. Click here for price information. 


    All the above-listed bubble level indicators were carefully selected and listed as the best by me because they are mobile and can be moved easily at any time, budget-friendly, and will not break your bank account to purchase. They are all top-level indicators popular for their accuracy in balancing turntables.

    Home Levelling Tips

    The following tips are helpful when setting up your turntable for use at home or small gatherings, they guide you on precautions to follow, and from experience, they have never failed or caused complications: (source)

    • The first helpful tip is in placement; ensure to place your turntables and speakers on different platforms or surfaces to avoid causing vibrations to your turntables, which, as earlier stated, can cause several complications.
    • Remember to place your turntable on flat surfaces and level adequately.
    • Ensure proper isolation of your turntable from external sources that can cause problems, including electronic equipment that poses threats.
    • Proper storage of your turntable is just as necessary as leveling it to keep it safe from dust and molds. Store on flat surfaces, too, not just when being played but also in storage.
    • Some people might not find this last tip necessary; however, it is essential to know that you don’t have to level your turntable every time you use it. Only when it has been moved or disturbed.

    Does a Turntable Have to Be Leveled?

    Leveling your turntable is important, and is one of the precautionary measures you must take before playing your records.

    The process might seem boring to carry out frequently, but it is necessary to do it and avoid bigger complications that come from unbalanced turntables. Your turntable must be leveled properly, and if you do not want to always do it, make sure you place it in a safe place free from external factors after getting it leveled.

    Frequently Asked Questions (FAQ)

    How Long Does It Take to Level a Turntable?

    Leveling your turntable takes approximately 5 minutes, depending on the methods used.

    My first experience lasted for more than 5 minutes, just in case you find yourself struggling with it on your first try. As you keep leveling your turntables when necessary, you get the hang of it and become a pro yourself.

    What Tools Do I Need to Level a Turntable?

    You will need a bubble level indicator and a flat surface or platform.

    The other necessary thing is the peg, and it comes with your turntable. The bubble indicator will help check if the turntable is at the center after screwing and unscrewing the pegs, while the flat surface is the platform needed to place the turntable on for balance.

    Summary 

    Leveling your turntable, from my experience, is an essential maintenance practice for both turntables and record players. Imbalance turntables cause a lot of costly damage; antique or rare vinyl records can also get damaged. 

    Similar to the leveling is the stability of where you place your turntable. For example, it might be perfectly level but if a person or even a pet walks by and the turntable could jump. Ideal locations for turntables include near-load baring walls where floors are secure and have less chance of transmitting vibration. 

    With a good foundation and a level platform, your records will play well. Just ensure you get things nice and level and you’ll be off to a great start.

  • Is Vinegar a Good Way to Clean Vinyl Records?

    Is Vinegar a Good Way to Clean Vinyl Records?

    Is vinegar a good way to clean vinyl records? That’s a good question. Vinyl records are currently considered antique items collected by many, but many music enthusiasts still love them. In the last few years, vinyl has even made quite the comeback, and it looks like it’s here to stay, so keeping your old vinyl clean might not be a bad idea.

    Vinegar, which is popularly known as the perfect natural cleanser, is also suitable for vinyl records. When properly diluted, vinegar aids in removing grime, dust, and oils from your vinyl records when applied with a soft cloth.

    In this article, I will be taking you through reasons you should consider vinegar for cleaning your records, how to use it, some cons involved, and the best type of vinegar for cleaning vinyl records.

    Can You Use Vinegar to Clean Vinyl Records?

    Vinegar helps clean vinyl records; however, only plain white vinegar is appropriate in cleaning vinyl records effectively. It eliminates microbial organisms on your vinyl record. Vinegar can help keep your records clean and new; it’s non-toxic and cheap to make or buy. There are many reasons why vinegar helps to clean your records. (source)

    Why You Should Use Vinegar

    As stated earlier, vinegar is a popular natural cleaner; it is efficient, effective, and cheap. It is also safe to breathe due to its non-toxic nature, especially homemade vinegar solutions. (source)

    There are lots of reasons why you should decide to use vinegar solutions to clean your vinyl records; these are the same reasons and outcomes I have experienced: 

    • When applied to the vinyl record, vinegar immediately breaks dust deposits on your vinyl records and breaks the grime. Deposits like cheesy fingers from eating chips or processed snacks are no match for vinegar.
    • The solution dries up fast and lets you have your record ready to play again in no time.
    • It is budget-friendly, and homemade vinegar solutions have also been widely effective among vinyl collectors and lovers like me.
    • The solution also has certain antibacterial features. So, you also have your records germ-free to some extent.
    • It is non-toxic, safe to breathe in the fumes without fear of toxic exposure, and not harmful to the health of humans when the fumes are inhaled or liquid touched. As you know, you can sprinkle it on your fries or fish and chips too.
    • It keeps your record looking polished, shiny, and neat, irrespective of how long ago it was cleaned last or how dirty it might be.
    • Vinegar does no damage to your records when adequately diluted.
    • When vinyl records are stained with grease or an oily substance, vinegar solutions clean them as effectively as they clean dust and dirt.

    How Do You Use Vinegar to Clean a Vinyl Record?

    There are a few precautionary steps to follow when using vinegar to clean your vinyl records; these steps also involve the quantity to use; these steps are essential and influential to the outcome, so it’s best to take heed:

    1. The first and most crucial step to using vinegar is to ensure you clean your record with a carbon brush first, wiping off the dust. This step is helpful for daily cleaning without any solutions and essential when using any substance or cleaning agents, including vinegar. Getting rid of loose stuff first is best, so you don’t smear wet dust into a groove.
    2. If there is a lot of dust on the record, it is not advisable to directly apply your vinegar solution on the vinyl record. Doing this will make it messy and sticky, and the answer to this is using PVA glue on your vinyl record surface, causing all the dust particles to stick to it. Then the glue is pulled out, and vinegar is applied to clean the record.
    3. The next step is to prepare your vinegar solution, and this includes a mixture of a 50 by 50 ratio of vinegar and distilled water. Many people add a few drops of dishwashing soap to the mix, which works well but is not mandatory.
    4. Ensure to use lukewarm distilled water in your mixture, avoid directly applying boiling or hot water on your record and avoid chilled water. The water used in the combination should be at room temperature before mixing and application.
    5. After you complete these steps and clean your record, check it for any residual solution. If any left, use soft linen cloth to wipe off the residual solution properly. Then use your carbon brush to remove any lint fibers left from the cloth.

    Can You Use White Vinegar to Clean Vinyl Records?

    In my experience, white vinegar is unarguably the best vinegar solution for cleaning vinyl records. 

    Flavored vinegar, like chili vinegar and others, must not be used to clean vinyl records. The only good vinegar to use in cleaning your vinyl record is plain white vinegar. It gives excellent results, highly effective for cleaning, and perfect for your records. The white vinegar also kills bacterial organisms and keeps them free from microorganisms like dust mites. 

    Killing microbes with vinegar is done using unflavoured plain white vinegar with a lukewarm distilled water solution to clean your records. Apple cider and rice bran vinegar are also not suitable for vinyl records; plain white is the only acceptable vinegar variant for your vinyl record (source).

    Disadvantages of Using Vinegar to Clean Vinyl Records

    Everything in life has a good and bad side, and the same goes for the act of using vinegar to clean your records. Vinegar is excellent for cleaning but is not perfect due to its acidic nature. 

    The rare aluminum records might get destroyed by vinegar over time due to its acidic nature. They gradually corrode, and the best solution to this is to ensure that after each vinegar cleaning, wash your record with only the lukewarm distilled water and wipe off with a clean and dry cloth (source). 

    After the record is dry, always use a carbon fiber brush to remove any lint left from the clean cloth used to wipe the record.

    Frequently Asked Questions (FAQ)

    Is Vinegar Bad For Vinyl Records?

    Vinegar is excellent for cleaning vinyl records. It kills disease-causing germs, wipes off any greasy stains, and is not toxic to humans.

    Most cleaning agents like soaps and others usually leave residues that are hard to get off; however, vinegar residues can be wiped off with just lukewarm water and a dry cloth to keep it shiny, new, and clean. 

    How Long Can Vinegar Be Used to Clean Vinyl Records?

    There is no expiration date on the use of vinegar in cleaning vinyl records. 
    People apply it multiple times to any vinyl record or as often as you wash them.
     It does not damage your record over time, as long as it is diluted accordingly.

    How Do I Mix the Vinegar Solution for Cleaning?

    Plain white vinegar is mixed with lukewarm distilled water to clean vinyl records; evenly measured. If you use two cups of vinegar, mix two cups of lukewarm distilled water to mix before use. Vinegar cannot be directly applied to a vinyl record by collectors because it is acidic and can corrode the vinyl record. It is mixed with distilled water to tone down its capacity and wiped off with lukewarm water and a clean, dry cloth after cleaning.

    Related Articles:

  • A Step By Step Guide To Cleaning Your Technics 1210

    A Step By Step Guide To Cleaning Your Technics 1210

    Technics make a fantastic bunch of turntables. But maintaining your turntable is essential to keeping it in good condition. The 1210 model is no different in its requirements for maintenance. However, knowing the correct way to perform a cleaning service is vital to proper turntable maintenance.

    The process for cleaning a Technics 1210 is no different from the process of cleaning a Technics 1200. However, to avoid any confusion, I’ll provide a step-by-step guide to cleaning your turntable without wrecking it or getting yourself electrocuted.

    Cleaning your turntable is vital for a turntable’s longevity and proper operation. So, let’s get started and walk through a good cleaning of your Technics turntable.

    Technics 1200 Series Turntable Cleaning Procedure

    Cleaning a Technics 1210 is the same as cleaning a Technics 1200. The only differences between the two models are a voltage selector on the 1210 and the fact that the 1210 model is usually black in color instead of the silver-grey of the 1200 model.

    Technics SL-1210MK2 Professional Turntable

    What You’ll Need

    • Sponge
    • Warm water
    • Mild soap (no perfumes, moisturizers, or additives)
    • Bucket (for your soapy water)
    • Cotton swab sticks (brand Q-Tip is well-known)
    • A stylus cleaning brush
    • Alcohol (optional)
    • Paper towels (optional)

    Most Important First Step

    Unplug your turntable completely. It includes power and audio cables. There should be no wires plugged into the turntable at all when you start cleaning. It is for safety reasons. You do not want to get electrocuted while cleaning your turntable.

    Turntable Cover Cleaning

    If you have a turntable dust cover installed, or rather, haven’t removed the stock cover that came with the turntable, then it’s likely you’ll want to clean it.

    In time the dust covers can lose clarity. However, that’s more of restoration, so I’ll save that for another day. Today, let’s focus on cleaning.

    The dust cover is made of clear plastic. However, the plastic is somewhat rigid, and we don’t want to scratch the clear surface. Therefore I recommend only using a soft cloth and warm water mixed with a small amount of mile soap.

    When I clean my turntables, I take a small pail and add some warm water. The soap I use is a bar soap with zero additives, so I just put the bar into the water and rub it a few times until there’s a small amount of soapiness in the water. Then, I remove the bar and save it for another day, leaving me just the soapy warm water.

    The cloth I use is a small microfiber cloth that won’t scratch the plastic. 

    1. Mix your warm soapy water.
    2. Wet soft cloth in water and wring out all water possible so the rag is moist but will not drip, even when squeezed.
    3. Wipe the top of the dust cover to remove dust. 
    4. Churn the cloth in water to remove the dust you just removed and wring out the cloth well a second time. Again, no dripping even when squished.
    5. Wipe the cover again. The interior won’t need wiping if it has been left installed on the turntable.

    Platter And Body Cleaning

    Here we will use the same pail of warm water and a soft cloth. We will also use the rag and some cotton swab sticks. Alcohol is optional. I’ll explain when I get to that point.

    Platter and Underneath

    1. Remove your platter slipmat or rubber mat. If you need to wash the rubber mat, look at my article on cleaning a turntable rubber mat best.
    2. Your platter will have two holes. Using both hands, hook your stronger fingers (one per hand) into the two holes. Using your thumb, press down on the center spindle while pulling up on the two holes to lift the platter off the spindle. 
    3. The platter is a part of the direct-drive motor. It’s why you need to push on the spindle when you lift the platter, so the spindle lets go of the platter, and the platter will rise off the spindle and lower assembly.
    4. After removing the spindle, you’ll notice a plastic cover over the electronic guts underneath. The cover is held on by several screws, which you will need to remove now that the platter is out of the way.
    5. Under the plastic cover you’ve just removed, you will see a large circuit board, half of the direct-drive motor and some wiring, and other such guts. In addition, there will be a half-inch edge around where you screwed off the plastic cover, and you will see dust and dirt around this edge. 
    6. Using your sponge, soak with your warm soapy water and wring out exceptionally thoroughly. Next, use the moist sponge to wipe out the dirt around the circumference of the edge you have exposed.
    7. Using your cotton swab sticks and some rubbing alcohol, moisten the cotton with the alcohol, but squeeze it out, so it’s again moist but won’t drip. Use this to get into the fine edge that would be under the edge of your platter. Also, use the swabs to clean any dust that has accumulated around the circuit board. Do not touch the circuit board at all, though.
    8. Once clean, do a once-over with a clean and dry cotton swab stick. It will pick up any last bits of dust or moisture left behind to ensure a clean under-platter.
    9. You can use warm soapy water and a soft cloth to clean the plastic cover after removal. Then you can dry it properly and ensure it’s dry before reinstallation.
    10. Reinstall the circuit cover and the platter.

    Main Turntable Body

    Treat the main turntable body as you would the cover. A moist, soft cloth and a wipe down for dust is likely all that is required. 

    Use extra caution around knobs or the slider. It would be best if you used the cotton swab sticks with rubbing alcohol in these areas. Rubbing alcohol ensures that it evaporates and that you don’t short anything out by leaving the water. Remember, you don’t need to use alcohol, but it’s better for electronics than water.

    Tonearm Assembly 

    The turntable tonearm assembly is a bit more complicated to do a thorough cleaning. My advice is unless it is severely dirty, I would avoid disassembling. I’ve used the same turntables for years and never had to disassemble the actual tonearm assembly, although I have replaced one. Typically, you can maintain these assemblies with some TLC and delicate care. Here’s how I go about it:

    1. I use mostly just cotton swab sticks and rubbing alcohol to clean the tonearm assembly (anti-skate, balance, and arm). Due to the delicate tiny cracks and crevices, it can be difficult to access, so I ensure a moist (but not enough to drip) cotton swab using rubbing alcohol.
    2. Go over the edge carefully to remove any dust accumulated around the rotating unit’s perimeter. Remember that there are electronics underneath, so be cautious and never use anything wet that could drip.
    3. Clean all the little nooks and crannies around the anti-skate, balance, and counterweight parts of the tonearm assembly. Use the cotton swab sticks because not much else will fit in many spots without you jamming it in. Doing this could cause liquid to drip out of the sponge or cloth, so stick to using the cotton swab sticks for this part.
    4. As I don’t recommend disassembly (you need to take the body apart to get at the inside workings of the tonearm assembly), it shouldn’t be too difficult to clean. It’s just a bit time-consuming due to all the small spots you need to try to access in and around the tonearm assembly.
    5. Lastly, take your stylus cleaning brush and gently brush the needle from back to front. You will only need to brush it a few times to remove any dust. Do not try to wash or wipe with your wet cloth or sponge. 

    To clean any further, you would need to disassemble your turntable seriously. Although I’ve done this a few times, I don’t recommend you disassemble any more than the cover under the platter, or you can seriously damage components. Having to replace an expensive part because of a failed attempt at cleaning is a poor way to reward yourself for the hard work of cleaning your appliance.

  • The Best Way To Clean A Turntable Rubber Mat

    The Best Way To Clean A Turntable Rubber Mat

    Looking for the best way to clean a turntable rubber mat shouldn’t be a huge ordeal. Rubber mats help dampen vibrations and also aid in sticking to the metal platter and record. In addition, the rubber mat allows the record to gain and hold momentum via the spinning platter underneath.

    Cleaning any rubber products, be it a turntable rubber mat or other rubber product, is best accomplished using warm water and mild soap. Natural soaps are the best, maintaining a lack of chemical additives such as perfumes or moisturizers that could leave a residue on the rubber mat.

    It may seem very straightforward to clean a rubber mat with soap and water merely, but there’s a little more to it than that, which you would do well to understand. After all, you don’t want to wreck that rubber mat by using the wrong soap or drying method. I’ll take you through a quick tutorial on adequately cleaning your mat, what soaps work best, and some other tips like proper drying methods, so stick around and let’s get this spinning. 

    The #1 Best Way To Clean A Turntable Rubber Mat

    The best way to clean a turntable rubber mat is by using warm water and mild soap. But, if you want to keep that mat in great shape, you have to heed the water, soap, and drying techniques. So, let’s take a look deeper into rubber, soap, water, and drying.

    Rubber – What You Need To Know

    Rubber is an incredible invention of humans, first created from the sap of certain plants, such as the rubber tree. Rubber is a polymer, whether it’s the natural rubber or rubber created synthetically. As a polymer, the molecule is susceptible to ultraviolet radiation, extreme temperatures, ozone, and oxidation. (source)

    Best Soaps For Rubber

    When determining the best soaps for use with rubber, we need to take a few things into account. First, the best soaps for cleaning rubber are the most natural, with the fewest additives. Second, you may also find some specialty soaps for cleaning tire rubber, but without knowing if they will leave a residue, like those that would make your tires shine, I wouldn’t recommend using them on a turntable rubber mat.

    Finding pure soap might be a bit of a challenge, but it isn’t impossible. Many people have allergies to perfumes and additives, so I’ve found that it’s pretty simple to find pure soap, but you have to know what to look for in a soap. 

    Try searching in grocery stores and pharmacies. Look where they sell the hand soap, and you will likely find either bar soap or liquid soap that does not have perfumes. You’re looking for natural, unscented, and without additives. Any additives, perfumes, or moisturizers will leave a film on the rubber that will transfer to your records. As that would be bad, we don’t want to use soap with additives like perfumes or moisturizers.

    Water Types For Rubber Cleaning

    When cleaning rubber, it is best to use mild soaps, but what about water? I mean, it’s just a turntable rubber mat, so I don’t recommend going to the effort of only using distilled water. We aren’t creating a vaccine in a laboratory. We’re just cleaning a turntable rubber mat, right?

    Ordinary tap water should be fine for cleaning rubber. Use a warm temperature, and just make sure that the rubber is thoroughly rinsed after so no soap stays on the mat.

    If you are a purist, then the best water to use is distilled. Distilled water is pure water and doesn’t have additives like chlorine, fluoride, or other such things. Although I think it would be a waste of time and money, if you have some distilled water and no other use, then have at it and go ahead with cleaning your rubber mat with it.

    Drying Rubber – The Right Way

    Drying a rubber mat is simple with some paper towels (if you like having to wash it all over again). But I don’t recommend using a towel, paper towel, or anything else. Why? They leave paper or cloth dust on the rubber, which negates your work to clean it in the first place.

    The best method to dry your turntable rubber mat is to hang it to air dry. Using warm water will promote the warmth in the mat to aid in speeding evaporative drying. Also, by merely letting the mat air dry, you will not be covering it in paper towel dust or fabric dust from a towel or other drying material.

    Should I Condition My Rubber Mat?

    Many people who are aware of rubber decay will want to know if one can condition the rubber. After all, many automotive products claim to condition tires – and they are also made of rubber, right?

    The issue with most tire rubber conditioners is that they cater to the car crowd who want to see shiny black tires on their vehicles. Unfortunately, that shiny sheen is the result of a leftover oily coating. Now that might seem cool – a shiny black rubber mat on your turntable. However, consider the dust that will stick to that residue or the shine residue that will rub onto your vinyl records. Worse yet, what if it reacts with the vinyl record?

    In short, the best idea is to avoid any rubber conditioners. Although working well on rubber applications where a bit of residue is okay, even natural olive oil should never be used on turntable rubber mats. Keep them clean, keep them clear of residues.

    How Do You Keep The Rubber From Drying Out?

    Older turntable rubber mats will start to degrade over time. Unfortunately, there is no way around it unless you can store your rubber in a vacuum environment with zero light, and of course, no time.

    As mentioned earlier, light (UV), ozone, oxygen, and temperature affect rubber decay. As a result, the rubber will inevitably become brittle and crack.

    Unfortunately, if you have an antique turntable and the rubber mat has aged, there is little you can do to renew the mat. Likely, you will merely have to replace it.

    How To Keep Rubber Mats In Good Condition

    Rubber is a wonder of nature. The elasticity and other features have made rubber a part of many parts of our lives, including use on the turntable platter. However, aged rubber will let the record slip and no longer hold the sticky rubber qualities that made it a great connector for vinyl records to metal turntable platters.

    A rubber band that is regularly used, regularly stretched, and allowed to spring back, will last longer than an elastic that sits idle. For example, if you were to experiment with two elastics, one stretched over a jar, the other regularly handled and stretched, you would find the elastic regularly handled and stretched would last longer.

    There are two reasons why some elastic that gets handled last longer. First, your hands have oils on them from touching your face. Second, that oil actually helps protect the rubber from oxidation. But that same oil on your records is a bad thing because it traps dust and dirt.

    The other reason why the elastic that gets handled lasts longer has to do with additives many manufacturers add to the rubber of things like tires and elastics. (source)

    However, rubber mat manufacturers for turntables likely don’t bother adding these substances during the manufacturing process due to the lack of need for contraction or stretching of the rubber during regular use.

    So, the only real thing that helps is again natural oils. But these same oils are not good on your records, so if you choose to oil your turntable rubber mat for prolonged life, it would be best to use a buffer like a slipmat. Using a felt slipmat keeps the oil residue from conditioning the rubber mat from getting on your records. 

    However, using a slipmat negates the need for a rubber mat in the first place. The choice, my vinyl-loving friends, is up to you. Either way, you know how to clean the rubber mat properly at the very least.

    Related articles

  • Is It Bad To Touch A Vinyl Record? (Let’s Find Out)

    Is It Bad To Touch A Vinyl Record? (Let’s Find Out)

    Everyone who has vinyl records touches them. And you’ve likely heard that it isn’t suitable (for the record). But what validity is there to that, and on the flip side, is it even safe for you (who cares about the record)? I was determined to find out, and you’ll be surprised at what I found!

    It is not a good idea to touch vinyl records with your bare hands. The act is potentially bad for the record and also potentially bad for your health.

    Wait, (record scratches to a stop), did that just read “bad for my health”? Yes, you read that right. So, let’s find out why touching vinyl records are wrong, shall we?

    Is It Bad To Touch A Vinyl Record? (For You, Or The Record?)

    Touching vinyl records typically have zero effect on either your health or the record, assuming your hands are freshly cleaned. However, there is another consideration, and that is – is the record itself clean (read: safe) for your hands to touch?

    We all know that your hands can get naturally oily, but I wasn’t so aware of what might be on or leaching out of the record itself. So, I decided some deep research was in order. Here’s what I found out, starting with the skin on your hands and what is likely to make contact with the record.

    What’s On Your Hands

    Let’s assume that your hands are clean. You had just washed them several minutes ago, and there has been not even the mention of sticky foods like donuts in your near past. So, you would assume your hands to be clean and safe to touch a record. Think again.

    Your skin is covered in microscopic pores. These pores secrete sweat and oils. So, although your hands are clean, your pores are spewing out sweat and oil. 

    Sweat consists of water and a tiny amount (about 1.5%) of salt, amino acids, and proteins. (source)

    The salts, amino acids, and proteins will not evaporate like the water in the sweat, so they stick around to leave a natural residue.

    The tiny pores on the fingertips don’t secrete much oil. But your face and other parts of your body sure do. Your sebaceous glands secrete the oils in the skin.

    A study in Australia on quantifying the hand-to-face contact rate found that the subject tested touched their faces on average 15.7 times per hour. That’s an average of once every 3 minutes 48 seconds. That means that if you were awake for an entire 24-hour period, you’d touch for face on average 379 times. That’s a lot of oil transferring from your face to your fingertips.

    What Type Of Vinyl Makes Vinyl Records – What’s In That Stuff?

    Records are made from varying formulations of polyvinyl chloride, or PVC for short. PVC is resistant to grease, oil, and chemicals, so its applications range from water lines to chemical carrying pails. The plastic is stable and not prone to de-polymerization. (source)

    PVC can be made with a variety of nasty chemicals that pose significant risks to the environment and you. The manufacture of records can produce:

    • Dioxin – an organic pollutant that bio-accumulates in the food chain and is very bad for your health and the environment
    • Chloro-ethene monomer – a somewhat carcinogenic compound released during manufacture. This cancer-causing chemical can also slowly release during the lifetime of the plastic, making it potentially dangerous to humans exposed to the chemical.
    • Plasticizers and Group Phthalates – chemicals used to soften the plastic or add flexibility can slowly leach from the PVC. These chemicals are typically toxic to humans.

    As you can see, PVC is not the wonder plastic many think it is. There are significant issues with the manufacture and also the final product. And because you aren’t eating off your vinyl records, lax laws stipulate very little about the quality of the plastic.

    It’s one of those grey situations. Although it is understood people are going to touch their vinyl records, there are no existing laws that state the vinyl has to be of a specific type or quality. I was unable to find any laws addressing vinyl records at all in terms of their composition.

    Most of the laws present in the United States concerning PVC are concerned with the manufacturing process and the pollutants the process creates. Vinyl chloride, for example, is a nasty pollutant used to make PVC and is a rather bad air pollutant. (source)

    So, Is Touching A Record Bad, Or What?

    At the end of my research, I concluded that the amount of chemical exposure might be pretty negligible from vinyl records touching your hands. There is likely a greater risk to the record than there is to you. Still, it’s pure speculation because I could not find any study completed on the residue or leaching of chemicals from vinyl records. The only information was regarding the horrifically environmentally harmful manufacturing processes.

    The oils your skin produces that wind up on your fingers do not harm the vinyl record chemically. PVC has the natural ability to withstand many oil and chemical exposure events. However, PVC is not able to withstand oil merely sticking to it. The oil can trap dust and dirt and act as a sort of glue to hold dust and dirt on the surface of your record.

    The dust and dirt or other contaminants that stick to the oils both on your fingers and deposited (albeit sometimes microscopically) onto the record can cause the record to sound quality to suffer if they build upon the needle. Extreme cases may cause the record to skip if enough dust or debris builds upon the needle or collects in one place on the record causing the needle to jump a groove.

    What’s The Best Solution?

    A wise old DJ once showed me an interesting method. He wore gloves. He used those cheap white woven cotton gloves with the rubber dots glued onto the fingertips and palms for grip. The funny thing was that he was a pretty decent scratch DJ too. 

    I recall seeing a friend laugh at my gloved DJ friend. Still, I also recall seeing one of the most impressive record collections of classic vinyl in pristine condition that I think I’ve ever seen outside a specialty vinyl shop. In the end, looks aren’t everything and if you’re an audiophile who loves your record collection, then investing in a pair of cotton gloves to use only for handling your records is one way to keep your collection in pristine condition. It also removes the potential for touching chemical residue from the PVC manufacture or vinyl composition.

    Keeping your vinyl clean is the ideal result for handling and storing your precious vinyl collection. If you choose not to use cloth gloves for handling (it may seem excessive), ensure your hands are clean. Don’t handle records after snacking on cheesy flavored chips or other such things that leave sticky food residue on your hands.

    Remember that the grooves on a record are as tiny as a human hair is wide. That’s a narrow groove that the tiniest of dust or sticky dirt hand grime can find its way into, causing record playback problems. You may not see oil on your fingers, but I guarantee you it’s there just waiting to stick to your record.

    The last piece of advice I’ll relay from my experience is that if you are going to handle your vinyl records with bare hands, only touch the extreme outer edges or the inner label of the record. Never touch the record anywhere else. Use the record sleeve to handle the record as much as possible to avoid touching it with your hands. And if the records are ancient, then it’s not a bad idea to wash your hands after touching the record either, to avoid old and poor quality PVC leaching chemical residue onto your skin. Not that it’s overly likely to be enough to harm you, but why take that chance in the first place.

  • Why Your Record  Is Skipping In The Same Spot And How To Fix It

    Why Your Record Is Skipping In The Same Spot And How To Fix It

    Do you have a record skipping in the same spot? I can’t stand it when that happens. There you are, grooving away, and suddenly the skip noise and it’s back where it was a few seconds ago. It’s like a finger’s on a chalkboard, isn’t it?

    Luckily, I’ve already gone through so many record skipping scenarios myself, that I felt it prudent to put this little skipping troubleshooting guide together for you. So, keep reading, and let’s discover together the five most common reasons why your turntable skips and what you can (or can’t) do about it.

    Why Your Record Is Skipping – A Troubleshooting Guide

    As mentioned, there are only really five reasons why your record is skipping in the same spot. I mean, there might be a sixth reason I’m yet unaware of, but these five are the usual suspects.

    1. The Tonearm Is Out Of Balance
    2. Bass Vibration
    3. The Record Is Dirty
    4. The Record Is Warped
    5. The Record Is Scratched

    The Tonearm Is Out Of Balance

    Symptom: During parts of a song, depending on where the record player resides and depending on the level of bass, the song may skip. It may also occur when you walk past the record player.

    Troubleshooting tip: Walk from five feet away up to your record player. Do so repeatedly with more firm steps each time (starting by nearly tip-toeing). Notice at what point the vibrations from your walking make the record skip. If the tonearm skips easily, either it is out of balance or the dampeners or surface the turntable is on is insecure.

    Remedy: If the tonearm is out of balance, the remedy is obviously to set the balance. If the surface is insecure, then move the turntable to a more secure surface. Check the dampeners as well to ensure the turntable feet are dampening vibrations adequately as well.

    If vibrations are a problem after you’ve balanced your tonearm, you can try using a turntable base that eliminates further vibrations. I like the Pro-Ject Ground It E Turntable Base available on Amazon. It’s heavy, feels solid, and works well to help isolate your turntable.

    Pro-Ject: Ground It E Turntable Base

    Bass Vibration

    Symptom: Similar in many ways to what you might expect with a tonearm that’s out of balance, bass vibrations can cause a record to jump or skip, but only in certain conditions.

    If your record player mounts above a speaker or subwoofer, then you likely require moving the turntable to a more suitable location.

    Troubleshooting tip: If you think the bass is causing a skip, try testing your theory with one of your records that has a lot of bass. Turn the volume up (safely) and play a track with bass. If your record skips during the heavy bass parts, you know that is why the skipping has occurred.

    Remedy: Move your record player onto a different surface. Do not place a record player on a speaker, subwoofer, or another sound-producing device.

    The Record Is Dirty

    Symptom: You may notice some crackling noises potentially followed by a skip. If dirt or dust has built upon the record or collected on the needle, a skip might occur each time the record revolves around a point where the build-up of dirt or dust overcomes the ability of the needle to stay in its groove.

    Sometimes this build-up of dirt or dust can correspond to a place on the record. The dirt or dust might even be stuck in place on the record. It would cause the record to skip each time the needle tries to plow through the dirt or dust stuck to the surface of the record.

    Troubleshooting tip: In my experience, you can see if a record is dirty or dusty by shining a flashlight on it at an angle. While shining the light, look at the record up close on an angle. If it is dirty, the dirt or dust will stand out like a sore thumb. That is, assuming you have good eyesight.

    Remedy: Use a proper vinyl record carbon fiber brush to clean your record. I like the Boundless model, again from Amazon. It’s cheap, works well, is anti-static, and most importantly it gets the job done.

    Boundless Audio Record Cleaner Brush - Vinyl Cleaning Carbon Fiber Anti-Static Record Brush

    The Record Is Warped

    Symptom: If a record is warped enough, it can cause the needle to skip. If records are stored on edge without proper support, the vinyl will sag and warp over time. Check how you’ve been storing your vinyl.

    Troubleshooting tip: Place the record on the turntable and look at it as close to horizontally as you can. Slowly rotate the record by hand and look for warps in the record.

    Remedy: Fixing warped records takes time. You need to reform the record without causing damage to the etched grooves. The process is tedious, but with a lot of patience, you can fix minor warps nine times out of ten. Take a look at the process to fix a warped record here.

    The Record Is Scratched

    Symptom: The record plays and has a noticeable skip at the exact and precise second in a track. You can either see the scratch, feel it, or see it with a magnifying glass.

    Troubleshooting tip: A bad scratch will be noticeable by the naked eye. A scratch that is not so noticeable will be visible with normal magnifying glass. Who doesn’t have a magnifying glass lying around? They are great in case of emergency for starting fires (all you need is sunlight and tinder), for plant observation if you’re into gardening, or, if you’re a bit of an audiophile, for inspecting records.

    A lit 30x magnifier is a great tool to help you see how your records are doing. If your record is scratched, this should see most scratches.

    BUSATIA Magnifying Glass 30X, 18LED Handheld Magnifying Glass with Light, 4in Large Glass Magnifier with 3 Modes, Illuminated Magnifying Glass for Reading, Hobbies - with a Lens Cloth (White + Black)

    Remedy: Unfortunately it’s time to go through your records pockets and look for loose change. If a vinyl record is scratched bad enough to skip, there’s very little chance you’re going to be capable of fixing it.

    I’ve heard of people trying to use fine knife sets, like those used for fine model crafting, to carve the groove back, but unless you’ve got a microscope and a robot-like steady hand, I think you’d best find a replacement for that record.

    With vinyl records formed out of malleable polyvinyl chloride, or PVC for short, you might think it should be easy to fix. And it would be if it weren’t for the tiny size of the grooves you’d need to fix.

    According to Wikipedia, some of the smallest record grooves cut in history were 0.001 inches wide. That’s really, very small, and obviously much smaller than the human eye can clearly discern.

    So, I’m sorry, my record-loving friends, but if the vinyl is scratched, you’re pretty much out of luck (S.O.L).

  • How To Fix A Bent Needle On A Record Player (6 Simple Steps)

    How To Fix A Bent Needle On A Record Player (6 Simple Steps)

    When your record player tonearm comes crashing down for whatever unfortunate reason, it often results in a bent needle. Sometimes you’ll be able to fix the needle; most of the time, you won’t. For those times that you can, I’ve got your instructions. And I’ll help you figure out if it’s feasible or if you’re out of luck.

    Fixing a bent needle for a record player cartridge is a delicate and somewhat challenging procedure. The skills require the hands of a surgeon, the patience of a saint, and a few special tools.

    Most of the time, a damaged needle on a cartridge means either replace or repair professionally. Some adventurous turntable owners choose option C: attempt the repair yourself (like I did). My hat is off to you brave folk, and for that, I bring you my knowledge of how to fix a bent needle on a turntable from my own attempts at repair.

    Understanding The Needle Helps Know How To Fix A Bent Needle On A Record Player

    There are two types of record player cartridges: the moving magnet and the moving coil. Which one you have may determine whether or not you want to attempt to repair yourself.

    Moving Coil Cartridges

    Moving coil cartridges are typically more expensive and preferred by audiophiles. (source)

    The cartridge works by having a coil attached directly to the needle. The coil itself is suspended in a magnetic field, and as it moves, the field changes, causing a charge. It’s how the assembly produces the audio signal. (source)

    The signal is fragile and the unit extremely sensitive. These cartridges are more expensive due to their delicate and tiny construction. When the needle of a moving coil cartridge is bent, it is best left to the professionals to attempt repair. If the coil cartridge is worth anything less than about $150, I would recommend merely replacing it rather than going through the hassle of repair. However, it depends on the repair costs too. Most technicians capable of repairing these types of cartridges charge top dollar for their skills.

    Moving Magnet Cartridges

    A moving magnet cartridge does a similar job to the moving coil but reverses the process in a sense. The needle is attached to a magnet that moves. The coil is built into the cartridge and surrounds the magnet. As the needle moves in the tiny grooves on your records, the magnet wiggles inside the cartridge, causing changes to the magnetic field inside. It is how the cartridge creates the audio signal.

    (source)

    Although not as fine a sound as a moving coil cartridge, as some would say, the moving magnet type is typically considerably cheaper. This cost difference is the reason why most turntables come with a moving magnet type of cartridge.

    Six Steps To Repairing A Bent Needle On A Turntable Cartridge

    When you’re feeling bold, or maybe you’ve got nothing to lose because you intend to buy a replacement anyway, you can attempt to repair your own bent needle on your record player. Here are a few simple steps to follow, which I’ll detail after the steps.

    1. Remove
    2. Clamp
    3. Inspect
    4. Align
    5. Reinstall
    6. Test

    Remove

    Start by unplugging the record player from all sources of power and also from your amplifier. Then you’ll proceed with removing the cartridge from the record player.

    Clamp

    For ease of repair, you will want to have a small clamp that can firmly hold the cartridge with the needle facing upward. I use a small desk-mounted vice with rubber bumpers that work great at clamping things without damaging them. Of course, you need to ensure you can set the pressure because you don’t want to crush or damage your cartridge.

    Two things that will come in handy here:

    Desk Mounted Vice with Rubber Boots (links to Amazon)

    Magnifying Desk Lamp (links to Amazon)

    Tweezer Nose Pliers (links to Amazon)

    Inspect

    Once you have your cartridge removed and clamped in a secure place, continue to inspect the needle. Look with a magnifying glass to see what the damage is. You need to see if the needle is genuinely bent or if it has dislodged the rubber boot that holds it in place. If you’re lucky, either the boot is just out of place, or the needle got stuck on an angle somehow. 

    Align

    Try to gently align it with your fingers or a tip of a toothpick if you can’t see any noticeable bend. If there is a bend, you will need to clamp the needle, without touching the tip, in a way that straightens the bend, or you will need to grasp the needle on either side of the bend.

    Given the size of the needle, you can understand how you require a surgeon’s hands to achieve grabbing the needle on either side of the bend and straightening it. It is a challenging process.

    When I attempted to straighten a bent needle on a cartridge on my turntable, I wound up snapping one by using too much force to bend it straight. Again I tried on a spare that had a bend. I could bend it straight using two micro needle-nose pliers I used to build electronic circuit boards.

    There is nothing I can tell you to help other than I hope you have steady hands, a tremendous hands-free clamp, a light and magnifying glass and a lot of patience.

    You need specialized fine tools to be successful with straightening a needle, and often it doesn’t matter, and you wind up replacing the cartridge anyway. But let me tell you more of the needle I didn’t break when I tried to fix a bent record player needle.

    Reinstall

    After straightening the needle as best, I could (by the naked eye, I saw no bend, but it was still slightly bent when viewed under magnification), I reinstalled it and tested it. 

    Test

    Although it played music, there was a weird high treble to the sound. It was difficult to explain but unbearable after only a few moments. The sound was just not traveling along the needle the same as it once did. I wound up replacing the cartridge.

    Some Cartridges Have Replaceable Needles

    Depending on the manufacturer, popularity, cost, and some other variables, you might be in luck to find a replacement needle for your cartridge. Most big box brands will not offer such replacement parts as it is in their higher profit interest to sell you a whole new cartridge. However, many specialty brands or serious audiophile brands may offer replacement components. 

    If you happen to have a brand like Audio Technica, you can likely get a replacement needle for your cartridge. The replacements range from about $30 to over $100, depending on the model.

    Not all brands offer replacement needles, and many only offer replacement cartridges, needle included.

    Or, you may find an aftermarket component if you’re lucky. And again, it is a highly delicate procedure and requires special tools and skills. Your best bet is still to replace the cartridge and maybe keep a spare around if this happens again.

  • The Costs Of Repairing A Record Player

    The Costs Of Repairing A Record Player

    When your favorite record player stops working so well, it’s time to take it in for a repair. Knowing the costs of repairing a record player is vital before spending any money to ensure the player is worth repairing. In some circumstances, it might be wise to replace the unit merely. But don’t fret; we’ll go over all of this here today to make your life easier.

    The costs of repairing a record player vary based on the make, model, parts needed, and labor required to repair. Most repairs are simple, but others that involve high-precision soldering or other specialized repairs can turn out expensive.

    Understanding the repairs that record players most commonly require is a fundamental aspect of understanding the associated costs. I’ll take you through the most common of these turntable repairs and some of the costs you can expect. It’s going to help you decide whether to do a repair, upgrade, or replace the turntable altogether, so stick around and let’s go for a spin, shall we?

    The Cost Of Repairing A Record Player Explained

    As mentioned, and evident as it may be, I’ll mention that the type of turntable will dictate whether or not a repair is worth doing. If a record player is a budget one, you may not even have the option to get parts. Therefore, it’s advised that you have a rough formula to figure out if it’s worth the repair in the first place.

    Here are the formulas I use to determine if I should repair a turntable:

    • Value of Turntable < Cost of Repair = Don’t Repair
    • ¼ Value of Turntable = Cost of Repair = Repair Turntable or Upgrade/Repair
    • ½ Value of Turntable = Cost of Repair = Consider Upgrade

    When I use these rules, I take my love for the turntable into account. For example, if you have a solid Technic 1200 base, you may want to keep it forever and upgrade minor components as they break. You have to consider how you use the machine and how comfortable you are with it.

    Let’s take a quick look through some of the more common repairs required and what you can expect to pay for them.

    Common Record Player Repairs, Descriptions, And Costs

    Repair Estimate

    Many record player repair services will charge a nominal equipment troubleshooting/repair estimate fee. Some shops will do a preliminary investigation for free, but anything over a minute or two and you are likely looking at the cost of between $50 and $95, depending on the shop. (source)

    Broken, Stretched, Or Worn Drive Belt

    This repair never happens on direct-drive turntables, but it’s an inevitable repair on a belt drive. Most people don’t bother taking the record player into the shop for this, it’s usually a very straightforward repair. That and the fact that many repair shops carry a 2 to 3 week wait time for turntable repairs, so it usually isn’t worth paying someone to replace the belt when you can likely do the work yourself. (source)

    Drive belts for record players start at as little as a few dollars. However, you get what you pay for in the end. Here are a few examples of standard OEM replacement belt costs for standard models:

    • Audio Technica $17-$35
    • Clearaudio $29-$49
    • Crosley $10-$25
    • Emerson $10-$25
    • Harman Kardon $17-$35
    • Magnavox $17-$20
    • Pioneer $17-$20
    • Technics $17-$30

    Drive belts for record players are typically repaired by the owner of the record player. It’s relatively straightforward to replace and is often not worth the price of labor to replace.

    If you decide to get someone to replace the belt, you can expect to pay about $60 plus the cost of the belt. This service usually includes a complimentary tune-up and cleaning for the cost as a way of justifying a two-minute repair. (source)

    Tip: If your record player is worth less than $100, you may want to consider buying an upgraded turntable instead of replacing the belt.

    Cartridge Replacement

    Replacing a cartridge is something that all record player owners will need to do at some point or another. Audiophiles who enjoy their records must replace their cartridges more than others, as the greater the use, the greater the wear.

    Cartridge replacement can vary widely in cost. Here are two manufacturer examples of the extensive range in cost that a cartridge might cost you:

    • Audio Technica
      • AT-XP5 DJ Cartridge $79
      • AT-F2 MC Phono Cartridge $189
      • AT-ART9 Phono Cartridge $990
      • AT-ART1000 Cartridge $4,999
    • Clear Audio
      • Concept V2 MM Phono Cartridge $250
      • Performer V2 Ebony Phono Cartridge $450
      • Maestro V2 Ebony Phono Cartridge $1,300
      • Da Vinci V2 Phono Cartridge $7,000
      • Goldfinger Statement Phono Cartridge $16,000

    As you can see, you can get cheaper yet name-brand products at relatively low costs. However, you can also get 24-carat gold components with embedded diamonds. I’m not kidding; the Goldfinger cartridge is literally machined from gold and has a ½ carat diamond embedded. (source)

    So, what kind of record table repair do you need?

    The cartridge replacement is likely the most common repair amongst all record players despite make or model. Different cartridge mounting types exist, so if you do decide to upgrade to a non-OEM model, you may require an adapter plate of sorts to accommodate a different mounting arrangement.

    Tune-Up And Cleaning

    A common repair required for record players is the basic tune-up and cleaning service. This repair service usually costs in the neighborhood of $60 to $75 for most turntable brands. The repair usually includes calibration of the tonearm counterbalance and detailed and delicate cleaning of all components. Turntables with built-in brakes, like those used for DJing, may also include having the brakes adjusted. Some service repair shops include a new drive belt in the tune-up service if the turntable is a belt-drive type.

    Tonearm Issues

    There are several issues that a tonearm might have that may include:

    • Lowering too fast – counterbalance adjustment most likely cause
    • Wandering to one side – check if the record player is on a level surface
    • Won’t lower completely – check counterbalance adjustment or limit screw

    Most issues involving the tonearm are easy to repair, and thus you shouldn’t have to pay anything for most of these minor issues. Usually, an adjustment is all that is required. However, if you aren’t sure and frustrated, you could bring the turntable into a general cleaning and tune-up shop. Usually, service shops will include a minor adjustment like that of tonearm counterbalance or similar in a tune-up/cleaning cost. Typically you will be looking at anywhere from $60 to $75 for this service.

    Another not-so-common issue with the tonearm is the failure of the cables. Sometimes a cable just has a bad spot on it and needs replacement. The cables will be very fine and easy to damage, so extreme caution is required.

    Many tonearm cables are plug and play, but some models will require skill with soldering. You will need to remove the cartridge and possibly part of the unit’s underbelly to expose where the cables need to be fed through the tonearm and counterbalance assembly.

    Replacing tonearm cables is a repair usually best left to a repair shop. The part is typical at $10 to $45 for most models and makes of the turntable; however, the higher-end models like Clearaudio will cost considerably more, depending on the model the cable set is made to suit.

    Power Source Repairs

    One of the less common issues that turntables may face is a failed power source. Typically a transformer, this repair can be more involved than you may want to take on yourself. For starters, you’ll likely need some experience with soldering electronics.

    Typically, when an internal component of a record player such as a transformer goes, I recommend taking it into the shop. Here’s where you need to look at whether or not it’s worth it.

    Most repair shops will charge between $60 and $150 in labor to replace an internal component like a transformer. Likely, the cost of the part will be in addition. Depending on the make/model, the part can range from $25 to $400 or more. Use the formula for this to decide if it’s worth paying for the repair.

  • Where Does The Needle Go On A Record? (We’ve Got The Answer)

    Where Does The Needle Go On A Record? (We’ve Got The Answer)

    Understanding how records work is vital to placing the needle on the record in the correct place. So, how do you know where the correct place on the record is? Well, don’t worry, I won’t let you scratch up your records by dropping the needle in the wrong spot.

    If you are playing a record from the beginning, there is a narrow band around the outside edge of the vinyl record called the lead-in; place the needle here to begin playback. If you look at the record from an angle, you’ll see a slightly darker band.

    If you are playing the record from a particular track, you’ll need to use a different method of finding the location, which I’ll detail below. I’ll also explain why the lead-in is essential to use, rather than just dropping the needle into a groove, so stick with me to the end. Let’s get this spinning, shall we?

    Where Does The Needle Go On A Record? It Depends Where You Want To Play.

    The longest vinyl record in standard production is the twelve-inch 33 ⅓ rpm recording. This size of the record can store about 22 minutes of music per side for a total of about 44 minutes. These records are used for albums and LPs.(source)

    The record is divided up by the music recorded on it. Regardless of the music, whether it’s an album of songs or a symphony, there will be a lead-in and lead-out on either end of the recording, on both sides of the record.

    Placing the needle in the lead-in zone of the record is ideal when starting from the beginning.

    Placing the needle on the lead-in ring segment separating tracks on a vinyl record is possible but not advised for the new turntable apprentice. I’ll get into why in a moment.

    Needle Safe Zones

    There are three ‘needle safe zones on a vinyl record:

    1. Lead-In Zone
    2. Mid Lead-In/Out Zones
    3. Lead-Out Zone

    A quick explanation of each, and we’ll get to why these are fundamentally essential areas to release the needle onto the vinyl.

    Following, you will find the explanations of each of the needle dropping-safe zones. The image below the three-zone descriptions shows each area on the record for easy reference.

    A – Lead-In Zone

    The intended area where the needle should meet the vinyl record. Audiophiles will tell you that you should play a record from beginning to end without disturbance. It means starting in the lead-in zone and nowhere else.

    The lead-in zone is the wider of the dark circles around the record. The lead-in zone is on the outermost edge of the record. The position of the lead-in zone is dependent upon the fact that the record is designed for play, starting at the outer edge and working inward.

    B – Mid-Lead-In/Out Zones

    The mid-lead-out or mid-lead-in zones are the darker rings that appear on a record. These zones are in between tracks on the record.

    The number of mid-lead-in/out zones depends on the number of tracks on the record. You can count these rings to find the place to drop the needle to start at a particular track on the album rather than the beginning.

    How To Find A Track On A Record By Counting Lead-In/Out Zones

    1. Start at the outer edge of the record. Often the sleeve or label will state a side A or side B and which tracks are on each side. The outer edge of the record has the main lead-in area. This area is off-color compared to the bulk of the record, making it fairly easy to discern. Count this area as one because it leads into track 1 of the record.
    2. The next small ‘line’ that shows on the record, closer to the center label, is the lead-out zone for track 1 and also the lead-in zone for track 2. Therefore, we can call this area the track 2 lead-in zone.
    3. Count subsequent ‘lines’ on the record, counting up from the first (1) on the outer edge of the record until you find the ‘line’ or lead-in zone for the appropriate track you are looking for.
    4. That’s it! Now use extreme caution to set the needle in place. Caution aids in preventing damage to your record, or the needle for that matter.

    C – Lead-Out Zone

    Although the lead-out zone and final locking grooves are acceptable to drop the needle, I can’t imagine why anyone would bother. There are no tracks after the final lead-out zone near the center of the record. This zone leads to a locking groove that is designed to skip to hold the needle from meandering into the record label section.

    Why Not Drop The Needle Anywhere On The Record?

    Take a good, long look at your record. The tiny lines are grooves that are cut, near microscopically, into the vinyl record. Can you see the tiny nuances within a cut groove that show the sounds of a track? Not likely!

    The grooves on a vinyl record are only about 0.0015 to 0.00314 inches wide; that’s 0.04 to 0.08 mm wide for those of you using metric. The last time I checked, that was very small and near impossible for normal humans to see the detail. (source)

    Now, consider the enormous clumsy hands of a human compared to that microscopic-like world where one could see the nuances of the cut groove.

    With that in mind, drop the needle on this fine-cut groove, and you’re likely to cause permanent damage. Likewise, if you drop the needle regularly on a place on the record, you will invariably cause damage.

    How Tracking Force Is Involved

    The downward pressure applied to the stylus, and thus the needle, will invariably play a role in how your needle interacts with your records. And it doesn’t just affect regular play; it affects dropping the needle as well. (source)

    The tracking force pushes down on the needle to hold it in place in the record groove. However, some novice DJs tend to set their tracking force high to let them get away with more when it comes to scratching.

    A greater tracking force equates to a heavier needle. When dropped on the lead-in zone, the needle can score the record, causing an annoying and possibly loud blip in the silence before or after a track starts.

    The Best Way To Drop The Needle

    Before playing any records, you should ensure your record player is tuned correctly.

    Proper turntable tuning involves balancing the tonearm with the cartridge in place.

    Balancing the tonearm is essential for the proper tracking force application to the record. However, as mentioned earlier, one can damage a record if the force is too great.

    After balancing the tonearm assembly and placing the record on the platter, start up the spin.

    Gently lift the tonearm out of the holding cradle. Most record needle cartridges have a built-in handle for moving the tonearm assembly. I like to use mine by holding a finger under the lever arm, letting the weight of the tonearm hold it in place on my finger while I maneuver it to the lead-in zone.

    By lowering the needle by holding your finger under the cartridge handle, you ensure you put zero extra pressure on the record via the needle. You simply lower the needle, and that’s it; no downward force applied.

    FAQ

    Do records start in the middle or outside?

    Records start around the outer edge of the record. As the record plays, the needle and tonearm will gradually wander towards the center of the record.

    Does dropping the needle on the record damage it?

    If by ‘it’ we are referring to the needle, the answer is that it will not likely damage the needle. However, if we refer to the record made of PVC plastic compared to the rigid diamond needle, then the answer is yes; dropping the needle can damage it (the record).

    Can you stop a record with the needle down?

    Technically, you can stop a record with the needle down, but it isn’t advised for the sake of the record.

    The best practice is to lift the needle off the record gently, but only when the needle has reached a lead-in or lead-out zone. That way, you don’t risk damaging where the audio is recorded on the vinyl record.

  • 9 Of The Worst Record Players To Avoid

    9 Of The Worst Record Players To Avoid

    Everyone will try to tell you which are the best record players to buy. And they are likely based on a mixture of real-life reviews and the amount of money the blog is making from convincing you to purchase. But, whoever warns you NOT to buy something?

    Wasting money on products with poor reviews is something I try to avoid. So, I’ve compiled a list of the worst record players (in my opinion) that you should avoid purchasing at all costs.

    Top X lists are enormous. I say let’s take a look at what to avoid for once, rather than just show what’s hot and selling. After all, some of the best gear is just off the main playing field. Let’s just try to avoid the lousy gear while we navigate the turntable market, shall we?

    My Top 9 Worst Record Players To Avoid At All Costs

    In the following table, I’ve collected data from Google on the worst-rated turntables being offered currently. These were all the way at the end of page 16, and Google was not offering a page 17, so I’m assuming these are the worst that Google is willing to show.

    These models are assumed to be the worst available, based on the reviews of actual buyers. If you do your research in the forums, you’ll find a correlation between what people say is not good and the brands listed in the table below. Or at least, I found a correlation at the time of researching this information.

    Record Player

    Rating On Google

    Price On Google

    RPM

    Crosley T200A

    3.3

    $ 129.00

    33.3, 45

    Crosley Turntable McQueen

    3.2

    $ 109.99

    33.3, 45, 78

    Crosley C3

    3.1

    $ 69.25

    33.3, 45

    Jensen JTA 470 Professional

    3.0

    $ 74.55

    33.3, 45, 78

    Victrola Hawthorne 7 in 1

    3.0

    $ 149.99

    33.3, 45, 78

    Victrola Acrylic Bluetooth Turntable

    2.9

    $ 149.99

    33.3, 45

    Crosley Journey Turntable

    2.7

    $ 49.99

    33.3, 45, 78

    Victrola 3-in-1 Bluetooth Suitcase Turntable

    2.6

    $ 49.99

    33.3, 45, 78

    Victrola Brighton Turntable

    2.4

    $ 99.99

    33.3, 45, 78

    As you can see in the table above, the worst record players are dominated by Crosley and Victrola, with only a Jensen also making the list.

    Assuming that user ratings and reviews correlate to the worst record players for sale, it’s safe to say that Victrola is the worst, having all four positions within the bottom half of the ratings. Crosley comes in as the second-worst brand of the turntable, with a review rating correlation showing the four Crosleys all reside in the top half of the worst nine.

    Jensen sneaks its way into the list with an underperforming JTA 470 Professional turntable. Far from what I call professional, this record player is not on my wish list, that’s for sure.

    My advice is to buy yourself something decent. If you’re buying for a five-year-old, then maybe one of these. Nah, even a five-year-old deserves better, in my opinion.

    Are Cheap Turntables Any Good

    The bottom line is that any turntable will play a record as long as the RPM of the turntable coincides with that of the record. However, this says nothing about the quality of the audio. Not to mention, really cheap cartridges with cheap needles might harm your records. So, if you like your records, you should use a half-decent cartridge and needle at the bare minimum.

    There are two primary considerations when looking at purchasing a cheap turntable. Answering these two questions before spending any money can help save you from making a wrong purchase.

    1. What is the purpose of this turntable?
    2. What is a good quality sound worth to me?

    What is the purpose of this turntable?

    When you’re on a tight budget, determining the purpose of a turntable purchase is an excellent way to figure out what you should buy.

    For example, if you are buying a turntable for a kid, and it’s likely they won’t respect it, or perhaps it’s just a fad, then a cheap turntable might be the best solution.

    If you are heading off to college and there is a high likelihood that your record player will get borrowed a lot, then perhaps a cheaper one is a better idea.

    However, if you intend to guard your turntable along with your valued vinyl collection, then a cheap turntable is not for you.

    If you enjoy listening to music, you might want to reconsider and get a better turntable.

    That leads me right into the second point:

    What Is Good Quality Sound Worth To Me?

    When you consider the stereo system, that is something that plays music either out loud or through headphones or other speakers; there are many links in the chain. I am referring to these links: the amplifier, the record, the record player, the speakers, the wiring or cables, and so forth. You get the idea.

    Each of these components creates a chain that outputs music in your chosen way (speakers, headphones, etc.). That chain is only as good as the weakest link. I’m sure you’ve heard that expression before.

    The rule I always use is never to purchase a “link” of equal or lesser value. Or rather, in this case, never purchase a turntable of equal or lesser value. Now keep in mind here that I say the word value. I did not use the word cost. My definition of value is a quality manufactured product intended to last. Sometimes you find a used Technics 1200 at a garage sale for $20, and it works perfectly. That’s value.

    Now that we’ve established value let’s consider the quality of sound for a moment. If we only look for value, quality manufacture intended to last, then we consider quality sound over mediocre sound. What are you willing to pay to upgrade from mediocrity to a pleasurable existence? That is while listening to vinyl records, of course.

    Other Brands To Avoid

    I find that there are altogether too many brands of turntable now. Call me old-fashioned, but in my experience, it’s best to go with the tried, tested, and authentic brands. So, if it’s a weirdly named brand you’ve never heard of, your best bet is to carry on not knowing it and leave it behind.

    However, you can’t judge a record player by whether or not you’ve heard of the name. For example, many people have heard of Crosley and Victrola. But I wouldn’t touch these brands with a ten-foot pole.

    Perhaps I am just old-fashioned, but I’m still a Technics guy. Don’t get me wrong; there are some other great brands out there like Audio Technica, for example.

    Sometimes It’s The Model, Not The Brand

    I’ve found that out of the name brands that don’t catch my eye, I have one rule for turntables: Never buy a portable or ‘suitcase-style record player. They never seem to be any good, and many models have shown to prematurely wear records from cheap needles, improper tracking pressure, and similar issues. Not to mention the atrocious sound quality you get from the small and inadequate built-in speakers in many of these models.

    Sometimes I also notice that a brand might have a flawed model, but some other great ones. For example, you can debate which Technics record player is the best and which is the worst. It’s a matter of perspective, but who is to say the worst Technic model is not equivalent to the best model of another brand?

    Either way, the cheap portable types of record players are usually the bad ones. Turntables intended for single location use are the ones you want to look at if you want any kind of quality at all.

    And if budget is an issue, take a look at hock shops and used electronics stores. You can often find a great deal on a great record player worth much more than a suitcase-style in terms of quality, but often for less money. I once found a Technic 1200 at a garage sale for only $20. I still have that turntable twenty years later. What does that tell you about the value of the $20 I spent?

    Do yourself a favor and buy a decent turntable right from the start; it doesn’t have to be expensive if you shop for a bargain or a used unit. You’ll be glad you did.