Category: Turntables

  • 10 Best Turntables Under $250

    10 Best Turntables Under $250

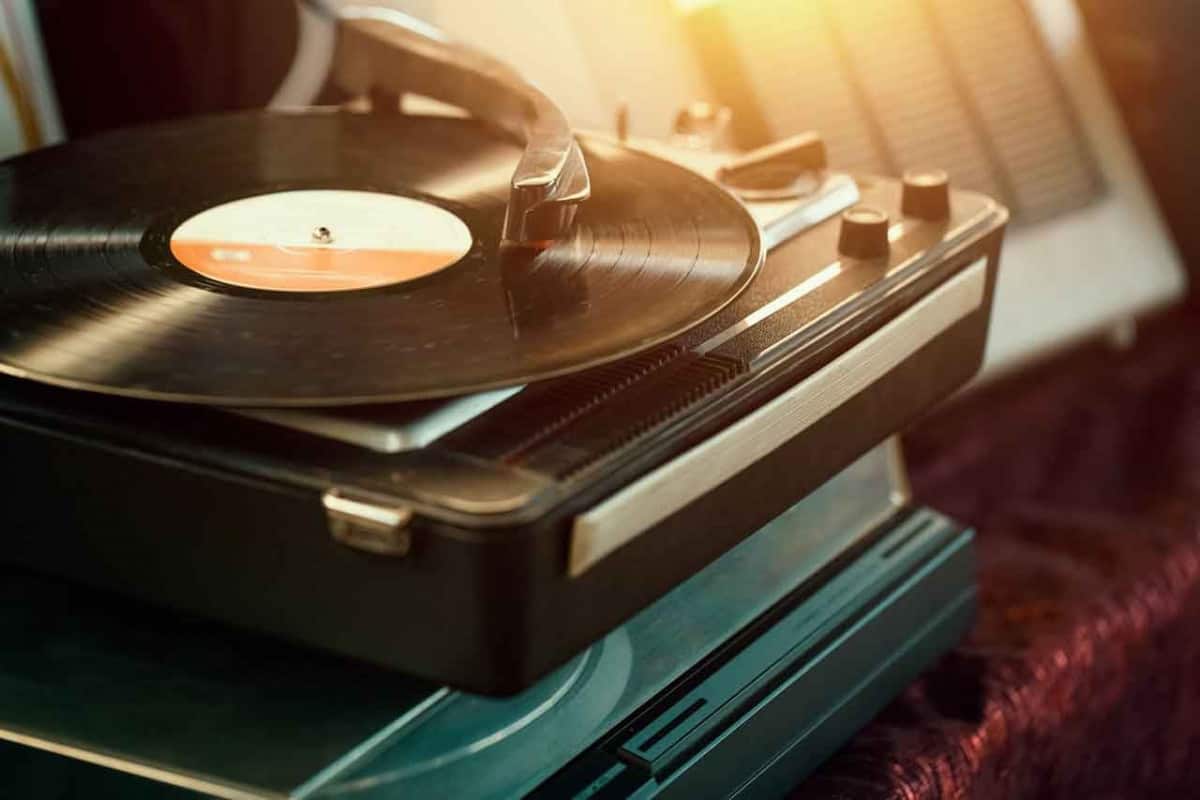
    It seems like you only hear about two kinds of record turntables. There’s the vintage model you come across in a thrift store. It’s pretty battered on the outside and only costs a couple bucks. There’s a 50-50 chance that it sings like an angel… or screeches like the lead in a Hair Metal band.

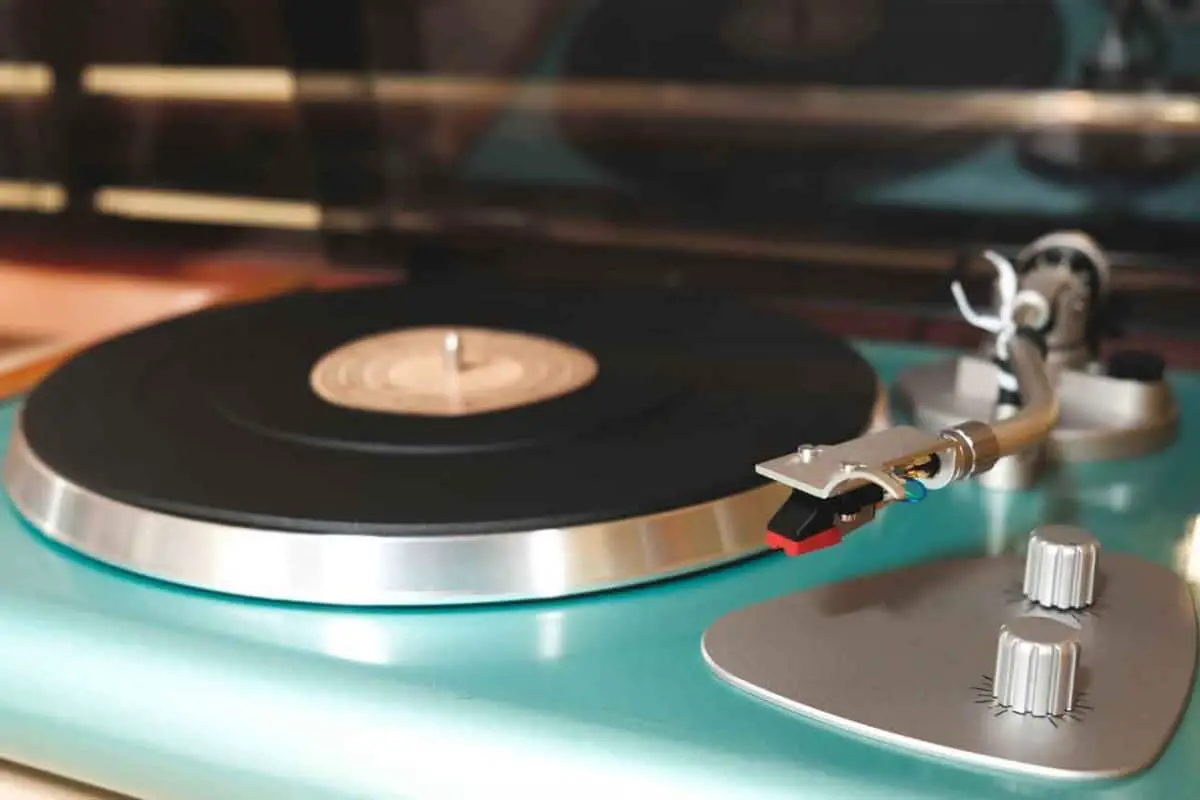
    On the other hand, there’s that sleek modern machine advertised with all the accessories and smart capabilities you could dream of. You’ve been drooling over it for a while now… but it costs two months’ rent.

    There’s some good news here. Thanks to the resurgence in vinyl’s popularity, you don’t need to break the bank or risk your eardrums. The market has some quality record players at a decent price, if you know where to look. All of the devices on this list have 33 and 45 RPM capability. Many of them also include the same features as top-end turntables, like:

    • Bluetooth compatibility
    • upgradeable cartridges and other components
    • curved S-type tonearms
    • automatic operation
    • vibration-dampening design
    • gain controls
    • anti-skate systems
    • a variety of aesthetics, from playfully retro to classic wood to sleek metal

    What’s the catch? If you’ve gotten bit by the vinyl bug, you probably want it all. For under $250, you’ll probably need to pick your priorities and let a few extra features go. That’s why this isn’t a Top Ten-style list that ends on the absolute ‘best record player under 250’. However, there’s a good chance that you’ll find the best turntable under 250 for you somewhere down below.

    The record players on this list were drawn from a variety of review sites. Some were more tech-oriented, focusing on advanced features and fine-tuned control.  Others focused more on beginner-friendly options that were durable and easy to operate.  I took a look at buyers’ reviews as well to get some insight on real user experiences.  Finally, I chose a mix of devices to cater to every kind of user.  In the list below, you’ll find recommendations for everyone from beginners who just want to play their favorite records to techies itching to fiddle with the controls and get that perfect sound.  Let’s take a look.

    10 of the Best Turntables for Under $250

    U-Turn Orbit Basic

    U-Turn Audio - Orbit Plus Turntable (Black)

    Best for: Vinyl beginners willing to save a little by learning manual controls.

    U-Turn designed the Orbit for beginners who’ve gotten a taste for vinyl but don’t want to break the bank. You won’t see all the high end features here or a lot of automatic controls. What are you getting instead?  A simple set up, manual operation, and the option to upgrade certain components in the future. Overall, the U-Turn Orbit Basic incorporates a quality build with great sound for your investment.

    As we mentioned, the turntable’s manual. Users need to set the needle by hand. You also need to manually adjust between 33 and 45 RPM speeds. This can take a little practice and may be difficult for people with poor grip strength or finger dexterity. The advantage of manual over automatic is price, and there’s one less component that might get damaged and need replacing.

    The U-Turn uses a midrange cartridge with a conical diamond stylus. This can be upgraded later, if you’re interested. The cheapest version of the Orbit doesn’t have a preamp, but you can find the model with this feature and still fall within the budget for this list.

    Features:

    • a precision OA2 gimbal tonearm
    • Audio-Technica AT91B cartridge
    • adjustable counterweight
    • low-noise motor
    • powdercoated MDF acrylic platter for clearer playback
    • a cue lever, available separately


    1byone High Fidelity Belt Drive Turntable

    1 BY ONE High Fidelity Belt Drive Turntable with Built-in Speakers, Vinyl Record Player with Magnetic Cartridge, Wireless Playback and Aux-in Functionality, Auto Off

    Best for: People looking for an easy-to-use device that’s compatible with even complex music systems.

    1byone’s High Fidelity Turntable is compact and unobtrusive, keeping the focus on the music. At just 7 ½ inches high and a touch over 17 inches wide, it’s also a great space saver.  You’ll be able to slot the record player into your media tower or the corner of your desk without sacrificing another part of your sound system.

    1byone isn’t marketing this as a turntable so much as an all-in-one music system. In today’s world, that means Bluetooth compatibility. You’ll be able to go analog with your records and then transition smoothly to streaming music from your phone, PC, or other compatible devices. However, that has a limit as the Bluetooth connectivity is input only. You can connect it with devices like tablets but not Bluetooth speakers. On the plus side, the High Fidelity also features an AUX input, addingflexibility to your music setup.


    1 BY ONE High Fidelity Belt Drive Turntable with Built-in Speakers, Vinyl Record Player with Magnetic Cartridge, Wireless Playback and Aux-in Functionality, Auto Off


    Features:

    • manual start
    • switches for pitch correction and shifting speed
    • a universal head shell
    • diamond-tipped MM Phono Audio-Technica stylus
    • adjustable counterweight
    • manual start
    • built-in preamp
    • analog Phono and Line outputs
    • Bluetooth

    Fluance RT81

    Best for: Users who are willing to give up some features for a machine that doesn’t cut corners on quality. Fluance RT81 Elite High Fidelity Vinyl Turntable Record Player with Audio Technica AT95E Cartridge, Belt Drive, Built-in Preamp, Adjustable Counterweight, Solid Wood Plinth - Walnut

    Fluance is one of the bigger names at this price point, so it was tricky to narrow the options down. Their RT81 turntable rises to the top of the pack by offering a solid and usable set of features at a reasonable price.

    The appearance may be a little on the plain side, but every part of it was designed with function in mind. First of all, this record player has a real wood plinth, not veneer. Who cares?  Well, the combination of solid wood and sound isolation feet dampens vibrations throughout the machine. This helps the needle transmit a more accurate sound. Meanwhile, the aluminum platter is lightweight yet sturdy. This helps it keep a steady pace and further reduces the vibration.

    Fluance is offering an upgraded elliptical stylus as well as a curved S-type tonearm. The curve, plus 2.0 grams of tracking force, doesn’t just echo the sleek design of more expensive turntables. It also increases accurate music tracking by keeping the needle centered in the groove. There are semi-automatic controls for the tonearm. You get a switch to engage or disable auto-stop, but no auto-return.

    Features:

    • built-in Texas Instruments pre-amp Fluance RT81 Elite High Fidelity Vinyl Turntable Record Player with Audio Technica AT95E Cartridge, Belt Drive, Built-in Preamp, Adjustable Counterweight, Solid Wood Plinth - Walnut
    • gold-plated RCA line to protect sound quality
    • a pre-balanced and adjustable counterweight
    • an advanced anti-skate system
    • reverb-controlling rubber slip mat
    • AC power adapter for 100V and 240V

    Crosley C100 Belt-Drive Turntable

    Best for: Those who want a modern aesthetic with modern tech as they enjoy classic sound.

    Instead of the usual understated fare and dark woods on the list, Crosley’s C100 has a sleek and modern design incorporating bright aluminum, black accents, and an S-shaped tonearm. It’s a departure for this list and for Crosley itself. The brand used to stick to a retro-replica aesthetic and suitcase style machines. Crosley C100A-SI Belt-Drive Turntable with S-Shaped Tone Arm with Adjustable Counterweight, Silver

    However, the C100 isn’t just good looking. It’s also highly adjustable and customizable. The adjustments give you a lot of control over your final sound. Meanwhile, customization options mean that the device can be grown into as you upgrade features along the way.

    This turntable gives you stop-start controls and an adjustable strobe pitch. The arm itself offers a lockable rest, height adjustment, a counterweight, and hydraulic lift control. All of this is calibrated to keep the needle in position and reducing skipping. This means moment by moment control for people with turntable experience. Raw beginners may have a bit of a learning curve as they learn how to coax out the best analog sound.

    However, it isn’t the most feature-heavy item here. There’s no Bluetooth receiver, which somewhat limits your setup options.

    Features:

    • AT3600L cartridge and NP5 needle
    • adjustable counterweights
    • a preamp ready to plug and play
    • detachable RCA output cables
    • felt slip mat
    • die-cast aluminum platter

    Sony PS-LX310BT

    Sony PS-LX310BT Belt Drive Turntable: Fully Automatic Wireless Vinyl Record Player with Bluetooth and USB Output Black

    Best for: Those with the space for a large, solidly built machine that offers quite a bit of audio control.

    The Sony PS-LX310BT belt drive turntable is heavier and has a larger footprint than many on the list. It’ll take up more space in your media center or audio tower. On the plus side, this size and mass can help keep vibrations to a minimum.

    You’ll be able to fine tune your audio experience with a smartly thought out control scheme, no manual fumbling involved. This includes switches to adjust the speed, accommodate 7” and 12” records, and lift and lower the needle.

    The PS-LX310BT has a preamp like many others here. It stands out from the competition by featuring three gain control settings. For added versatility, you can also switch the preamp off and connect to other devices with Bluetooth.

    Always wanted to digitize your vinyl collection? This turntable can connect to your PC via its USB port. You can use this to record digital files. If that’s a priority for you, check the specifications carefully to make sure your system’s compatible.

    Features:

    • Sony PS-LX310BT Belt Drive Turntable: Fully Automatic Wireless Vinyl Record Player with Bluetooth and USB Output Blackeasy-to-replace cartridge and stylus
    • toggle for speed control
    • a built in preamp
    • one-step audio playback
    • a thick dust cover
    • Phono and line output

    House of Marley Stir It Up Wireless Turntable

    House of Marley Stir It Up Wireless Turntable: Vinyl Record Player with Wireless Bluetooth Connectivity, 2 Speed Belt, Built-in Pre-Amp, and Sustainable Materials

    Best for: People who want an eco-friendly device with a rustic look.

    There’s a growing concern about the environmental impact of the electronic gadgets we love so much. People are looking for that middle ground between enjoying their favorite hobbies while minimizing their carbon footprint. House of Marley’s Stir It Up is a record player designed to fit neatly in that market space.

    This turntable is crafted from multiple sustainable and eco-friendly materials. House of Marley uses bamboo for the wood top. This highly sustainable source of wood offers an elegant natural grain, a clean look, and visual warmth. Here, bamboo is paired with recycled fabric, a solid aluminum platter, and a slipmat of recycled silicone. The Stir It Up turntable has a simple, brighter presence than the dark hardwood or polished steel bricks of some devices. This makes it a comfortable fit for more rustic or casual homes.

    It may seem homey, but this record player offers users a host of modern features. There’s a preamp, making it a snap to integrate with speakers and stream to other devices. The base model doesn’t have Bluetooth, but you can get an upgraded model with pairing capability. You can also take advantage of its USB port to back up your favorite albums on your PC or MAC. This uses Audacity as the recording software. You may want to check out our review of the AT-LP60 (see below) for device compatibility.

    Features:

    • Audio-Technica MM ATN3600L stylus with replaceable cartridge
    • adjustable counter balance
    • volume control
    • a switch for shifting playback speed
    • belt drive with auto start and stop
    • multiple options for connectivity
    • RCA and Phono line

    Audio-Technica AT-LP60

    Audio-Technica AT-LP60-USB Fully Automatic Belt-Drive Stereo Turntable (USB & Analog), Silver

    Best for: Vinyl enthusiasts with some technical knowledge, looking for a feature-rich device on a budget.

    Looks-wise, the AT-LP60 is not that impressive. It’s a simple black and grey with boxy lines and a plastic frame. So what’s it doing on this list?

    You may be giving up a certain style factor, but in return you’ll be gaining a record player with many of the bells and whistles of more advanced and expensive models. It gives you a lot of direct control, with 33/45 RPM toggle, start and stop, and buttons and switches to precisely position the tonearm at the start of the single or album.

    Complete newbies might be overwhelmed by this array of controls. Audiophiles with more experience will appreciate the convenience.

    Looking to connect your Audio-Technica record player with the rest of your setup? There’s a built-in preamp that’s compatible with powered speakers. You can also connect via RCA cables to your stereo, or through the USB to your computer.

    You can use the AT-LP60’s USB connection to make high quality backups on your computer… maybe. The system requirements are fairly basic: a PC or Mac with a USB port of USB 1.1 or higher, running OS X 10.1, Windows 98, or later versions. Most computers have that. The included software itself, Audacity, has been somewhat fiddly for reviewers to use. Backing up music on this device may be better suited for tech-minded people who are already passingly familiar with Audacity.

    Note that you’ll need a CD-R or CD-RW drive for burning the files onto the CD. If your computer doesn’t have one (nowadays, many laptops don’t), you can get a portable CD-R drive and plug it into a second USB port.

    Features:

    • dual magnet ATN3600 cartridge with a replaceable needle
    • a 7” adapter
    • fully automatic belt drive
    • compatible with Mac and PC
    • aluminum platter that dampens resonance and vibration
    • 120V AC only

    Audio-Technica AT-LP60X

    Audio-Technica AT-LP60X-BK Fully Automatic Belt-Drive Stereo Turntable, Black, Hi-Fi, 2 Speed, Dust Cover, Anti-Resonance, Die-Cast Aluminum Platter

    Best for: Users who liked the specs on the Audio-Technica LP60 but want crisper sound.

    Audio-Technica earns another spot on this list with the AT-LP60X. This is technically a newer model of the LP60 that we already covered. However, it isn’t so much an across-the-board upgrade as it is a moderate redesign.

    You’re getting a budget, fully automatic turntable that offers quality sound. The LP60X has many of the same features of the LP60 including:

    • built-in preamp for your powered speakers
    • fully automatic playback with play, stop, and autostop capability
    • multiple switches for device control
    • quality components
    • USB output and Audacity software for archiving your discs to the computer
    • compatibility with 7” and 12” discs

    So what’s different? Audio-Technica has made a number of tweaks to improve the sound experience. The tonearm was redesigned with a new headshell and base to improve needle tracking and reduce vibration. The power cord includes an AC adapter that reduces possible interference. The cable output has been switched from non-removable RCA to removable AUX, allowing you to upgrade the cable or replace it if it gets worn.

    Can a casual ear tell the difference between this and the earlier model? It’s hard to say. Both devices are solid in the mid-range and have decent bass. True beginners may want to choose whichever unit is on sale at the time. People with a trained ear may benefit from the LP60X’s audio fine-tuning.

    The overall look has also gotten an overhaul. The compact design has been squared off a bit. It comes in a choice of classy colors. Overall, it has a more subtle look that would be right at home with other electronic devices. This turntable will fit easily into smaller setups and tight gaps in the media tower.

    Features:

    • upgradeable line and phono outputs
    • adapter for RCA cable

    Pro-Ject Primary E

    Best for: People willing to sacrifice bells and whistles for a quality build that will last for years.

    Pro-Ject has earned a solid reputation on the market with their midrange devices. However, they’ve also dipped their toes into the more budget friendly edge of the scale. The Pro-Ject Primary E is a great introduction to the brand. It’s also a good choice for people who may work up to more expensive record players.

    The Primary E doesn’t offer USB recording. It doesn’t have a built-in phono stage. What it does have is a seriously sturdy build and quality components. These all tie together to create great sound without the hassle of a finicky setup and multiple buttons and switches.

    This device’s overall look is understated. It has a simple top in solid colors, available in white, red, or black. This keeps the focus on the record itself. Note that this unit is designed with three feet, and some users have struggled to keep it stable.

    Features:

    • Ortofon OM cartridge pre-set with tracking force and anti-skate
    • tonearm with durable sapphire bearings to improve needle tracking
    • Made in Europe with a 230V motor
    • acrylic lid and felt mat
    • manual speed control
    • gold-plated RCA Phono cable
    • 7” singles adapter
    • stylus pressure gauge


    Lenko L-85

    Best for: Those looking for user-friendly operation in a budget-friendly package.

    The Lenko L-85 has had a polarizing entry into the budget-friendly turntable market. It is lightweight and includes a lot of plastic. It’s available in a variety of vivid colors that might be at home among Crayola crayons. The rounded appearance has been compared to old-timey school lunch boxes. In short, if you love the classic elegance of hardwood and aluminum, look elsewhere on this list.

    However, the Lenko L-85 is a great choice for the right user. This petite record player is one of the most affordable we cover. It also offers a very user-friendly music experience. The turntable is essentially plug and play. Buyers can be enjoying their favorite vinyl within minutes of unboxing. It may not have the crispest sound, but it handles voices and the midrange well.

    This is a semi-automatic device with a built in phono stage. You can get started right away with the RCA cables and a stereo amp. Sadly, your other devices will languish because it doesn’t offer Bluetooth. As a pleasant surprise, there is an included USB port. That’s a feature missing from some turntables twice the price.

    Features:

    • integrated stereo preamp
    • USB port
    • MM cartridges
    • mechanical arm lift
    • auto return
    • removable plastic dust cover


  • Why Cheap Turntables Can Damage Your Records

    Why Cheap Turntables Can Damage Your Records

    The past few years have seen the so-called “vinyl revival.” With the resurgence of vinyl records, budget-friendly turntables also proliferate. But how do these cheap turntables differ from high-quality, expensive ones?

    Inexpensive turntables will destroy your records. They lack a counterweight to balance the tonearm, causing its weight to rest on the record. Your vinyl record will also hang on these undersized, cheap turntables, so it bends and flexes while spinning.

    There are a lot more reasons why budget-friendly turntables can damage your records. That said, it is essential that you know what to look for when buying a turntable.

    Why Cheap Turntables Can Damage Your Records

    Back then, the only place where people can purchase a turntable was a high-end audio shop and online stores. But since vinyl records became popular again, manufacturers began to produce turntables catered to those who are on a tight budget.

    Right now, there is a lot of cheap record players in the markets. However, these turntables have low-quality parts, making them bad for your vinyl record.

    Here are the reasons why cheap turntables can cause damage to your vinyl records:

    1. Cheap Turntables Do Not Have A Counterweight

    A counterweight is a part of a record player that works to balance out the tonearm. This way, all of the cartridge tonearm’s weight will not rest on the record itself.

    Additionally, turntables should have a tracking weight — the weight at which the tonearm rests on the record. A turntable’s tracking weight should be from one to two grams. The tracking weight is also adjustable to balance the tonearm if you add a new cartridge.

    A correctly set counterweight will allow modern records to survive even after hundreds of plays. However, cheap turntables do not have a counterweight. Instead, they only use a piece of plastic to hold and balance the tonearm.

    Since there is no counterweight, low-quality turntables will grind away your vinyl records twice or trice the right tracking weight. So, after approximately ten plays, your record will begin to deteriorate.

    1. Wrong Stylus Size

    Cheap turntable styli are too large for modern 33rpm records. They are also too small for old 78rpm records. Still, manufacturers opted for such a stylus to save cost and make the final product’s market price affordable.

    If you do not want your turntable to ruin your records, you need to ensure that you are getting one with two different styles. This way, you will be able to play both 33rpm and 78rpm vinyl records.

    A lot of good turntables do not even have a 78rpm speed. The reason is that you need to make many changes to play the old format properly. The large stylus will cause the turntable to skip over your record’s groove, leading to scratches.

    1. Lack Of Anti-shake Feature

    Turntables with an anti-shake feature prevent the arm from going to the center or out of the record. If the arm tries to move in and out of a playing record, it damages one side of the groove.

    If your turntable does not have an anti-shake feature, the arm will grind away your record. Anti-shake works by keeping the stylus at the center of the group. As a result, it maximizes the quality of sound and minimizes the damage to the vinyl record.

    1. Undersized Platter

    Some cheap turntables are too small, causing the record to hang off of it. Since the tonearm is tracking extensively against the other side of the vinyl record, it causes it to flex and bend while spinning. Such a factor results in lousy sound quality and damage to the groove of the record.

    1. Built-in Speakers

    Turntables amplify the vibrations that the stylus makes while it is running on the vinyl record. Some cheap turntables have built-in speakers that work by making vibrations. The vibrations cause the record player to skip, resulting in terrible audio quality and damage to your record.

    What Makes An Excellent Record Player?

    There are many turntables in the market. So picking the best one can be a difficult task. If you do not know the features you need for a record player, you might get the wrong one.

    But one thing worth noting about turntables is that they can be expensive. At first, spending more than $1,000 for a record player can sound ludicrous. But considering the features that you can get for this price, you are definitely getting what you paid for.

    On the other hand, buying a cheap turntable is not only a waste of money but is also a way of putting your vinyl record at risk.

    For that reason, make sure that you know the features that your record player needs to have.

    Sufficient Extraction

    A good turntable should be able to extract as much information out of the grooves as possible. You may expect your record player to extract all the information from the record groove, onto the stylus, and into the cartridge, without distortion or interference. However, that is impossible in reality.

    That said, you need to get the most stable turntable possible for your vinyl record.

    Good Motors And Belts

    It is inevitable for motors to produce vibration. But high-quality turntables can minimize their degree of vibration. They do such by utilizing a belt drive.

    Moreover, a belt drive also acts as a driver for the platter apart from working as a shock absorber for the motor’s vibration.

    Vibration Reduction

    There are different factors responsible for making a record player produce excellent sound:

    • Proper stylus size
    • Counterweight
    • Vibration reduction

    While we cannot argue that these three factors are essential, turntable engineers have a primary goal of reducing the most amount of vibration that they can.

    As a result, the only vibration that high-quality record players have comes from the record groove that moves around the stylus. Such is the reason why expensive turntables sound a lot better than cheap ones.

    Perfect Plinth

    The plinth is basically the body of the turntable. This part comes in a variety of materials and shapes. If you want the best turntable in terms of isolating vibration, a double plinth is an ideal choice.

    Moreover, the different materials used for making the plinth can significantly affect the sound. The reason is that different materials mean different resonation, frequencies, and how fast or slow vibration passes through them.

    In addition, the feet where the plinth sits play a factor. The feet can aid in controlling resonance. It can also dampen the vibration coming from the cabinet that your turntable is sitting on.

    The plinth also encases the main bearing that the spindle turns on.

    With all that’s said, you should look for a plinth that perfectly isolates vibration and improves resonation.

    Good Platter Design

    Turntable engineers often use heavy materials to produce heavy platters. This way, the platter will be less prone to being disturbed by vibration. Apart from that, it will also have inertia on its side.

    Heavy platter generally rotates to a speed that you set without it being too fast or too slow. On the other hand, lightweight platters tend to slow down pretty quickly.

    Moreover, some turntables feature a platter mat. This mat helps in reducing vibrations. It is essential to have something for vibration control so that it will not pass up into the record and reduce the sound quality produced.

    Furthermore, high-quality turntables have a platter and plinth designed to negate the need for a platter mat.

    Sources

    1. Stephen Nelson-Smith, Just Say No! Why Cheap Turntables Destroy Your Records, Audio Advent, https://audio-advent.ghost.io/why-cheap-turntables-destroy-your-records/ July 27, 2021. 
    2. Will A Cheap Turntable Damage Your Records?, Audio Appraisal, https://www.audioappraisal.com/will-a-cheap-turntable-damage-your-records/ July 27, 2021.  
    3. AJ Powell, Why Pay $1,000 for a Turntable?, Gear Patrol, https://www.gearpatrol.com/tech/a264002/how-a-good-turntable-works/ July 27, 2021. 
  • Why You Shouldn’t Leave A Record On The Turntable

    Why You Shouldn’t Leave A Record On The Turntable

    Vinyl records require a lot of maintenance if you want them to provide you with the best sound quality. However, people sometimes leave them on the turntable so that they will not need to position it again once they want to play music. While that sounds convenient, what you don’t know is that it can damage your vinyl record.

    Leaving your record out of its sleeve will or on the turntable will expose it to dirt and dust. It will also increase the risk of damaging the record’s surface. In the long run, the sound quality of your vinyl record will degrade until you can no longer use it.

    Apart from leaving your vinyl record on the turntable, other things can ruin it. Fortunately, you can take several steps to keep the integrity of your record.

    Leaving Your Record On The Turntable: Is It Bad?

    If you want to get the best possible audio quality from your vinyl record, you need to exert a significant amount of discipline. Unlike digital music that does not require any maintenance, vinyl records need lots of time and care to remain in their best state.

    If you are new to collecting vinyl records, you may have tried leaving it on the turntable, so you can simply play it whenever you want to. But as good as that sounds, leaving your record on the turntable while it is not in use can ruin it.

    Ideally, the only time you can keep your record out of its sleeve is while using it. If you leave it on the platter or for an extended period, you are exposing the vinyl record to dirt and dust. Leaving the record on the turntable often will increase the risk of damaging its surface.

    Even if your turntable has a dust cover, leaving the record on the platter when not in use is still not ideal. A vinyl record sleeve or jacket is there for a reason, and that is to protect your record. So, make sure that you put your vinyl record in it the moment you are done playing some good music.

    Bad Habits That Damage Your Vinyl Record

    Knowing how to clean your vinyl record is one thing. But that is only the beginning of maintaining it. Apart from cleaning, you should be aware of your habits to avoid to ensure that you are not damaging your record.

    1. Horizontally Stacking Your Records

    Horizontally storing your vinyl records on your storage shelf makes sense. However, this storage method is the most common habit that every record owner should avoid.

    Under extreme conditions, stacking your records can render them unplayable. Putting your records on top of each other will apply excess weight to those stored under the stack. That can lead to warping and permanent damage to the record sleeve.

    For that reason, store your vinyl records vertically to prevent warping caused by pressure.

    1. Touching The Surface Of Your Record

    Your hands have dirt, natural oil, and grease. Touching the vinyl record will transfer these oils and dirt to the surface. That will result in the griming build-up, and the dirt and dust that stuck to the oil your hand transferred to the record’s surface will contribute to wearing the stylus.

    To avoid damaging your vinyl record, always handle it by the outer edge. In case you touched the surface accidentally, the best thing to do is to clean it immediately.

    If you cannot avoid touching your record, use a record cleaning solution to clean your hand prior to handling.

    1. Picking Up The Record Even Before The Platter Stops

    Removing the record from the turntable even before the platter stops spinning will scratch the wax’s other side. Flipping the record as soon as you turn the turntable off to play your favorite song may sound tempting. However, your patience can go a long way in preventing any damage to your vinyl record.

    1. Carelessly Pitting The Vinyl Record Back To Its Sleeve

    Some people let their vinyl record drop as it enters the sleeve. This habit will damage not only the record but also the sleeve.

    If you let the record slip into the sleeve often, you will end up punching a hole into the bottom of the sleeve. It is also likely that you will scratch the surface of the record.

    To prevent these damages, open the sleeve wide enough. This way, you will be able to reduce contact with the vinyl record.

    1. Poor Cleaning Practice

    One thing you need to avoid when cleaning your vinyl record is using household cleaning products. Using harsh chemicals to clean your record will be the fastest way to render it useless.

    In my experience, this is one of the biggest problems people have when trying to increase the longevity of their vinyl collection.

    Vinyl records are delicate as they consist of polyvinyl chloride. Even the slightest change will cause a significant impact on the tiny grooves of the record. So, if you have no choice but to clean the record, make sure that you are aware of the proper cleaning method and the materials that you need to use.

    How To Properly Clean Your Record

    Whether your record is new or old, you need to take time to take care of it. As mentioned, the wrong cleaning practice will damage your vinyl record and reduce its audio quality. Worse, you might even destroy your record permanently if you cleaned it the wrong way.

    To prevent yourself from damaging your vinyl record, you need to be aware of the proper cleaning method that you can do.

    But before that, here are the materials that you need to use when cleaning your record:

    • Record brush
    • Cleaning solution for vinyl record
    • Microfiber or cotton cloth
    1. Use A Record Brush To Remove Static And Dust

    When removing dust particles from your vinyl record, use a brush specifically made for a vinyl record. Do some long and gentle brush strokes to ensure that you can remove dust without scratching the record’s surface.

    1. Check If The Record Has Visible Blemishes

    Inspect the surface of the vinyl record under a soft and bright light to see if there are smudges, discolorations, and fingerprints. If there are any, you will need to exert time and record to remove them. You may even have to scrub the entire record in some cases.

    If there are many smudges and fingerprints, use warm and soapy water to clean the record. Next, allow it to dry and repeat the first step.

    1. Use Spray Cleaning Solution On Parts That Need Intensive Cleaning

    Check the entire record for sections that need intensive cleaning. If you find problem areas, spray a cleaning solution directly on them. However, it would be best if you were careful not to touch the label with any liquid to prevent the epoxy from loosening.

    Additionally, use a cleaning solution specifically made for vinyl records. Avoid using household cleaning solutions as the harsh chemicals in them can damage the record’s delicate surface.

    1. Wipe The Record Clean With A Microfiber Cloth

    After applying a cleaning solution on the record’s surface, wipe it in a circular motion using cotton or a microfiber cloth. Apply pressure to rub away the blemishes.

    Again, avoid touching the label to prevent any damage and discoloration.

    1. Store The Vinyl Record Back To Its Sleeve

    As mentioned, open the sleeve wide enough when putting the vinyl record back to it. This way, the sleeve will not touch the record too much, preventing its surface from acquiring scratches.

    Sources

    1. Marc Henshall, Seven Bad Habits That Will Destroy Your Vinyl Records, Your Sound Matters, https://www.yoursoundmatters.com/seven-bad-habits-will-destroy-vinyl-records/ Accessed July 28, 2021.
    2. 10 Things NOT to do to Your Vinyl Records, Disco Music.Com, https://www.discomusic.com/10-things-not-to-do-to-your-vinyl-records/ Accessed July 28, 2021.
    3. James Schiff & Brandt Ranj, For The Record: How to Clean and Care for Your Vinyl Collection, https://www.rollingstone.com/product-recommendations/electronics/how-to-clean-vinyl-records-850080/ Accessed July 28, 2021.
  • Turntable Cable Lengths – An Audiophile’s Ultimate Guide

    Turntable Cable Lengths – An Audiophile’s Ultimate Guide

    Whether you are setting up a temporary or a permanent stereo system, knowing the basics about how your components communicate is essential to getting the best quality sound. This fact couldn’t be more true when it comes to the delicate signals produced by a turntable. So, knowing the proper gauge and turntable cable lengths are critical to maximizing your audio experiences.

    Understanding the correct turntable cable length involves using the equations to calculate voltage drop. Depending on the turntable and whether or not a pre-amp exists within will significantly affect the length of cable necessary before noticeable audio signal degradation.

    Okay, so you don’t really need to be an electrical engineer to figure this out, even if it may appear as such. Never fear; I am going to walk you through it, step by step. So, by the end of this article, you’ll sound like a geeky audio engineer spewing formulas and numbers until your heart’s content. Let’s take this for a spin, shall we?

    Turntable Cable Lengths – Start Here

    As I mentioned, we need to apply some math if we are to figure out just how long a cable is required (and what gauge) for optimal audio performance. However, before we dive right in, I should note the difference between two types of signals you likely have heard of: PHONO and LINE.

    PHONO SIGNAL

    Back in the day, when vinyl records were being invented and innovated, there was an issue with how much audio you could fit on a record. So, the Recording Industry Association of America (RIAA) introduced a standard (still in use today). This standard they created boosted the higher frequencies while lowering the low ones. In essence, it allowed more audio to fit on a record. However, when reproduced, it sounded weird, so the record players needed a mechanism to undo the standard for playback. The RIAA preamp was born, and this internal device amplifies the frequencies, reversing the compression standard imposed to fit more audio on the vinyl. (source)

    The signal is called PHONO before it reaches the preamp. Many turntables offer both PHONO and LINE outputs.

    The voltage of the PHONO signal is very weak and delicate at only 0.004 to 0.005 volts compared to the 0.3 volts found on the LINE signal. (source)

    LINE SIGNAL

    The audio signal produced post preamp in a turntable with LINE output is the amplified and corrected frequency version of the PHONO signal produced by the record cartridge. As mentioned, the LINE signal is amplified and runs at the industry nominal standard of 0.316 volts, with a peak of 0.447 volts. (source)

    When To Use PHONO Or LINE

    If your turntable has a built-in preamp, then you use the LINE output to your amplifier’s AUX input. Do not plug a preamp line like LINE into a PHONO input. If you have a PHONO input on your amplifier, ensure that a)you’re using the PHONO output from the turntable and b) if the turntable has an output selector, ensure it’s selected PHONO before plugging into your PHONO input on your amplifier.

    Also, it’s wise to do the wiring when everything is turned off unless you like frying your speakers (And your ears).

    Voltage Drop

    Okay, so we’re almost ready to discuss cable lengths. First, you need to understand why length matters. The reason length matters is because of a phenomenon called voltage drop. 

    Here’s how voltage drop works. So, you have a braided cable wire, and that wire is a specific size. The wire gauge or AWG rating measures its thickness.

    The wire gauge, or thickness, determines how much metal area there is in any slice of the wire at any given time. As such, it determines the amount of electricity that can safely pass through each slice of the wire as the electricity travels along. If there is too much electricity and not enough wire, the wire will heat up and catch fire to the wire’s housing. If there is too much wire and not enough electricity, the electricity will weaken over distance and time as it disperses and slowly fades into the surroundings. Some even escape the wire as electromagnetic fields, further weakening the electrical charge. 

    Over distance, this loss of charge, or voltage drop as it is called, will continue until there is no electrical signal left in the wire. Now, in a common audio line voltage of 0.316 volts, the voltage drop will be relatively negligible in a setup where the turntable is only a foot or two from the amp. But if your turntable doesn’t possess a built-in pre-amp, then you need to send the tiny signal (0.0004 volts) from the cartridge to your preamp. That tiny signal is going to be the victim of voltage drop if you try to go too far with the cabling. The preamp should sit basically right beside the turntable with the shortest possible cable length.

    So the question is now, how long can you send a PHONO signal down a wire before voltage drop really messes with your audio signal. And just how long can that cable be before we have a problem?

    Voltage Drop General Formula

    VD = IR cox0 + IX sin0

    Where:

    VD = Voltage drop, the line to neutral, in volts 

    I = Line current in amps (the line load)

    R = Circuit Resistance, ohms

    X = Circuit Reactance, ohms

    Cos0 = decimal power factor of the load

    Sin0 = decimal reactive factor of the load

    Obviously, we’re going to need to know a few more things, and also we’ll need a scientific calculator. We already know cos and sin, as they are programmed into the calculator. We also know the voltage, but that doesn’t appear in our formula. We need to know the amperage, resistance and reactance.

    To get the rest of our numbers, we can either get a decent multimeter and start metering things out, or look in the manual for your particular record player as well as cartridge and get the rest of the data.

    In reality, no one is going to want to go to all the effort, so I’ve created some general rules, which you will find below.

    Rules For Turntable Cabling Length And Gauge

    I’ve got four basic rules I follow for my turntable cabling. Here is what has worked for me:

    • Phono cables like those used in your tonearm to feed the cartridge should be at least AWG 33. There are reported issues with 34 and smaller, but it depends on the particular manufacturer. The insulation ought to be isolating because the weak signals are easily affected by surrounding electrical fields. The wires need to be small due to weight restrictions that can affect the quality of playback, so we keep them thin to keep them light.
    • Phono out like from the back of your turntable generally follow the same rules as for standard audio cabling in terms of gauge. I like to use the usual RCA’s at 14 AWG for this, but there’s a catch:
    • External phono cables at 14 AWG should not be longer than 3 feet.
    • Line cables at 14 AWG should not be longer than 100 feet.

    According to Techwalla, most RCA cables built with decent quality or “reasonably well with shielding” as they say, can effectively run up to 200 feet.

    High-quality cabling might get you more distance, but you might need a step-up transformer amplifier to extend the signal. 

    Isn’t A Bigger Cable Always Better?

    It isn’t just in the movie Star Wars where we find Rebels. In the world of electricity, the rebel is called resistance. No, not The Resistance, just resistance. Resistance is measured in ohms, represented by the Ω symbol.

    Just to give you the quickest rundown on how it works: Electricity, represented by a bunch of flying electrons, travels down the conductive path that is the wire. However, the wire is a solid, and not a gas, so although great for conductivity, there are also a lot of atoms in the way, which the electrons have to fly around. Think of it like this: the wire is a road, but because it’s a road it’s a natural traffic jam.

    The more traffic on the road, the more the jam gets worse. That slows down the traffic more and causes the flying electrons to slow and watch the traffic, carefully rubbernecking while their counterparts are honking their horns because they are late to lunch. 

    So, our wire has this ‘traffic’ built-in that causes the flying electrons to slow down. The slow down causes other electrons to get mad, which heats things up until someone melts the wire.

    Anyway, if you are a Douglas Adams fan, I hope you enjoyed the metaphor, if not, then I apologize. The point is that all wires have resistance. The smaller the wire, the less the size road so the resistance is greater. The larger the wire, the larger the road, the more room for traffic, the less resistance.

    However, when you have a very weak electrical signal, then a really big road is somewhere the signal can get lost, confused, and eventually pull over to the side of the road to contemplate its own existence. In other words, too large a cable and the signal dissipates faster from dispersion. 

    It applies to very weak signals like those coming from a cartridge. That and cartridge cable needs to be as small and lightweight as possible or it can affect playback, anti-skate, and more.

    At the end of the day, follow the guidelines from the manufacturer for your particular equipment and you’ll do just fine. If you can’t find those, stick to my rules above and in most cases, you’ll have great sound.

  • How to Level Your Turntable

    How to Level Your Turntable

    Ensuring that your turntable is on a level surface is critical during setup; this helps avoid issues like stylus tracking problems that cause distortion, skipping, or imbalances in the channels.

    The turntable’s feet are responsible for leveling the turntable and isolating it from feedback, making it work without giving problems.

    In this article, I will be giving an in-depth guide on how to level your turntable, what isolation and balanced turntable feet do to your music output, feedback, placement, and tips to help you get the most out of your turntable.

    Part 1: How Do I Make Sure My Turntable is Level?

    To make sure your turntable is level, the following steps are important;

    1. Place it on a flat surface
    2. Use a bubble level indicator
    3. Balance the feet
    4. Do a final check

    Flat surface: 

    The first step is to ensure that you place your turntable on a flat surface. This step is essential because in my experience, placing your turntable on an irregular surface can cause issues like vinyl record damage, damaged stylus, and improper isolation of vibrations. The surface of the platform used must be balanced and smooth. (source)

    Bubble level indicator: 

    The next step is using a bubble level indicator. I use a bubble level indicator to check if my turntable is adequately leveled. When you place the bubble level indicator on the platter, you will be able to check if the turntable is balanced or not. (source)

    Balance the feet: 

    This next step involves loosening the turntable feet and screwing them back in place until they are balanced. Most turntable feet can be unscrewed and screwed back, in cases where it is still unbalanced, and then you can easily adjust each of the four pegs till they align with themselves.

    Final check: 

    Finally, use your bubble indicator to check if it is at the center; after all the three above steps have been carried out. If you check your bubble level indicator, and it is at the center, you have successfully leveled your turntable, and it is now ready for use. This also means you aligned the turntable’s feet correctly, so you can always use your bubble indicator while carrying out step 3 to check which peg to screw and which one to unscrew.

    Part 2: Six Best Bubble Level Indicators For Your Turntables

    The primary tool used to level a turntable in the steps above is the Bubble Level Indicator, and it checks if your turntable is centered. The following bubble level indicators, with their price information links attached, are currently the top bestsellers and highly recommended by turntable enthusiasts:

    1. Audio-Technica AT615a
    2. Circular bullseye level inclinometers
    3. Nobsound aluminum record weight LP turntable disc.
    4. Viborg LP320B disc stabilizer HiFi vinyl weight clamp.
    5. Standard spirit bubble level.
    6. Ubei levels high precision round bullseye indicator.

    Audio-Technica AT615a 

    Audio-Technica AT615a is a high precision bubble level indicator; it has a machined housing made of aluminum, comes in 37mm diameter and 17mm height. It is primarily known for its excessive precision, which is essential in the leveling of a turntable for getting accurate results. Click here for price information.

    Circular Bullseye Level Inclinometers 

    The Circular Bullseye Level Inclinometers bubble level indicator comprises top-notch PMMA quality, manufactured with registrations around its round vial, and a waterproof feature. There are no adhesives or glue included in its product, and it is also for not just turntables but telescopes, cabinets, and other equipment. Click here for price information.

    Nobsound Aluminium Record Weight LP Turntable Disc 

    The rotation velocity of the disc has a combined power of 60 hertz and 45rpm, produced from non-magnetic aluminum material. Its spindle gap is a match for many varieties of turntables, including old and modern ones. It checks The steadiness of your turntable and helps improve sound quality by ensuring balance. Click here for price information.

    Viborg LP320B Disc Stabilizer HiFi Vinyl Weight Clamp 

    This level indicator is luxurious because of its shiny black color and attractive look. However, it is efficient in leveling turntables, improves the sound from proper balance, and helps in eliminating noise from feedback. Click here for price information. 

    Standard Spirit Bubble Level 

    This Standard Spirit is a side-to-side bubble level indicator, and it is permanently mounted to wall frames or in hand. It works by pointing out the part of your turntable that needs leveling. It comes with six ranges per pack and can double as a hanger for artworks aside from leveling your turntable. Click here for price information. 

    Ubei Levels High Precision Round Bullseye Indicator 

    This indicator accurately measures and levels your turntable’s balance, indicating when it’s wobbly or perfectly centered. It is shockproof, made from high-quality non-magnetic aluminum, and known for its accuracy. Click here for price information. 


    All the above-listed bubble level indicators were carefully selected and listed as the best by me because they are mobile and can be moved easily at any time, budget-friendly, and will not break your bank account to purchase. They are all top-level indicators popular for their accuracy in balancing turntables.

    Home Levelling Tips

    The following tips are helpful when setting up your turntable for use at home or small gatherings, they guide you on precautions to follow, and from experience, they have never failed or caused complications: (source)

    • The first helpful tip is in placement; ensure to place your turntables and speakers on different platforms or surfaces to avoid causing vibrations to your turntables, which, as earlier stated, can cause several complications.
    • Remember to place your turntable on flat surfaces and level adequately.
    • Ensure proper isolation of your turntable from external sources that can cause problems, including electronic equipment that poses threats.
    • Proper storage of your turntable is just as necessary as leveling it to keep it safe from dust and molds. Store on flat surfaces, too, not just when being played but also in storage.
    • Some people might not find this last tip necessary; however, it is essential to know that you don’t have to level your turntable every time you use it. Only when it has been moved or disturbed.

    Does a Turntable Have to Be Leveled?

    Leveling your turntable is important, and is one of the precautionary measures you must take before playing your records.

    The process might seem boring to carry out frequently, but it is necessary to do it and avoid bigger complications that come from unbalanced turntables. Your turntable must be leveled properly, and if you do not want to always do it, make sure you place it in a safe place free from external factors after getting it leveled.

    Frequently Asked Questions (FAQ)

    How Long Does It Take to Level a Turntable?

    Leveling your turntable takes approximately 5 minutes, depending on the methods used.

    My first experience lasted for more than 5 minutes, just in case you find yourself struggling with it on your first try. As you keep leveling your turntables when necessary, you get the hang of it and become a pro yourself.

    What Tools Do I Need to Level a Turntable?

    You will need a bubble level indicator and a flat surface or platform.

    The other necessary thing is the peg, and it comes with your turntable. The bubble indicator will help check if the turntable is at the center after screwing and unscrewing the pegs, while the flat surface is the platform needed to place the turntable on for balance.

    Summary 

    Leveling your turntable, from my experience, is an essential maintenance practice for both turntables and record players. Imbalance turntables cause a lot of costly damage; antique or rare vinyl records can also get damaged. 

    Similar to the leveling is the stability of where you place your turntable. For example, it might be perfectly level but if a person or even a pet walks by and the turntable could jump. Ideal locations for turntables include near-load baring walls where floors are secure and have less chance of transmitting vibration. 

    With a good foundation and a level platform, your records will play well. Just ensure you get things nice and level and you’ll be off to a great start.

  • The Best Way To Clean A Turntable Rubber Mat

    The Best Way To Clean A Turntable Rubber Mat

    Looking for the best way to clean a turntable rubber mat shouldn’t be a huge ordeal. Rubber mats help dampen vibrations and also aid in sticking to the metal platter and record. In addition, the rubber mat allows the record to gain and hold momentum via the spinning platter underneath.

    Cleaning any rubber products, be it a turntable rubber mat or other rubber product, is best accomplished using warm water and mild soap. Natural soaps are the best, maintaining a lack of chemical additives such as perfumes or moisturizers that could leave a residue on the rubber mat.

    It may seem very straightforward to clean a rubber mat with soap and water merely, but there’s a little more to it than that, which you would do well to understand. After all, you don’t want to wreck that rubber mat by using the wrong soap or drying method. I’ll take you through a quick tutorial on adequately cleaning your mat, what soaps work best, and some other tips like proper drying methods, so stick around and let’s get this spinning. 

    The #1 Best Way To Clean A Turntable Rubber Mat

    The best way to clean a turntable rubber mat is by using warm water and mild soap. But, if you want to keep that mat in great shape, you have to heed the water, soap, and drying techniques. So, let’s take a look deeper into rubber, soap, water, and drying.

    Rubber – What You Need To Know

    Rubber is an incredible invention of humans, first created from the sap of certain plants, such as the rubber tree. Rubber is a polymer, whether it’s the natural rubber or rubber created synthetically. As a polymer, the molecule is susceptible to ultraviolet radiation, extreme temperatures, ozone, and oxidation. (source)

    Best Soaps For Rubber

    When determining the best soaps for use with rubber, we need to take a few things into account. First, the best soaps for cleaning rubber are the most natural, with the fewest additives. Second, you may also find some specialty soaps for cleaning tire rubber, but without knowing if they will leave a residue, like those that would make your tires shine, I wouldn’t recommend using them on a turntable rubber mat.

    Finding pure soap might be a bit of a challenge, but it isn’t impossible. Many people have allergies to perfumes and additives, so I’ve found that it’s pretty simple to find pure soap, but you have to know what to look for in a soap. 

    Try searching in grocery stores and pharmacies. Look where they sell the hand soap, and you will likely find either bar soap or liquid soap that does not have perfumes. You’re looking for natural, unscented, and without additives. Any additives, perfumes, or moisturizers will leave a film on the rubber that will transfer to your records. As that would be bad, we don’t want to use soap with additives like perfumes or moisturizers.

    Water Types For Rubber Cleaning

    When cleaning rubber, it is best to use mild soaps, but what about water? I mean, it’s just a turntable rubber mat, so I don’t recommend going to the effort of only using distilled water. We aren’t creating a vaccine in a laboratory. We’re just cleaning a turntable rubber mat, right?

    Ordinary tap water should be fine for cleaning rubber. Use a warm temperature, and just make sure that the rubber is thoroughly rinsed after so no soap stays on the mat.

    If you are a purist, then the best water to use is distilled. Distilled water is pure water and doesn’t have additives like chlorine, fluoride, or other such things. Although I think it would be a waste of time and money, if you have some distilled water and no other use, then have at it and go ahead with cleaning your rubber mat with it.

    Drying Rubber – The Right Way

    Drying a rubber mat is simple with some paper towels (if you like having to wash it all over again). But I don’t recommend using a towel, paper towel, or anything else. Why? They leave paper or cloth dust on the rubber, which negates your work to clean it in the first place.

    The best method to dry your turntable rubber mat is to hang it to air dry. Using warm water will promote the warmth in the mat to aid in speeding evaporative drying. Also, by merely letting the mat air dry, you will not be covering it in paper towel dust or fabric dust from a towel or other drying material.

    Should I Condition My Rubber Mat?

    Many people who are aware of rubber decay will want to know if one can condition the rubber. After all, many automotive products claim to condition tires – and they are also made of rubber, right?

    The issue with most tire rubber conditioners is that they cater to the car crowd who want to see shiny black tires on their vehicles. Unfortunately, that shiny sheen is the result of a leftover oily coating. Now that might seem cool – a shiny black rubber mat on your turntable. However, consider the dust that will stick to that residue or the shine residue that will rub onto your vinyl records. Worse yet, what if it reacts with the vinyl record?

    In short, the best idea is to avoid any rubber conditioners. Although working well on rubber applications where a bit of residue is okay, even natural olive oil should never be used on turntable rubber mats. Keep them clean, keep them clear of residues.

    How Do You Keep The Rubber From Drying Out?

    Older turntable rubber mats will start to degrade over time. Unfortunately, there is no way around it unless you can store your rubber in a vacuum environment with zero light, and of course, no time.

    As mentioned earlier, light (UV), ozone, oxygen, and temperature affect rubber decay. As a result, the rubber will inevitably become brittle and crack.

    Unfortunately, if you have an antique turntable and the rubber mat has aged, there is little you can do to renew the mat. Likely, you will merely have to replace it.

    How To Keep Rubber Mats In Good Condition

    Rubber is a wonder of nature. The elasticity and other features have made rubber a part of many parts of our lives, including use on the turntable platter. However, aged rubber will let the record slip and no longer hold the sticky rubber qualities that made it a great connector for vinyl records to metal turntable platters.

    A rubber band that is regularly used, regularly stretched, and allowed to spring back, will last longer than an elastic that sits idle. For example, if you were to experiment with two elastics, one stretched over a jar, the other regularly handled and stretched, you would find the elastic regularly handled and stretched would last longer.

    There are two reasons why some elastic that gets handled last longer. First, your hands have oils on them from touching your face. Second, that oil actually helps protect the rubber from oxidation. But that same oil on your records is a bad thing because it traps dust and dirt.

    The other reason why the elastic that gets handled lasts longer has to do with additives many manufacturers add to the rubber of things like tires and elastics. (source)

    However, rubber mat manufacturers for turntables likely don’t bother adding these substances during the manufacturing process due to the lack of need for contraction or stretching of the rubber during regular use.

    So, the only real thing that helps is again natural oils. But these same oils are not good on your records, so if you choose to oil your turntable rubber mat for prolonged life, it would be best to use a buffer like a slipmat. Using a felt slipmat keeps the oil residue from conditioning the rubber mat from getting on your records. 

    However, using a slipmat negates the need for a rubber mat in the first place. The choice, my vinyl-loving friends, is up to you. Either way, you know how to clean the rubber mat properly at the very least.

    Related articles

  • My Turntable Smell Like It’s Burning: 5 Issues And Easy Fix Tips

    My Turntable Smell Like It’s Burning: 5 Issues And Easy Fix Tips

    Relaxing to some classic vinyl and a funny smell like burning starts to meander across the room. It’s subtle but makes you wonder why the turntable smell like it’s burning has entered your nose. Before your house burns down, it would be best if you unplugged the device and kept reading to find out more.

    Several things may cause your turntable to smell like it’s burning from a short to a bad belt. You need to discern the exact smell and place where the smell originates from knowing how to fix the problem. Use our handy troubleshooting guide below to find out why your turntable smells like it’s burning.

    We’ll explore the five primary causes of a turntable smell like it’s burning and help you troubleshoot to figure out which cause affects your turntable. Stick with me for the repair tips for each as well, so your turntable will be back up and spinning in no time.

    Why Does My Turntable Smell Like It’s Burning?

    As I mentioned, a few different things might cause a turntable to start giving off an odor of burning suddenly. However, five things are usually the culprit:

    1. Electrical Short – Smells like burning plastic or chemicals.
    2. A Belt Is Loose Or Brittle – Smells like burning rubber.
    3. Motor Failing – Smells like metal or chemicals burning.
    4. Dust Buildup – Smells like paper or waste burning.
    5. Bearing Failing – High pitch squeaks accompanied by smell like burning oil or chemicals.

    Each of these common issues can make an older (or even a new) turntable smell like it’s burning. A smell like burning often happens with brand new turntables out of the box. However, it should not be taken for granted because there could be a potential fire hazard. Here’s more information you need to know (keep reading).

    Electrical Short

    A common cause of a smell of burning with many small appliances, not just turntables, is the electrical short.

    Turntables are known for their reactions to and creation of static electricity. Although not a huge threat, a small short can weaken electrical insulation over time and cause a short to occur more and more often at a particular location.

    How To Diagnose An Electrical Short On A Turntable

    Sometimes, a turntable component, like the wiring or a switch/control knob, starts to fail and starts shorting out.

    Suppose the short is in a circuit that directly affects operation. In that case, the source of the failure should be evident from either a failure of the turntable to produce sound or some other failure in the operation that makes a short obvious.

    Suppose the short is in a circuit that does not directly affect the operation but still has power, like that of an led lighting up part of the turntable or some other similar subsequent circuit. In that case, there is the possibility of a short, without operation being affected.

    Unplug your turntable and give it a thorough inspection. Remove any protective covers to expose the wiring. Trace the wiring from the plug to each end of the circuits and look for:

    • Scorched wiring
    • Loose wiring/connections

    If you find a loose connection, do your best to tighten it or even solder it if you have experience. Otherwise, you may want to bring the unit in for repair, especially if you see anything burnt.

    If you find scorched wiring, do not plug the device back in until professionally repaired.

    A Belt Is Loose Or Brittle

    Turntables that are not direct drive are notorious for burning out drive belts. Commonly the older the turntable or, the more it is used will cause the belt to wear faster.

    Once a belt is aged, it will become loose or brittle. In both cases, it case cause the belt to slip.

    How To Diagnose A Loose Or Brittle Belt On A Turntable

    Usually, when a belt slips, you’ll notice a stop or slow-down in the tempo of the record. However, if the record hasn’t started yet, or the slip wasn’t noticed, you may notice a faint burning rubber smell.

    Unplug your turntable and carefully flip it over (without placing the weight onto the tonearm).

    Inspect the belt for damage. Feel the belt with your fingers to determine if it is still pliable and if there are any brittle spots.

    Inspect that the belt is tight but not over-tightened. The turntable should spin freely and without much discernable friction. The belt should hold firm without slipping.

    Motor Failing

    Whether your record player is a belt-drive or a direct-drive, both use an electrically powered motor. The motor is not indestructible, nor do they last forever. That is, they don’t last if they are ill-maintained or in poor conditions.

    I once kept an old turntable in my garage. An exceptionally wet spring came and went, and I found that the platter had all but seized due to a seized motor.

    When I took the belt-driven turntable inside and opened up the case, I found that the moisture from the air outside had rotted away the motor, bearing, and other metal components. The rusty tonearm was the first dead giveaway. In my experience, it’s best to keep these indoors.

    How To Diagnose A Failing Motor

    Usually, when a motor fails, it either stops working altogether, or you’ll find it ‘steps’ by stopping for very brief pauses and then picking up again.

    The motor is often quite warm to the touch, sometimes even hot enough to burn, so be cautious. Always unplug first.

    If you have a belt-drive, remove the belt and turn the wheel pulley by hand. It should spin freely and without any noticeable friction.

    The motor shaft should not have much, if any, play in the shaft. The pulley and shaft should neither wobble side to side nor extend and retract at all. If they do seem to be loose, then it is likely the inner bearings of the motor are gone.

    If the motor simply stops working, you can test the circuit using a voltmeter if you are experienced with such things. If you aren’t experienced, don’t try to test any electrical circuits and bring the turntable professionally repaired.

    If your motor seems okay but has never had oiling, try oiling it. All record players should have the motor and spindle bearing oiled every 2000 hours or so of use.

    Dust Buildup

    Just because your record player has a dust cover doesn’t mean that dust can’t build up inside the unit. Any record player that has any holes exposing the inner workings may get dust building inside the machine.

    Record players that are used often will gain more dust between the platter and the turntable body.

    Record players that don’t have a dust cover will be highly susceptible to dust buildup issues.

    How To Diagnose A Turntable with too much dust buildup

    If you can see dust at all, there’s too much. One issue that can occur is the use of carbon fiber brushes.

    We are taught to slowly glide the carbon fiber brush, working it from the center spindle outward along with the record as the record spins.

    The motion is similar to plowing snow off the road. In this case, we are plowing dust off the record.

    The problem is that fine carbon brush fibers and dust are being swept off the edge of the record. Over time, this fine dust can build up between the platter and the turntable body.

    When enough dust builds up, and the record player finds use, the friction can heat the dust to the point where a burning smell can emanate from the turntable.

    Use a compressed air can (purchase in a computer maintenance area of stores that sell computers) typically used to blow out keyboards. Focus the air around the platter’s outer edge to remove any dust trapped between the platter and the body of the record player.

    Bearing Failing

    Record players don’t often have a bearing go, but it can happen on turntables used heavily. Smelling the smell of burning plastic (the housing around a hot bearing) is rare but not impossible. Often the turntable is used for scratch djing as this provided adequate pressure on the table bearings to cause premature wear.

    How To Diagnose A Bearing Failure In My Turntable

    The most common noticeable fact when a bearing goes is the sound. True, a blown bearing may start to smell like burning, but it is usually the plastic around the bearing that is starting to heat up due to a hot and worn bearing that would smell. Furthermore, by the time this happens, you’d likely already know due to a noticeable change in turntable operation.

    The most common way to diagnose a blown bearing is the sound. Most bearings start to squeal when they wear. The smell is much less common.

    You might also be intersted in these articles:

  • Why Turntable Cartridges Are So Expensive

    Why Turntable Cartridges Are So Expensive

    Turntable cartridges are the heart of the turntable experience. They are responsible for ‘reading’ the record and translating it’s microscopic transcriptions of sound into an electrical signal. For such a small piece of the turntable, you’re probably wondering why turntable cartridges are so expensive given what a small part of the whole turntable they are.

    Turntable cartridges are considered expensive because the cost of medium to high end record playing cartridges can range from hundreds to thousands of dollars. Compared to what a smartphone can do, the simple technology carries a high price tag.

    To truly appreciate and understand why the price of turntable cartridges is so high relative to other, seemingly greater technologies, we must turn to understanding the product’s manufacturing process.

    I’ll take you on a turntable journey through the cartridge in particular to examine the types of cartridges and why some are so much more expensive than others. Stick with me and let’s find out more about why turntable cartridges are so expensive.

    Types Of Turntable Cartridges (And Cost)

    In order to discuss why turntable cartridges are so expensive, we’d better define what it is we’re talking about; after all, there’s more than one kind of turntable cartridge.

    When it comes to turntable cartridge types, there’s tow very common forms and they are:

    • Moving magnet – $$
    • Moving coil – $$$

    Moving coil are almost always more expensive than moving magnets. In case you’re wondering what I’m talking about, I’ll describe each and throw in those costs you’re probably looking for as a comparison.

    Moving Magnet Turntable Cartridges

    The concept of a record player (turntable) cartridge is pretty simple. The needle vibrates as it scrapes over a minute groove cut into the record. The needle, otherwise known as the stylus, wiggles around as it encounters the minute variations within the groove.

    The wiggling stylus is attached to a moving magnet. The magnet changes proximity with coils inside the cartridge as it moves from the wiggling stylus. Those proximity changes cause the coils to output electrical signals which correspond to a phono audio signal.

    The moving magnet cartridge is heavier and cannot move as well as a coil cartridge. Therefore, the moving magnet type of cartridge doesn’t catch all the tiny subtle changes of music. The sound is still great, but it’s sort of the brute of cartridge types, in my experience.

    Average Moving Magnet Cartridge Cost

    Okay, so I told you I would get you a price, and here it is: it depends. It depends on the manufacturer and model of cartridge. You could go to a big box store and merely purchase an entire new turntable for the price of some other cartridges.

    For the sake of audiophiles looking for some examples, here you have it:

    • Audio-Technica AT-VM95ML – Retails for $169
    • Ortofon 2M Blue – Retails for $236

    Audio-Technica AT-VM95ML Dual Moving Magnet Turntable Cartridge Red

    Moving Coil Turntable Cartridges

    Moving coil turntable cartridges are more delicate than the moving magnet type. The principles are the same, the audio signal is produced by movement of coil to magnet, rather than the moving magnet to coil.

    The moving coil cartridges are lighter and more precise than the moving magnet type. They pick up the finer details and subtleties of the records. However, the finer sound comes at a greater price.

    The manufacture of moving coil cartridges is more difficult and uses finer components such as wires for the assembly. The downside to the fine componentry is the lack of a strong signal produced. The weaker signal requires a secondary amplification if you are to hear it.

    • Denon DL-103R – Retails for $260
    • Audio-Technica AT33Sa – Retails for $1419

    Audio-Technica AT33SA Shibata Nude Dual Moving Coil Turntable Cartridge Beige

    Which Type Of Turntable Cartridge Is More Expensive? Which Is Cheaper?

    As mentioned, you will find that the moving magnet type of cartridge is less expensive than moving coil type. The moving coil type is lighter and produces a finer sound, yet also produces less voltage than the moving magnet.

    The finer sound of the moving coil cartridge requires finer components and thus a more laborious manufacturing process. The higher labor and finer componentry equates to the higher cost for the moving coil style of turntable cartridge.

    Obviously if the moving coil type is more expensive, the moving magnet style is cheaper. However, it doesn’t mean you can’t find a very high quality moving magnet cartridge with great sound.

    How Much Should I Spend On A Phono Cartridge?

    When it comes to phono cartridges, there are innumerable choices out there to choose from. Deciding which is best for you may seem difficult, but when we analyze the situation, you’ll find that you likely already have the answer. Let me explain.

    The amount spent on a phono cartridge ought to be equal or greater than the replacement value of a standard OEM cartridge for your make and model of turntable. In practice, if focused on quality, you will always get you the same or better quality than the original equipment.

    At the end of the day, the amount you choose to spend to replace a turntable cartridge will depend on you make and model of turntable, the available compatible models of cartridge, and your desired budget.

    Desired budget based upon your quality of sound ideology, of course. If you’re like me, then in my experience you’re going to grab something that’s better than your last cartridge. I have a simple rule, if I have to replace it, I upgrade it.

    What’s In Turntable Cartridges That’s Expensive?

    The basics of a turntable cartridge material list are pretty simple. There are only a handful of components within the cartridge. Here are the basic components:

    • Coil
    • Magnet
    • Cantiveler
    • Stylus
    • Rubber suspension
    • Terminals
    • Wiring
    • Casing

    The casing is typically a lightweight plastic and that is pretty cheap. The magnet and coil, although specialty, are not typically very expensive parts either. Certainly there are ‘high-end’ coils and magnets, but for the most part these are standard and common in terms of the materials used to manufacture them.

    The cantilever arm and rubber suspension are nothing too extraordinary. The cantilever arm typical construction uses metal, and it is a tube shape most of the time as well. The cantilever has a great effect upon the quality of sound produced.

    Wiring is not expensive and neither is the solder used to for the wiring connections, so these are not the major source of expense for manufacturing.

    The last part, the one I have yet to mention, this is where the money gets involved: The Stylus.

    Typically diamond or sapphire finds use as the stylus tip. These incredibly hard minerals make great tips for the stylus needle and work well at translating the grooves into movement.

    Some types of stylus are more expensive than others. For example, the spherical tipped stylus are more affordable than other types. There are four stylus tip shapes commonly in use. (source)

    • Spherical – cheapest tip type, easy to use
    • Elliptical – great tracking, wears out faster than spherical (requiring more replacements is more expensive)
    • Hyper Elliptical – very precise sound and relatively expensive by comparison to spherical or elliptical stylus tip types
    • Micro-Ridge – the most accurate and most expensive

    You may not have much of a choice, depending on your turntable and the types of cartridges that are compatible with it, but if you have the option, a hyper elliptical makes superb sound in my experience.

    Turntable Cartridge Manufacture Vs. Supply And Demand

    The primary factors in the final cost determination of a turntable cartridge, aside from the materials used in it’s manufacture, are the labor and supply and demand.

    Labor is always one of the most expensive parts of any manufacturing process. The fabrication of high-end turntable cartridges is no exception.

    The last factor in determining the expensiveness of a turntable cartridge falls on the law of supply and demand. The higher-end cartridges are requested by fewer people than the cheaper ones. The most expensive also require the greatest cost labor for the highest skilled workers. Add these facts up, and the better the cartridge, the more expensive.

    The manufacture of turntable cartridges is a specialty skill left to artisans who don’t mind staring into a microscope for most of their day. The components are so small, that without such optical equipment, it would be very difficult to properly assemble a high-end cartridge.

    Related Articles