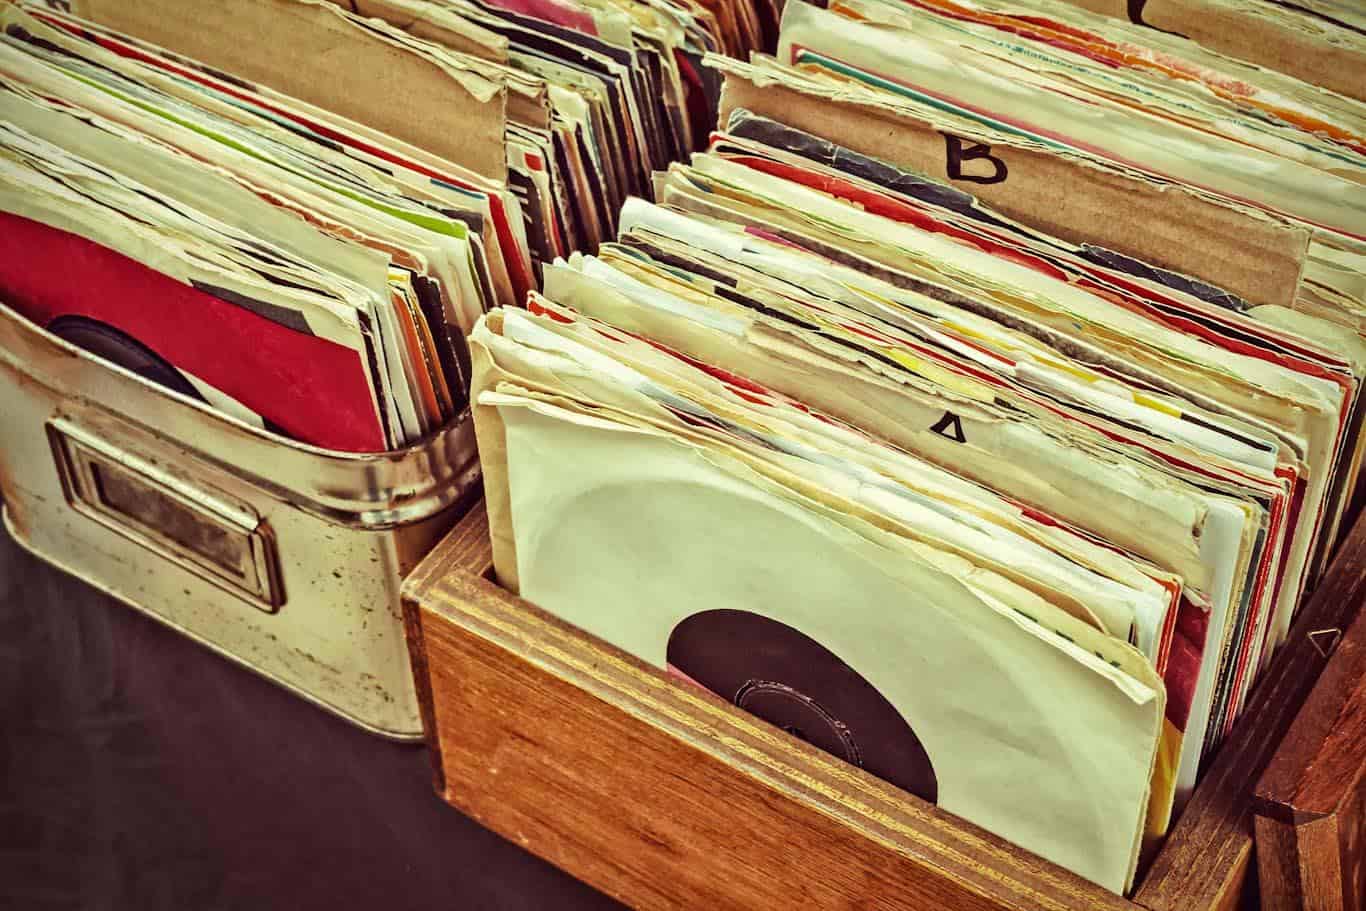
PVC (polyvinyl chloride, popularly known as vinyl) is the most versatile plastic on Earth and was used extensively by the record industry. While most people have switched to digital music, many of us continue to store our vinyl records at home, unsure what to do with them.
Vinyl records are non-recyclable. This is because the materials they are made of are toxic and harmful to handlers, and most recyclers are either unequipped or unwilling to handle this material.
So to many who were wondering, ‘Are vinyl records recyclable?’ they aren’t. In this article, I’ll explore why recycling vinyl records isn’t a viable option and look at what you can do with your old records instead.
Why You Can’t Recycle Vinyl
As mentioned, to properly recycle vinyl records, you’ll need to find a recycling facility that is specifically designed to handle it – and doing so can be challenging.
Most companies accept PVC in the form of banners, gift cards, and old construction material. These forms of PVC are easier to break down and repurpose, and finding a company to handle them isn’t much of an issue.
However, vinyl records are made from thicker layers of PVC and emit a lot more toxic fumes when melted. The poisonous gases and heavy metals they give off will need to be contained because recycling can release these toxins into the air or underground. Finding a facility that is adequately prepared to handle this complex recycling process can be almost impossible.
This is why vinyl records need to be kept out of the waste stream – doing so helps avoid further pollution.
Alternatives to Recycling Vinyl Records
As we’ve established, vinyl records can’t be easily recycled, and they can be harmful if left unattended. Luckily, there are a few alternatives to recycling records.
Reselling
Selling your old records is an effective way to ensure they’re put to good use. While it may seem like vinyl records have gone out of vogue, many of today’s artists are producing music on LPs thanks to the superior sound quality.
You’ll likely be able to find plenty of record stores looking to buy older vinyl records to add to their collection.
The challenge with selling your records is finding a fair price, as the cost will differ based on the value of the vinyl and the buyer’s need for the said record. However, reselling is a viable option, and you won’t have to worry about dumping your records in a landfill.
If you’re thinking of reselling, here are a few options you should consider:
Record Stores
The most obvious buyer would be your local record store, and you’re sure to find buyers willing to pay a fair amount for your collection. Snoop around a little, find out what kind of music the store is looking to stock up on, and see if you can provide them with suitable records.
Online Stores
The internet comprises a vast landscape of potential record-buyers – you just need to find them. For example, Hard to Find Records is a website that offers cash in exchange for your records. They even have a wanted list to let sellers know which specific LPs they’re willing to pay top dollar for.
Discogs is another website where you’ll be able to sell certain records, depending on what they’re looking for.
eBay
While it may not seem like the right marketplace, you never know who’s looking for a specific record on eBay. Consider posting your records on eBay, especially if you’ve got some older LPs that aren’t too popular with record stores.
You may get lucky and find a buyer looking to buy the record you’re selling.
While it may seem like selling isn’t so profitable, you will, at the very least, ensure that your records end up in a store and not the dumpster.
If your records have no resale value, consider donating them to local thrift stores that deal with old LPs. Either way, your music will end up on a shelf where it may be of use to someone else.
Upcycling
Upcycling is the creative alternative to selling your old LPs, and there’s a lot you can do with used vinyl records. Here are a few ideas to get you started:
Book Holder
You can use two vinyl records to make a nifty and easy-to-dismantle book holder. You’ll need the following:
Boiling water
2 vinyl records
Block of wood
Here are the steps to make a book holder:
Immerse one-third of the vinyl record in boiling water for a few minutes. The portion immersed in water will be malleable when you take it out.
Fold the record at this portion and use the wooden block to press down hard to even the surface.
Do this with both records and place them parallel, with the folded portion facing inward.
Stack a few books between them.
The straightened parts of the records will keep your books in place.
Clock
Clocks made from old vinyl records look classy and neat and are pretty straightforward to assemble. You’ll need a bit of drilling knowledge for this one, but this idea shouldn’t take much time if you’ve got the proper equipment.
Watch this YouTube tutorial on how to go about building a vinyl record clock:
Vinyl Bowls
Vinyl record bowls are another straightforward DIY idea that takes little effort but turns an old record into a slick everyday household item.
Heat is the crucial element in morphing vinyl into different shapes and sizes. Here, you’ll use an oven to heat the vinyl before changing its shape.
Watch this YouTube video to know more:
Here are the steps on how to make bowls using vinyl:
Select a bowl with the shape and size that you want your vinyl record to replicate.
Place the bowl upside down on cookie paper and the vinyl on top of the bowl.
Put this arrangement in the oven for about ten minutes.
Ensure to put on gloves before you handle the hot record.
Take the bowl out, turn it over, and place the vinyl inside, using the pressure of your hands to mold the record into a desirable shape.
This bowl works best as a fruit or candy holder, thanks to the hole at the bottom.
Coasters
Vinyl records make for neat little coasters, and the best part is you’ll have an assortment of different ones you can use while serving drinks.
Here, again, the critical element is heat. The process is similar to making a bowl, and you will start by placing the record on the bowl before putting it in the oven. That said, making coasters is a bit more nuanced than making a bowl, as you’ll have to be careful to avoid melting the center of the record.
Here is how you can make coasters using vinyl records:
Once the outer edges of the record have melted, you can cut it out using scissors or a knife. Carve the exteriors carefully, so you’re left with the circular middle.
You can use sandpaper to smooth out the edges and give your coasters a neat finish.
If the middle starts to warp, you can straighten it out by placing it between two books or weighted blocks of wood till it reverts to its original smoothness.
Photo Frames
Using a vinyl record as a photo frame is perhaps the least-involved yet satisfying DIY idea. All you have to do is cut out the edges of your photos and try making them circular. Now, stick this photo in the middle of your record, and you’ve got a neat new photo frame.
You can hang this up on your wall or melt one side and bend it away from the photo side to create a stand.
Final Thoughts
While vinyl records aren’t recyclable, there are various ways to repurpose them and ensure they don’t pollute the Earth by ending up in a landfill.
All it takes is a bit of creativity, and with a bit of effort, you can find ways to prolong the use of these records.
The capability of their cartridges defines the ultimate performance of all record-playing systems. Therefore, clarity of the peaks of the music, tonal balance, stereo separation, and freedom of distortion and noise is affected by the quality of your cartridge. The quality of the cartridge also affects the life of your records. So after thorough research, we created the following article on everything you need to know about cartridges and turntables.
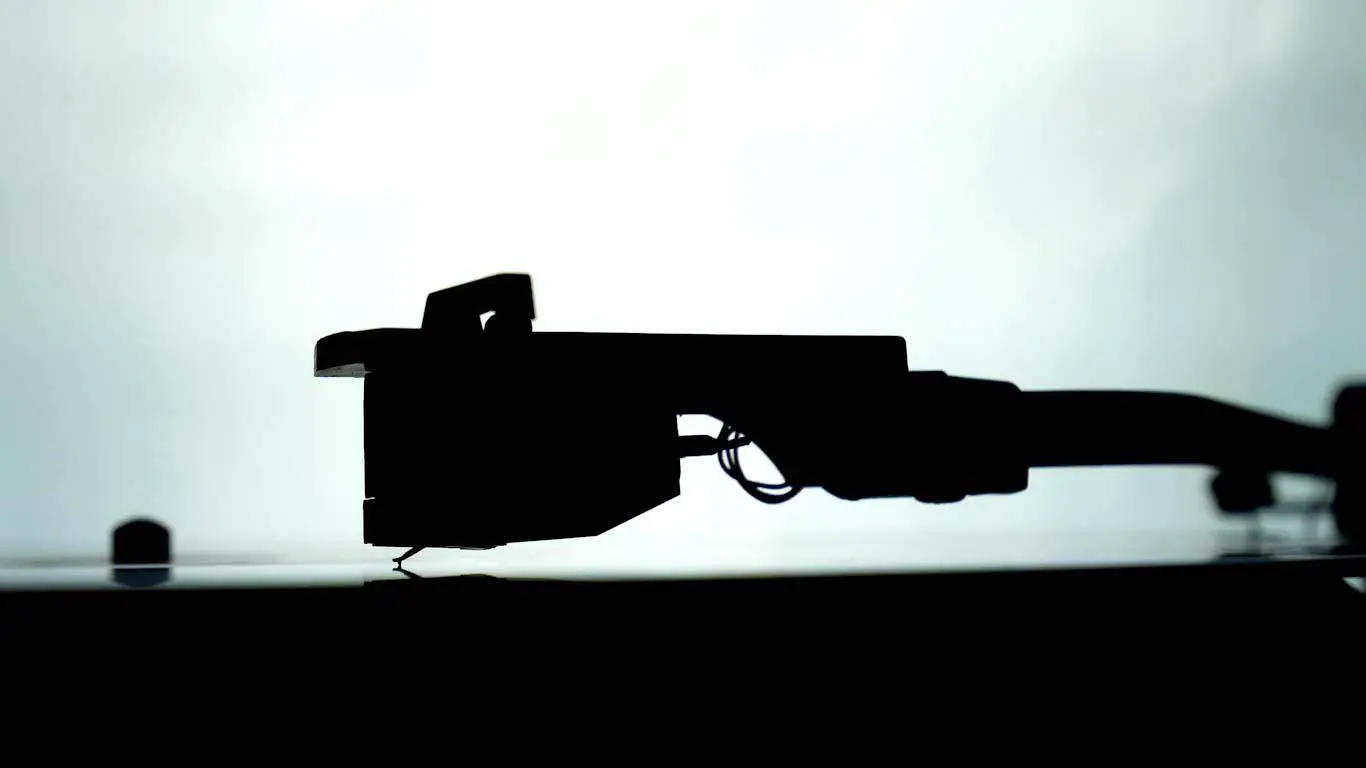
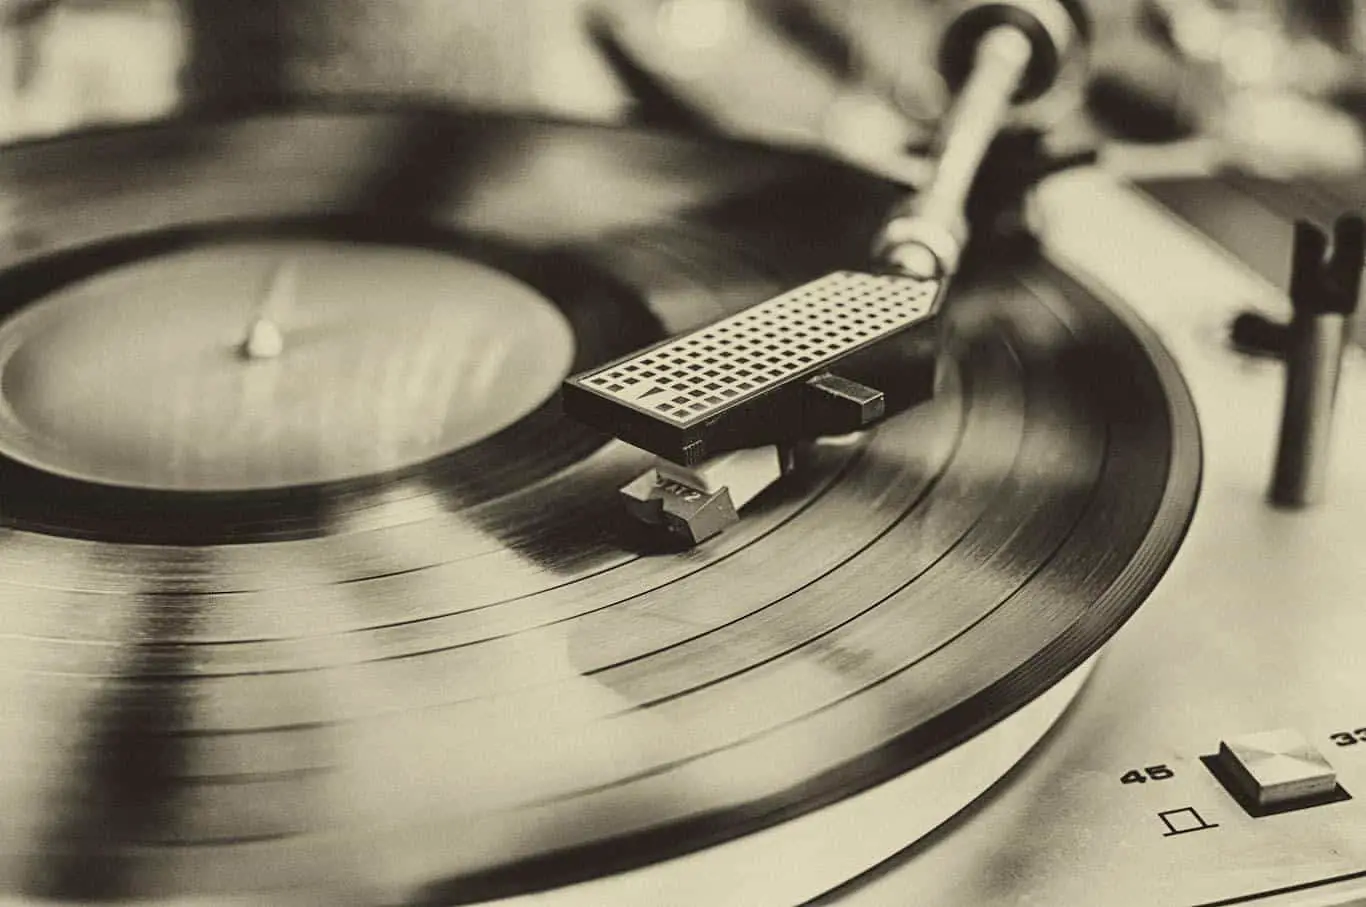
The turntable cartridge is the crucial part of the turntable situated at the end of the turntable’s tonearm that supports the stylus. The stylus is the pickup or needle that reads the grooves of the record and produces music.
The turntable cartridge is the hardest working part of the record player that sits on the vinyl record’s grooves. The cartridge is responsible for reading the undulations on the groove’s wall and converting it into a signal that the amplifier can pick.
So in this article, we’ll give you cartridge and turntable information. We’ll also show you how they work.
Turntable And Cartridge Information
The turntable is a part of the record player that supports the vinyl records. The turntable is responsible for rotating the vinyl with its needle on the record’s grooves and producing sound. Turntables revolve at a speed of 78, 45, 33 1/3, and 16 2/3.
Most recorders have a gearing system that allows you to pick the right pace for your record. (source)
The record player has many parts that work together to guarantee you a high-quality output. The platter is responsible for holding the record in place while being spun by the motor. But the most crucial part of the turntable that’s responsible for sound production is the cartridge.
What Is A Cartridge?
Cartridge, styli, needle, call it whatever you like, but every turntable comes with a unique device that sits on the records’ grooves and reads its undulations. The signal produced by the cartridge travels through the arm to the amplifier.
And then, the amplifier boosts and equalizes the signal to a level that a second amplifier can pick before being transported to the speakers. (source)
The cartridge is the most hardworking part of a turntable responsible for converting mechanical movements to electric signals. It is a transducer that does the opposite of loudspeakers which convert the signal to vibrations. (source) So, depending on the type of cartridge your turntable has, you have to set it up correctly to minimize record damages.
Types Of Cartridges
Generally, the ancient ceramic and crystal pickups in high-end systems got replaced by magnetic cartridges (moving coil or moving magnet). And that is because the magnetic cartridges lower record wear by applying lighter pressure on the grooves and improved playback fidelity. Magnetic cartridges are known for using less tracking force and reducing the likelihood of the grooves getting damaged. Magnetic cartridges also have lower voltage outputs than ceramic and crystal pickups. (source)
Moving Iron (Mi) And Moving Magnet (Mm) Cartridges
The moving iron and magnet cartridges function the same way, and the only difference between the two is that one has a magnet attached to the cantilever while the other has a piece of iron.
The stylus of the moving magnet cartridges has a small magnet between two coils that create an electromagnetic generator. When the stylus reads the undulations on the record, the magnet vibrates, which induces a current in the coils. (source)
Since the magnet is tiny and isn’t attached to a generator like ceramic cartridges, it has a unique stylus that requires less tracking force and faithfully follows the grooves.
The moving iron cartridges have a moving iron attached to the cantilever and a hug magnet over its coils to provide the needed magnetic flux. (source)
Moving Coil Cartridge (MC)
This cartridge comes with a tiny electromagnetic generator, but with the coils and magnet reversed. Instead of attaching the magnet to the cantilever, the coil is attached to it and moves in a permanent magnetic field.
The coil is made using fine wires, and since the windings connected to the armature are tiny, the voltage produced is also small. (source)
The signal produced by this cartridge is a few hundred microvolts. So, noise can easily swamp it out. Therefore, instead of a preamplifier, most turntables with these cartridges use a step-up transformer.
Luckily, some high output MC cartridges produce the same output as the MM cartridges. MC cartridges are tiny instruments that are generally costly but preferred by audiophiles. (source)
Moving Micro-Cross (MMC) Cartridges
The MMC is a variation of the MI cartridge that was patented and invented by Bang & Olufsen. In this cartridge, the coils and magnets are stationary while its micro-cross moves with its stylus. The MMC design allows for channel separation since the movements of these channels appear on a separate axis. (source)
What Is The Difference Between The Moving Coil And Moving Magnet Cartridges?
Generally, MC design is quite common among high-end turntables, while most low-end turntables come with MM cartridges. The debate over which design produces better sound is entirely subjective and heated.
The MC cartridge offers low impedance and inductance, which means that the capacitance’s effect is negligible. On the other hand, the MM cartridge provides high impedance and inductance.
The MC cartridges sport low-moving masses. But even high-quality MM designs offer lower moving masses than MC designs. (source)
Parts Of A Cartridge
Most cartridges have a unique design that features many components, with the most common ones being:
Stylus: the stylus is the tip of the needle that rides on the grooves of the vinyl records. The stylus comes built from either a polished diamond or unique industrial gemstones.
Cantilever: you may think that the only work of the cantilever is a stylus holder, but it does more than just support the needle. The cantilever carries the vibrations from the stylus to the coil and magnets. Some models of MM cartridges have a detachable design, which means that you can detach the stylus when replacing it instead of changing the cartridge. (source)
Magnets: each cartridge comes with a magnet. The magnets are the most crucial part of the cartridge that induces the voltage in the coil after the cantilever moves.
Coil: the coil is a tightly wrapped wire column that usually situates in the cartridge. The coil helps the cartridge generate more than enough electrical signals to make a sound.
How Does The Cartridge Work?
The work of the cartridge is turning the movement of the stylus into a signal with the magnet attached to the cantilever. Every time the needle moves, the cantilever carries the tiny magnet, which induces a voltage in the coil. The coil is connected to the pins situated on the rear parts of the cartridge.
Since each cartridge has two coils, the four pins are negative and positive connections of the channels (this is how the MM cartridges function). (source)
On the other hand, the magnets of the MC design are always static. It provides a lighter moving mass, which means that the coils, cantilever, and stylus can start and stop quickly. But you need thinner wires and high precision when making MC cartridges. It is why they are way more expensive than the MM cartridges. (source)
Unfortunately, the power or size of the signal is relatively low; therefore, the turntable needs an amplifier to help boost the voltage to a level that the regular amplifier can handle. The MC cartridges produce even lower voltage, so the phono stage must be quieter than MM cartridges. How efficient a cartridge will depend on:
The materials used to make the cantilever
The shape of the stylus
Arrangement of the coil or magnet in the cartridge
The material used to make the body of the cartridge
Remember, the Japanese manufacturers make the body of the cartridges using jade or hardwood, while some MC have nobody.
The lady of an outer body helps lower the weight of the cartridge, but it does expose the delicate parts of the cartridge. (source)
In an ideal situation, all the vibrations the stylus gets from the groove of the record player should be transformed to sound by the cartridge. But this system is constantly battling unwanted sounds from the furniture and the air; therefore, you must place the turntable away from furniture and speakers. The best place for setting the turntable is on a wall shelf at the end of the room, but make sure it’s as far from the speakers as possible. (source)
Setting Up The Cartridge
If you plan to reduce vinyl wear and listen to a lot of music, you should set up the cartridge correctly. But one thing is clear; the stylus will not always be in line with the grooves on the vinyl.
And that is because the tonearms are usually attached to a fixed point; therefore, the cartridge will have to describe the arc as it traverses the vinyl.
Therefore, the set-up of the cartridge should be a balance of compromises. You have to optimize the position and angle of the stylus for a considerable part of the record’s surface as humanly possible. To get the correct position, you need an alignment protractor to help you position the cartridge correctly.
Set Up An Appropriate Downforce
Too much force can result in high wear of the stylus and vinyl; therefore, it’s crucial to set the correct downforce. You can find the proper downforce in the cartridge manual or online. And if the arms have some calibration markings, you can balance the arm so that it floats with the tip of the stylus near the vinyl’s surface.
You can do this by simply adjusting the counterweight and dialing into the required downforce. (source)
If the arm of your turntable doesn’t have this feature, you need a downforce gauge like Shure SFG-2. And then adjust the exact position of its counterweight until you get the proper downforce.
With the correct downforce, your turntable will produce high-quality sound, and your records will last longer. The old technique of putting a coin on the turntable’s headshell to prevent it from jumping is not a great idea. (Art Zuckerman 1980) (source)
After setting the downforce, you can look for a protractor and fine-tune the angle and position of the stylus and cartridge.
Unfortunately, the fancier the cartridge, the more demanding it will be to set up. A good thing about MM cartridges is that they come with a spherical stylus that is easy to align. The high-end MC cartridges come with a line-contact stylus that you must align correctly for the best results. (source)
If the tonearm allows it, then you can even adjust the VTA (vertical tracing angle). The VTA is the angle of the styli in the grooves, as seen from the side.
Remember, the vertical tracking angle is correct if the tonearm is parallel to the record’s surface when the stylus is in its track. If it is not, then you should lower or raise the arm for better results. (source)
Factors To Consider When Choosing The Correct Cartridge For Your Turntable
When you purchase a turntable, it always comes with a pre-installed stock cartridge. Unfortunately, the stylus tends to get damaged with time, so you may have to replace the entire cartridge at some point.
Or, if you love music and want to listen to more details from your vinyl record, then you may have to upgrade its cartridge. It means getting an even better cartridge. (source)
After all, most folks purchase low-end record players and then upgrade them with time. They replace the stylus, platter, tonearm, and even the belt to improve the output quality.
The gradual process of upgrading and customizing a turntable helps them get the right tone. So the first and most common replacement done by audiophiles is cartridge replacement.
The correct cartridge can help keep your records safe and make them last longer while producing high-quality sounds.
So getting a better cartridge can make a huge difference. And with vinyl becoming hard to replace, you must select the correct cartridge for your turntable.
Unfortunately, most entry-level turntables have a non-removable stylus, so instead of just replacing the stylus, you may have to purchase a new cartridge. High-end turntables come with detachable needles that can you can easily replace when damaged. So here are a few factors to consider when buying the best turntable cartridge:
Stylus Construction And Shape
The stylus is the most crucial part of the cartridge that rides on the grooves of the vinyl records. Therefore, it plays a pivotal role in how great the cartridge replicates the sound from your record.
And due to the access, it has on the surface of the vinyl, it does play a vital role in the wear and tear of the records. Therefore, the shape of the stylus matters a lot, and if you want to listen to high-end audio, you should be ready to spend more. (source)
Before getting into the different types of styles, we must consider shank construction. The stylus that is usually attached to the cantilever is either tipped diamond or nude diamond.
A nude diamond stylus is made from diamond and glued to the cantilevers.
On the other hand, the tipped diamond stylus is just that-the tip of the stylus is the only part made from the diamond; the rest is just metal. (source)
The nude diamond stylus is the premium option that tracks more accurately and has a low mass. The different types of the stylus are:
Spherical
The most common kind of stylus that is cheaper is the conical or spherical stylus. The spherical stylus resembles a tip of a ball-point pen. And thanks to their radius, this stylus traces less of the small groove modulations that produce high frequencies.
The debate on whether it creates more wear is still debatable, with some claiming it produces less wear.
Others claim that it produces the most wear since the contact region is restricted to 2 points. (source)
Elliptical
The second most common types of stylus are the bi-radial or elliptical stylus. This stylus makes contact across a considerable part of the grooves thanks to their dual radii. It guarantees improved phase response, improved frequency response, precise tracking, and lower distortion.
Unfortunately, the Elliptical stylus wears out faster; plus, you’ll have to pay attention to the tonearm and cartridge alignment. (source)
Micro-Ridge Stylus
Micro-ridge also referred to as a Microline stylus, is the most advanced style available. Its computer-designed tip allows the stylus to offer better high-frequency performance with a longer stylus and record life. Micro-ridge stylus is quite costly and hard to produce. (source)
Hyper Elliptical Stylus
The hyper elliptical stylus also referred to as stereohedron, fine line, or Shibata is an advanced elliptical stylus.
This improved version of the elliptical stylus has a unique design that offers more significant contact with the grooves. Hyperellipticptic stylus can offer improved tracking, lower record wear, and longer tip when appropriately aligned.
Audiophiles are always looking for perfection, and this has forced engineers to become inventive.
So if you want to listen to quality music, then you should be ready to upgrade the diamond-tipped stylus that comes with your low-end turntable with a cartridge with a nude stylus.
The nude styles can be costly, but it’s the best option for transferring the kinetic energy needed to create the signals. (source)
Do I Need A Headshell?
You might have noticed that some turntables come with a factory-installed cartridge attached to a light headshell. You can uninstall these headshells by loosening the screws on the tonearms.
Therefore, if you are a vinyl lover who likes replacing their cartridges, you will have to purchase multiple headshells for convenient and easy swapping for your different cartridges. (source)
Therefore, if your collection includes standard recordings, mono-recordings, and some 78s, you need multiple headshells.
Mounting System
Confirm if your turntable has a p-mount or a standard mounting system. It will help you pick the correct cartridge that will match your turntable. Luckily, most turntables come with standard cartridges.
These cartridges can be mounted on the underside of the tonearm and then secured with vertical screws.
On the other hand, the P-mount cartridge inserts into the end of the tonearms and typically get secured using one horizontal screw.
Your Vinyl Records
Most modern 78rpm records get pressed using standard-width micro-groove technology. Therefore, you can play them using any cartridge, but if you have the older original records, you’ll need to get a specialized needle such as Audio-Technica VM670SP. The standard needle has a diameter of less than one mil, while the correct stylus for playing the old records should have a diameter of approximately three mil* (mil* is equal to 0.001inch). (source)
Other Specs To Consider
For beginners, reading the specs on the cartridges can be quite challenging. Understanding some of the specs on the cartridge can feel like going back to your high school physics classes.
So here are some of the most crucial specs to consider when buying a cartridge:
Frequency response: this is the measure of the range of sounds the cartridge can produce uniformly. It starts from a baseline of between 20 and 20,000Hz, with high-end cartridges going higher or lower. (source)
Channel separation: this is the ability to deliver the right signal to the proper channels of the cartridge when there is no signal on the right and vice versa. Channel separation is measured in dB, and the lower the number, the lower the separation and vice versa. Separation is crucial when dealing with higher frequencies. (source)
Channel balance: this is the measure of excellent basic design and production quality. Technically either side of the cartridge must have equal loudness when the recorded levels are present.
Output level: you must match the output levels of your electronics with that of the cartridge. Remember, a lower level can result in too much noise, and a higher level can over-drive your preamplifier into distortion. (source)
How to Replace a Cartridge
Replacing a cartridge is a simple procedure that anyone can do; all you need are some simple tools. But first, make sure you know exactly where the cartridge is located. To replace the cartridge, you should do the following:
Open the dust cover of your turntable and look for where the headshell is situated.
Since the needle can be pretty dangerous, the next step is detaching the stylus if it’s possible. But don’t pull it out aggressively, as it can break the cartridge in the process. It might be the best time also to replace the stylus if the current one is damaged.
Release the headshell from its tonearm by turning the nut holding it in place towards you.
Remove all the screws attaching the cartridge to the tonearm using a screwdriver and uninstall it.
Finally, unplug the wires connecting the cartridge to the turntable from its pins.
Install the new cartridge, but first, make sure you plug the pins correctly into the tonearm. You can match the colors of the pins with the wires.
Screw the cartridge back to its original place and return it to the headshell.
Finally, you can install the new stylus, and you’re good to go. But if your turntable’s stylus is not detachable, you can skip this step. Or you can replace it with a cartridge that has a detachable needle. (source)
FAQs
How Do I Know If I Can Replace The Cartridge On My Machine?
If you are not sure, then you should look at the end of the tonearm (the end that you lift when placing the needle on the vinyl). If you see some screws connecting the cartridge to the arm, then it can be replaced. But if you don’t, then you can only replace the stylus.
When Should I Replace The Stylus?
Most producers recommend that you should replace the stylus after about 1,000hours of playing time. So if you listen to music for an average of an hour every day, then you can replace it after about three years.
How Long Does It Take To Break In A New Stylus?
Generally, the break-in time of most styluses is 14 days, but this will depend on how often you use it. But after two weeks, the bearing, which is ordinarily stiff when new, will be ready to deliver high-quality sounds.
Conclusion
In terms of output quality, no sound player can rival a record player. A record player uses an analog signal, and it gives you a great experience that is almost tangible. But for you to enjoy memorable songs, you have to be ready to get the suitable turntable and make sure it’s properly serviced. You can even upgrade some parts for better performance and increase the life of your records.
If your turntable doesn’t spin after being turned on, then the chances are that you have problems with the belt. The turntable belt links and spins all the motors in your record player at a constant speed. Unfortunately, it does wear down with time, and if yours has, you may be wondering, are turntable belts universal?
Turntable belts construction is usually the same material, but they are not equal in size. These belts vary in thickness, length, and width; therefore, you can’t just install any belt in your turntable. In fact, each model has its specific replacement belt.
A turntable belt is a crucial part of the turntable responsible for spinning the motors and playing the record. The belt connects the motor to the platter, which in turn rotates the vinyl record.
So, in this article, we will elaborate more on why you can’t just install any belt in your turntable. We’ll also show you how to replace the belt and how to pick the right one.
Are Turntable Belts Universal?
Generally, three kinds of turntable drives are produced in the market (direct-drive, idler-wheel, and belt-drive systems). And their names are based on the coupling installed between the motor and the turntable’s platter. It means that the motor is situated outside or underneath the platter.
The direct-drive systems have a motor beneath the platter that rotates it, while belt drives have a belt connecting the platter to the motor. (5)
The belt connecting the platter to the motor in drive belts systems is made using elastomeric materials. (source) The direct drive system is quite common among high-end options, while the drive belt system can be found in low-end turntables and uses less costly motors.
The elastomeric belt does more than turn the motors; it also absorbs the vibrations from the motor that the stylus would have picked. (source) The belt acts as a filter and absorbs the low-frequency vibrations, and as long as the belt has proper tension, it won’t create speed irregularities. (source)
Unfortunately, there is nothing like one turntable belt that fits all; different belts from different manufacturers vary in length and width. These belts consist of using different types of elastomeric materials.
So you have to be very careful when looking for a replacement for your turntable. You can either get a substitute for your model or get the right option that has the same size as the one on your machine.
Until recently, all high-end turntables used belt drive, but their popularity has reduced since the introduction of direct drive systems. Luckily both direct drive and belt-driven systems have their enthusiast, but most DJs prefer direct-drive designs.
Some DJs prefer the belt drive systems because the slippage of the belts makes it easy for them to manipulate the platter’s speed. (source)
Turntable belts are designed to serve you for a few years, but they tend to wear out with time when used regularly. So if your device is running slow, then it means that it’s time for a replacement. Another standard indicator of a damaged belt is a change in the quality of the sound produced. When the belt is damaged, a record may sound deeper or low-pitched. (source)
Once you have opened the turntable, you might notice signs of belt slippage on the rim of the platter. Some slippage symptoms include shiny gray pulleys inside the turntable belts or dark slick spots on the platter.
You might also see tiny rubber particles on the turntable’s motor pulley. It will show that the belt is slipping in the platter and motor, and it’s time for a replacement. (source)
How To Replace An Old Turntable Belt
As aforementioned, turntable belts rarely snap, so when they start slipping, then you need to replace them. When the wearing of the belt occurs, their resistance reduces, and the speed of the platter increases.
So you may notice the speed of the platter is high after placing the stylus on the record. Plus, the belt’s length will increase by about 5% resulting in a reduction in resistance and slippage.
Luckily, every turntable model has a replacement belt designed for the exact model or a matching belt customized to fit your machine. Plus, replacing an old belt is relatively easy, and anyone can do it with minimal effort and tools.
But make sure you clean the dark, slick particles on the platter and the surface of the motor before installing a new belt. To replace the turntable belt, you should do the following:
Diagnose The Turntable Belt And Confirm If You Need A Replacement
If you suspect your belt is getting old, the main sign to watch out for is if the turntable spins when turned on. If you notice a change in speed when playing a record, then you need a replacement. To confirm the speed of the turntable, you need a strobe disc.
A stroboscope or strobe disc is a circular device used to set and determine the turntable’s speed. The strobe disc helps you set the speed of your turntable when it’s new.
So when you notice that its rate has increased, you can confirm it by placing the disc on the player and running it. The strobe disc will help you ensure that the turntable is running correctly. (source)
You can even confirm if the length of the turntable belt has increased by checking if the tension between the platter and motor has reduced. After confirming that the belt is the issue, you can remove it and start looking for a replacement.
Look For The Right Belt For The Turntable
Remember, all belts are made differently. They vary in length, width, and thickness. So you need the right option if you plan on listening to high-quality sounds. After all, the dimensions of the belt will make a massive difference in how the record plays.
Therefore, if possible, you should replace it with the same belt; this means getting a replacement made for your specific type of record player. (source)
You can find the right option online by looking for your turntable’s model replacement. Luckily, many websites offer specific turntable belts, like turntable belts; all you have to do is click your model and make. So before ordering a replacement belt, you should do the following:
Measure the length of the old belt and then subtract about 10mm to account for how much it has stretched over the last few years.
Measure its width and then make your order
If it’s an old machine and you can’t find its original belt, you will have to measure the circumference of the platter’s hub using tape. Remember, the belt has to be tight, so make sure you subtract about 10mm from the platter’s circumference to get the right length of a replacement belt. (source)
With the correct measurement, you can place your order and make sure it’s made using durable elastomeric material.
Unplug The Turntable And Remove Its Plastic Mat
Before you even start doing any repair or replacement work on any electronic machine, including the turntable, it’s always a good idea to disconnect it from the mains. It will help lower the likelihood of getting an electrical shock.
Electrical shock may be rare, but for the safety of your motor and you, you should disconnect it from the power.
After unplugging it, the next step is removing the plastic mat. The plastic mat is situated on the platter, and it’s where the record sits when playing. Removing this mat from the center shaft is relatively easy; all you have to do is pull it out and place it aside. (source)
Remove The Turntable’s Platter
Platters are the plastic or metal circles beneath the mat that are spun by the motor. Most platters come with two access ports that allow you to access the motor while others don’t. The platters are typically attached to the turntable’s center shaft in different ways, but removing it can be pretty straightforward. For example:
Removing it can be straightforward if the platter has a tiny C-shaped clip attached to its center shaft. All you need to do is pry it out using a flat-head screwdriver and then free the platter.
If it has no clip and resists when being pulled out, then it’s press-fitted. So you can pull it out while tapping the center shaft lightly using a hammer. (source)
Clean The Motor
Before replacing the belt, you may consider cleaning the motor, especially if you have never done it before or it looks dirty. Using rubbing alcohol and a lint-free rag, wipe the exposed parts of the motor and remove all the dirt and dust.
Stretch The Turntable Belt Over The Platter’s Hub
The belt must fit snugly over the platter’s center hub, so make sure you do it correctly. First, you should make sure the belt is straight and then flip the platter upside down to access the center hub. Next, put as much of the belt as possible in the center hub. Remember, the belt doesn’t have to be kinked or twisted in any way.
So if you notice that it’s twisted after stretching it over the hub, you can remove it and then install it correctly. If your new belt has a ribbon, you can line it up with one of the access holes. It will make it possible for you to pull the belt and run it over the motor.
If your platter doesn’t have an access hole, you should stretch it onto a small post or peg. You can place a peg near the edge of the platter and stretch it over it to create a round-bottomed triangle. The peg will give you access to the belt when stretching it over the motor. (source)
Flip The Platter Over And Install The Turntable Belt
After installing the belt, you can flip the platter over and put it back, but don’t install the C-clip yet. Turn it until the access holes can expose the motor. The turntable’s motor is a metal shaft situated at the corner of your record player. Remember, the belt must hook to it for the turntable to play the record. So make sure you can reach through the holes and touch the motor.
If your turntable’s platter doesn’t have an access port, then you should align the motor spindle with the peg or post that you placed on the platter. Place the platter back in its position and then spin it two complete rotations counterclockwise and two clockwise to help hook the belt on the motor’s spindle.
Hook The Belt Over The Motor’s Spindle
If your platter has access ports, you can pull the belt and stretch it over the motor’s spindle. Ensure the motor has a small cap on its spindle to hold the belt in place and prevent it from slipping off. Place the belt on the motor’s body after pulling it over the cap and make sure it’s locked tight. (source)
Test The Belt
After stretching the belt over the motor, you should spin it in both directions to confirm if it’s working correctly. And when turning it, make sure you get a light, consistent resistance. If the platter is stopping instantly or jerking, then it means that you didn’t install the belt correctly. So you should check the new belt for twists and kinks before reattaching it and testing it again.
If it’s smooth, you should replace the c-clip on the center shaft and the mat before plugging it in and hitting the start button.
Troubleshoot The Turntable
The most common problem with replacing the turntable belt is not attaching it correctly to the motor. So make sure the belt is below the small cap on the motor. Another problem that can affect the spinning speed of the motor is a loose or tight belt. If the belt is loose, then it can’t spin the motor.
And when it’s too tight, then turning the platter by hand can be very hard.
If this is the case, then you should repeat the above steps and install them correctly.
How To Unstretched A Turntable Belt
Does the revolving speed of your turntable keep you up every night? (Nelson Kline, 2019) Well, if it does, then you may have noticed a change in its speed, and one of the leading causes of this problem is a stretched belt.
Naturally, belts stretch with time, and while stretching for about 6mm may seem too small, it can affect the speed of your turntable. (source) if it stretches for even a few millimeters, the record player will slow down.
But if the stretched belt has no cracks and is in excellent condition, then you can shrink it back to normal instead of replacing it. To unshrink it, you should fold it into two and measure its size before placing it in hot water. so set the belt in a container and then boil some water in a kettle to its boiling point. (source)
Pour the boiled water over the turntable belt and let it soak for about 5 minutes. Please remove it from the water and then measure its size again. You will notice a size reduction, and if it hasn’t returned to its original size, you can repeat the process later.
Remember, the goal is to return it to normal, and since you know its original size, you want it to shrink to that size.
FAQs
How Long Can A Turntable Belt Last?
Generally, turntable belts can serve you for between 3 to 5 years or even more. But if you’re the kind of person who uses the turntable once in a while, then it can serve you for more than five years. After all, the wear and tear rate depends on how often you use the machine.
How Tight Should My Turntable’s Belt Be?
The right belt needs to be tight enough to effortlessly grip the platter’s hub with little to no strain. It must also be tight enough to remain on the platter’s rim even after it’s turned upside down and not too tight to put too much pressure on the motor’s bearings.
How Do I Know That the Turntable Belt Is Damaged?
There are a few signs that can show you when to replace the belt, and one of them is when the sound becomes pitchy after the belt starts slipping. You’ll quickly notice the sudden change in the rotating speed of the turntable belt.
Conclusion
The turntable belt is one of the most crucial parts of a belt-drive turntable. The belt is responsible for turning the platter for the record to play. So don’t assume that all belts are equal or universal, and install any belt you find in the store when your turntable’s belt gets spoiled. Instead, you should remove the belt, measure its length and width and then order the exact model designed for your machine or a matching replacement.
Record player and vinyl renaissance are currently showing no sign of ever slowing down. What was once considered a dying trend is presently growing in popularity at a fast rate. And this is slowly turning young music lovers into vinyl record collectors. So if you are still on the fence and still not sure why you should switch to analog music, here are nine reasons that make record players worth it.
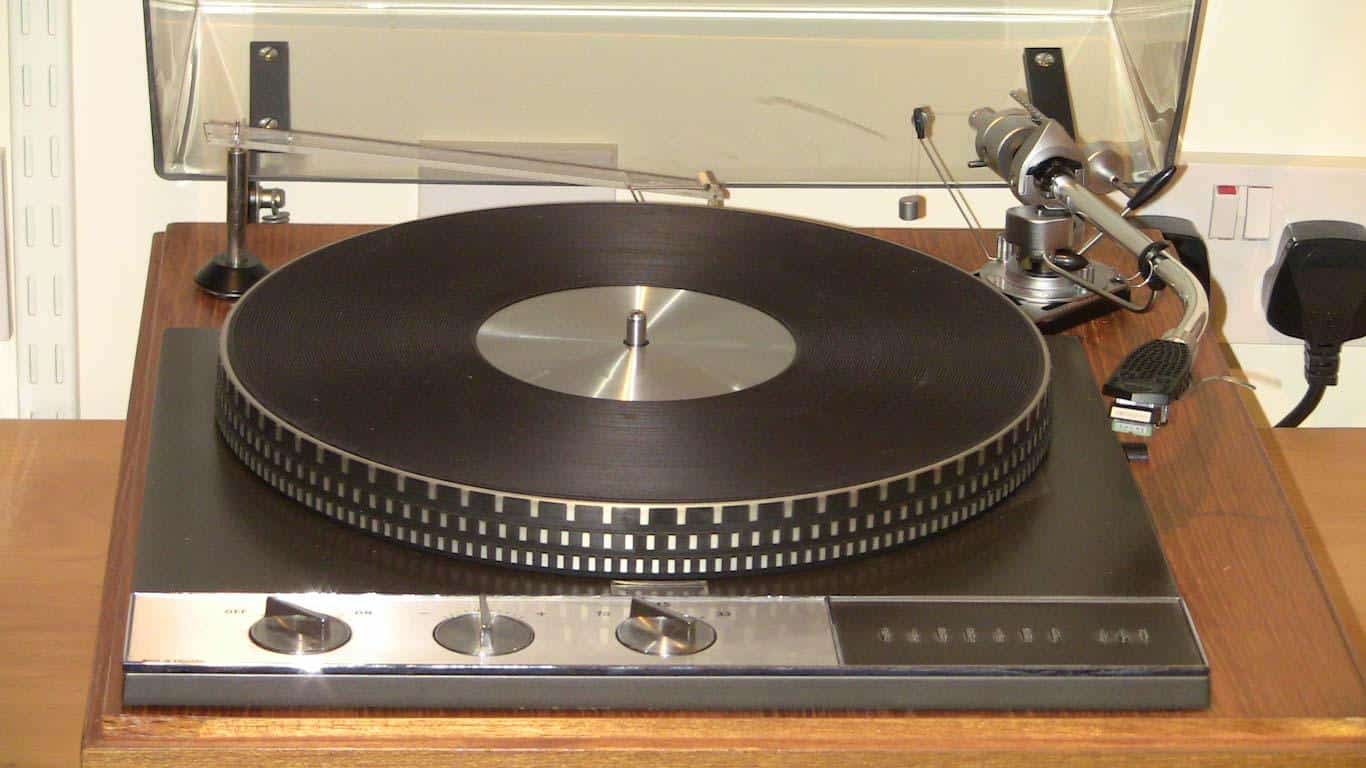
Record players, which adopted this name in the 1940s, have evolved from phonographs to the automatic record players that we have today. But the quality of sound they produce is still unrivaled to date and what really makes record players worth it.
Even with the convenience of introducing digital music on streaming platforms, some people still prefer record players. Audiophiles prefer the quality of sound produced by record players. So in this article, we will give you nine reasons why record players are worth it.
What Are Record Players?
A record player, known initially as a phonograph or gramophone, is the oldest device used for analog recording and playing sound. Generally, the sound vibrations are recorded on a vinyl record with spiral grooves engraved on its surface.
And to recreate the recorded sound, the disc is rotated with the stylus tracing the grooves to reproduce the sound. (source)
Record players have evolved for the century, with the first phonographs’ stylus vibrating to a diaphragm that produces sound waves. The record players dominated the industry until the 1980s when the compact cassettes took over. The cassettes became replaced by the compact disc, and the introduction of digital music began.
Fortunately, record players find use by turntablists, collectors, DJs, and audiophiles who love listening to quality music. And since the 2000s, record players have undergone a revival, with music lovers turning to records.
Fortunately, the change in record player technology plays a crucial role in the rising popularity of vinyl records. (source)
The renewed interest in vinyl records has seen sales of record players and vinyl records increase in the music industry. Vinyl records have experienced increased popularity in East and West Asia since 2007.
And by 2010, the once almost forgotten music player’s popularity had started growing at an even faster rate. In some parts of the world, vinyl records are more popular than they were in the 1980s. (source)
The steady increase in record players’ popularity is evident in the revival of record shops and music charts dedicated to vinyl. However, vinyl records still account for 6% of music sales, so why the sudden interest in vinyl records?
(2) During the covid-19 pandemic, the sales of vinyl records exploded, the sales grew by 28.7% in 2020. (Terry Josh, 2021) (source)
The sales of the vinyl record have been increasing since the early 2000s. But 2020 marks the year when the vinyl beat finally beat CDs in revenue. It is the first since the 1980s that vinyl records have plagued the industry. (source) and that is because music lovers have spent the cash on turntables instead of concerts.
So why don’t you join the vinyl bandwagon and enjoy quality sounds? After all, it is part of our past and the future for high-quality music.
Reasons That Make Record Players Worth It
We also experience music differently, with audiophiles preferring the best sound ever. But all this depends on the music player that you’re using.
The music we stream from YouTube, mp3, and CDs are digital formats. It means that they are compressed to smaller sizes, making it possible to carry them on our smartphones.
For most folks, the convenience of digital songs outweighs the low quality of the digital formats. On the other hand, some music enthusiasts enjoy listening to the experience only a record player can provide.
For them, the quality outweighs the convenience of streaming music.
It is why the sales of vinyl records skyrocketed during the pandemic; after all, people could no longer go to concerts, so they had to pick the next big thing.
And these were vinyl records which are known for delivering more than music. Vinyl records can introduce the experience of music in our homes. So here are a few reasons why record players are worth it:
Vinyl Records Produce Better Quality Than Digital Recordings
Generally, vinyl records are analog recordings, while CDs are digital recordings. On the other hand, the original sound produced by musical instruments and musicians is analog by definition.
Unfortunately, to create a digital signal, the digital recordings take a snapshot of analog signals at a rate of about 44,100times/second for CD and measure every snapshot with an accuracy of about 16bit.
It means that digital recordings don’t capture complete analog sound waves; instead, it approximates it with a sequence of steps. (source)
And since sounds undergo quick transitions, they can be distorted as they tend to change at a high-speed rate. When played on CD players, the stereo converts the digital recording to analog signals fed to amplifiers that raise the signal’s voltage to the right level that the speaker can pick. (source)
On the other hand, vinyl records have an original sound wave, which means that nothing is lost when the stylus picks the sound. The output from the turntable is analog, and it’s fed to the amplifier without any modifications.
Therefore, the wavelength from records is more accurate, and you can hear its richness, unlike other mediums. Vinyl records will make you feel like you are listening directly to your favorite band in the concert.
So provided there are no specks of dirt on the disc, the quality of music produced by record players will be exceptional. (source)
Since digital recording doesn’t do an excellent job replicating the initial analog sound, it can’t compete with vinyl recordings in terms of quality. (source) A vinyl record is a better representation of live music than digital recording. So if you need to relive your childhood memories with legendary bands, you need to get a record player.
Record Players Are The Only Means Of Listening To Vintage Records
Initially, the music industry was dominated by vinyl records until the mid-1960s, when people started using cassette tapes and 8-track cartridges. (source) It means that some of the ancient jazz songs produced before the 1950s may not have been converted to digital form.
You may have inherited some of the oldest songs in history from your grandparent and don’t know which player to use.
Well, now you have a solution, the only way you can listen to vintage music in its original form is by playing their vinyl records. And even if there is a digital form of these songs, the conversion process may have distorted them. So as an audiophile who loves vintage music, you need to get a record player.
Remember, any vinyl record pressed before the 1950s play at about 78RPM. So you may need to get a turntable that can play three speeds. (source) Initially, all record players were designed to play at a standard rate of 78RPM, and all vinyl records were designed to operate at that speed.
However, modern records run at either 33.333 or 45 RPM, ideal for current vinyl records. So if you own an older record, you need a turntable that can run records at 78RPM. (source)
Save Some Cash
If you have a collection of records that have been in your family for decades that you saved in the garage, then you need a record player. So instead of sacrificing quality and paying lots of cash to stream the digital version of the same music, you can get a record player and enjoy your tracks. It can be the best time to visit your grandparents and borrow some original songs you loved while growing up.
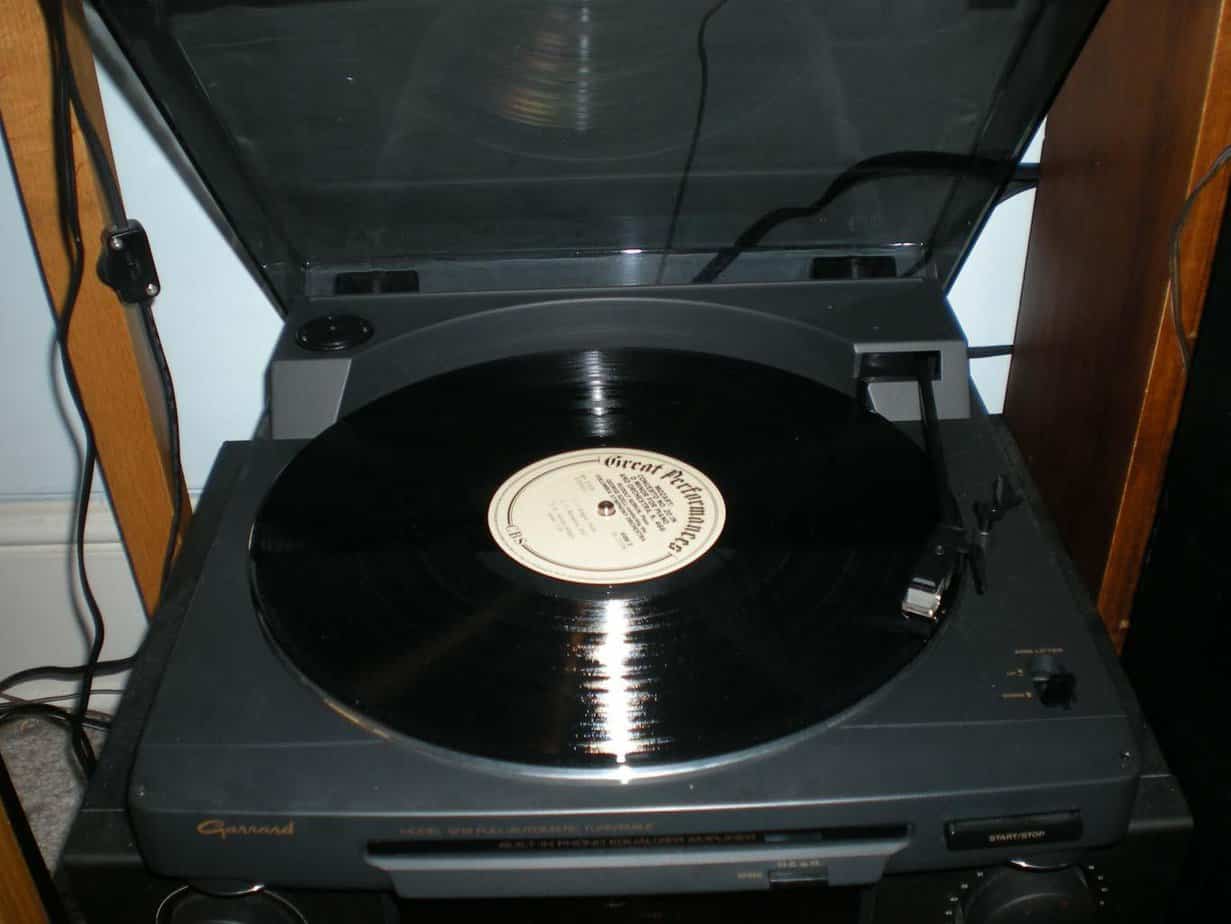
Automatic Record Players Are Easier To Use
Generally, there are three types of record players (automatic, manual, and semi-automatic). This classification refers to how the stylus is accurately placed and removed from the grooves on the vinyl records.
If you disliked record players because placing the needle accurately on the record was challenging, you would love the automatic record players. I am sure many young folks don’t like the idea of placing the needle on the recorder and removing it every time.
Automatic record players can do the work for you accurately. Or you can try the semi-automatic that removes the stylus from the surface of the record on demand.
So instead of going for a manual system that requires you to lift and place the arm on the vinyl record manually, you can try automatic machines.
Unfortunately, a considerable percentage of the high-end record players are manual. So if you don’t have a steady hand and don’t want to scratch the record while placing the needle, you can go for automatic machines. (source) Or you can practice and perfect your skills with time.
Record Players Are Upgradable
One of the best things about record players is that you don’t have to break the bank for a high-end option. Instead, you can look for a turntable within your price range and then upgrade it later for high-quality output.
After all, you only need to change a few parts on low-end record players to improve their functionality and output quality. Some of the elements that are easier to upgrade include:
Platter: the platter is the plate on the record player where the records sit. Unfortunately, low-end options come with lighter platters affected by vibrations, which can distort the output’s quality. So you can replace them with heavier options and even add a dampener to help with the vibrations. (source)
Stylus: the stylus is responsible for the details and accuracy of the sound produced. High-end record players have a nude diamond stylus that is durable and delivers better quality. So you can upgrade your machine’s stylus with a nude stylus and then listen to the quality of the sound produced.
Tonearm: the quality of tonearms has a significant impact on the consistency and accuracy with each rotation. So upgrading it can have a massive effect on the quality of the sound.
Another upgrade that you can try is adding isolation feet beneath its base to help reduce vibrations. (source) The upgrades may not transform your machine into a high-end recorder, but they can improve the quality of the output and its durability.
A Record Player Gives Your Home A Character
If you have a rustic interior home design, you must finish it with a stunning record player. Place your record player on a table and a crate of well-arranged records beneath the table, and you have something to talk about with visitors.
A collection of vinyl records can give your living space character, and they can be a conversation starter.
You can even hang the sleeves of some of the records, with the best art, on the walls. But make sure you store the records correctly to prevent scratches; after all, vinyl records can be pretty costly. So make sure you get the right record player that can help improve your home’s décor.
Owning a record player can help you create a unique and harmless hobby that will save you more cash than smoking or drinking every weekend. You will find yourself in fleas markets, music stores, or garage sales, looking for priceless records with a record player.
You can even make new friends who appreciate great music and get an opportunity to swap records. And if you’re lucky, you will finally listen to high-quality records of the music you love. (source)
On the other hand, it is harder to make friends with digital music since everyone can stream them from the comfort of their homes. But the vinyl record will give you something to talk about with your grandparents and other older family members instead of focusing on politics every time.
You Get To Listen To An Entire Album
Smartphones are killing our relationships and stressing us out. And even though they have everything we may need to have a memorable day, we all need a change at times.
So instead of wasting time creating a playlist and skipping bad songs, you can sit down, put your record on and pour yourself some drink and enjoy. It will help keep you away from screens and give you a chance to enjoy quality music at home.
So instead of multitasking while listening to music, you can sit down and enjoy uninterrupted minutes of high-quality sounds. Listen to side A until the end before turning to side B and enjoying the vintage music. (source)
You can also purchase a record player to honor the world record store day with your pals. After all, you can finally listen to the songs that top the music chart list dedicated to vinyl music. (source)
You Can Mix And Scratch Your Music Just Like A Dj At Home
If you love going out and wish you could mix and scratch like a DJ, then you need a record player. The introduction of direct drive turntables has made it possible for anyone to copy their favorite DJ and have fun.
Unlike belt-drive, direct-drive turntables are perfect for mixing without damaging the belt, which is why most DJs love them. So if you aspire to be a DJ, you need a direct drive turntable to train and perfect your mixing skills. (source)
You can even entertain your pals and family members with your high-quality music and DJing skills.
FAQs
What Is So Good About Record Players?
Record players add a unique quality to all songs that no music player can ever add. The only thing that can rival vinyl records is a live performance or live recording of the music. Record players bring songs to life, making them almost tangible, and you can easily get lost in the beautiful tunes.
Why Are Vinyl Records Popular?
The most appealing fact about vinyl records is the unique analog signals better than digital sounds. Since there is no conversion done with vinyl records, the vocals and music are closer to concert performance than digital sounds, giving them a remarkable and warm quality effect.
Why Are Vinyl Records Costly?
Reduction in supply of records due to the high production costs and increased demand for them in the last few years has forced their cost to go up. In fact, most music lovers ended up buying these price records during the pandemic.
Conclusion
Record players were the original music players that served people for decades before the introduction of compact tapes in the mid-1960s. But with the price of making tapes and CDs being low, the industry turned to digital music.
But this fad didn’t die; in fact, it resurfaced in the early 2000s and has been growing in popularity since then. And that is because it brings music to life thanks to its high-quality output.
Andy Betts, Buying a vinyl record player? Seven things you must know, https://www.makeuseof.com/tag/6-things-must-know-buying-vinyl-turntable/ Accessed November 19, 2021
Danielle Fox, Screw digital. Here’s why you should buy a record player, https://www.menshealth.com/style/a19544133/here-s-why-you-should-buy-a-record-player/ Accessed November 19, 2021
Are you looking for the best ways to fix your record player arm? Then you’re in the right place. We’ll show you how to fix your faulty record player arm in seven easy steps.
It is essential to read through the manufacturer’s manual to fix or change a record player’s tonearm. Ensure that all steps are followed correctly while setting up the tonearm, as an incorrect setup causes the most common tonearm faults.
The tiniest issue from an incorrect setup of a turntable’s tonearm either single-handedly or combined with other factors can ruin the quality of sound it produces. Mechanical problems can also cause poor sound quality. That’s why you have to get your record player’s tonearm fixed right.
The tonearm is as much an essential part of the record player as the record itself. It has been so easy to overlook the tonearm and its role when talking about the parts of a turntable; however, all changes now.
The Record Player’s Tonearm
Initially, the tonearm was intended to conduct soundwaves from the soundbox to an amplifying horn, as was introduced with the earliest design of the electronic record in 1925. (Source)
Over the years, several changes have been made to the tonearm ranging from the type of materials used to the design and its primary function. (Source)
A record player’s arm is designed to support the cartridge in the proper position over the record, permitting it to move inwards towards the center of the record without changing its position. To be able to do this effectively, it also has to perform a few other tasks simultaneously.
Firstly, the cartridge has to be in the correct position. It means its height and angle above the record must permit it to trace the groove towards the center.
Then it proceeds to apply the exact amount of weight to the stylus, ensuring that the anti-skating force is in place to prevent the cartridge from darting towards the inside of the record before finally moving the signal transmitting cabling from the cartridge to the turntable.
The significant issues identified when dealing with a record player’s arm can be categorized into two groups:
Visual issues – These are defects identifiable by sight, such as a bouncing tonearm or one which won’t lower properly.
Mechanical issues – The issues that you can’t see but can hear audibly; an example of such is a skipping record.
Let’s get into common visual and mechanical issues that can affect a record player’s tonearm and how to troubleshoot them.
Table Showing Different Tone Arm Issues And How To Fix Them
Visual Issues
How To Fix The Issues
Single side swinging of the tonearm
Check to confirm the platter of the record player is level as most tonearms are super sensitive.
The tonearm won’t stop returning.
With your arms, manually rotate the record player’s platter till you hear a click.
The tonearm does not lower all the way.
It is caused when the tonearms bridge does not lower enough when the cueing lever is in use. Tweak the adjustment screw to regulate the bridge’s height.
The tonearm drops too fast.
Adjust the tonearm’s bridge screw or
Lubricate the cueing lever with some damping oil
A bouncing tonearm
Avoid manually lifting and lowering the tonearm
Lubricate the cueing lever with some damping oil
Mechanical Issues
How To Fix Them
Sounds produced from a single channel during record play
Contact a Professional
Be sure that the cartridge is accurately connected to the tonearm
A skipping record
Check that the VTF is correct
Check that the anti-skate is correct
Noise or humming sounds during record play
Confirm the balance of the tonearm/ VTF
Clean the contact connecting the headshell to the tonearm with a cotton wool swab with a dab of alcohol
Interference when you move the tonearm
Contact a Professional
No sound during playback
Adjust the tonearm’s bridge to regulate it
Read through the manual to confirm that the Vertical Tracking Force (VTF) is correct.
How To Fix A Record’s Player’s Arm
There are several methods to fixing a record player’s arm. However, these methods are dependent on which issue you’re experiencing.
With your tonearm and your knowledge and expertise with the tonearm, if you aren’t sure what to do to fix it, it is advisable to seek professional help if you are unfamiliar or new with a record player and its components.
Mounting And Adjusting The Tonearm
A most common mistake amongst new record owners is incorrectly adjusting or incorrectly mounting the tonearm of their turntable. Several individuals use turntables with tubular tonearms and adjustable screws to change and replace the tonearm if and as needed.
However, if you own a plug-and-play record player, likely, you do not need to install or perhaps even adjust the tonearm. But it is always good to have some knowledge. A particular model from a specific brand can have its settings.
However, this means you always have to keep these settings in mind and adjust them accordingly when replacing the cartridge. You can also write them on a sticky note and keep them in your record player corner.
Aligning The Record Player Tonearm
In order to produce the sound of the best quality, the stylus has to align perfectly with the record. The best alignment is when the stylus rests vertically in the groove at precisely 20 degrees to the front. It is because the sound is generated when the stylus touches the sides of the groove.
Most record players come with their adjusting ring or locking lever to align the stylus. With this, you can properly align the tonearm and stylus to the record with great precision.
To adjust the tonearm, firstly release the lever, then place the needle on the record, ensuring the drive is turned off during this period.
Now you can turn the adjusting ring carefully without touching the tonearm until it runs parallel to the record.
Now lift the needle off the record and secure this setting with the locking lever. This process is always the same. If you can’t find certain parts, it is best to read the manual, for it could be the case that your turntable lacks this feature.
Balancing The Tonearm
Your turntable can start to experience a skipping stylus problem for several reasons. It is the process to help you align the tonearm.
The Vertical Tracking Force (VTF) is the weight at which the needle contacts the record and might be why you are experiencing a skipping record. Your turntable must run with the correct VTF, as too high a VTF can damage the record, and too low will damage the stylus. (Source)
The proper VTF weight varies across models and brands as the cartridge’s manufacturer determines the proper vertical tracking force. There are several determinants of a VTF, including variations in the tonearm.
To adjust the VTF, follow the following steps:
Proceed to the component of the tonearm known as the counterweight. It is usually found at the tail end of the tonearm
By turning the counterweight to a specific number, you can adjust the tonearm’s weight
If your turntable includes an anti-skating setting, turn this to zero. If not, reset the tonearm, so it is balanced mid-air.
Check the cartridge’s manual for the correct VTF or check online.
Set the counterweight to the specific number setting for your cartridge. For turntables with anti-skate settings, adjust this to match that of the cartridge.
Once this is done, this should move the cartridge downward towards the record and sit at the correct weight.
Once the vertical tracking force has been set to the correct weight, your record should not experience further skipping issues.
Getting a digital gram is an easier way to determine the weight of the VTF easily. They are easy to use and can measure the needle pressure accurately.
Fixing A Tonearm’s Interference
If you’re experiencing difficulties moving the tonearm or hearing some interference feedback that you do not notice during playback, then the problem might be the tonearm’s cabling.
The wires within the cable might be rubbing against each other or the casing walls. It can induce current or cause static.
To fix the wiring of the tonearm is not as easy as changing other components. That’s why we generally recommend you contact a professional to prevent irreversible damage to your record player.
Fixing A Bouncing Tonearm
Most turntable owners manually lift and lower the tonearm rather than use the cueing lever to control the lifting and dropping when your turntable is in use. The bouncing might also be caused by the fast movements of the cueing lever or by loose screws.
There are two ways to fix this. The first method is by tightening the bridge screw. The bridge screw is found at the base of the tonearm.
Adjusting this screw controls the height and brings the stylus within proper contact of the record.
The second method is to apply some damping oil to the cueing lever. Since the lever controls the up and down movement of the tonearm, the damping fluid would naturally dry up over time and might lead to stiffness.
Maximum output by the cueing lever would require a certain level of fluidity. That’s where the damping oil comes in.
There are cueing levers damping oils sold in syringes for easy and minimal application. The thin mouth of the syringe allows it to access narrow and tight spots.
If, after trying these methods, your tonearm is still experiencing the same issues, it is best to contact a professional.
Cartridge Replacement
Your turntables cartridge is an essential component in ensuring that the record player works well and produces quality sound. Changing a record player’s cartridge is easy to do with the right tools and some patience.
Follow the following steps to change your cartridge when the need arises:
Open the turntable’s dust cover to identify the headshell.
Gently detach the stylus from the cartridge. Pay attention not to damage the plastic.
Once this is done, gently release the headshell from the tonearm.
Remove the screws with a screwdriver to release the cartridge.
Gently unplug the wires from the pins with a long nose plier. An easy way to do this is by pulling them from the metal detector at the end of the cartridge.
Replace the cartridge and the pins making sure to connect the wire to the pins following the provided color codes.
Tighten back the cartridge screw the same way you took them off.
Connect the new stylus to the cartridge before joining the headshell. Pay attention to adjusting the alignment of the cartridge.
Join the assembled headshell to the tonearm.
Your tonearm is ready to be tested and used.
If you follow these steps accurately and with caution, your turntable should produce quality sound, given that the cartridge was faulty. (Source)
Needle Replacement
The function of the needle is to read and turn the vibrations on a record player into sounds. The movement of the needle on the groove creates an electric signal that the amplifier produces to us as good sound.
Constant use over time can result in chips or bending. Once this happens, it automatically affects the quality of sound it produces. That’s the point where you start to hear crackles and distorted sounds.
Also called a stylus, a tired needle would contribute nothing but ruin your record. It is essential to know when to change your turntable’s needle and learn how to change one when the need arises. (Source)
When Should You Replace Your Needle?
Few signs indicate when your turntable’s needle is due for a change. Such signs include:
When the quality of sound changes or drops. Soon as you notice sound warps or dull vocals, your needle is due for a change.
After purchasing a pre-owned turntable, most turntable needles have an average usage rate of 500 hours, after which it is due for a change. It is advisable to change the needle when you are unsure about its state or usage period to avoid possible damage to your record.
To replace the needle, identify the correct type of needle your turntables use. A helpful tip would be checking the serial number on the cartridge to determine the exact kind of needle you need.
Once you have purchased a similar needle replacement for the turntable, consult the accompanying manual or check online if you don’t have access to the manual for the appropriate guidelines and steps to follow when changing the needle.
Make sure you have a plate or bowl handy to hold the disassembled part to ensure that you do not lose any while replacing the needle.
How To Fix A New Tonearm’s Rest
The tonearm rest is a clip-like instrument that is used to hold the tonearm firmly in place. The tonearm’s rest is typically constructed out of strong plastic, and replacing this rest is as easy as it comes. Follow the following steps when replacing your tonearm’s rest:
Remove the plastic dust cover on the tonearm
Then you remove the counterweight on the tonearm
Proceed to remove the headshell and the cartridge
Once complete, gently move the tonearm to the center of the turntable’s platter
With a screwdriver, unscrew the nut under the tonearm’s mounting bridge
Remove the old tonearm’s rest and replace it with the new one
Tighten the screw and assemble other disassembled parts
Those are the simple and easy steps to changing your turntables tonearm’s rest.
How To Clean The Tonearm
The tonearm and its components have spaces and holes that can collect dust and debris. Due to the sensitivity of a turntable and record surface, these specks of dirt can cause poor sound quality and negatively impact the listening experience.
To clean your tonearm, you need a stylus brush, anti-static dust cloth, compressed air, and rubbing alcohol.
Clean the needle with the stylus brush from the front to the back. You can also dab the brush with some alcohol and brush gently.
Wipe down the tonearm with a cloth dabbed with alcohol. You can use the can of compressed air to blow dirt out of small and inaccessible spaces.
Wipe down the tonearm with a clean and dry cloth
Always pay careful attention and try not to touch surfaces of the record player or the stylus with your bare finger. Make sure your hands are clean before you start cleaning your turntable.
Conclusion
A record player cannot function with even the slightest defect to any of its components. Appearances can be deceiving, and even though the tonearm looks like a simple rotating tube on the record player, it is one of its most essential components.
We have shared the different processes to identify and troubleshoot possible issues the tonearm could develop.
Remember always to follow the instructions outlined in the product manual and purchase original and exact replacement parts.
Always consult a professional when you are unsure about fixing any part of your turntable.
High-quality turntables are often expensive because of their setup. All the parts need to be top-notch, and even then, they can malfunction. Finding a good deal on a turntable these days can seem like mission impossible – but not if you know where to look.
Turntables are expensive on account of the manufacturing of their numerous segments. Servicing and maintenance of turntables are essential for their optimal performance. Finding the best value for money is attainable through online and in-person auctions.
There are plenty of modern turntables on the market right now that comes at a reasonable price. It is because of the boom that vinyl has experienced in the last decade or so. Music lovers returned to this nostalgia-inducing medium, and they need the equipment to be able to take part.
On the other hand, vintage record players have a different presence. Most brands have stopped producing them decades ago, so buying them second-hand is the most logical choice.
Music shops that specialize in restoration sometimes offer old-school decks. Browsing through various markets and yard sales is your next best bet for locating a pristine vintage record player.
The most crucial thing to bear in mind here is the state of the individual turntable parts. You can come across a preserved table that has a faulty motor you can’t service. It is why you first have to get acquainted with the various components that make a record player.
Turntable Replacement Parts
To avoid spending tons of money at your local turntable repair shop, get a firm grip on the ins and outs of your musical companion. A typical record player has a dozen parts, most notable being: the motor, the cartridge, the stylus, the tonearm, the (pre)amplifier, and the platter.
There is always work you can do on your turntable so it can perform at its best. To avoid ruining your vinyl, you should keep a close eye on specific parts, such as the cartridge and the stylus.
Always pay attention to strange sounds coming from the motor and stop the turntable if you hear anything unusual.
As for the other parts, don’t fix something that isn’t necessarily broken in the first place. The tonearm and the platter are usually the parts of the turntable that don’t get broken easily.
The amps and the preamps can cause you some trouble, but they are unchallenging. Look up the costs for getting new ones if the old ones stop working.
Be observant of the pieces that are in direct contact with your records. Perceive the turntable separately from the vinyl it plays, although they work in tandem.
Turntable Motor
First things first, make a note of the type of turntable you’ve got on your hands. The two main types are belt-drive and direct-drive, which differ in ways of spinning the platter. (1)
Belt drives are preferred in vintage turntables. The belt isolates the motor from any unwanted vibrations, as well as variations in speed. Direct drives have more robust motors since they power them without any additional parts in between. (1)
Taking care of a record player’s motor resembles taking care of any motor-powered device. You should always have some motor oil on hand for the belt-driven models. Direct-driven turntables don’t need any due to the way of assembly. They should function fine without any extra help from your side. (1)
Make sure to keep the motor clean from any dust, dirt, or debris. A thorough wipe with a cloth now and then does the trick.
Cartridge
A cartridge is a part of the tonearm, one of the vital parts of the turntable. It determines the quality of sound produced, as the stylus on its end transmutes the groove of the recording to sound.
There are two main types of cartridges, both magnetic: the moving magnet cartridge and the moving coil cartridge. Moving magnet cartridges feel lighter on vinyl than the moving coil cartridges. The stylus is easy to remove, so you can switch it up between different types of styli as you wish. (2)
Moving coil cartridges have the coils moving when the stylus gets close to the record, and they have more precision than magnets alone. In turn, the sound is cleaner, so you can expect to find these cartridges on upscale record players. It means they cost more, too. (2)
Since the coils aren’t as heavy as magnets, turntables with moving coil cartridges need an additional step-up transformer. In this case, you can’t replace the stylus on your own – you need to send the entire cartridge to the shop. (2)
Make a note of how the cartridge mounts to the tonearm as well. You can go either for the standard half-inch or the P-mount cartridge mount. If unsure, check with the factory which setting is the best one for your turntable.
Choosing the correct cartridge comes down to what you’re looking for in your record player. The costlier option results in a better audio experience, but the inexpensive one might not give you what you’re looking for. It seems to be a rule of thumb for all turntable parts.
Stylus
The stylus or the needle that comes on top of the cartridge is the thing that can damage your record collection most severely. Because it moves within the grooves of the record, you must change it regularly. Otherwise, tiny particles of dust can get stuck within, ruining your beloved records for good.
Styli come in four main shapes that help you distinguish between them: elliptical, conical, fine line, and microline.
The elliptical stylus comes with a polished tip, so its contact with the grooves is smooth. Its price is mid-range, but it can be hard to replace on your own. (3)
The conical stylus falls heavier on the recording. It is the most common type of stylus out there, so it’s usually not that expensive. It’s pretty easy to replace it, so it’s excellent for beginners. (3)
The fine line (or the shibata) stylus is easy to recognize because it’s shaped like a diamond. It falls very gently on the record due to its lightness, but it comes with a higher price.
The microline stylus is the most precise out of all the styli, and the most expensive one. Don’t consider replacing it by yourself – it’s quite a process. (3)
Replacing both the cartridge and the stylus is a delicate procedure. You don’t need to change the cartridge as often as you should change your stylus. Measure the next replacement in playing hours – once you hit the 1000 hours mark, change the needle. (3)
When you get to this point comes down to how often you play your records. If you play them each day for a few hours, make sure to change the stylus about once per year. (3)
If you’ve bought your turntable second-hand, it’s best to change the needle straight away. You never know how long the old one has been within the cartridge, and you don’t want to risk damaging your records, do you?
Tonearm
A tonearm is here to support the stylus to find its way in the depths of the record. To do so, it needs to be firm and steady without applying too much pressure.
When it comes to setting up a tonearm, everything counts, from the angle of the cartridge to the sharpness of the needle.
Without the direction of the tonearm, the cartridge would head to the center of the vinyl. That’s where the anti-skate force comes into play, keeping the tonearm unmoving. (4)
Ever since the invention of the gramophone, tonearms have been playing their roles. They have remained unchanged for the most part, serving as a buffer between the turntable and the recording. The difference now is the material used in production.
Carbon fiber is used more and more in the manufacturing of tonearms. It is stiffer and less dense than traditionally used aluminum. (4)
A tonearm isn’t a part of the turntable you should think about replacing. A new tonearm might give you slightly better sound quality, but you have to think about aligning it to your cartridge. Manual turntables could use a change but think about getting a second opinion before doing so.
Turntable Longevity
A turntable lasts as long as you take good care of it. Cheaper turntables come with motors past their expiration date and still work if their owners had looked after them. Fresh out of the factory models will, of course, give you nothing to worry about for a good couple of years.
If you’re a fan of vintage turntables, be careful what you wish for. You might stumble upon a record player in mint condition, only to realize its stylus has never been changed. If you forget to consider this and put your favorite record on, say goodbye to it.
Because a record player consists of multiple interconnected pieces, its longevity depends on them. Check the state of your entire tonearm on the regular, and you should be golden. If you notice any changes to the platter or the motor, take your deck in for maintenance.
The vinyl revival has ensured a plethora of new fans of analog who tend to over-complicate things. Getting all the latest gadgets for their vintage turntables develops into an obsession. Changing the stylus every few months is a must. (5)
It’s one thing to take care of your favorite records, and it’s a whole other to worry over them for no apparent reason. Get all the know-how of your turntable brand of choice, but approach it with common sense.
The situation can also be the other way around. If your vinyl is in poor shape, it’s better to invest in a spherical stylus than an elliptical one. Even if it costs a bit more, you’ll find it’s worth it. In the end, it all comes down to what you want to preserve more. (5)
Setting up your turntable isn’t rocket science, although it may seem so at first. Finding a good deal is the same.
Best Turntable Deals
If you’re looking at buying a turntable at a reasonable price, you have a couple of choices in front of you. The first and the most obvious one is ordering one online.
There are plenty of sales via retail sites, on Amazon, and various marketplaces. Plan to get one this way around special dates, such as Black Friday. (6)
You can find a good deal on a turntable by walking into your local supermarket as well. Don’t expect to find the best quality, though. It is what Hi-Fi shops are for. (6)
Since record players are fashionable once again, you can easily find them in selected audio shops. The knowledgeable staff will be sure to point you in the right direction if you’re in doubt.
Besides great deals, these stores often assemble complete sound systems on their own. You will be going home with a one-of-a-kind turntable for way less than what you’d spend if you were buying each part individually.
What’s particularly convenient about these kinds of spots is you can test the sound for yourself. Spend some time getting to know different turntables and see which one fits you best. It is not a one-size-fits-all, and it shouldn’t have to be.
You can always walk into a flagship store of a turntable manufacturing company. Brands like Dual and Rega offer a myriad of options; you’re bound to find a record player that suits you.
If you’re into vintage turntables, spend some time getting to know your city’s yard sales. They’re your best bet when it comes to purchasing a record player in a solid-state at a fair price.
Finding a decent deal for a turntable shouldn’t have to be a nuisance. Make it into a challenge and browse through multiple routes until you discover something just for you.
Are Expensive Turntables Worth It?
With turntables, like with other devices, you can expect to get quality at a price. There are so many types of turntables for a reason. You won’t see an audiophile jamming to a suitcase record player.
Vintage turntables need a lot of patience and devotion. Sometimes an investment or two as well. Vinyl enthusiasts go into so much trouble because the entire experience is worth it.
Buying a record player means you are in it for the long run. Turntables have been made to last for years to come.
That is why there are so many vintage turntables still around. When every household had one, thinking if it was worth it wasn’t even in question back in the day.
Getting together and listening to records was the best way to spend quality time together. When technology wasn’t as advanced as it is now, entertainment came from a different source. It seems our culture is coming full circle.
Putting the needle down to a recording is more than a way of listening to music; it’s a ritual. It links you, even if just for a few minutes, to an art that is older than you.
The atmosphere that a turntable creates is pleasurable that DJs attempt to recreate it each day and each night. (7)
The renaissance of vinyl is a statement in an overly digitalized society. It came back to show us all how attached we are to the things we value most – and for a lot of us, it’s always been music. Some things never change. Or do they?
Alternatives to Expensive Turntables
You don’t have to pay a lot of money to have a good sound system. You can buy a low or mid-range turntable which will deliver the goods. You can always upgrade it with a good tonearm, amp, or hook it up to a great set of speakers.
Anything worth having doesn’t come easy – and this is especially true with good music. You can always decide on playing your favorite tunes via another medium. Don’t expect you’ll be getting the same treatment you do with record players, though.
The battle of analog versus digital continues. Everyone decides on their preference: a full, warm sound that a turntable makes or a no-fuss, easy-to-share MP3.
You don’t have to choose which one wins the whole game. Mix and match and see where your audio journey will take you to.
Why Are Turntables Expensive?
Turntables have been around longer than any person alive today. They are a part of our history, and we are learning to appreciate them. It is why class A turntables cost a lot, in some cases.
They’re hard to come by, they require proper TLC, but they grow on us. When you find the perfect record player that has that sound you’ve been dreaming of, you’ll be sure to feel it. And there is no price you won’t be willing to pay to continue this relationship.
Are you a newcomer to the vinyl world? Vinyl is back in style, but in reality, they never went out of style. There are different ways to customize your turntable. One of such ways is playing a turntable through a soundbar for sound optimization. If you’re wondering how easy it would be to connect your soundbar to your turntable on your own, you’re in the right place.
The easiest way to connect your turntable to a soundbar is by using an analog AUX input, especially if your turntable has a built-in phono stage and phono/line switch. However, since most soundbars are Bluetooth-enabled, you can also connect them wirelessly.
A soundbar is one of the many types of loudspeakers. They were primarily created to create an intense sound combined with an outstanding bass response. Soundbars come in all types, including ones with built-in amplifiers or two channels.
On the other hand, a turntable is the flat round part of the record player that houses the record. It comes in 2 types, the belt drive, and the direct drive.
The belt drive turntable connects the motor to the surface with an elastic belt, while the direct-drive turntable holds the platter directly above the motor allowing for more speed and control.
Although a soundbar and a turntable are significantly different from each other, connecting them is highly possible. Each device on its own is a little tricky to pick out and to use; combining them to create the best sound, however, doesn’t have to be complicated.
Whether you are dusting out your old collection or you’re venturing into the world of vinyl music, you don’t have to be an audio engineer to get the best quality of sound. However, it requires a basic understanding of what you’re dealing with in terms of sound.
Components Of A Soundbar Vs. Elements Of A Turntable?
While the vinyl record and turntables are mostly analogs, soundbars are mostly made with digital inputs such as the TOSLINK and the HDMI.
The HDMI is a high-definition multimedia interface that transmits both compressed and uncompressed video and digital audio data.
The TOSLINK is used to transport digital audio from one component, such as a CD player, to an AV receiver.
The turntable uses preamplifiers and amplifiers to transmit sound from the record player to the speakers. The preamplifiers and amplifiers are in charge of the sounds produced, such as the bass and the treble.
A preamplifier works by picking up weak electronic signals and converting them into an output signal strong enough for an amplifier to pick up. It filters the noise and distortions, making it clear enough for a speaker or an amplifier.
An amplifier is a device that boosts an electric current from small ones to larger ones. In simpler terms, it increases the power of a signal.
The receiving speakers are either external speakers, speakers that are connected by a cable, or built-in speakers within the record player.
Differences Between A Preamplifier And An Amplifier
Pre Amplifier
Amplifier
Changes multiple input signals into a single line for an amplifier to process
Send the single output signal from the preamplifier to a speaker
Commonly found in audio/video receivers
Requires several channels
Filters the sound to erase noise and distortions
Amplifies the sound to speakers for louder and clearer output
Regardless of the differences between both types of equipment, the amplifier should function together with the preamplifier for the best sound. (Source)
What To Consider Before Connecting A Turntable To A Soundbar
Connecting a turntable to a soundbar does not require professionalism. With explicit knowledge, you can run the connection seamlessly too. Let’s talk about several connection methods.
Turntables are designed to produce a signal called the phono signal. These signals are produced by the cartridges of a turntable and are so weak they make horrible audio when connected to a line signal producing soundbar.
A line signal is 100% stronger than the phono signal produced by a turntable. Most modern equipment and devices produce the line signal.
In order to get a high quality of sound production, it is necessary to change the phono signal produced by a turntable to a line signal that matches that of the soundbar. To convert these signals seamlessly, you need a device called a phono preamp. (Source)
The phono preamp converts phono signals into line signals for better sound production and quality. Most turntables come with a built-in phono preamp, some soundbars also include the feature, and in some rare cases, both devices are without a phono preamp.
How to Confirm If Your Turntable/Soundbar Has A Built-in Phono Preamp
You can easily check to be sure if any of your devices have the phono preamp option integrated with the following steps:
Behind your turntable, check for a button/switch labeled phono/line. If you find one, it means your system has an inbuilt preamp feature, and all you need to do is switch it to Line mode to turn it on.
Check your soundbar for an input option labeled phono. If you find this option, then it means your soundbar has a built-in preamp.
In rare cases where neither the turntable nor the soundbar contains a built-in preamp, then it is essential to purchase a separate or external phono preamp.
How To Connect A Turntable To A Soundbar
RCA/AUX Direct Connection
There are some brands of turntables that come equipped with a built-in preamplifier. For such brands, connecting to a soundbar is as easy as using an AUX or RCA cable to connect directly.
Firstly, you flip the switch behind the turntable to change the signal to a LINE signal. Then you connect the AUX/RCA cable from the turntable to the input option labeled LINE on the soundbar.
Once you have completed this step, select your turntable device on your soundbar, and the connection is complete.
Bluetooth Record Player
A significant percentage of soundbars come equipped with Bluetooth connectivity. It eliminates the knots and tangles you would typically experience with wires and cords.
Some turntable brands include the Bluetooth connectivity feature too. It allows for a seamless connection between a turntable and a soundbar.
Turn both devices on and pair them following the instructions in the manual carefully, as the pairing methods sometimes differ by brand.
Turntables And Bluetooth Adapter
While most soundbars have the Bluetooth connectivity option, most turntables don’t. A Bluetooth adapter works by bridging the gap between the soundbar and the turntable.
For this method, it is essential that you buy an adapter compatible with analog inputs, like an AUX cable.
Also, confirm that the Bluetooth connectivity bandwidth is compliant with that of the aptX Bluetooth protocol to guarantee a high quality of sound output.
Connect the Bluetooth adapter to the analog outputs of the turntable player, making sure to follow the instructions in the manual carefully. Once this is done, the sound transmission to the soundbar is complete.
For cases where external preamplifiers are used, be sure to connect the Bluetooth adapter to the preamplifier’s output.
Analog Soundbars
Connecting your turntable to analog soundbars is applicable in two ways – it works for turntables that come equipped with a built-in phono preamplifier and turntables without one.
For a turntable with a built-in phono preamplifier, all you need to do is confirm that the phono switch is set to LINE, after which you can then connect it directly to the AUX point on the soundbar. It is to avoid the distortion created from using two phono preamplifiers at the same time.
Turntables without a built-in phono preamplifier will connect to a soundbar, too, as long as you get a separate phono preamplifier.
Here are a few steps to follow on how to connect a turntable with a separate phono preamplifier to a soundbar:
Purchase an external phono preamplifier
Connect the wires on the turntable, especially the audio cables to the separate phono preamplifier
Then connect the audio cables on the phono preamplifier to the soundbar
Connect the preamplifier to a power source and turn it on
Choose your turntable device on your soundbar, and you’re good to go
The following methods all work effectively at connecting a turntable to a soundbar hitch-free to produce impressive and clear quality sound.
How To Connect A Turntable Without A Built-In Preamplifier To A Soundbar With A Built-In Amplifier
In situations where the soundbar comes with a built-in preamplifier and the turntable is without one, here are the steps to follow:
Prepare the soundbar for connection.
From the phono output port of the soundbar, connect one end of the cable, making sure to connect the other end to the turntable.
Once complete, choose your turntable device on your soundbar, and the connection is complete.
What Is A Phono Preamplifier?
A phono preamplifier is an audio electronic device or component that increases the sound quality from a turntable to make it compatible with an amplifier. (Source)
It is compatible with turntables without a built-in preamplifier and with built-in amplifiers as it helps produce a much better sound quality.
When purchasing a phono preamplifier, it is imperative to look out for some features such as:
Good timing
Dynamic and expressive sound
Sleek design
Moving coil
Moving magnet
Phono preamplifiers that tick these boxes are worth investing in for your home theater.
Some Of The Best Soundbars For A Turntable Player
Because most soundbars come with digital outputs, the chances of getting one that is easily connectable to a turntable are low.
The following soundbars can easily be connected to a turntable without any stress, thereby easing your search.
Polk Audio Signa S2
It is a budget soundbar with a wireless subwoofer. It is equipped with an AUX analog input, Bluetooth, HDMI, and TOSLINK connectivity too.
Sonos Beam+ Port
The Sonos Beam is a small soundbar and wireless speaker with streaming features. They, however, do not have an AUX analog input and require a Sonos port to connect to a turntable.
You can read more about Sonos here in these articles that I wrote:
It is a high-quality soundbar with a great design and clear sound. It comes with an AUX analog cord to make connecting it to a turntable super easy.
Vizio Soundbar
There are different types of soundbars from this brand, including soundbars with subwoofers. The Vizio 2.1 soundbar is your best pick as it comes with an AUX analog input, easing connectivity to a turntable.
Some Of The Best Turntables To Use With A Soundbar
When choosing a turntable for easy connectivity to a soundbar, it is best to go for a turntable with the Bluetooth connectivity option. It is primarily because most soundbars prioritize digital inputs like HDMI over an AUX analog input.
Audio-Technica AT-LP60XBT
This budget turntable is 100% automatic that is easy to set up and easy to use. The AT-LP60XBT is also compatible with Headphones, soundbars, speakers, or devices that require Bluetooth connectivity.
It is a high-priced turntable that delivers on quality. It also comes with a slightly higher than regular Bluetooth bandwidth. This feature increases and simplifies the connectivity range to a soundbar.
This turntable is currently one of the best available. It not only comes with an AUX analog output, but it also allows for Bluetooth connectivity.
Are Soundbases and Soundbars Similar?
Soundbases are budget-friendly, and are much larger speakers designed to improve the quality of sound generated by a TVs speakers. They are a larger single device capable of generating high-quality sound while
Soundbars are external members of the speaker family, also designed to upgrade the sound a TV produces. They are typically equipped with more and better features and integrations than sound bases.
Soundbases and soundbars are not similar. Their differences span several features, such as the quality of sound produced, how they are assembled, how they are set up, and how they should be placed.
Differences Between Soundbars And Soundbases
Soundbar
Soundbases
Slim and tall design
Compact, heavy, and small design
Produces a broader sound and room-filling surround sound
It does not produce a wide coverage as much as a soundbar
Unable to create a bass sound most times
Can produce a bass sound due to room within its enclosure
Often needing external subwoofers
Mostly come with internal subwoofers, amplifiers, or speakers with higher sound production.
Can be mounted or placed across a stand or cabinet
It cannot be mounted and can mainly only find use as a TV base
As much as they come with different features to satisfy different needs, the soundbar and soundbase also share similarities, such as the Bluetooth and wired connectivity options. (Source)
How To Setup Your Turntable For Premium Sound Quality
Connecting to a soundbar is one of the many ways to get an improved sound quality from your turntable. However, there are some basic steps to follow to ensure the sound produced from the turntable is at its best.
Keep Your Turntable Level
Keeping the turntable level is the best way to get a good flow of sound from it. It allows the needle to drag evenly across the surface of the vinyl. (Source)
Check The Speed Accuracy Of The Turntable
Several issues can affect the speed accuracy of the turntable. Once the speed-accuracy is affected, it becomes audible in the quality of sound produced.
Align The Cartridge
A misaligned cartridge causes blips in sound production. Always check through, especially after an upgrade, to be sure it hasn’t been tampered with.
Every turntable comes with a manual and an alignment protractor to confirm the alignment of the cartridge.
Turntable Brush
Turntable brushes help to keep the dust and debris away from your turntable. Dust and debris can affect the sound production from your turntable by causing static.
Replace The Needle
Some turntables allow for an easy needle replacement. A blunt turntable needle can lead to dull sounds. Check through your turntables manual for instructions on how to replace the needle and possibly purchase the replacement part.
Final Thoughts
There are several benefits to using a Soundbar. They are trendy, modern, and come in very sleek designs that don’t require much space.
This article contains detailed information about essential features to look out for, the meaning and function of some terminologies, and the best ways to connect a turntable to a soundbar.
Analog does not have to mean noise, distorted beats, or low volume. Soundbars are exciting modern ways to spice up your record life.
All you have to do is choose your preferred turntable and soundbar to get this journey started.
Although the Garrard Engineering and Manufacturing Company is barely relevant today, many still aspire to hear and use their turntables due to their vintage quality. However, most Garrard turntables to date are old and are in dire need of repair. To aid you with the very first step of repairing your own Garrard turntable, let us know how to remove a Garrard turntable in three basic steps.
To gain access to your Garrard turntable’s inner workings, you will need to remove the turntable mat. To initiate this, pull from the center first before pulling the sides using either a pen knife or a screwdriver.
Tearing apart your turntable is a very delicate process, and it can seriously get intimidating quickly. However, please do not fret, as we guide you throughout the process step by step, making the whole process a walk in the park.
Taking It Apart: Removing A Garrard Turntable In Three Simple Steps
Most people who own Garrard turntables get them either from a garage sale or through inheritance. Unfortunately, most do not own a manual for it, nor can they bring them to turntable service centers since most do not cater to Garrard turntables. In addition to that, the sheer weight and fragility of Garrard turntables make them extremely difficult to carry around from town to town for repairs. (source)
Although I sincerely discourage repairing them on your own, most people simply do not have the choice, nor do they have the luxury of having a nearby technician. Add to that, and they might just want to do simple maintenance such as oiling or replacing the belt. That is why below, we listed the three easy steps to removing your Garrard turntables.
Make sure that your Garrard turntable is in an idle state (not playing).
Unplug the turntable from power sources
Remove the platter or turntable mat first
Ensure That Everything Is Turned Off
Aside from specific repair requirements, one of the basics of repair and maintenance is to turn off the turntable and unplug it from its power source. Although this may seem as basic as one, two, and three, most people frequently forget to do this step.
Keeping the turntable unplugged keeps you safe from electrocution. But watch out for things like capacitors that can store energy even when electronics are unplugged.
Primarily, electrocution concerns stem from the fact that most turntables, especially Garrard, are powered by the stronger alternating current (AC) instead of, the weaker direct current (DC). In addition to that, we may need to touch the wires for specific repairs, and most repairs involve physical contact with conductive materials, making this process critical for your safety.
In the instance that your turntable was in use before repair, you will need to turn it off. When doing such, make sure that your turntable has cooled off for at least thirty minutes before opening it up. Also, try turning it on and off several times after unplugging. This action will help to dissipate any capacitors that may be present. Moreover, when doing repairs and maintenance regarding the turntable belt, it is critical not to skip this step to prevent any possible injury from a moving part. (source)
Taking It Apart: Removing The Top Layer
Now that you have turned off everything, it should be safe to operate the turntable now. The first thing you will need to remove is the rubber dust cover, as most Garrard turntables require you to remove the dust cover before taking the said turntable apart. This item looks like a caterpillar sliced in half (or like rubber clips, depending on the model) and is used to prevent dust from building up inside the turntable, affecting the sound quality.
The next step is easy to understand but challenging to execute, so read carefully. Newer Garrard turntables tend to remove easily, using a pulling motion on the platter directly from the aligning rod. (source)
However, if you have an older model, we might need a more blunt approach. Gently, using a small hammer and pry edge like a flat screwdriver, gently pry open the Garrard turntable’s platter out of its casing. After doing this, slide the platter off and set it aside in a safe area. (source)
This whole process is beneficial for those who want to remove or replace the belt from their Garrard turntable. However, for those wanting a simple oiling procedure, we might want to refer to Garrard’s user manual (if available).
Diagnosis And Home Repair: Simple Garrard Turntable Maintenance Processes You Can Do At Home
(Image By Porius – Own work, CC BY-SA 3.0, https://commons.wikimedia.org/w/index.php?curid=7743507)
After you have opened up your Garrard turntable, indeed, you are not leaving it at that. That is why, in this section specifically, we will teach you essential maintenance steps to preserve your Garrard turntable. By taking some pages of information directly from the manual, we will discuss these maintenance steps.
Oiling Your Garrand Turntable: It Shouldn’t Be So Hard.
Whether for the motor for the turntable belt or the bearings, your resident Garrard turntable is not the type to require a lot of oiling. However, there are times where oiling becomes less of a luxury and more of a necessity. In those situations, use our short guide on how to oil our Garrard turntable.
The oiling points for your Garrard turntable are accessible by removing the turntable mat. To remove the turntable mat, you will need to lift the turntable from the side after lifting it from the center boss. By following this process, you make sure that the turntable is not damaged nor the insides. (source)
You can access the retaining clip by levering the nameplate with a screwdriver or a penknife in an upward motion. Remove the retaining clip afterward.
You can now remove the turntable. To initiate this, with the foam mat attached, lift the turntable using your fingers on opposing sides while applying the same amount of pressure. This action is done evenly so you don’t create an uneven force that may damage the Garrard turntable.
You can now access the oiling points for the turntable’s motor. To oil effectively, make sure you place the appropriate amount. Any excess oil should be accounted for and removed using cloth. (source)
Replacing The Turntable Belt The Easy Way
After removing the turntable and exposing its internal parts, you can now check the turntable belt. Hold the strap and use your hands to pry the belt away from the belt drive if the turntable belt is still attached to the drive. However, if the belt is broken, throw it away instead. (source)
To make sure that the belt drive is clean, dampen a cheesecloth using isopropyl alcohol. Use the damp cloth to wipe down the belt gently.
When dust and debris build up around the turntable, the sound quality of the Garrard will be affected. Ensure that you wipe the essential parts of the turntable, from the insides to the belt drive, including the new turntable belt and the platter.
Now that everything has been wiped clean, please insert the new turntable belt. Wrap it around the belt drive such that it fits snugly into the drive. (source)
Frequently Asked Questions
Who Owns The Garrard Engineering and Manufacturing Company?
Since 2018, Garrard Engineering and Manufacturing Company has been owned by Cadence Audio SA. However, the history of Garrard Turntables goes way back to 1915, when it was under Garrard & Co. (source)
What Are The Record Spindles In My Garrard Turntable For?
Record spindles in Garrard Turntables function for the automatic playing of records. (source)
How Often Should I Oil My Garrard Record’s Belt?
You can oil it as often as four times a year or once in three months. However, oiling frequency is typically only required about once a year. The frequency will also depend on the condition of the turntable and the frequency with which you use it.
The record player history is a long topic to tackle. Still, many people are interested in it since it is among the most significant inventions in home entertainment history. That said, how did record players evolve through the years?
The history of record players began in 1877 when Thomas Edison invented the phonograph. Alexander Graham Bell upgraded the phonograph into the graphophone so it could record sound waves. The record player was brought out to the market in 1895. Record players seem to be coming back to the mainstream these days. So, apart from knowing the history, it is equally essential to understand why the vinyl resurgence.
When Was The Record Player Invented?
The Record Player was invented in 1877, but as we mentioned before it was actually a Phonograph, but it’s considered to be the first record player.The record player was brought out to the market in 1895
The Record Player History
There is no denying that the invention of the record player is a significant step in home entertainment. From a simple turntable, this invention evolved into numerous restatements. The creation of the record player is also the reason why we enjoy digital music today.
Moreover, the record player history can be divided into six periods:
the invention and rise of the first record player
Emile Berliner took record players to a new level
bringing the record player into the commercial market
the golden age
record players for the hip-hop scene
the fall of record players
Looking at each period will help you understand how the invention of the record player led to how people consume music today.
The Beginning And Rise Of The First Record Player
The very first version of the turntable came out in 1857. That is when Edouard-Leon Scott de Martinville created the phonautograph device in France. However, his invention was not capable of audio playback. Instead, it could only transcribe airborne noise into paper for visual study purposes.
That said, the phonautograph’s purpose was mainly used for lab settings.
In 1887, Thomas Edison invented the phonograph. This device popularized him as the man behind the record player invention. That said, it is safe to say that Thomas Edison is responsible for why people can enjoy music today.
The phonograph worked by recording and playing sound by inscribing audio to a cardboard cylinder wrapped in tinfoil. As a result, Edison’s invention played continuous playbacks.
In the same year, Alexander Graham Bell upgraded the phonograph by adding wax to its design.
Graham Bell called his invention the graphophone. Such is a device that can record sound waves, which is a significant improvement to record players back then.
Taking Record Players To A New Level
Emile Berliner took record players to a whole new level when he created the gramophone. It consisted mainly of shellac and hard rubber before manufacturers used vinyl.
Berliner’s invention was also called the turntable. Unlike the graphophone that used a cylinder, the gramophone interpreted grooves on a flat disc. The device has a cone-shaped needle that reads the grooves of the record as it spins.
In addition, the needle, which is usually made from diamond or sapphire, hangs at the end of the tonearm. The tonearm moves across the vinyl, allowing the needle to follow the grooves on the record. This way, the needle was able to pick up vibrations and transmit them to the coil.
The coil would then turn the vibrations into electrical signals, which would travel to the amp. Finally, the speakers would turn the signals into sound, thus producing music.
Moreover, Berliner secured a patent for the gramophone in 1887.
The Mass Production Of Record Player
The record player history achieved another milestone in 1895. During this year, manufacturers released the first record player to the commercial market.
However, the gramophone record player was only popular until the emergence of the radio. The popularity of radio did not make the record player obsolete. But it indeed took away the spotlight for some time.
The advent of radio in the early 1920s made the record player industry face new challenges. It posed significant competition to record players. The reason is that the radio made the airway broadcast of music possible.
More than that, the radio’s audio quality was a lot better than the sound of record players. Such is due to a difference in the electrical sound pickup.
Moreover, the sales of record players did well in the 1930s and 1940s. But it only hit the mainstream tipping point after approximately a decade.
The Golden Age Of Record Players
Record players experienced extreme popularity in the 1960s and 1970s. This period is another milestone for the record player history. The reason is that Dual released the first turntables that have stereo playback.
It was also during this period when high-fidelity sound reproduction went out commercially. The sound quality of devices this time motivated many people to purchase a record player.
Additionally, the automatic Hi-Fi turntable also became a massive hit in the early 1960s. This era had also seen when Electrohome released the famous Apollo Record Player. (source)
Using The Record Player In The Hip-Hop Scene
The modernization in the record player history began in the 1980s and beyond. It was when hip-hop DJs creatively used turntables. They connected the record players to audio mixers and used their hands to guide the records.
That way, they could scratch the vinyl record against the needle. Doing such allows them to produce a rhythmic instrument.
Moreover, many people still use record players for their original purpose. Similarly, many hip-hop artists used turntables and mixers to add rhythm to the music. (source)
The Fall Of Record Players
By the 1980s, many families had a record player in their homes. The record player history was ongoing for a century. For this reason, these devices had gone from primitive.
However, time keeps going on, and technology progresses continuously. As a result, digital technology and compact disks made their way to the music industry.
This advancement brought a huge benefit. But it also resulted in a sharp decline in record player sales.
Still, many music enthusiasts did not let go of record players. For instance, DJ turntablism kept the format alive until the 1990s and early 2000s. (source)
More Of The Record Player History: The Vinyl Resurgence
The invention of the first record player and its improvements made modern music consumption possible. Record players turned to CDs and digital music due to various advancements.
But after years of digital music consumption, vinyl records are coming back to life. In fact, many major artists now release their albums in LP forms. For this reason, the young generation can experience the 100-year-old record player history.
Moreover, the increasing interest in vinyl records resulted in the need for modern record players. Many casual listeners and music enthusiasts alike want to experience music using vinyl. However, they also want some of music devices’ modern features, such as connecting to their smartphones and USB recording.
But regardless of the changing needs of music consumers, it is clear that record players are here to stay.
Today’s Vinyl
Looking at the record player history, you will see that vinyl only became a thing years after record players became popular.
Vinyl records made the rubber discs created by Berliner obsolete. Such records were easier to produce in high numbers. Additionally, manufacturers could easily recreate the vinyl master copies using lacquer on the cutting machine.
The master copy of a record will use the cutting head to transmit the electrical signals to the cutting machine. The said cutting head has a needle on its end. That needle cuts the grooves into the lacquer wrapped around the center of a disc.
After the cutting process, manufacturers will send the lacquer to a company that will cover it with metal, thus making the final master copy. That said, you can say that the master copy is somewhat a form of negative for a record. The reason is that manufacturers can use it every time they mass produce a record.
Moreover, companies use the metal copy of a record to create a stamper. They put it onto a hydraulic press placed with vinyl in the middle of the plates. They also use steam to soften the vinyl before stamping it.
Finally, the pressed vinyl is cooled using water, which is the final step in creating a copy of a record. (source)
The Modern Record Players
As mentioned, along with the vinyl resurgence is the need for modern record players. A lot of audiophiles and casual listeners want to experience the vintage way of listening to music. Such is proof that the record player’s history is alive and thriving in the modern-day.
However, they also want a touch of modernity and better functionality in their record players.
For this reason, companies integrated the following features to modern record players:
USB recording
Bluetooth connectivity
aux and RCA connections
speed options
Moreover, the reproduction of vintage record players has also become a big thing. These models look exactly like the vintage ones on the outside. But their interior consists of various modern features.
For instance, some of the modern record players feature built-in speakers. This way, music listeners can plug in the unit and start listening to music without the need for additional speakers and an external preamp.
Even better, many of the modern turntables sound better than the vintage ones produced in the early days of record player history. (source)
A Comparison Of Vintage And Modern Record Players
Record players have been alive for a very long time. But the invention of the cassette, the radio, and other music forms emerged. Such resulted in record players going out of fashion. Later on, vintage record players became an item for audiophiles to collect.
Still, it seems that the record player history is still not over. As mentioned, vinyl records and records players came back to life. However, there are differences between vintage and modern turntables that we need to tackle.
1. Appearance
The record player history allowed vintage turntables to have a modern counterpart. Vintage and modern record players do not have many differences in their appearance. However, vintage turntables were usually massive and had a preamp connected to them.
On the other hand, companies equipped modern record players with portability. For this reason, owners can easily place them from one place to another anytime they want.
2. Audio Quality
If you will spend money on record players, it is essential to know which sounds better between the vintage and modern ones.
There is a long record player history. For this reason, vintage turntables experienced various improvements as time passed by. So, the superior construction of vintage record players will generally produce better sound than the modern ones.
However, the sound quality of vintage turntables depends on the state of the device you have. If there is damage to a feature like a subpar stylus, the sound quality will become a mess.
On the other hand, new record players feature a mix of:
particle boards
alloys
carbons and other metals.
For this reason, there is no shortage in the construction quality of these modern turntables. Thanks to the turntable’s great cartridge and stylus combination, there is also no shortage of sound quality.
What sets vintage and new turntables apart is the motor sound. Even the lower-end modern turntables do not have audible sound coming from the deck spin. For this reason, they produce warm and crystal clear sounds.
That said, modern record players sound better than vintage ones. Though the vintage ones have a long record player history, the modern turntables have more technological advancements that make them sound better.
3. Technology
A lot of technologies were not available when vintage turntables became popular. Still, some vintage record players have more advanced features than others. However, they are still primitive compared to the features possessed by modern turntables.
But depending on your needs, the features of modern record players may be irrelevant. The reason is that some of these features are not necessary for people who want to listen to music.
That said, modern record players have more features. But if you do not need these features, it is ideal to go for modern turntables.
4. Repairs
One significant thing to consider when buying a record player is if you can repair it or not. They are likely to break at least once in their lifetime, which requires you to have them repaired.
Vintage turntables are extremely durable. They do not break easily, and you will have a hard time having them repaired once they do.
The reason is that vintage record player parts are hardly available. While vintage turntables survived the long record player history, only a few companies manufacture their spare parts.
Meanwhile, new record players are also sturdy. Once they have damage, it is easy to find their spare parts and have them repaired.
So, if you want an easy repair when it comes to your turntable, you should go for modern record players. Both of them are highly durable. But new record players are a better option since there are manufacturers that produce their spare parts.
5. Prices
One significant difference that vintage and modern record players have is their prices. A good quality vintage record player will have you spend about $300 if you buy one these days. Such is already an excellent deal considering the century-long record player history.
On the other hand, a modern turntable costs approximately $300 for its most basic settings. Yet, you will not have much playtime with the audio on a device this cheap.
Moreover, you need to spend about $1000 if you want a high-quality modern record player.
So, the best option in terms of the price for turntables is the vintage ones. Still, buying a vintage record player means that you need to get extra speakers and an amplifier, thus increasing the cost. But if you will go for a modern record player, you will have to spend double the amount of money.
6. Ease of use
Another essential feature for professionals and amateurs alike is system usage. That said, vintage turntables are extremely easy to use. They possess straightforward settings and uncomplicated usage processes.
Vintage turntables are also fully automated despite the record player history going on for more than a century. For this reason, there isn’t much for users to do except configuring the device’s basic settings and enjoy music.
The new record players have all their features in manual mode. So, these modern versions of turntables are not even partially automated. That means you need to lift the platter a lot of times when you are using the device.
In addition, you need to set all the features with maximum knowledge. For this reason, modern record players may not suit amateur users.
Furthermore, it should seem those modern record players are the most convenient to use. But the truth is they are not. Vintage record players are easier to use despite the century-old record player history.
In addition, vintage music devices are much more automated than modern ones. (source)
In a world where everything is digital, vinyl records are considered gold. The funny thing is you won’t find them in many homes, except for people who are music enthusiasts. If you have a Vinyl record, you must take extreme care of it to ensure that it lasts you a lifetime.
To make your vinyl records last, you will need to store the records at a cool room temperature, with low humidity. stored clean and upright with support, protected by both an inner and outer sleeve.
It can be a daunting task to take care of your vinyl records because every time you take them out of their cover, you risk causing damage. It is because there is a high risk of it collecting dust and dirt, which can create pops and tics, preventing the smooth flow of music. Furthermore, if the tonearm is heavy, you risk having it scratched.
Since vinyl is pretty delicate, you must be extremely careful when removing it from the cover, placing the tonearms, and above all ensure that your house is not dirty or dusty. So how do you ensure that your vinyl records last long?
8 Ways to Ensure that Your Vinyl Records Last
Storage
The way you store your records when you are not playing them determines how long they will last. So what are the best ways to store your vinyl records?
Do not place your vinyl records on top of each other. Vinyl is easily malleable; therefore, stacking them up may make the records warp or bend due to the weight.
Warping causes pops and tics, which result in the record skipping some audio parts or playing at a different speed.
You should store the records in vertical order, mostly on shelves. Make sure to use sturdy dividers to separate your records. You can use wood. When placing them on the shelves, ensure they are leaning on one side to lessen the pressure on the edge of the records.
It keeps them strong, and they can last longer. That’s why you will find most record shops display the vinyl collection vertically.
You can either use crates or containers to store your vinyl records. However, avoid containers that will require you to place them diagonally as they may cause warping or bending. Containers are better as they keep dust out. I recommend that you store them away from light and vibrations.
Handling
How you handle your vinyl records when removing them from the cover and placing them on the turntable also affects their lives. So always ensure that you touch only the outer edges when removing them from the cover. It is because if you touch the record’s surface with an oily or dusty hand, it could damage it.
Also, the more you use your record, the higher the chances of it deteriorating due to wear and tear. So ensure that you have a variety so that you can switch them up.
Cleaning
After playing your records, make sure to clean them thoroughly before storage. When you clean your records right, they will last, but they will be damaged if you do it wrong.
If your vinyl records are new, use an anti-static brush to brush them to remove dust and any other debris that may have collected on its surface. If you store it without cleaning, the dust particles may be embedded too deep in the record, making it difficult to remove. And the next time you place it on the turntable, the stylus will further entrench the dust into your record. And this is what leads to tics and skipping when you are playing it back.
Consider giving your vinyl record a deep cleaning if you notice that they are not in good condition. Use gentle strokes to avoid scratching the vinyl.
How to Clean Your Vinyl Records
Brush the records to remove dust particles using a soft brush
Then check for smudges, discoloration, and fingerprints, and pay special attention to them
Spray some vinyl cleaning solution on the surface, but ensure that the liquid does not contact the label as the epoxy may come off or cause discoloration of the name. Rub the cleaning solution in a circular motion using a soft cotton fiber cloth to remove the fingerprints and marks. Always avoid touching the label.
Once you finished, rinse and dry the disc. Its best done under a running tap to remove the remaining cleaning solution. Then use a clean cloth to dry it. Then check to make sure that no fingerprints or blemishes are left.
If you have an extensive collection, it might be quite a task to clean all of them. So invest in a cleaning machine that will apply the cleaning solution and then vacuum the liquid off. Although it’s expensive, it’s worth every penny.
You can read more about how to clean your Vinyl collection in these articles:
If you want your records to last, you must ensure that the temperature is right. Always maintain the temperature between 65 and 70 degrees Fahrenheit. Because once it goes above and reaches 140 degrees Fahrenheit, the viny loses its resilience. And this is when it warps or bends. Do not expose it to direct sunlight for extended periods. So your storage must be away from the windows.
Humidity
It’s good to store your vinyl record in the proper humidity to prevent mold formation. Ensure that the humidity ranges between 45 to 50%. Unfortunately, some cities are generally humid, and to ensure that your discs are in tip-top condition, invest in a dehumidifier. It will not only reduce static charge but also help in preserving your collection.
Inner Sleeves
You must ensure that your vinyl record cover is designed to protect the disc. Some of the sleeves to use on the inner part of your cover include:
Paper: this is the most common and cheapest inner sleeve to use. And if you’ve ever bought a new record, you might have noticed that the inner part is layered with paper. However, they also pose a certain degree of danger because they may scratch your disc as you slide it out and in. In addition, the paper sleeve may collect dust. And since it’s paper, it wears fast, and as such, it may rip or fold over. However, they are better than storing them without.
Poly: Also known as polypropylene. Although it’s more expensive, it is more durable than pa[er sleeves. It keeps dust away. And due to its nature, your disc will not be scratched when sliding it in or out. The good thing is that they simplify removing it from the cover and some poly sleeves are rounded, making disc storage easy. (source)
There are several inner sleeves in the market, so try out several until you find what works best for you.
Arrangement
One rule of storing vinyl records is never stacking your records horizontally. Vinyl is delicate, therefore stacking may result in warping or bending of the discs. Instead, use crates, which you can easily find on amazon. Alternatively, you can place them on the shelves and use dividers after every few of them. Ensure they are leaning on each other to prevent putting pressure on its edges.
Turntable And Stylus Maintenance
You must well maintain the turntable and stylus to ensure the longevity of your vinyl records. A vinyl record player is not cheap, and in some places, it’s considered an antique. So do not play your vinyl discs on a cheap player as it may destroy them. Invest in a quality turntable to prolong the life of your records.
The most common way many people cause damage to their disc when playing is if there is a lot of friction causing groove wear. So, make sure that the stylus is not too tight to cause friction by adjusting it accordingly. Although it’s challenging to notice groove wear, you’ll notice a variation in the sound quality. So be keen when listening.
What are the Common Mistakes People Make when Storing Vinyl Records
Some of the mistakes people make when storing their vinyl records that reduces their lifetime include:
Exposing them to sunlight.
Stacking them on top of each other, thus causing them to warp or bend.
Putting them in a cover with no inner sleeves. Thus allowing them to collect dust or get scratched.
Storing them in the attic or the cellar where the climate is too hot or humid for the records.
Using weak shelves. And since vinyl is heavy, the racks may break, placing your records at potential risk of damage.
Final Thoughts
If you want your vinyl records to last, store them in a cool and dry place free from direct sunlight. You must also handle them with care and avoid touching the surface of the disc. And as long as you clean them regularly, especially after playing, you can be assured of having them for a long time.
If you have a vast vinyl record collection, use the tips above to maintain them in tip-top condition for years to come. And avoid the mistakes discussed above that most people make.
Annika Lindström and Minna Hakkarainen, Biomacromolecules 2007 8 (4), 1187-1194, DOI: 10.1021/bm070001k, Designed Chain Architecture for Enhanced Migration Resistance and Property Preservation in Poly(vinyl chloride)/Polyester Blends, https://pubs.acs.org/doi/abs/10.1021/bm070001k, accessed November 2, 2021.
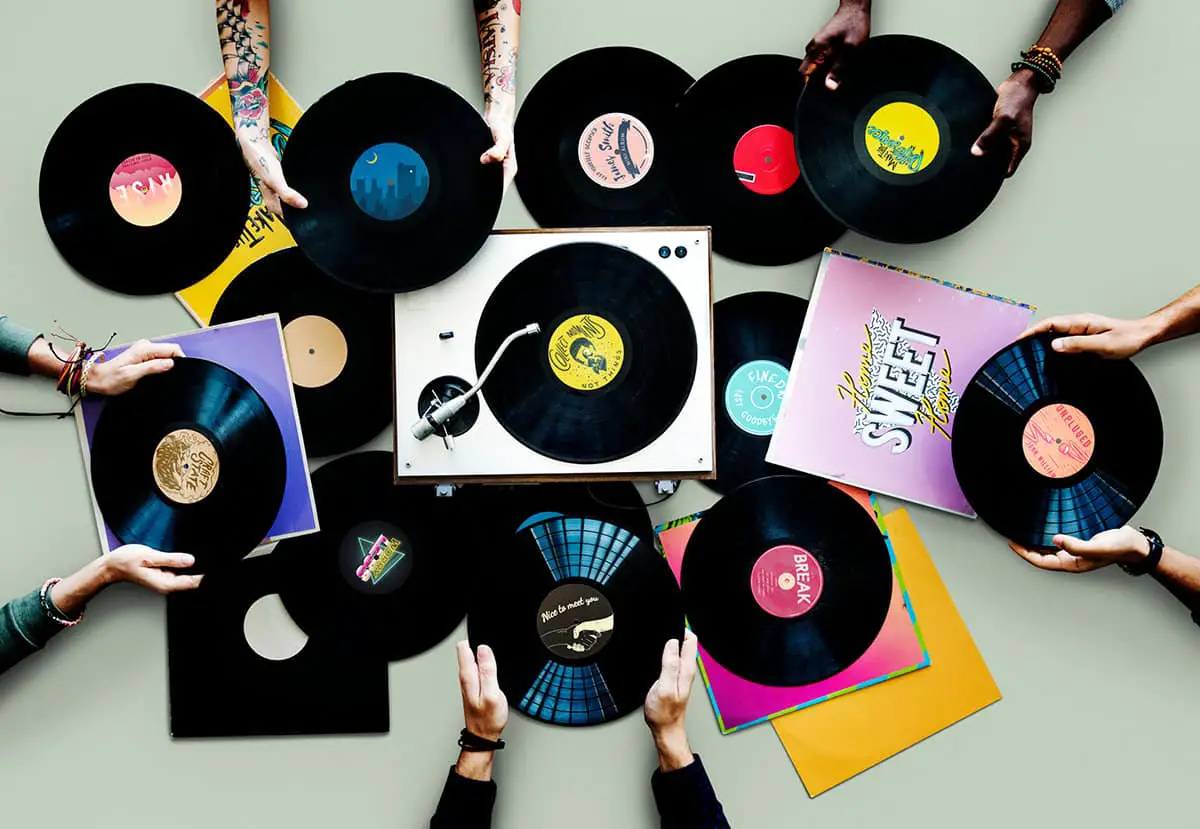
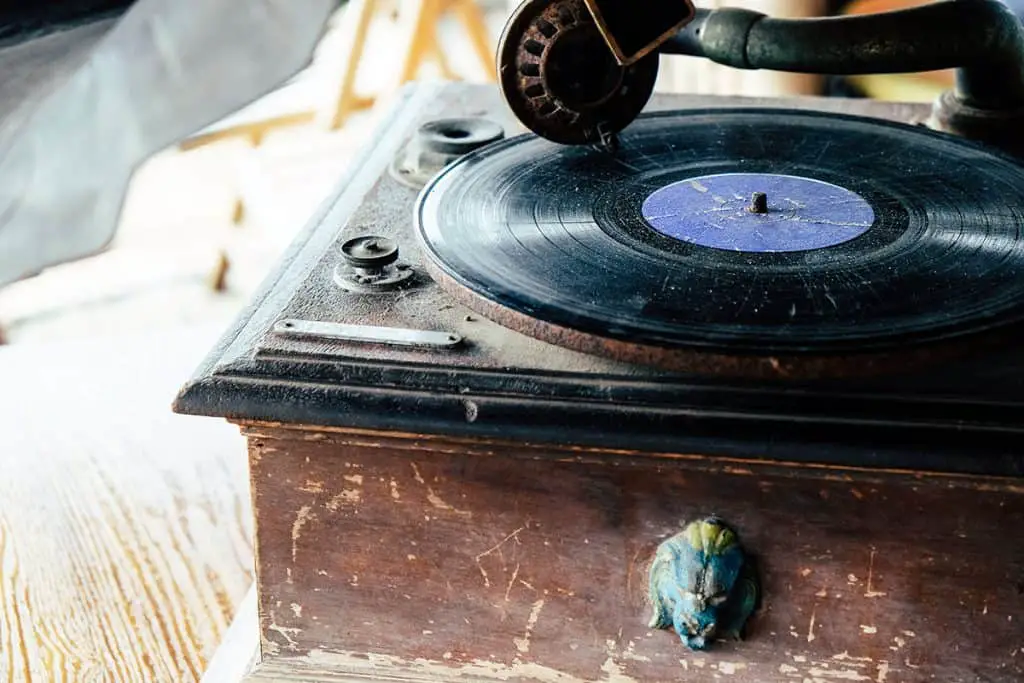

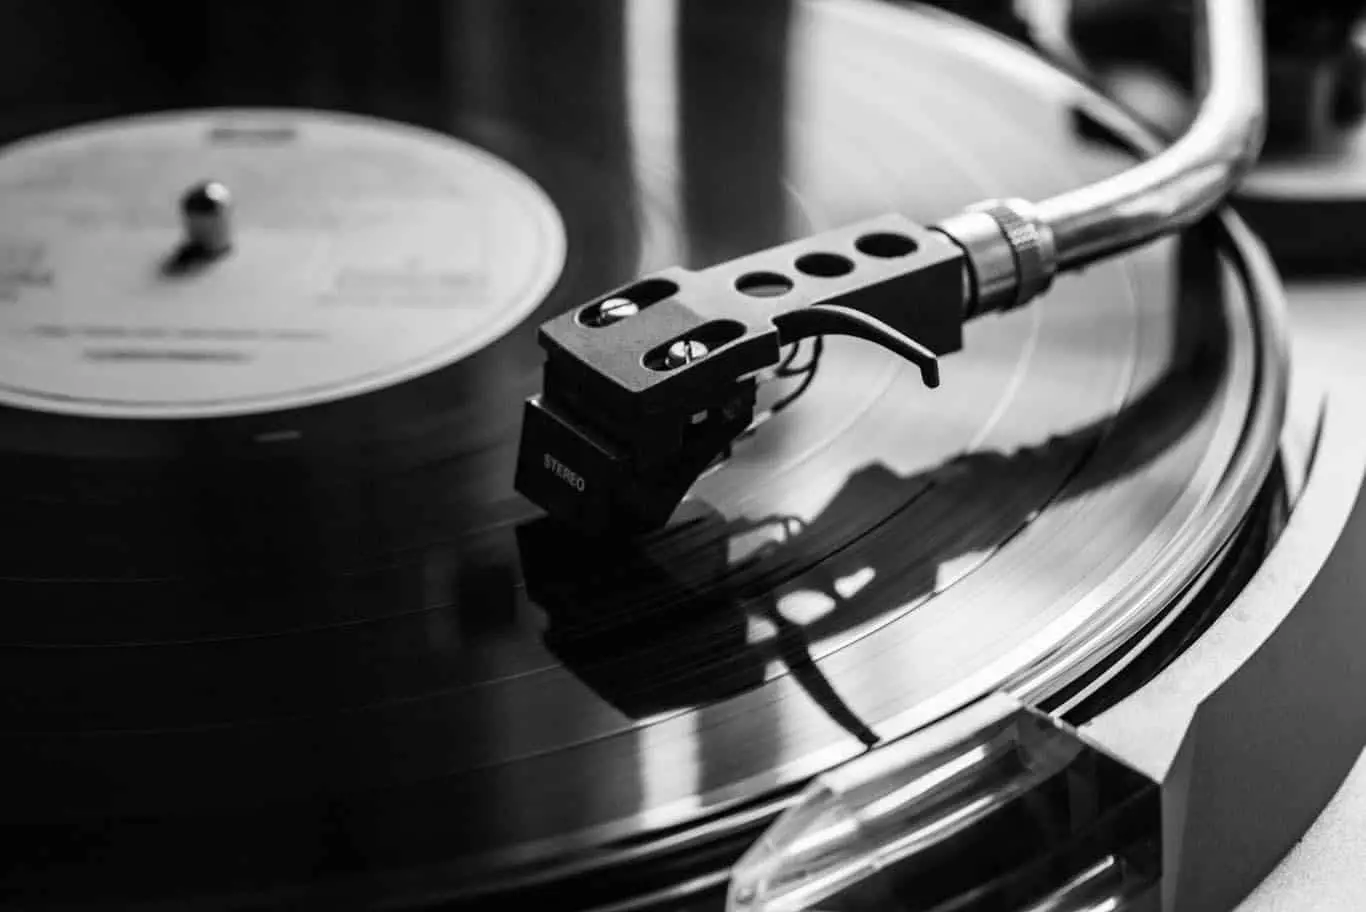

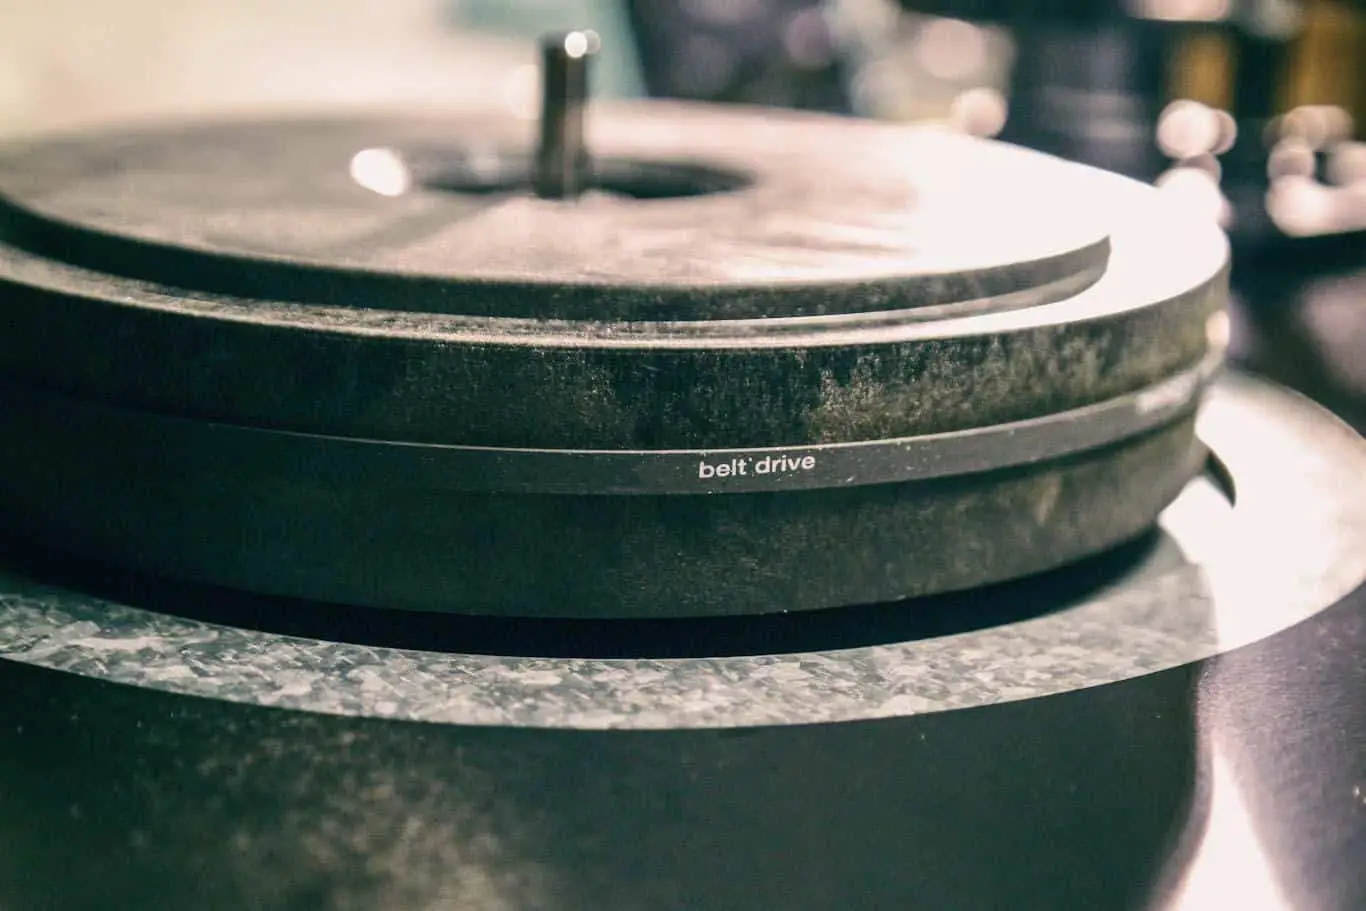
")
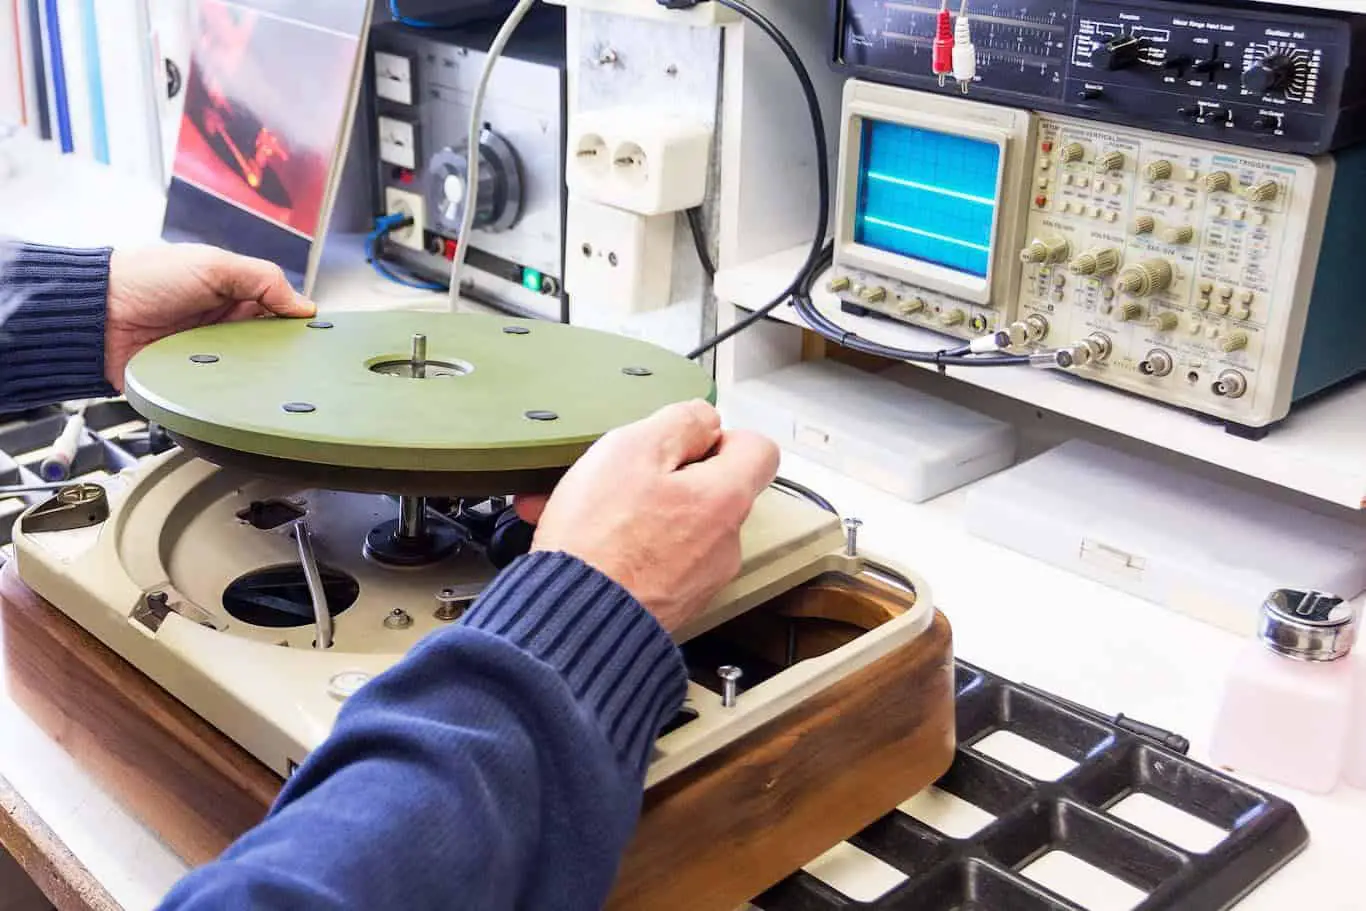

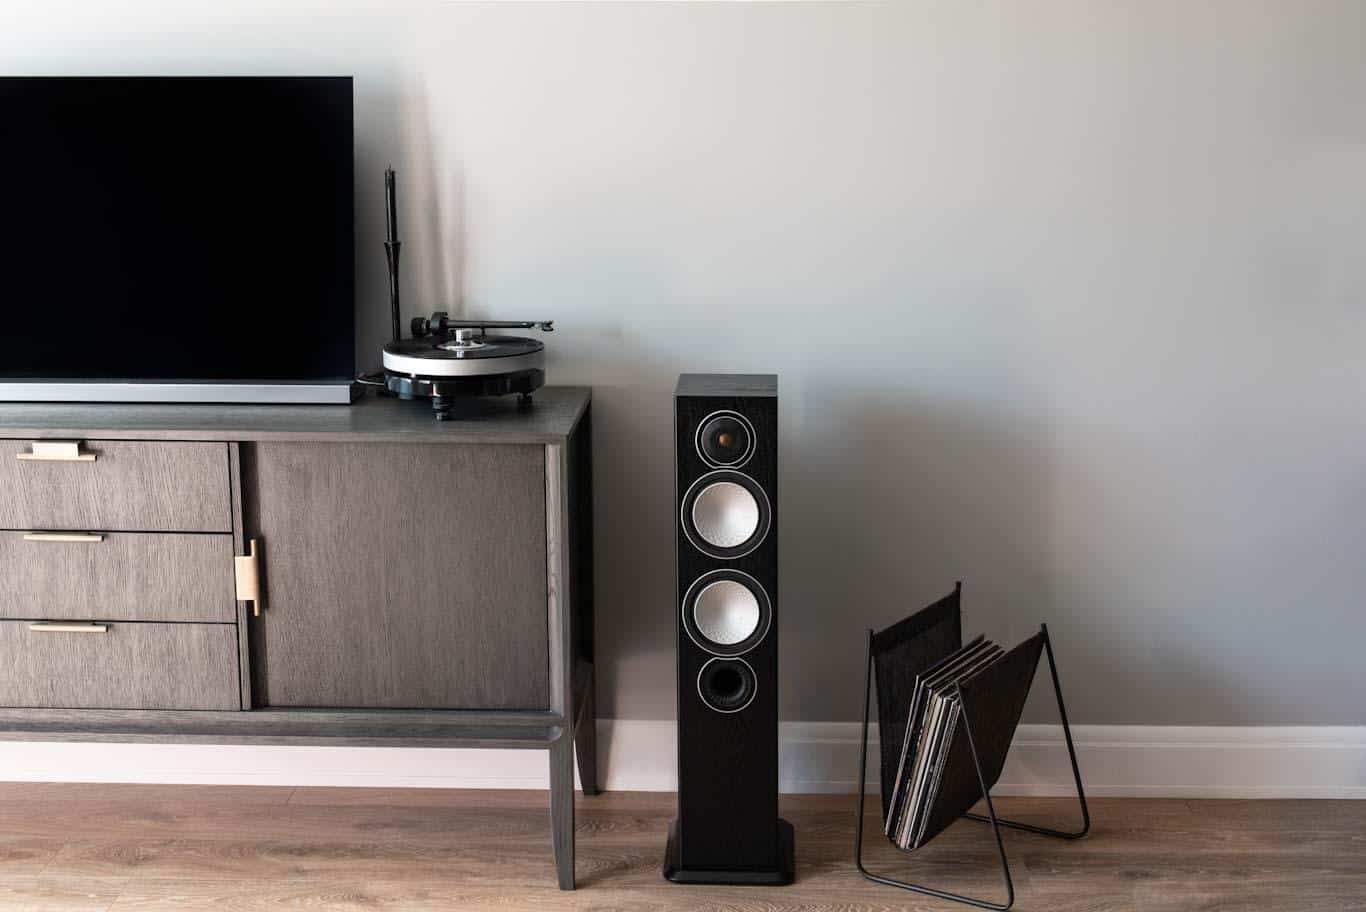
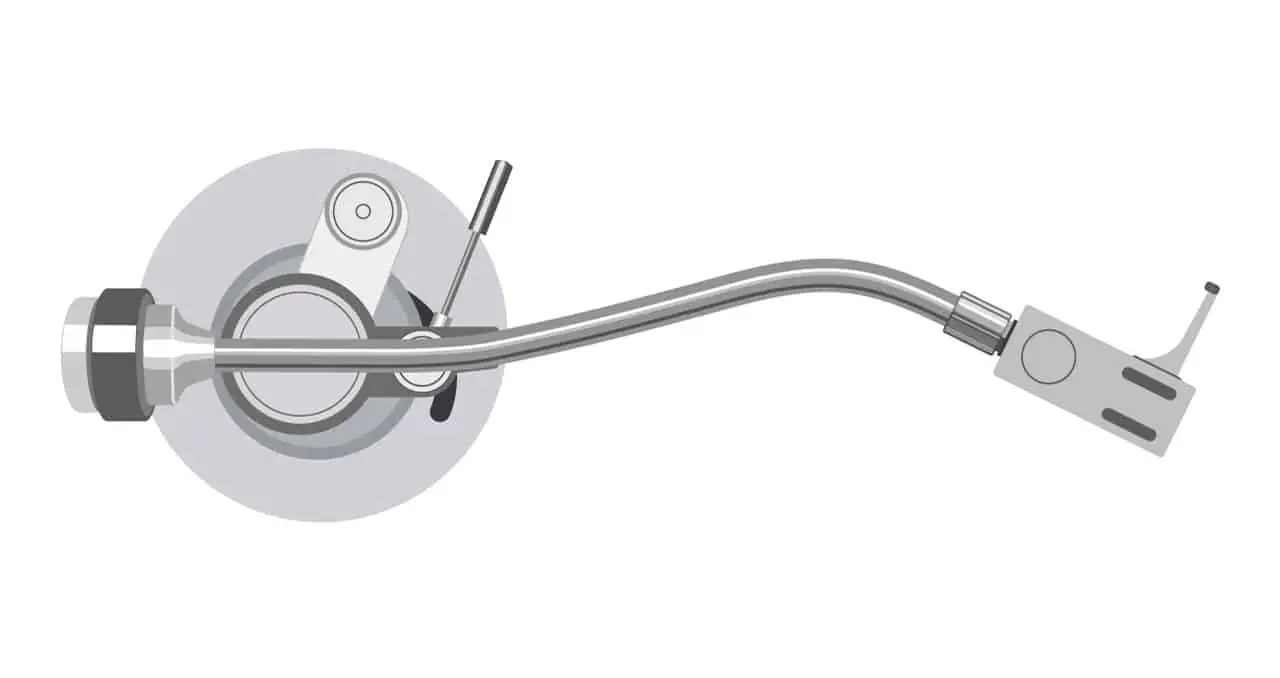
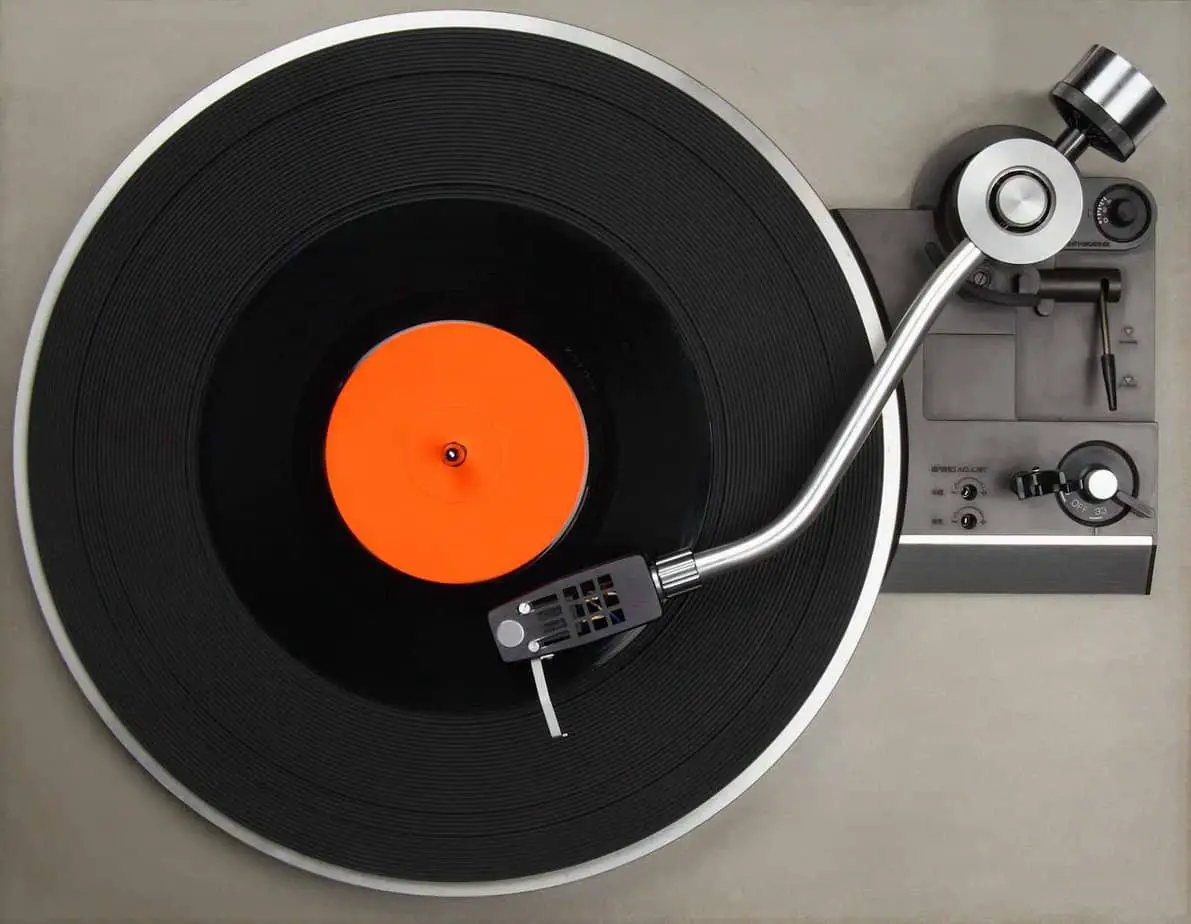
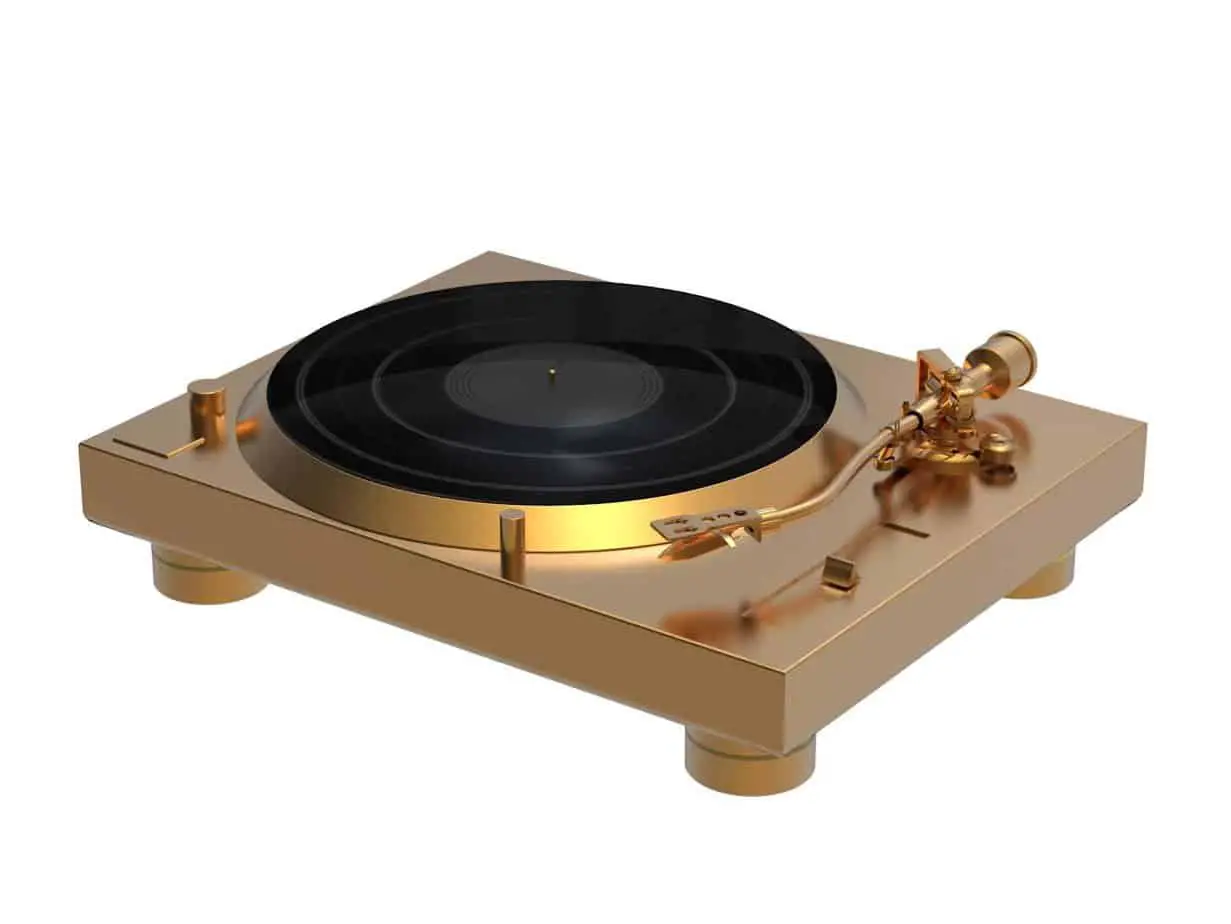
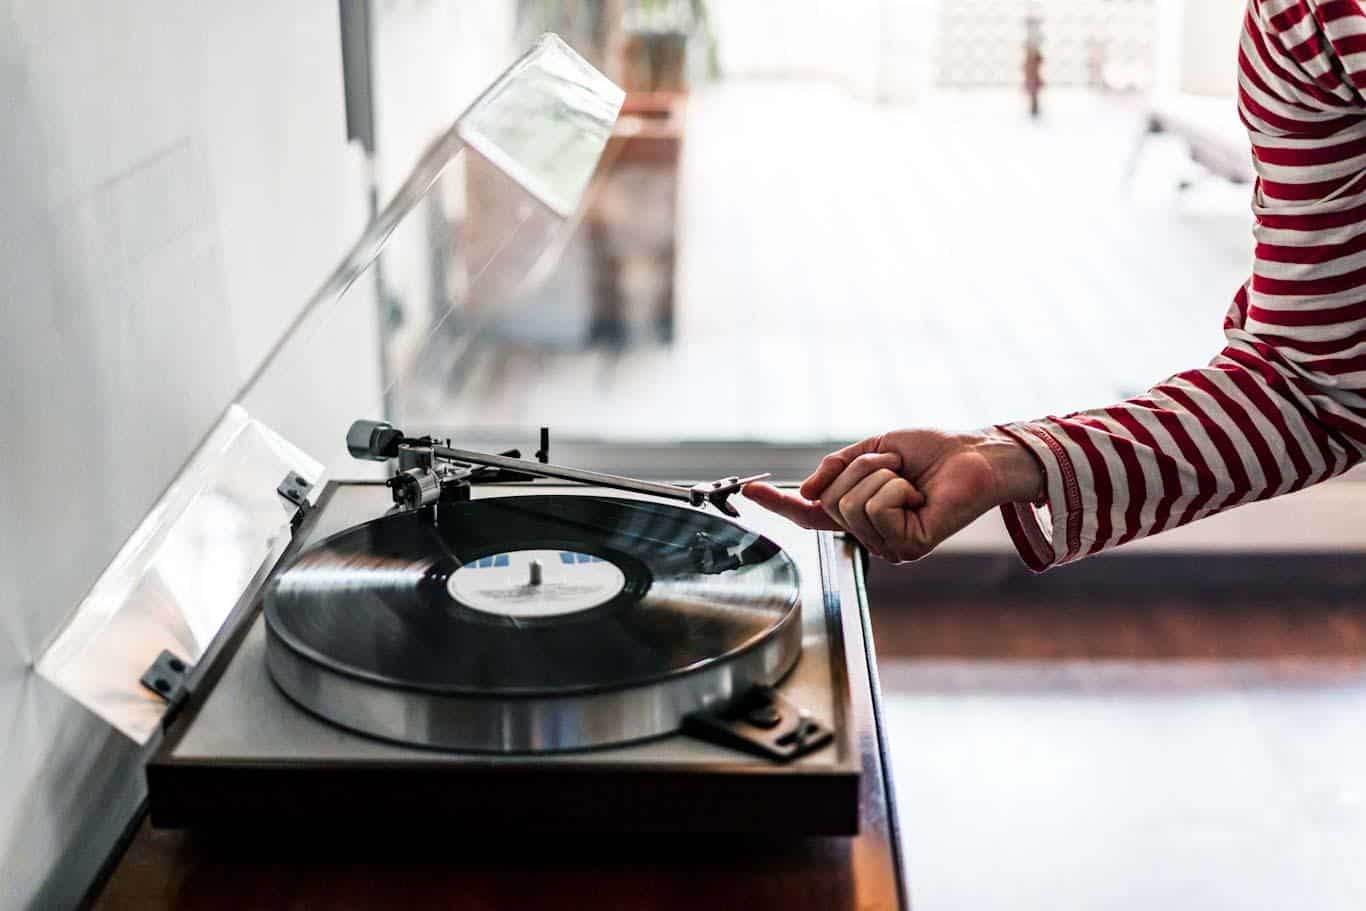
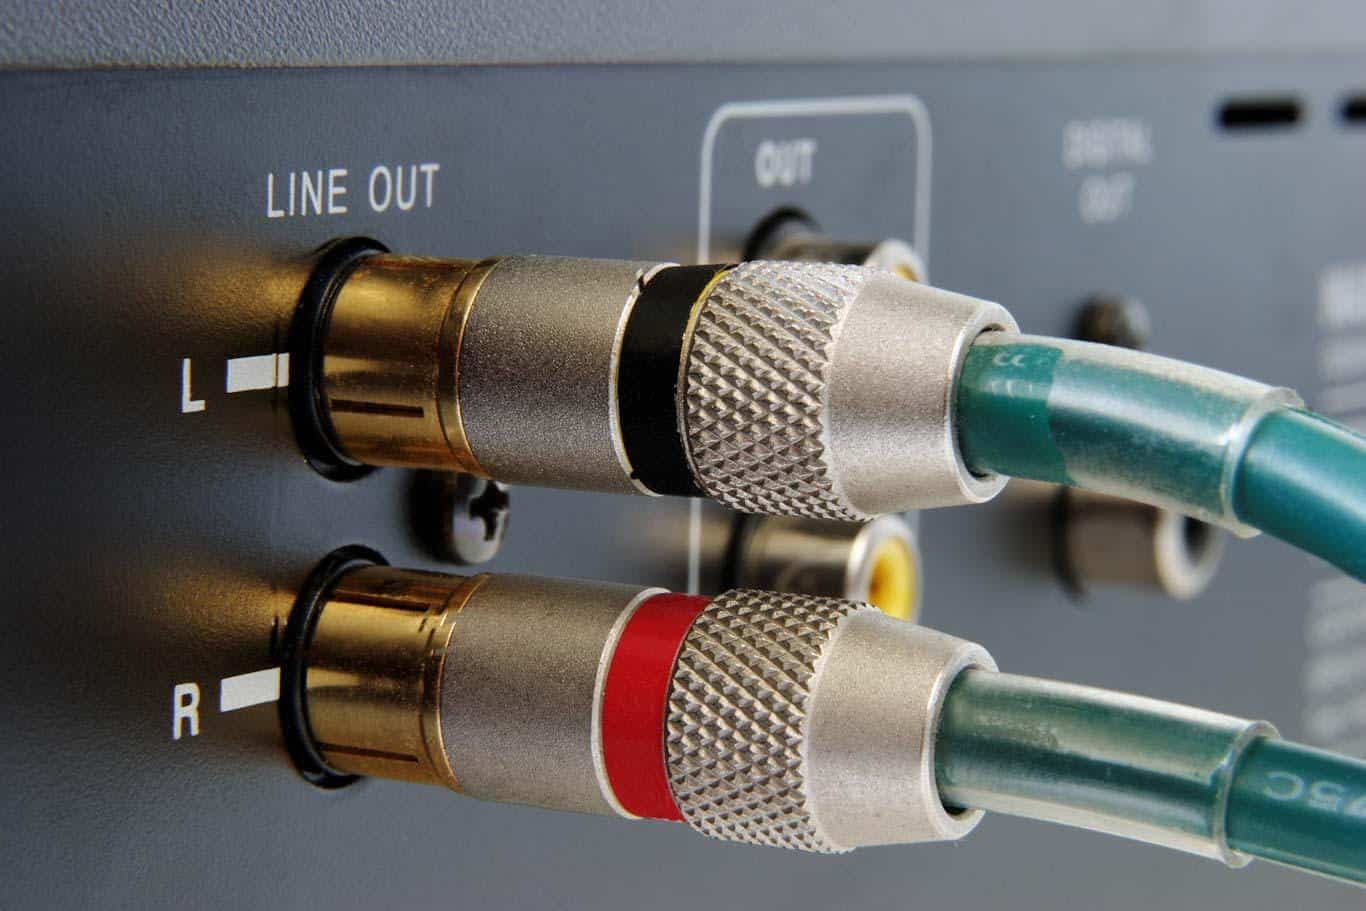
 (ATLP60XBTBK)")