Think you can clean your vinyl records with baby wipes? You might want to save those wipes for actual babies.
You can’t and shouldn’t clean vinyl records with baby wipes. Although these wipes seem soft and harmless, they also contain chemicals that strip your records of their protective coating and harm them in the long run. Always use cleaning agents specially made for vinyl records.
In the next section, I’ll explore the topic — can you clean vinyl records with baby wipes — in greater detail and suggest alternative materials to use for cleaning your records. Then, I’ll go into detail on how to clean vinyl records, so stick around until the end.
Can You Use Baby Wipes on Vinyl Records?
In theory, using baby wipes on vinyl records seems like a good idea. After all, baby wipes consist of microfibers which probably won’t scratch your records. But that doesn’t mean baby wipes are indeed suitable for cleaning vinyl records.
You can’t use baby wipes on vinyl records because they can’t adequately clean vinyl records. Here’s why:
Baby wipes contain phenoxyethanol.
Baby wipes have ingredients that leave a residue.
Other substances are more suited to clean vinyl records.
The following sections explain these reasons further.
Baby Wipes Contain Phenoxyethanol
Vinyl records consist of 96 percent PVC/PVA polymer. PVC, or polyvinyl chloride, has the perfect durability for a vinyl record. It’s flexible enough to have grooves carved into it and is strong enough to withstand constant scratching from a turntable stylus. Also, PVC can accommodate large quantities of music and is relatively cheap to produce.
When PVC absorbs phenoxyethanol, the former can deteriorate by up to 20 percent. Since vinyl records consist almost entirely of PVC, the latter shouldn’t be anywhere near phenoxyethanol.
Baby Wipes Have Ingredients That Leave a Residue
Aside from phenoxyethanol, baby wipes have oils, fragrances, and other substances that leave residue on your vinyl records. Even if you think you’ve wiped down your vinyl record thoroughly, tiny particles from the substances above may remain. That said, avoid baby wipes when cleaning your precious vinyl records.
Other Substances Are More Suited To Clean Vinyl Records
Anything that comes into contact with a vinyl record must:
Not sacrifice the integrity of the materials comprising the record.
Be free from even the tiniest impurities.
Have as little contact with the record as possible.
So what specific materials meet the above criteria? Let’s talk about those in the next section.
What Can You Clean Vinyl Records With?
If you despair at the idea of not putting those baby wipes to good use, don’t worry. Plenty of other materials can clean vinyl records instead.
You can clean vinyl records with the following:
Record cleaning machines
Distilled, deionized water
Alcohol-free cleaning solutions
Specialized cleaning solutions
Let’s go into more detail about the above materials.
Record Cleaning Machines
If you have the cash to spare, the best way to clean a vinyl record is with a vacuum cleaner or a record washer.
When I say “vacuum cleaner,” I’m not talking about the one that removes dust balls from your living room floor. I’m talking about vacuum cleaners designed especially for vinyl records.
For example, the Record Doctor Record Washer (available on Amazon.com) is a vacuum cleaner and record washer rolled into one. All you have to do is secure your record using the machine’s platter and turner, turn it by hand and let the record washer work its magic.
The only downside to record cleaning machines is the price. Unless you have enough vinyl records to fill up an entire room, you’re better off with more budget-friendly options.
Distilled, Deionized Water
If you think you can use regular tap water to clean a vinyl record, think again. Tap water contains impurities that build up residue over time.
You don’t want to use regular bottled water, either. Like tap water, bottled water may contain tiny particles that damage vinyl records.
Instead, you need to use purified water such as the Crystal Geyser Since 1977 Purified Water (available on Amazon.com) that can function as a record cleaner and drinking water.
Alcohol-Free Cleaning Solutions
Contrary to what you read in some places online, isopropyl alcohol is the last thing you want anywhere near your vinyl record. Although alcohol is strong enough to remove the kind of dirt that settles on vinyl records, it’s also potent enough to strip away its protective layers.
Unfortunately, many record cleaning products contain isopropyl alcohol. Before buying any record cleaning product, check the ingredients list first.
Specialized Cleaning Solutions
Luckily, you can buy record cleaning solutions online. The good ones have the following characteristics:
Low surface tension: If a cleaning solution has low surface tension, it can penetrate the difficult-to-reach areas of your vinyl record.
Zero reaction to PVC: As noted earlier, PVC comprises over 90 percent of your vinyl record. Therefore, your cleaning solution mustn’t react negatively to PVC.
Residue-free: The cleaning solution shouldn’t leave even the smallest amount of residue on your record once it’s dried off.
One reputable brand of record cleaning solution is GrooveWasher. In particular, the G Groove Washer Record Cleaning Kit from Amazon.com. It comes with a special brush, so you don’t have to worry about buying a cleaning cloth separately.
Now you know the “what” of cleaning vinyl records. What about the “how?” If you don’t have a record cleaning kit or don’t want to buy one because it’s too expensive, I’ll give you a quick walkthrough on cleaning vinyl records with the materials you have on hand.
How To Clean Vinyl Records
As I said earlier, vinyl records are delicate. If you’d rather not spend a fortune on record cleaning materials, you can still clean your vinyl record — though you have to be more careful than people who have specialized cleaning tools.
Brush the Surface With an Anti-Static Brush
Before using your cleaning solution, you must first clear dirt and other particles from the vinyl record’s surface. Otherwise, if you spray your cleaning solution right away, the dirt might stick deeper into your record and make it harder to clean.
Using an anti-static record cleaner brush, brush your record while following the groove lines. If your record cleaning kit doesn’t already have a brush, you can buy something such as the Boundless Audio Record Cleaner Brush (available on Amazon.com). This record cleaner brush safely removes dirt and dust.
Spray Cleaning Solution, and Wipe With a Microfiber Cloth
Earlier, I outlined the possible cleaning solutions you can use to clean a vinyl record. Whichever you choose, spray it over your record and wipe it off using a microfiber cloth. If you’re using water, distill and deionize the water first.
When wiping off your record, make sure you do it in a circular motion that follows the groove lines. Also, put as little pressure on the cloth as possible, lest you scratch or damage the record.
Dry With a Clean Microfiber Cloth
If you have a dry and clean microfiber cloth, use that to wipe the cleaning solution off your record.
If the vinyl record wasn’t cleaned in one go, repeat the steps above in order until your record is spotless.
For a quick guide on how pros clean their vinyl records, I recommend that you watch this YouTube video by Deaf Man Vinyl:
Conclusion
Baby wipes aren’t the best tool to clean vinyl records. Instead, buy record cleaning solutions online that won’t break your budget. Don’t forget to take care while cleaning your precious records.
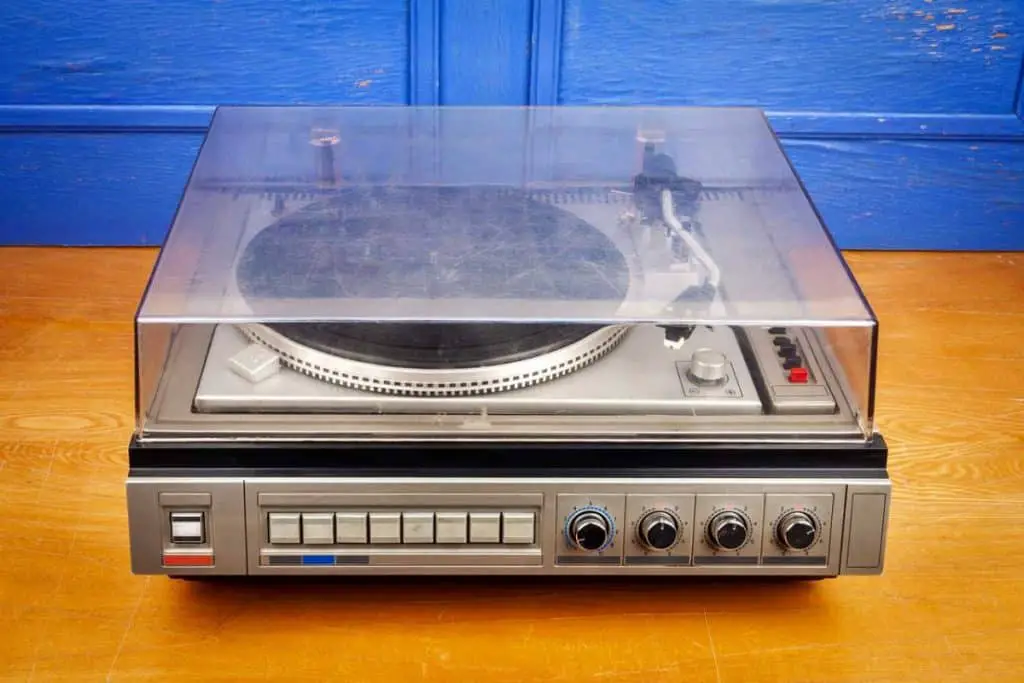
Around 75 thousand turntables are sold in the US each year. One can’t help but wonder whether all those vinyl enthusiasts know how to maintain their gear properly and get the most out of it. Cleaning a turntable needle is one of the essential elements in properly experiencing your music collection.
Here’s how to clean a turntable needle:
Use a stylus brush for regular maintenance.
Do light cleaning using a magic eraser.
Use a stylus cleaning gel for more detailed cleaning.
Do deep cleaning using a liquid stylus cleaner.
Use ethanol for extremely grimy turntable needles.
Keep reading to find out all the details on cleaning a turntable needle quickly and effectively.
1. Use a Stylus Brush for Regular Maintenance
Like most things in life, prevention is also the best medicine for turntable needle longevity. Regular stylus cleaning and maintenance is the key to keeping your turntable sounding good and keeping your records scratch-free.
All you need for regular turntable needle maintenance is a soft paintbrush. Vinyl enthusiasts who are willing to spend a few extra bucks can even get a specialty stylus brush for regular needle cleaning.
Whatever of the two items you choose, here’s how the regular turntable needle cleaning process should look:
Run the stylus brush or a soft paint brush across the tip of the turntable needle two to three times per cleaning.
Keep each brushstroke light to avoid damage to the turntable needle.
Repeat the cleaning process at least once per week.
The stylus brush method is considered the most traditional method for cleaning the turntable needle. Such a method isn’t as much of a cleaning method as it aims to prevent dirt from accumulating on the needle.
There’s one important thing to remember with turntable needle cleaning.
All of the dirt that reaches the needle has originated from the records you’re playing. That’s why, in addition to cleaning the needle, you should also look into wiping down your records after a few uses.
All of the dirt that reaches the needle has originated from the records you’re playing. This is why, in addition to cleaning the needle, you should also look into wiping down your records after a few uses.
2. Do Light Cleaning Using a Magic Eraser
Now that you know that regular cleaning and prevention of dirt accumulation is the best method to keep your turntable needle clean. What’s the next best solution if you neglect regular turntable needle maintenance?
Melamine foam pads, more commonly known as magic erasers, are an excellent way to clean your turntable needle. This cleaning method is especially effective on needles that have been slightly neglected and won’t benefit from a light brushing.
Here’s how you can safely apply the magic eraser cleaning method to your turntable needle:
Cut a piece of the magic eraser (you won’t need more than a sixth of the pad).
Place the piece of the magic eraser under the needle.
Lower the turntable needle slowly onto the eraser and lift it.
Repeat the process until the needle is clean.
Vinyl users who decide to use a magic eraser-type product to clean their turntable needle should keep something in mind: this is an abrasive product that can easily cause more harm than good by damaging the needle. Don’t rub the needle on the piece of foam padding to avoid any potential damage.
Additionally, you shouldn’t use a wet magic eraser for cleaning your turntable stylus. While adding water softens the pad, a dry magic eraser is more abrasive. That’s what makes it capable of cleaning the needle with just a few light touches.
3. Use a Stylus Cleaning Gel for More Detailed Cleaning
Some turntable users might find the previous method too risky or too aggressive. In case the brushing can’t help you, and you’re hesitant to use a magic eraser on your turntable needle, there’s a much safer cleaning solution.
Stylus cleaning gels are purpose-made turntable needle cleaning products. These gels provide the best cleaning performance and micro-dust control, according to experts. Stylus cleaning gels are most commonly urethane-based, meaning you can reuse them as many times as you want.
Follow these steps to effectively utilize any stylus gel product for a detailed turntable needle cleaning:
Open the packaging that the stylus cleaning gel arrived in.
Remove any protective covers from the gel.
Lower the tonearm and the turntable needle into the gel.
Lift the arm and repeat the last two steps as many times as necessary.
As already mentioned, stylus cleaning gels are products that have a single purpose — cleaning the turntable needle. That means this needle cleaning product has no potential drawbacks, caution alerts, and use warnings.
Stylus cleaning gels are perfectly safe as long as you follow the above instructions. An excellent benefit of this turntable needle cleaner is that you can reuse it.
Once the urethane resin (gel) part gets dirty, you can take it out of the packaging. Rinsing gently with tap water and allowing it around 30 minutes of room temperature drying time should make the gel as good as new.
4. Do Deep Cleaning Using a Liquid Stylus Cleaner
If the gel cleaning method can’t get your turntable needle as clean as new, then you need something that offers a deeper and more powerful cleaning.
Liquid stylus cleaners most commonly come in a bottle that resembles nail polish. While some of the bottles might have an included applicator in the cap, others might require a stylus brush to apply.
Here’s how you use a liquid stylus cleaner the right way:
Open the bottle and see if there’s an applicator inside.
Get a stylus brush or a soft paintbrush if there’s no applicator.
Apply a small amount of the liquid cleaner to the applicator or the brush.
Remove any excess by tapping the applicator or the brush against the inside of the bottle.
Run the applicator or the brush across the turntable needle using light pressure.
Reapply the liquid and repeat the application process until the stylus is clean.
Liquid stylus cleaners are most commonly a mild mixture of rubbing alcohol and water, making them capable of removing dirt from almost any turntable needle. In addition, this alcohol and water mixture also makes liquid stylus cleaners perfectly safe for use and easy to make on your own.
The only thing I’d recommend is to maintain a light touch while applying the product to your turntable needle, just like with any other cleaning method. Suppose you decide to make your own mixture; make sure you use ethanol and distilled water.
5. Use Ethanol for Extremely Grimy Turntable Needles
Suppose none of the methods listed previously can’t clean your turntable needle. That means the turntable needle has been neglected for a while. Don’t worry; there’s always a solution.
Ethanol, or rubbing alcohol, is an excellent way to clean stubborn dirt accumulations from hard surfaces. Using ethanol with no addition of water can be the way to go for those who need to get rid of dirt from their stylus.
You can clean your turntable needle with ethanol by following these steps:
Apply some rubbing alcohol on a stylus brush or a soft paintbrush.
Clean the stylus by moving the brush lightly over it.
Make sure that you use front-to-back and back-to-front motions.
Even though this method is perfectly safe to use on occasion, it shouldn’t be overused. Getting too much liquid onto your turntable needle might increase its degradation.
Final Thoughts
Although there are multiple ways you can clean a turntable needle, all of them share a few common features. Here are just some of the things that every turntable owner should keep in mind if they want to keep their device and records playing for a long time:
Get a soft stylus brush for regular turntable needle maintenance.
Use the brush at least once a week.
Wipe down your records after every use.
Use other cleaning tips from this article as needed.
If you’ve never cleaned your vinyl records collection, the needle on your record player probably hates you for it. Besides that, your precious records could also be on the brink of succumbing to dust mites! Here’s a step-by-step guide to getting squeaky clean vinyl records.
Here’s how you can clean your vinyl records using soap and water:
Use a record brush to dust off the records.
Check for imperfections and fingerprints.
Prepare a cleaning solution using dish soap and water.
Spray your DIY cleaning solution on the dirtiest patches.
Rinse and wipe the records clean.
Dry them up.
A responsible record junkie must understand the importance of keeping your collection clean. It has various benefits, such as improved playback, preventing needle wear, and longer vinyl life. Read on to follow the easiest method of cleaning your vinyl records properly!
1. Use a Record Brush To Dust Off the Records
Start by stripping the sleeves and dust cover off your vinyl record. Inspect both sides of the record carefully to assess how bad the dust and grime situation is and which parts of the record need more attention.
The first step is to use a record brush to dust it off properly. The most efficient way to do that is by spinning it on your turntable without dropping the needle.
Spin the record at a high RPM and get your record cleaning brush into contact with the spinning vinyl applying gentle pressure. Move the brush back and forth between the inner and outer grooves of the record to cover its entire surface area. Keep it up until there’s no visible dust on the record.
Be careful not to press the brush too hard on the vinyl as that can damage it and push the gunk deeper into its grooves. Also, try not to touch the vinyl after you’ve freshly brushed off all the dust off its surface.
You can also clean the vinyl without spinning it on a record player if you prefer a toned-down method. Make sure you apply gentle pressure and brush the record with soft sweeping movements.
2. Check for Imperfections and Fingerprints
After brushing, look closely at the vinyl record to look for marks, scratches, fingerprints, and imperfections on either side. If you find anything on the surface that’s easily removable, revisit step 1 with a record cleaning brush.
Shine a bright light over the record to find imperfections. You can also hold the record up against bright light and pivot it in a circular motion to get the light to bounce off of the slightest imperfections. You can’t do much about scratches as they’re permanent marks of rough use, but leftover dust and grime on the surface can be removed before using the cleaning solution on it.
3. Prepare a Cleaning Solution Using Dish Soap and Water
The next step is to make a cleaning solution for your vinyl records using dish soap and water. I’d highly recommend adding isopropyl alcohol to the mix, but if you can’t get your hands on any of that, some water and a few drops of dish soap will do just fine.
The ideal cleaning solution consists of one part distilled water, one part isopropyl alcohol, and a couple of drops of dish soap. This exact mixture is a tried and tested mixture to clean vinyl records with a DIY mixture that’s pretty easy to put together.
From there, simply fill this mixture up into an empty spray bottle, and that’s it for step 3!
4. Spray Your DIY Cleaning Solution on the Dirtiest Patches
Remember that spray bottles aren’t a must-have for this cleaning procedure; they just make it easier to apply the cleaning mixture evenly across the vinyl records. If you don’t have spray bottles, you can carefully pour the solution onto the dirtiest patches of the records.
Once you’ve sprayed or poured the cleaning solution all over the vinyl, spread it around in a circular motion using a microfibre cloth. Apply gentle pressure to make sure you get to the gunk that’s trapped inside the grooves of the vinyl and work the stains away.
If you can’t seem to clean some stubborn patches of dirt or grime, feel free to spray or pour some more of your cleaning solution in those spots. You can also try letting the solution sit and soak into the problem areas for a few minutes before wiping it with a cloth. Repeat until there’s a clear before/after difference on difficult patches.
Some records are more challenging than others to clean, depending on the storage conditions and the number of years they’ve spent in your dusty drawers. It’s easy to lose patience and get aggressive while cleaning these, but that can easily lead to irreversible damage to your beloved records.
Don’t lose your patience — stay calm and clean them gently without using any caustic cleaning products that might harm the vinyl.
5. Rinse and Wipe the Record Clean
Once you’re done spraying and rubbing the grimiest spots on your vinyl record, the next step is to rinse and wipe it clean. This involves getting every bit of the cleaning solution off it. For this, you can either use a water spray bottle — or if you’re brave enough — wash it under the kitchen faucet.
The leftover cleaning solution on the vinyl acts as a grime and dust magnet, so it’s necessary to get it all off before moving on to the next step of drying it up. Rinsing the record will eliminate excess cleaning solution and fingerprints.
6. Dry Them Up
Finally, all that’s left to do is dry up your vinyl record. You’ll need a dry microfiber cloth for this. Get a fresh one since the ones from steps 4 and 5 are already wet. Wipe your record down to absorb all of its moisture into the dry cloth. This step also removes any static buildup from the vinyl record.
You’ll also get rid of those grimy fingerprints (if any) as you wipe the record clean with a dry cloth.
Proper Storage for Vinyl Records
Now that you’ve worked so hard on cleaning your vinyl records, it’s essential to store them properly to maintain them well. Since vinyl is a heat-sensitive material, it’s best stored in a cool and dark place. For instance, keeping them on a hot and sunny windowpane for several days can cause the metal on the record to melt and deform.
To store records safely, you need a hard case durable container that can fit your vinyl. Some are 12 by 12 inches (30.48 x 30.48 cm) in size, while others are 7 by 7 inches (17.78 x 17.78 cm). Ideally, the container should have sharp corners, flat sides, and almost identical dimensions to your record sizes.
You’ll also find lots of vinyl crates and shelves online — they’re one Google search away. For instance, check out this Amazon’s Choice Wooden Vinyl Records Case — it can hold records of several different sizes including 33s, 45s, and 58s. Remember that wherever you keep your records, make sure they’re at least secured in an inner sleeve, a plastic dust cover, and a cardboard jacket.
Regular carpet vacuum cleaners aren’t meant for your delicate records, and you shouldn’t use them for cleaning your vinyl either. However, there are vacuum wands in the market that are specially designed to clean records. They’re effective enough to suck out the majority of the dirt from the vinyl’s grooves, but the record won’t be ‘squeaky’ clean without the traditional cleaning procedure mentioned above.
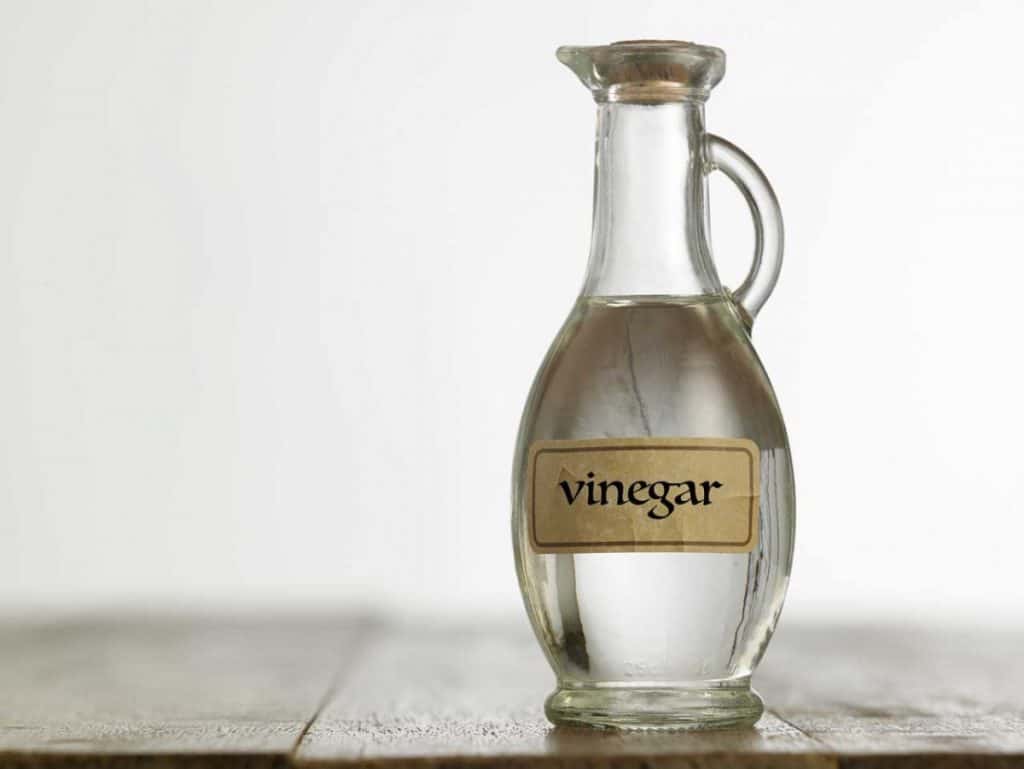
Using Vinegar To Clean Records
Thanks to vinegar’s strong acidic properties, it’s commonly used as a cleaning agent. It might be super effective against grease buildup in the kitchen, but it doesn’t do a better job at cleaning vinyl records than good old dish soap or isopropyl alcohol. I wrote a separate article about how to clean records with vinegar. You can find it here: Is Vinegar a Good Way to Clean Vinyl Records?
Cleaning Records With an Ultrasonic Cleaner
Another alternative method of cleaning vinyl records is using record-specific ultrasonic machines. They do a great job at cleaning up your records requiring minimum effort on your part, but they’re expensive. Not everyone has one of these lying around the house, no matter how big of an audiophile they are.
Even the mid-range models aren’t a cheap solution to some dust buildup on your records — at least not as cheap as some dish soap and a microfibre cloth. However, affordability is subjective, so if you don’t have any budget constraints and want an easy and effective way to keep your vinyl records clean, an ultrasonic cleaning machine might be worth it.
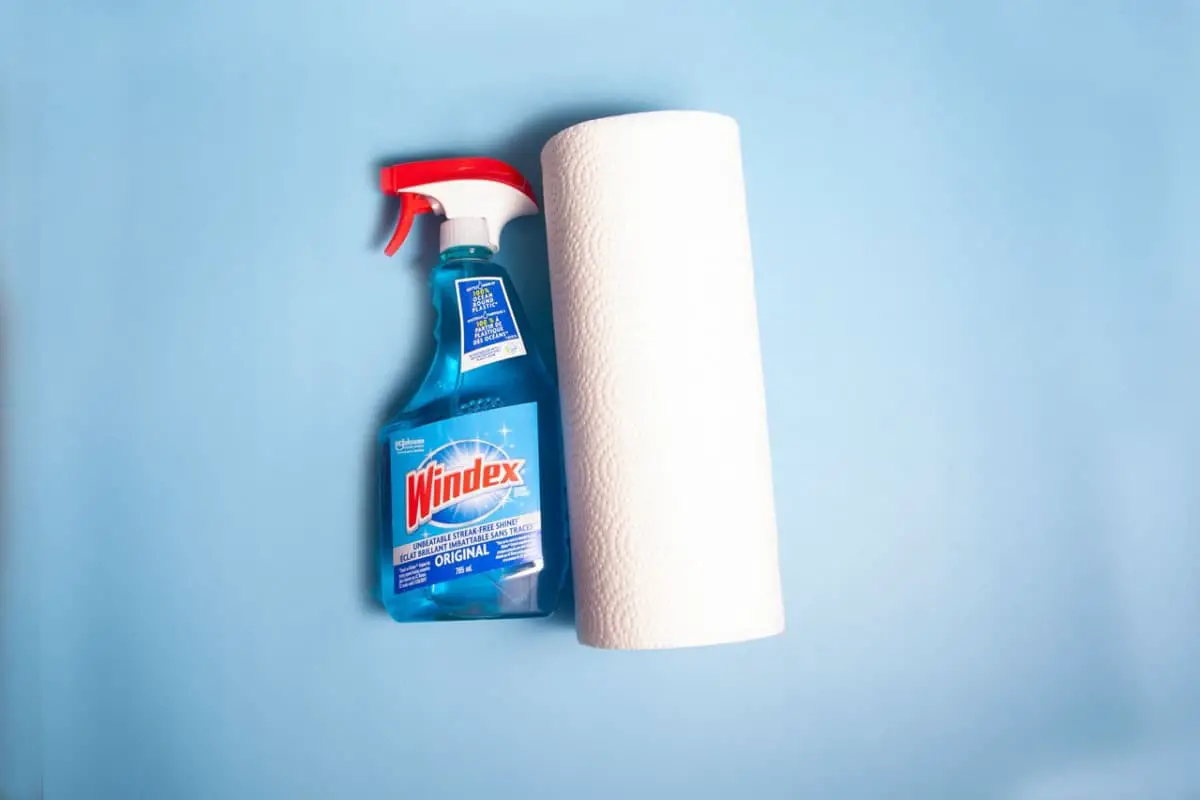
Using Windex To Clean Vinyl Records
Windex is great for cleaning windows, so it’s natural for this one to pop into your mind as a potentially promising cleaning agent for records. However, it’s a caustic cleaner with a ton of chemicals in its ingredient list. The most problematic chemicals are ammonia and alcohol, which can eat pits into the vinyl.
Caustic cleaning agents are generally super harsh on vinyl, so if you love your records, you wouldn’t want to risk exposing them to Windex. Even if it doesn’t damage them, it’ll leave behind a pungent smell of chemicals that doesn’t belong on vinyl records. I’d strongly advise you to steer clear of this one!
Don’t confuse this option with regular washing machines — because those will destroy your vinyl records. Instead, record washing machines are specially designed to clean records. However, people have mixed feelings about them.
They can clean your records quite well, but they’re not nearly as gentle as the hands of a true audiophile, so your records might develop some scratches with regular use of record washing machines.
If you’re tired of hearing random pops and hiccups on your record player, it’s probably time to give your vinyl records a proper cleaning. Not only will your record player’s needle thank you for it, but also your ears when you play a squeaky clean vinyl record without any imperfections to mess with the audio.
Cleaning vinyl records with microfiber is an essential step if you want your vinyl to have a pristine and undistorted audio quality. The reason is that dust and dirt on the surface of your vinyl can cause it to produce a popping sound. So, how do you clean your record using a microfiber cloth?
The cleaning process of vinyl records using microfiber involve:
removing dust
using alcohol or dishwashing liquid for dirt removal
rinsing
drying
This process allows you to clean your vinyl record without scratching it or ruining its sound quality. (source)
Cleaning your vinyl records is a critical step to preserving them. But other maintenance methods will help your vinyl last a lifetime.
Cleaning Vinyl Records With Microfiber
A vinyl record collection is a rather expensive hobby that can hurt your wallet. But nothing hurts more than finding out that your record is starting to sound bad. Various factors such as distortion, popping, and fuzzy sound can cause a vinyl record’s degrading audio quality.
For that reason, cleaning your vinyl records is highly essential. However, the process is not a simple wipe-and-rinse technique. There are a few steps that you need to follow when cleaning vinyl records with microfiber.
Moreover, you will need the following materials for the cleaning process:
microfiber cloth
distilled water – tap water can leave minerals on the grooves of your record
isopropyl alcohol – a common ingredient found in many record cleaners
dishwashing liquid
spray bottle – this material is optional, but it will let you apply your cleaning solution in a controlled manner.
1. Prepare Your Cleaning Solution
Before getting your vinyl record out of its sleeve, the first thing you need to do is to prepare your cleaning solution. You need to mix one part of distilled water with one part of isopropyl alcohol. One to two drops of dishwashing soap will also make the solution effective.
You can either put the cleaning solution in a bowl or a spray bottle. However, a spray bottle is ideal as it will let you apply the solution sparingly.
Moreover, this fluid will also help you in cleaning vinyl records with microfiber.
2. Wipe The Vinyl Record With An Anti-Static Microfiber Cloth
Removing the dust and static on the surface of your vinyl record before applying a cleaning solution will result in an easy cleaning process. For this step, you can either use an anti-static brush or a microfiber cloth. This way, you can wipe away dust and static from the vinyl record without scratching it.
You may be asking why you should use a microfiber cloth instead of an anti-static record brush. Well, you can opt to use a brush, but you have to note that it costs more than a microfiber cloth.
To find out how effective microfiber is, let us establish its difference from an anti-static brush:
Microfiber Cloth
Anti-Static Record Brush
The fibers dislodge the dirt stuck on the record’s surface.
It has extremely fine carbon fibers that can gently remove dirt from the record surface.
Can catch microscopic dirt particles
Effective in swiping dirt and dust particles
The dirt caught by the fibers stays stuck to the cloth until you wash it.
Carbon fiber is electrically conductive. Thus it can remove static from the record surface.
The fibers can get through the record grooves to remove dust and static
Soft enough to leave your record scratch-free
Looking at this comparison, you will see that a microfiber cloth and an anti-static brush works similarly in cleaning your vinyl records.
3. Check If There Is Any Visible Blemish On The Record
Place the record under a soft and bright light. This type of light will allow you to see if the record surface has discolorations, fingerprints, and smudges.
If you see any blemishes, you need to wash your record with warm, soapy water. Once the record is dry, then begin at step one again. Remember that you should only be cleaning vinyl records with microfiber to prevent scratching.
4. Apply Your Cleaning Solution To The Problem Areas
Now that you have removed the blemishes, you will see the areas that need intensive cleaning. Inspect your record once again and apply your cleaning solution for every dirt that you see.
However, you need to be extremely careful during this process. Make sure that the liquid will not touch the record label. The reason is that wetting the label can cause discoloration and will loosen the epoxy.
Allow the cleaning solution to sit for at least a minute so the dirt on the record would soften. After that, get your clean microfiber cloth and wipe the record’s surface in a circular motion. You can also apply a little pressure while wiping to ensure that you are rubbing away the stubborn blemishes.
But make sure that you are not applying too much pressure as it can damage your vinyl record. In addition, avoid touching the label to prevent yourself from damaging it.
6. Dry Cleaning
You need to clean your vinyl record often to maintain its excellent condition. But if there are no dirt or blemishes on the surface of your record, you can opt not to do the steps above. Instead, you can do the dry cleaning method for a fast yet effective process.
After using them, dry cleaning vinyl records with microfiber will ensure no dust or static left on the groove.
For this process, let your vinyl record spin on your turntable. With a light touch, hold the microfiber cloth gently on the surface of the record as it spins. This way, you will be able to wipe away the static and dust buildup.
After one to two rotations, gently angle the cloth to the edge of the record. Then, slowly pull it off the surface. This step will ensure that no dust is left on the record surface. (source)
Why You Need To Clean Your Vinyl Records
Your vinyl records require cleaning from time to time. Such is especially true if you purchased secondhand records. The reason is that dirty records sound bad and can even ruin your record player’s stylus.
Moreover, cleaning vinyl records with microfiber is the most effective way to preserve their quality. You can ensure that muck, dust, and dirt will not contaminate your collection with proper cleaning.
More than that, here are other reasons why you need to clean your records:
Vinyl Records Can Be Contaminated With Particles That Can Scratch Them
Even if you clean your vinyl record before storing it, there can still be dust and small particles on the surface when you take it out of the sleeve. Such is especially true for newly bought vinyl records.
Manufacturing places are contaminated with dirt and dust that can stick to a statically charged record. In addition, the record production process leaves the record surface full of gummy release agents. This residue can contaminate your turntable mat and stylus, as well as your other records.
If such a thing happens, the contaminants can also stick to your other records, thus ruining their audio quality.
Furthermore, cleaning vinyl records with microfiber can remove both the dirt and static on their surfaces.
Vinyl Records Have A Static Charge.
Pulling your vinyl record out of its sleeve produces friction. As a result, its surface becomes positively charged with static electricity.
A statically charged vinyl record can be a nuisance for various reasons. For instance, it will stick to the turntable mat every time you need to lift it. But what is worse is that the static charge can attract dust and other particles that can ruin your record.
For this reason, the best thing to do is to wipe your record with an anti-static microfiber cloth before and after using it. (source)
When To Clean Your Vinyl Records
Now that we have established the importance of cleaning your vinyl records, the next question is, “how often should you clean them.”
Vinyl records are delicate items. For this reason, following the cleaning process is essential. But how often should you be cleaning vinyl records with microfiber? Below is the answer:
Clean Your Records After Buying Them
As mentioned, factories, where vinyl records come from can contaminate them with dust and dirt. Such is especially true if you bought a record from a store you do not trust and not from an online shop.
So, before a newly-bought record hits the shelf at a local store, distribution may have stored it in a warehouse for a long time. Meaning dirt and dust may be on its surface and its jacket when it reaches your home.
That said, make sure to clean your vinyl record as soon as you get it from the record store. Additionally, you should clean the sleeve before storing it with your other collection.
Before Putting Them On Your Record Player
It would be best to clean vinyl records with microfiber before putting them on your turntable. This way, you will be able to protect your record player’s needle. Wiping the record with a microfiber cloth will also prevent possible dust buildup from scratching them.
That said, cleaning the record will prolong its life.
But this process is only applicable if you are not using the record daily. The reason is that exposing it to chemicals every day will do more bad than good.
If you play a vinyl record daily, it is ideal for cleaning it using the drying method. Wipe the surface of the record using a microfiber cloth to remove dust and other particles.
Additionally, return the record to the sleeve once it has finished playing. This way, you will be able to prevent your record from acquiring scratches accidentally.
Once They Acquire Damage
Your vinyl records are going to acquire damage at one point in your life. It can be that you accidentally dropped the record, or you touched the groove side. While many types of damages can happen, cleaning your records after any damage is essential.
Additionally, your hands need to be clean whenever you need to touch your records. This way, you will not leave dirt and smudges when you touch them.
Before Returning The Vinyl To Their Sleeves
Once you are done playing vinyl, you should clean it first before putting it back on its sleeve. Like when you bought your record, this process will ensure no dirt particles on its surface.
This time, you do not need to apply a cleaning solution to the record. Instead, it would be best to clean vinyl records with microfiber to remove whatever is on their grooves and surface.
In addition, you need to clean the sleeves as well. The reason is that there can also be dust inside it and on its surface. After cleaning both the sleeve and the vinyl record, then you can return it to their storage. (source)
Tips For Maintaining Your Vinyl Records
Cleaning vinyl records with microfiber is an excellent way to preserve their good condition. But a proper cleaning method is not enough. Instead, you should also know what the other maintenance methods are.
Proper maintenance is crucial if you want to protect your vinyl records. If you do not know how to maintain your records, they will lose their good sound quality in the long run.
Moreover, vinyl records are prone to scratches. That said, here are some maintenance tips:
Proper Storage
After cleaning vinyl records with microfiber, another vital maintenance step is proper storage. It is essential to note that you should store your records vertically and never horizontally.
Stacking vinyl records horizontally for a long time can result in warping. The reason is that the weight of the records above will put pressure on the ones below. In addition, make sure that your storage area is away from humidity and heat.
Avoiding Direct Sunlight
Cleaning vinyl records with microfiber will keep them free from further damages. However, it is not enough to clean your records.
Vinyl records are prone to warping when exposed to extreme temperatures. When a record warps, fixing it will be a complex process. Even if you were able to fix the damage, you would never restore the sound quality of your vinyl.
For this reason, please do not place your storage area near windows where sunlight can reach it. Even if your vinyl records did not warp, sun exposure could cause the record sleeve’s design to fade in the long run.
Keeping The Records In Their Protective Sleeves
One thing to take note of when you have vinyl records is that you need to beware of dust and dirt. These particles are two of the most damaging things for vinyl records.
That said, you need to clean your storage area from time to time. This maintenance step will keep the dust and dirt away from your record. As a result, you will be able to keep the records’ sound quality.
Furthermore, you do not want your vinyl to rattle around inside its sleeve. What is the point of cleaning vinyl records with microfiber if they will get scratches eventually, right? For this reason, you need to use inner sleeves for your records.
Paper – cheapest and most basic option. Paper sleeves are commonly included in the package when you purchase your vinyl. However, this material can produce paper dust that will stick to your record.
Poly sleeves – more durable compared to paper but are also more expensive. If you are a serious vinyl collector, this material is the ideal sleeve to use. Just like cleaning vinyl records with microfiber, poly sleeves eliminate dust issues.
Paper with poly lining – this sleeve is paper on the outside and poly on the inside. The paper makes the material rigid, while the polypropylene makes it smooth. (source)
Proper Handling
Cleaning vinyl records with microfiber is one way to keep them clean. But another way to do that is to touch the records as little as possible.
Of course, holding your vinyl records is not preventable. But when you do, make sure that you are only touching the inner label and edges. Keeping your hands away from the record surface will prevent grease and natural oil on your fingers from getting on it.
Using The Record
You can also take steps to extend the lifespan of your records when you are playing them. For instance, your hand needs to be very steady when cueing your record.
A steady hand is especially essential if you have a manual turntable as you need to lift and put its needle on the record. If you are not careful enough, you can end up scratching your vinyl, thus ruining its audio quality.
That said, put your hand on the side of the record where you can rest it to something to ensure stability. Then, carefully lift the stylus using your finger.
Moreover, it would be best to be extra careful when removing the needle from the record grooves. It would be best if you waited until the record stops spinning before lifting the needle. If you move the needle while the record is still spinning, chances are you will scratch its surface. (source)
While cleaning vinyl records with microfiber is a vital maintenance method, proper usage is also crucial for keeping their quality. (source)
Vinyl records are increasingly becoming popular. Both collectors and turntable DJs are playing them regularly. However, they need proper care to ensure that these artistic pieces last longer and provide quality sound. In this article, we will provide a detailed guide on how to clean vinyl records.
Vinyl records need dry and wet cleaning with anti-static record brushes and vacuum record cleaners. Dry cleaning removes the more significant dirt and dust particles, while wet cleaning ensures permanent dirt is removed.
Besides covering the comprehensive cleaning methods, we will also examine why it’s crucial to clean vinyl records. Read on to find out more.
Do Vinyl Records Need To Be Cleaned?
Over the years, vinyl records have evolved. Initially, these analog sound-storing mediums were referred to as phonographic disc records. Manufacturers made these phonographic records from shellac. With time, however, records made from polyvinyl chloride (PVC) became more common.
These records were then coined ‘vinyl’ records from the material they were made of. With time, all types of records were referred to as vinyl records, regardless of what they were made of.
As much as new formats were introduced (e.g., compact cassette), vinyl records retained a significant market share. However, in 1991, once the market share of compact disks rose, vinyl disappeared from the mainstream.
It was not the end of vinyl records as they made a comeback in the 21st century. This time, they were common in particular niches such as rock bands and with DJs. Over time, collectors have also increased with these pieces considered to be of historical and artistic interest.
Taking proper care of records, therefore, becomes necessary, no matter who owns them. One of the ways to do this is through preservation. To prevent gradual degradation of the audio, most collectors transfer the audio to other media. Preservation also involves playing the records once in a while (1).
Proper care for the vinyl also involves cleaning them regularly. In turn, owners are rewarded with the tremendous and lush sounds that they have to offer. The cleaning applies to both new and old records. Below are the reasons why cleaning records is essential.
Static Charge on Records
Playing records is fun, but with static, the process can be tedious. The static charge has no exception whether the record is new or old. In fact, before adding a vinyl record to your collection, it is already exposed to static (2).
Static electricity is a result of an electric charge building up in non-conducting materials. The moment two non-conductors are rubbed against each other, static is created. The vinyl itself is made of non-conductive material.
Vinyl comes into contact with other non-conductors during their production process. The records’ sleeves are also non-conductors, and the friction between the two also creates charge (3).
In order to ensure higher quality, lower noise floor, and better pressings, vinyl records are made purer and thicker. But unfortunately, this also means the concern with static electricity becomes worse.
Facts have presented themselves by comparing recent pressings and those from the 80s. Thinner records from the 80s are affected less with the static charge when compared to the latest pressings (4).
While it’s not possible for the static charge on the records to shock the users, it’s still detrimental. First, the sound from the record will be tampered with. Instead of the lush sound, one will get poor-quality audio.
Also, the records will be susceptible to dirt and, in turn, they will require thorough cleaning. The electric charge attracts dust meaning the vinyl surfaces will allow dust build-up. In this case, the vinyl records will act as literal dust magnets. Unfortunately, the static charge also threatens the lifespan of the needle.
For a vinyl record to last long, it’s necessary to take the required measures. It applies to common records or rare records that are difficult to find. While records made from vinyl are known to be less prone to damage when compared to those made from shellac and acetate, they still require attention (5).
Proper storage and handling prevent slow degradation. Storage practices that you should carry out include storing the records on metal shelves instead of wood. It is to keep them from the contraction and expansion of the wood. Also, the vinyl shouldn’t hang over the sleeve’s edge.
Also, immediately after the records have been used, they should be placed in their jackets. Again, it would be best if you avoid unnecessary exposure to light and air. Keep in mind that the only places that should be touched when holding it are the label areas and the edge.
By operating a clean vinyl, one is also assured of an increased lifespan. Dirty and dusty records, on the other hand, may result in permanent damage to the vinyl. The increased friction may also damage the stylus (needle), and in turn, the tonal response may be affected (6).
As mentioned above, static electricity is generated when non-conductors are rubbed against each other. Therefore, the increased friction between dirty records and stylus only results in more dirt.
According to an analysis conducted, the dust removed on stylus tips included; 35% diamond dust, 12% jagged silica, and 40% miscellaneous particles (grit, soot). The rest consisted of lint and fibers (7).
Stay Free From Surface Noise.
First, it’s vital to understand that occasional surface noise on records is normal. This noise is expected when the music is sliding into existence. It also occurs between tracks.
However, there may be a problem when the hisses, clicks, and pop sound out of place. There are various reasons to consider. They include; excessive dirt or debris on the vinyl, excessive dust build-up on the stylus, or playing ancient records that require a deep clean.
Loud pops that prevent enjoyment of the track are caused by actual contamination. At times, one can identify the piece of dirt on the record. Other times, it’s safer to do a quick sweep on both sides of the record. Prior cleaning before use also results in minimal surface noise (8).
Clean Vinyl Records With Alcohol? We Find Out.
In order to ensure effectiveness, cleaning vinyl records requires caution and consciousness. Failure to do so may result in damage to the records. Scratches, for example, may form on the record if abrasive agents are used to clean them.
For vinyl enthusiasts, damage to their rare collection is a real fear. Using alcohol for cleaning, in particular, has been a debated issue over the years. For the most part, however, using it has been discouraged.
Adequate precaution is necessary when considering alcohol as a surface cleaner. It is because pure alcohol isn’t safe, and you should never use pure alcohol on records. However, there are commercially sold record cleaning agents that contain alcohol in them.
In an interview, Steve Chase, the founder of Groove Washer, stated why Dr. Bruce Maier (1970s Disc washer creator) steered clear of iso alcohol (high amounts). He mentioned that iso alcohol could remove plasticizers from the records and make the groove brittle.
He also mentioned that while other experts took pride in using high amounts of iso alcohol, its effectiveness was questionable. Mainly since the alcohol dried up too quickly, leaving no time for the contaminants to be removed (9).
One may still choose to use alcohol for cleaning their vinyl. However, there are two things they should be aware of. One, the alcohol used should be carefully selected and properly diluted. Also, it is not possible to guarantee that nothing will happen to the records.
Polyvinyl chloride has properties that make it resistant to solvents. It means that the base material of the records created from PVC is not affected by alcohol. The risk, however, comes in with the additives in the Polyvinyl chloride, e.g., plasticizers.
As mentioned before, one of the things alcohol could remove is plasticizers. Plasticizers, together with extenders and stabilizers, ensure the vinyl record has flexibility. Unfortunately, once these additives react to the alcohol, their bonding to the record’s surface is compromised. Therefore, this makes alcohol a less desirable cleaning choice for Vinyl records (10).
The decision to use isopropyl alcohol, therefore, would require usage in small quantities. Failure to control this solution can cause it to turn into an abrasive quickly. The risk is much higher when it comes into contact with acetic acids (such as vinegar).
Using distilled water to rinse vinyl records cleaned with isopropyl alcohol is recommended. However, due to their delicate nature, you shouldn’t clean shellac records with any kind of alcohol.
Since some vinyl cleaning agents contain alcohol, going through the ingredients before purchase or use is necessary. Types of alcohol to look out for include ethyl alcohol, pure alcohol, and methyl alcohol. Isopropyl should also be in small quantities.
How to Deep Clean Vinyl Records
There are two primary cleaning methods, dry cleaning, and wet cleaning. As the name suggests, dry cleaning does not involve any solutions, while wet cleaning involves a cleaning solution.
Record owners should conduct dry cleaning every time they take out a record to play. You should do cleaning both before and after the record is played. It keeps the record in great shape. It is because you will remove superficial dirt regularly. Therefore, the chances of the dirt permanently sticking onto the grooves are minimal.
The best tool to use is an anti-static record brush. These brushes tend to have two bristle rows. While one row removes dirt and dust on the record, the other row is meant to de-stat. By minimizing the static build-up, the chances of dust clinging on the record are also reduced.
You should start by brushing the record’s surface gently. It should be done in a circular motion while following the grooves. You should apply only light pressure in this case since the aim is to remove large dirt and dust particles. Using too much pressure may destroy the grooves.
However, there are scenarios where different cleaning methods need to be incorporated. Deep cleaning will offer a thorough clean by using specific solutions.
The first scenario is when you’re playing a record (regardless of whether it’s brand new or second-hand). The second scenario is with visibly dirty records, they don’t sound good, and they don’t respond to dry cleaning.
Below is a detailed guide on how to deep clean vinyl records.
Prepare The Cleaning Solution.
Deep cleaning vinyl records requires a wet method. That is, incorporating a solution to ensure thorough removal of dirt. Once you decide to use a homemade solution, it is essential to prepare it correctly.
The necessary ingredients include isopropyl alcohol, a rinse agent, and distilled water. Dishwasher fluid can serve as the rinse agent. However, it should be both fragrance and color-free.
The dishwasher fluid is essential as it breaks the vinyl’s surface tension. It then allows the solution to reach the deeper parts of the record’s grooves.
Take a few drops of the rinse agent, three parts of the distilled water, and one part of the iso alcohol. Distilled water is preferred as it does not contain impurities when compared to tap water. You can use a bowl to combine the ingredients and then gently stir. Alternatively, you may opt to use a spray bottle, provided you shake well before use.
There are homemade solution recipes that recommend using ‘Free Clear’ laundry detergent instead of iso alcohol. In order to avoid damage to the vinyl, it is required that the detergent is free of fragrances, phosphates, or color agents (11).
Keep in mind, however, that using homemade solutions is taking a chance. Therefore, proper dilution of the alcohol is necessary.
Using Pre-Packaged Solutions
Pre-packaged solutions are a bit costly when compared to homemade solutions. Also, the ease of availability of home solutions makes for a strong argument against pre-packaged stuff. However, they go a long way in ensuring the records are clean, safe, and protected. Therefore, they are a much-needed investment if you truly want your vinyl for the long haul.
Both record stores and music stores sell these solutions. Before making any purchases, you should ensure the ingredients used will be favorable on your vinyl. Most of these solutions come with detailed instructions for proper application.
Pre-packaged solutions are highly effective whether cleaning by hand or using a machine. However, using cleaning solutions designed for cleaning devices is recommended. Fortunately, there are plenty of cleaning solutions one can choose from.
There are cleaning solutions packaged individually, while there are those packaged in kits. Cleaning solutions packaged individually tend to be enough for an entire record collection. Especially since they only require a few drops. Solution kits come with cleaning fluid, microfiber cloths, and soft brushes, which are convenient.
A pre-packaged solution is suitable for absolute purists and collectors with hundreds of dirty records (12).
Put The Vinyl Record On A Cleaning Mat.
Finding a suitable surface before cleaning is vital. Cleaning mats are a good option. These mats are made of soft material that will be gentle on the records. It offers an excellent solution for those fearful the solution would seep into the turntable. The attached spindle would ensure the vinyl is secure.
However, there are mats meant for dry cleaning. Therefore, they cannot handle the solution. Prior confirmation would prevent unnecessary accidents.
Instead of the turntable, you may opt for other flat and stable surfaces, such as a table or a desk. In cases where a record cleaning mat is unavailable, a micro-fiber towel should suffice. The main aim is for the surface to be non-abrasive and can handle the solution.
Apply Cleaning Solution On Record
There are two main ways to apply the cleaning solutions on the record. The first is by spraying a few drops on the vinyl surface. For this, the solution needs to have a spray function.
In order to completely cover the vinyl’s surface, five mist sprays should be enough. First, spray the solution at a distance of about 15cm. After spraying, give the cleaning solution a few seconds to seep into the grooves.
If you mix your cleaning solution in a bowl, you may choose to transfer it to a new receptacle, such as a dry spray gun. Alternatively, you may work on it as it is. Using a microfiber cloth, dab the solution onto the vinyl record. The aim is to make the record slightly damp, not to drench it. Therefore, you should avoid overdoing it.
Caution should be exercised when applying the solution. It is to prevent the label from getting wet. The solution may discolor the label or cause the label glue to loosen. Both incidents will be detrimental to the record’s label and destroy its aesthetic aspect. You may choose to purchase a record label protector disc to keep the fluid from getting to the label.
Wipe Solution With A Microfiber Towel
Take hold of your clean microfiber towel and wipe the solution. Start at the center of the record and wipe in a clockwise direction. Avoid wiping across the grooves; instead, move along them. Apply gentle pressure so that the microfiber towel gets into contact with the inner parts of the groove. It will wipe off any visible and invisible blemishes as you continue.
Once you get to the record’s outer edge, begin the rubbing process in a counterclockwise direction. The same way the needle does when the vinyl is playing. As you do this, ensure your fingers are flat. It is to avoid scratching the record with fingernails.
Once done with one side of the record, flip it and work on the lower surface. Soak a towel in distilled water and rinse both sides. Once cleaning is over, you should let the record dry.
There are several ways of letting this happen. Some prefer to let the vinyl air dry. Placing it on a rack for this to happen is advisable. However, by air drying the record, it runs the risk of dirt settling on it again. Instead, you should use a dry microfiber cloth to speed up the process.
Before tucking the records away again, they need to be entirely dry to prevent mold from growing. It especially applies if the cleaning solutions used contained alcohol.
As seen above, there are several ways that one can clean a vinyl record. For those who don’t wish to use their hands, they can use a machine to clean. These machines allow one to save both time and effort. However, before purchase, you may be required to save up as the devices can get costly. In fact, they can go as high as $500 (13).
When it comes to record cleaning machines, both manually operated and power operated devices exist. Finding one that suits your cleaning needs will require adequate research. When on a budget, however, machines that use a brush to clean are preferable.
Purchasing cleaning machines particularly applies to those with extensive record collections. These machines give the vinyl an actual bath. They incorporate both distilled water and cleaning solution. You’re required to spin the vinyl record through the solution for about a minute. The built-in brushes get rid of the dirt.
What Can You Use to Clean Vinyl Records?
Vacuum Vinyl Record Cleaners
Despite their costly nature, vacuum vinyl record cleaners offer several benefits that hand cleaning cannot. Not only do they minimize pressure used, but they also reduce the amount of physical contact on the delicate vinyl. Additionally, they suck up the dust and dirt found on the grooves.
The vacuum cleaners contain motors that rotate the vinyl as the suction arm does the cleaning. It makes cleaning thousands of records easier without worrying about fatigue, time spent or changing micro-fiber cloths regularly.
The cleaning solution is applied manually, and the motor rotates the vinyl. Once the entire surface is covered, the suction arm is put over the record, and the dirt and solution are removed. Within seconds, the vinyl record is clean and ready to be played.
However, allowing the suction arm to rotate for too long with the record already dry may damage the record and wear out of the felt pads.
Wood Glue
Unconventional as it may seem, many collectors vouch for wood glue as a record cleaner. In theory, both the wood glue and the vinyl’s materials are made chemically similar. So much so, the glue can’t stick to the record. However, it will stick to all the dirt and dust on the vinyl (14).
An experiment was conducted to test the truth concerning wood glue’s effectiveness on vinyl records (15). The result was remarkable effectiveness on heavy-duty stain removal. In one application, you should have eliminated most of the excessive grime on the disc used.
However, this process is not without its disadvantages. The process is complicated since wood glue is not easy to work with. Major requirements include a surface that you will discard afterward and gloves to keep hands protected.
The amount of glue needed on one surface is too much, meaning the total cost on many records would be expensive. The process also takes too long. It is because you have to wait for the glue to dry, peel it off, rinse the disc and dry it again.
FAQs
How To Clean Vinyl Records With Windex?
You should avoid household cleaning products like Windex completely. It is because they are very abrasive cleaners and pose threats to vinyl records. Instead, collectors should utilize three parts distilled water, dishwasher fluid, and one part isopropyl alcohol to save up on cleaning solution costs.
You should clean vinyl records every time before and after playing using an anti-static record brush. It goes a long way in increasing their lifespan and minimizes the chance of permanent dirt and dust.
For extraordinarily soiled or old vinyl records, a deep clean is recommended. This deep clean will incorporate a cleaning solution. Depending on the number of records, one may clean by hand or with a machine.
How Do You Clean Vinyl Records Without Damaging Them?
When purchasing cleaning solutions, be sure to check on the ingredients that make up the solution. It is because some ingredients, such as pure alcohol, may end up damaging the vinyl records.
Also, in situations where isopropyl alcohol is used, you should use it sparingly. Using microfiber cloths will also prevent the records from scratches.
If you hear scratching on your vinyl record while playing, that’s not a scratch on your vinyl record; that’s dirt. Here’s how you can use WD-40 to clean your vinyl record safely and efficiently.
For audiophiles out there that want a fast and reliable method of cleaning your vinyl record, you’re in the right place. Here’s how you use WD-40:
1.Spray the WD-40 on a lint-free cloth
2.Thoroughly clean the vinyl record with the sprayed cloth
3.Let it sit and dry for a couple of 3-4 minutes.
4.You’re done!
This article will go on to give you an in-depth explanation of this process. Not only that, but it will also provide additional information on cleaning vinyl records. Keep reading for more information on the maintenance and care of your vinyl records.
Here’s How To Properly Use WD-40 To Clean Vinyl Records
First things first, what is WD-40?
WD-40 is a type of petroleum solvent. It is volatile and evaporates to leave behind a lubricant that is non-volatile. Volatile refers to a substance that quickly evaporates even when exposed to average temperatures.
The volatility of WD-40 is one of the reasons that make this product a great vinyl record cleaning alternative.
So how do you use it to clean your vinyl records? Here’s how it starts.
1. It All Starts With A Clean Record
Before you can play a vinyl record, you have to clean it first. After playing it, you have to clean it again. Hence the reason for the first step, it all starts with a clean record.
Vinyl records tend to gather dust, dirt, and any other unwanted matter on their surfaces. When playing the vinyl record or storing the vinyl record, exposure to unwanted contaminants occurs.
It’s good practice to clean your vinyl records after every use, hence why this step is first on the list. It’s good to start on a clean record.
There are two types of cleaning methods for vinyl records:
Wet Cleaning
Dry Cleaning
Wet cleaning refers to the cleaning process of using a fluid and a brush or a record cleaning machine. In comparison, dry cleaning involves the use of a dry brush.
WD-40 uses the wet cleaning process, and instead of a brush, it uses a lint-free cloth. The wet cleaning process has three other cleaning processes:
one step cleaning process
two-step cleaning process
three steps cleaning process
The one-step cleaning process involves using one cleaner to clean the vinyl record, while the two-step cleaning process involves using two steps to clean the vinyl record. The three-step cleaning process follows the same pattern.
Since you are using one product, the WD-40, it is safe to say that you will be using the one-step cleaning process. Let’s get to it.
2. Place The Record On A Flat Surface
Record collectors prefer to place the vinyl record on top of a turntable mat with a towel or an absorbent cloth underneath it. You want a working surface that will not damage the record at all costs.
It’s unnecessary to have a turntable mat but make sure your record is sitting safe, pretty, and ready for a cleaning session.
3. Spray The WD-40 Onto A Lint-free Cloth.
You want to make sure that whatever touches the record will not damage it as well. Lint-free cloth won’t leave any unwanted strands of cloth behind, and it’s a safe material when cleaning vinyl records.
In my experience, lint-free cloth is a great tool when using the WD-40.
4. Spread The WD-40 Carefully Onto The Surface Of The Record.
Start cleaning the WD-40 on the lint-free cloth onto the surface. Be gentle and be sure to clean both sides of the vinyl record. You want to make sure that you spread the product evenly on the surface and the vinyl record is free of unnecessary damage.
Would you please not put your back into it? It needs some good cleaning but not enough force to split it in half or crack it.
5. Let It Sit For 3-4 Minutes
Remember that WD-40 is a volatile solvent. It evaporates and leaves behind a non-volatile lubricant. It doesn’t need to be left under the sun for it to dry.
Leave it on the flat surface you’ve been working on, and after 3-4 minutes, you can check on your vinyl record.
6. You’re Done!
You can now safely store or play your vinyl record with complete confidence that your vinyl record is clean and working efficiently.
What Does WD-40 Offer To My Vinyl Records?
WD-40 offers two things after use:
Dirt removal
Lubrication
WD-40 removes any dust, dirt, grime, or unwanted substances that were on the surface of your vinyl record. It also lubricates your vinyl records. Vinyl record owners reported smoother revolutions playback improvement.
Some users may deem it controversial, but WD-40 does the job. Moreover, it does not have any substances that may affect vinyl or PVC (polyvinyl chloride – the primary substance that vinyl consists of).
Vinyl erodes in the face of ammonia and alcohol. WD-40 contains none of the decaying substances. It cleans and protects vinyl before and after use.
Furthermore, the WD-40 formula has stayed the same since 1953. The formula remains a trade secret, but users can see its constituents. It’s safe to say that WD-40 is a consistent product that will probably not change its formula in the future, and it makes for a tremendous vinyl cleaning tool.
Disclaimer On The Different Types Of WD-40
WD-40 comes in numerous types of cans. It’s a multi-use product, so it’s not shocking that it has specialized product versions. Experts recommend using the blue can version of WD-40 for cleaning vinyl records.
Are You A Vinyl Record Owner? Here Are Some Helpful Faqs To Help You Maintain And Clean Your Vinyl Records With WD-40.
Is It Okay To Clean Vinyl Records With WD-40?
Yes, it is. WD-40 is a great vinyl record cleaning product. It does not contain any ammonia or alcohol, and it is a volatile solvent. After use, it will remove the dirt or dust, evaporate and leave behind a non-volatile lubricant.
Users have reported that it increases playback improvement. WD-40 is an excellent alternative to vinyl record cleaning products. All you require is a lint-free cloth, the WD-40, and time.
The entire cleaning process is fast, easy, and efficient. As long as you do it correctly and the vinyl record does not suffer from damage during cleaning, all is well.
What Is The Best Way To Clean Vinyl Records?
The wet cleaning method is the best method to clean vinyl records. Its because the wet cleaning method applies to both new, used or old vinyl records.
If you’ve bought used or old vinyl records, then the wet cleaning method is ideal. It will help jumpstart the maintenance process, and you will have a much easier time cleaning the vinyl records in the future.
The industry has numerous cleaning products to choose from if you’re in the market for one. However, if you’re looking for an alternative answer, the WD-40 is a great choice. Not only does it remove dirt or grime, but it also lubricates the vinyl record.
Does WD-40 Ruin Plastic?
No, WD-40 does not ruin the plastic. Vinyl consists of PVC or polyvinyl chloride.
PVC suffers damage from consistent exposure to ammonia or alcohol. WD-40 does not contain ammonia or alcohol in its formula.
For this reason, it’s one of the best alternative vinyl record cleaners. So if you’re in the market for a vinyl record cleaner, in my experience, WD-40 is a great choice.
1.Jenna Miles, The Beginner’s Guide to Vinyl Records: How to Build, Maintain and Experience a Music Collection in Analogue (Massachusetts: Adams Media,2017) 256.
The purpose of a record player’s dust cover is to protect your turntable from dust and debris. Keeping it clean, shiny, and ever-ready for use (2).
The steps in cleaning your turntable’s dust cover are:
Take off the dust cover.
Create a cleaning mixture.
Submerge microfibre cloth.
Wipe the surface.
Clean off the mixture.
Leave the dust cover to dry.
Polish surface.
This article will look at the steps involved in cleaning a dust cover, the best restoration products for dust covers, and how to lighten scratches on dust covers.
How To Clean A Record Player’s Dust Cover – Part 1: Dust Cover Cleaning Steps
Your turntable dust cover protects your record player; however, it also gets covered in dust or debris (3). It can get worn out, scratched, and need restoration because a dirty dust cover can ruin your record player and vinyl record.
Items Needed:
Dishwashing liquid.
Clean microfibre cloths.
Plastic polish.
Warm water.
Step 1: Remove the dust cover.
When you want to restore your dust cover, the first thing to do is take off the dust cover from the turntable. This step is not compulsory, and based on my experience with turntables, it is better to clean the dust cover while attached to your record player. However, if you find it difficult, taking off the dust cover is your first step, but it should be done with extreme care to avoid damaging the hinges.
Step 2: Create Cleaning Mixture.
The next thing to do is create your cleaning mixture. Using two cups of warm water and ¼ tablespoon of dishwashing liquid, mix the contents until it forms enough lather. The measurements above are not strict about following measures, so you can use any bar you desire. In my experience, this measurement has been the most effective on any brand of the dust cover.
Step 3: Submerge Microfibre Cloth.
After creating your soap mixture, your microfibre cloth comes into the scene. Place your soap mixture on a flat surface to avoid spilling, then submerge your microfibre cloth in it. Do this until it is damp; it should not be soaking wet to avoid dripping the mixture into your turntable or vinyl grooves. It should also be moist enough to clean your dust cover.
Step 4: Wipe Surface.
Using your damp microfiber cloth, wipe the entire top and bottom surface of your dust cover. Ensure to submerge the microfibre in the soapy mixture if it gets dry, do this to remove dirt, debris, or dust from the outside without leaving scratches on the plastic. Put the fragile nature of your dust cover into consideration when wiping, so you don’t apply too much pressure that can lead to permanent damage.
Step 5: Clean Off Mixture.
When you are sure that you have entirely wiped every surface of your dust cover with the soapy mixture, the next thing is to clean off any additional residue or dust stuck onto the plastic. Using another clean microfiber cloth, submerge it in plain water without soap until it is damp, and wipe off the dust cover’s entire top and bottom surface to remove the soap mixture. Do it several times carefully until you completely wipe off the soap residue from the surface of the dust covers and any part of your turntable the soap might have touched.
Step 6: Dry Dust Cover.
After the fifth step, leave your dust cover to dry completely. It is important to note that the surface must be dry before carrying out the next final step. Carrying out this step on a wet dust cover will create unpleasant results and sticky grime on your dust cover.
Step 7: Polish The Cover
The next and final step is the polishing part of the whole process. After your dust cover gets dried, apply your plastic polish on the entire surface of your dust cover in overlapping circles, using another clean microfiber cloth. This time, you will wet your microfiber cloth with the plastic polish and not submerge it. The work of your plastic polish is to make it shiny and attractive like it was when you purchased it.
Part 2: How to Lighten Scratches on Dust Covers
If you have a plastic or acrylic turntable dust cover, scratches are inevitable. They make your dust cover look old, unattractive and can store dirt in their grooves. In cases where you have blemishes on your dust covers, the following steps can help remove scratches while also polishing your dust covers:
Tools Needed:
Clean and dry cloth.
Toothpaste.
Car wax.
Polish.
Warm water.
Step 1: Wet Your Dry Cloth.
The first step to carry out is wetting the dry clean cloth with your warm water. This process removes any dirt or specs of dust on the fabric that you might have missed. Ensure to wet it enough to be damp or moist and not too wet to the point of dripping.
Step 2: Apply Toothpaste to the Cloth.
After getting the cloth damp enough, apply the toothpaste to the moist cloth. Any brand of toothpaste works, but from my experience, using toothpaste that is not gel works better and faster.
Step 3: Rub Cloth on Your Dust Cover.
The next step is rubbing the cloth on your dust cover’s top and bottom surface. Ensure to rub it multiple times on the body, covering all edges and parts of it. Rub it gently, too, so you don’t break it or cause more damage.
Step 4: Rinse Off Residue.
After getting satisfied with the previous step, rinse off the residue of the mixture from the dust cover. Ensure to use clean, warm water to rinse off the substance and leave it to dry correctly.
Step 5: Apply Car Wax and Polish.
Finally, apply your car wax and polish to the dust cover, rubbing them on all corners and edges of the body. When you are satisfied with this part, you leave it to dry out a bit, and your dust cover will be as good as new.
Part 3: Best Dust Cover Restoration Products
There are many products used to restore dust covers, both acrylic and plastic (3). Below are some of our best picks:
Novus 7100 Plastic Polish Kit – 8 Ounces is a plastic polishing kit used to polish dust covers made from plastic. It helps protect, clean and polish your plastics, making them free from dirt, dust, and scratches. When you use it frequently, it serves as protection against future scratches. Click here for more price information.
Chemical Guys BUF612 TORQX Random Orbital Polisher is a polishing kit that removes scratches, swirls, and defects from your dust covers. It works fast, comes with pads that can be switched quickly, and can handle any level of scratches on your body. They also come with the appropriate cloth for carrying out your cleaning steps and can be used for plastic and acrylic covers. Click here for price information.
Gloss Poly Wax is a car wax used to remove scratches from dust covers. They protect your surfaces from damage and have synthetic polymers. You will get a removal towel and hand wax pad on purchase to help make waxing easier. Click here for price information.
Frequently Asked Questions (FAQ)
How Do I Avoid Getting Fibers on My Turntable?
The best way to achieve this is to ensure that each time you take off your cloth dust covers, brush your turntable with a carbon fiber brush.
In cases where the fibers from your dust covers are becoming too much, it is probably time for you to change it. However, you can always dust them properly away from the record play before covering them after each use.
Can I Use a Cloth and Plastic Dust Cover at Once?
One turntable dust cover is enough, but you can use both plastic and cloth dust covers if you want extra protection for your turntables.
You can use both dust covers to protect your turntable at once, but they are not necessary at all. It is a personal preference, but they are not compulsory and do not hold any technical significance.
Summary
Cleaning your dust cover is very important and should be done frequently depending on how much you use your turntable. Do this to keep your record players safe and free from damaging external factors. For further questions and information, drop a comment below.
Technica, Audio. “Audio Solutions Question of the Week: How do I Clean My Audio-Technica Turntable’s Dust Cover Without Scratching It?” Audio-Technica, 2018, https://www.audio-technica.com/en-us/ Accessed 12 July 2021.
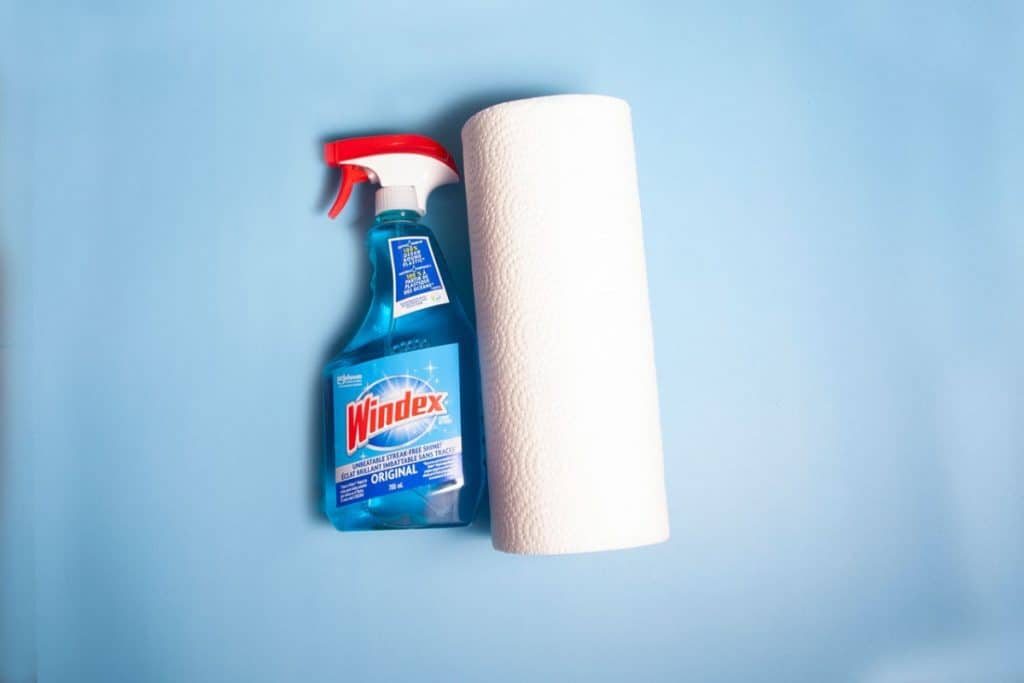
The internet is full of suggestions and mystery recipes on what to use to clean vinyl records. One such suggestion is using Windex glass cleaner, which quite frankly is a nightmare waiting to happen. Here’s why you should never use Windex to clean vinyl records.
These are the reasons why vinyl record owners should not turn to Windex glass cleaner to get the dust off of their beloved vinyl records:
1. Windex contains ammonia and alcohol
2. The product is a glass cleaner and not a specialized vinyl record cleaner
3. Professionals recommend not using Windex on your vinyl records.
This article will not only give in-depth explanations on the list mentioned above. It will also cover other harmful substances to your vinyl records and give you bonus information on cleaning vinyl records. Keep reading for more information.
Here’s Why You Should Never Use Windex To Clean Vinyl Records
In my experience, a lot of people attested that Windex was their go-to vinyl record cleaner. They swore by it and what it offered to your vinyl records afterward.
Long story short, they started to notice their vinyl records slowly turning grey. That color change is never a good sign for any vinyl record owner. Here’s why.
1. Windex Contains Ammonia And Alcohol
If you pull up Windex online, you can quickly get the contents of the product. Windex contains 4.0% isopropyl alcohol and 0.05% of 28% of ammonia.
These numbers aren’t the same on all Windex products; some have a lesser percentage while others have a higher percentage. The truth of the matter is that they still contain ammonia alcohol.
But why are ammonia and alcohol the big bad in this story?
Alcohol and ammonia dissolve your vinyl records’ essential compounds and subsequently damage your vinyl records to an irreversible state.
Slowly, you will start to notice your vinyl records turning into an unwanted shade of gray.
Towards the last leg of your vinyl record’s lifespan, it will slowly start to corrode to the point of no return. You will be the Avengers, and Windex will be Thanos. You saw how that went the first time.
Alcohol and ammonia are the main reasons why Windex is a poor cleaning choice. It’s also why it’s the first reason on the list. Windex’s primary contents do not provide the proper cleaning mechanism.
2. The Product Is A Glass Cleaner And Not A Specialized Vinyl Record Cleaner
If you’re starting your vinyl collection and someone recommends this product to you, be sure to confirm the actual purpose of the product.
Sure some products work great in other industries. You cannot apply that logic to Windex.
The product manufacturer laid out the contents of the product, its purpose, and its intended surface. That is enough reason to keep your vinyl records and your window cleaner miles away from each other.
It will not end well. The vinyl record industry has numerous specialized vinyl record cleaning options to choose from, both affordable and expensive. Look into them and see if they will satisfy your needs.
3. Professionals Recommend Not Using Windex On Your Vinyl Records.
Experts in the vinyl record will confirm that Windex is not a good cleaning product for your vinyl records. Used as a glass window cleaner, it’s great. Your windows will shine like never before.
However, using it as a vinyl record cleaner, it’s best to move away from that logic and consider much better and safer options. It’s not only good for you and your hobby but also your state of mind.
No vinyl record owner would like to wake up to corroding vinyl recorders. It’s sad, honestly.
Here Are Undeniable Record Cleaning Methods To Avoid
1. Cleaning Using Wood Glue
A couple of years ago, a video went viral on YouTube of someone cleaning their vinyl records with wood glue. Yes, you read that right, wood glue.
In the video, they ask users to add the glue while the record is on the turntable. The glue dries overnight, and you peel it off the following day to reveal a new and easily cleaned vinyl record.
This method may seem like magic, an overnight cleaner with a fun and satisfying peeling session at the end?
Unfortunately, it’s not as fun as it sounds. The wood glue method would eventually damage your vinyl record.
Not only that, but you have to add the glue to the vinyl record while it’s on the turntable, and the vinyl record must spin while you do this.
How do you spare the rest of the record player?
The wood glue method is inefficient, messy, and poses a much higher risk. Experts recommend staying far from this substance and turning to other effective methods.
Not only that, but experts advise you to clean your vinyl record before using it on a record player and after using it. After completing this phase, you can properly store it. What if you wanted to use it in a couple of hours?
The inefficiency of this method persists.
2. Dish Soap
Dish soap may have come up multiple times in forums and chats as a substitute vinyl record cleaner. Again, some people can attest to some brands and their efficiency.
Its best practice to sit down and look at the list of products present in dish soap brands. Not only that, but brands change their formulas over the years.
A dish soap brand that was great five or six years ago may not be the exact product today. Brands evolve with time, and changing their formulas may be a thing of the norm for them.
Because of this risk, experts advise steering clear from dish soaps if their formula will react badly to PVT (the main component of vinyl records) and if the formula changed with time.
Still, there are other specialized products in the market to help you clean your vinyl records. A silver lining exists for vinyl record owners.
Summary Of Cleaning Vinyl With Glass Cleaning Products
1. Is It Okay To Clean Vinyl Records With Windex?
No, it is not okay to use Windex glass cleaner as a vinyl record cleaner. Windex contains amounts of ammonia and alcohol. Regardless of the amount, these substances are harmful to vinyl records.
Ammonia and alcohol cause vinyl records to corrode. The vinyl records also become incredibly damaged and cross the point of no return. You can never restore the vinyl records.
Experts also advise keeping your vinyl records and Windex glass cleaner far from each other. It’s too toxic.
2. What Shouldn’t You Use To Clean Vinyl Records?
Experts advise staying away from Windex, wood glue, dish soaps, and anything else containing ammonia and alcohol. Or even anything that can negatively affect PVT, the main component of vinyl records.
These substances will cause harmful effects to your vinyl records. Moreover, if you can consult a record collector, be sure to consult on what they use to clean vinyl records. Check with other reputable sources on what the good and the bad of vinyl record cleaning are in the industry.
Research is a core part of the process. You cannot dismiss it.
3. Can You Use Any Other Glass Cleaner On Vinyl Records?
Ammonia and alcohol are one of the most common ingredients in glass cleaners. Inevitably, you cannot escape the glass cleaner ghost. It will haunt and corrode your vinyl records.
Be sure to check the ingredients of a glass cleaner. Despite the amount of ammonia and alcohol, it will damage your vinyl records as long as it’s present.
Take care of your vinyl records, and glass cleaners are not the way to do it.
1.Jenna Miles, The Beginner’s Guide to Vinyl Records: How to Build, Maintain and Experience a Music Collection in Analogue (Massachusetts: Adams Media,2017) 256.
2.Brenntag, The Various Chemicals in Glass Cleaners, Brenntag, https://www.brenntag.com/en-us/industries/household-industrial-institutional/chemicals-in-glass-cleaner/ Accessed July 18th, 2021.
3.Wikipedia, Windex, Wikipedia, https://en.wikipedia.org/wiki/Windex Accessed July 18th, 2021.
4.Marc Henshall, How not to clean vinyl records, Sound Matters, https://www.yoursoundmatters.com/how-not-to-clean-vinyl-records/ Accessed July 18th, 2021.
Is vinegar a good way to clean vinyl records? That’s a good question. Vinyl records are currently considered antique items collected by many, but many music enthusiasts still love them. In the last few years, vinyl has even made quite the comeback, and it looks like it’s here to stay, so keeping your old vinyl clean might not be a bad idea.
Vinegar, which is popularly known as the perfect natural cleanser, is also suitable for vinyl records. When properly diluted, vinegar aids in removing grime, dust, and oils from your vinyl records when applied with a soft cloth.
In this article, I will be taking you through reasons you should consider vinegar for cleaning your records, how to use it, some cons involved, and the best type of vinegar for cleaning vinyl records.
Can You Use Vinegar to Clean Vinyl Records?
Vinegar helps clean vinyl records; however, only plain white vinegar is appropriate in cleaning vinyl records effectively. It eliminates microbial organisms on your vinyl record. Vinegar can help keep your records clean and new; it’s non-toxic and cheap to make or buy. There are many reasons why vinegar helps to clean your records. (source)
Why You Should Use Vinegar
As stated earlier, vinegar is a popular natural cleaner; it is efficient, effective, and cheap. It is also safe to breathe due to its non-toxic nature, especially homemade vinegar solutions. (source)
There are lots of reasons why you should decide to use vinegar solutions to clean your vinyl records; these are the same reasons and outcomes I have experienced:
When applied to the vinyl record, vinegar immediately breaks dust deposits on your vinyl records and breaks the grime. Deposits like cheesy fingers from eating chips or processed snacks are no match for vinegar.
The solution dries up fast and lets you have your record ready to play again in no time.
It is budget-friendly, and homemade vinegar solutions have also been widely effective among vinyl collectors and lovers like me.
The solution also has certain antibacterial features. So, you also have your records germ-free to some extent.
It is non-toxic, safe to breathe in the fumes without fear of toxic exposure, and not harmful to the health of humans when the fumes are inhaled or liquid touched. As you know, you can sprinkle it on your fries or fish and chips too.
It keeps your record looking polished, shiny, and neat, irrespective of how long ago it was cleaned last or how dirty it might be.
Vinegar does no damage to your records when adequately diluted.
When vinyl records are stained with grease or an oily substance, vinegar solutions clean them as effectively as they clean dust and dirt.
How Do You Use Vinegar to Clean a Vinyl Record?
There are a few precautionary steps to follow when using vinegar to clean your vinyl records; these steps also involve the quantity to use; these steps are essential and influential to the outcome, so it’s best to take heed:
The first and most crucial step to using vinegar is to ensure you clean your record with a carbon brush first, wiping off the dust. This step is helpful for daily cleaning without any solutions and essential when using any substance or cleaning agents, including vinegar. Getting rid of loose stuff first is best, so you don’t smear wet dust into a groove.
If there is a lot of dust on the record, it is not advisable to directly apply your vinegar solution on the vinyl record. Doing this will make it messy and sticky, and the answer to this is using PVA glue on your vinyl record surface, causing all the dust particles to stick to it. Then the glue is pulled out, and vinegar is applied to clean the record.
The next step is to prepare your vinegar solution, and this includes a mixture of a 50 by 50 ratio of vinegar and distilled water. Many people add a few drops of dishwashing soap to the mix, which works well but is not mandatory.
Ensure to use lukewarm distilled water in your mixture, avoid directly applying boiling or hot water on your record and avoid chilled water. The water used in the combination should be at room temperature before mixing and application.
After you complete these steps and clean your record, check it for any residual solution. If any left, use soft linen cloth to wipe off the residual solution properly. Then use your carbon brush to remove any lint fibers left from the cloth.
Can You Use White Vinegar to Clean Vinyl Records?
In my experience, white vinegar is unarguably the best vinegar solution for cleaning vinyl records.
Flavored vinegar, like chili vinegar and others, must not be used to clean vinyl records. The only good vinegar to use in cleaning your vinyl record is plain white vinegar. It gives excellent results, highly effective for cleaning, and perfect for your records. The white vinegar also kills bacterial organisms and keeps them free from microorganisms like dust mites.
Killing microbes with vinegar is done using unflavoured plain white vinegar with a lukewarm distilled water solution to clean your records. Apple cider and rice bran vinegar are also not suitable for vinyl records; plain white is the only acceptable vinegar variant for your vinyl record (source).
Disadvantages of Using Vinegar to Clean Vinyl Records
Everything in life has a good and bad side, and the same goes for the act of using vinegar to clean your records. Vinegar is excellent for cleaning but is not perfect due to its acidic nature.
The rare aluminum records might get destroyed by vinegar over time due to its acidic nature. They gradually corrode, and the best solution to this is to ensure that after each vinegar cleaning, wash your record with only the lukewarm distilled water and wipe off with a clean and dry cloth (source).
After the record is dry, always use a carbon fiber brush to remove any lint left from the clean cloth used to wipe the record.
Frequently Asked Questions (FAQ)
Is Vinegar Bad For Vinyl Records?
Vinegar is excellent for cleaning vinyl records. It kills disease-causing germs, wipes off any greasy stains, and is not toxic to humans.
Most cleaning agents like soaps and others usually leave residues that are hard to get off; however, vinegar residues can be wiped off with just lukewarm water and a dry cloth to keep it shiny, new, and clean.
How Long Can Vinegar Be Used to Clean Vinyl Records?
There is no expiration date on the use of vinegar in cleaning vinyl records. People apply it multiple times to any vinyl record or as often as you wash them. It does not damage your record over time, as long as it is diluted accordingly.
How Do I Mix the Vinegar Solution for Cleaning?
Plain white vinegar is mixed with lukewarm distilled water to clean vinyl records; evenly measured. If you use two cups of vinegar, mix two cups of lukewarm distilled water to mix before use. Vinegar cannot be directly applied to a vinyl record by collectors because it is acidic and can corrode the vinyl record. It is mixed with distilled water to tone down its capacity and wiped off with lukewarm water and a clean, dry cloth after cleaning.
Technics make a fantastic bunch of turntables. But maintaining your turntable is essential to keeping it in good condition. The 1210 model is no different in its requirements for maintenance. However, knowing the correct way to perform a cleaning service is vital to proper turntable maintenance.
The process for cleaning a Technics 1210 is no different from the process of cleaning a Technics 1200. However, to avoid any confusion, I’ll provide a step-by-step guide to cleaning your turntable without wrecking it or getting yourself electrocuted.
Cleaning your turntable is vital for a turntable’s longevity and proper operation. So, let’s get started and walk through a good cleaning of your Technics turntable.
Technics 1200 Series Turntable Cleaning Procedure
Cleaning a Technics 1210 is the same as cleaning a Technics 1200. The only differences between the two models are a voltage selector on the 1210 and the fact that the 1210 model is usually black in color instead of the silver-grey of the 1200 model.
What You’ll Need
Sponge
Warm water
Mild soap (no perfumes, moisturizers, or additives)
Bucket (for your soapy water)
Cotton swab sticks (brand Q-Tip is well-known)
A stylus cleaning brush
Alcohol (optional)
Paper towels (optional)
Most Important First Step
Unplug your turntable completely. It includes power and audio cables. There should be no wires plugged into the turntable at all when you start cleaning. It is for safety reasons. You do not want to get electrocuted while cleaning your turntable.
Turntable Cover Cleaning
If you have a turntable dust cover installed, or rather, haven’t removed the stock cover that came with the turntable, then it’s likely you’ll want to clean it.
In time the dust covers can lose clarity. However, that’s more of restoration, so I’ll save that for another day. Today, let’s focus on cleaning.
The dust cover is made of clear plastic. However, the plastic is somewhat rigid, and we don’t want to scratch the clear surface. Therefore I recommend only using a soft cloth and warm water mixed with a small amount of mile soap.
When I clean my turntables, I take a small pail and add some warm water. The soap I use is a bar soap with zero additives, so I just put the bar into the water and rub it a few times until there’s a small amount of soapiness in the water. Then, I remove the bar and save it for another day, leaving me just the soapy warm water.
The cloth I use is a small microfiber cloth that won’t scratch the plastic.
Mix your warm soapy water.
Wet soft cloth in water and wring out all water possible so the rag is moist but will not drip, even when squeezed.
Wipe the top of the dust cover to remove dust.
Churn the cloth in water to remove the dust you just removed and wring out the cloth well a second time. Again, no dripping even when squished.
Wipe the cover again. The interior won’t need wiping if it has been left installed on the turntable.
Platter And Body Cleaning
Here we will use the same pail of warm water and a soft cloth. We will also use the rag and some cotton swab sticks. Alcohol is optional. I’ll explain when I get to that point.
Your platter will have two holes. Using both hands, hook your stronger fingers (one per hand) into the two holes. Using your thumb, press down on the center spindle while pulling up on the two holes to lift the platter off the spindle.
The platter is a part of the direct-drive motor. It’s why you need to push on the spindle when you lift the platter, so the spindle lets go of the platter, and the platter will rise off the spindle and lower assembly.
After removing the spindle, you’ll notice a plastic cover over the electronic guts underneath. The cover is held on by several screws, which you will need to remove now that the platter is out of the way.
Under the plastic cover you’ve just removed, you will see a large circuit board, half of the direct-drive motor and some wiring, and other such guts. In addition, there will be a half-inch edge around where you screwed off the plastic cover, and you will see dust and dirt around this edge.
Using your sponge, soak with your warm soapy water and wring out exceptionally thoroughly. Next, use the moist sponge to wipe out the dirt around the circumference of the edge you have exposed.
Using your cotton swab sticks and some rubbing alcohol, moisten the cotton with the alcohol, but squeeze it out, so it’s again moist but won’t drip. Use this to get into the fine edge that would be under the edge of your platter. Also, use the swabs to clean any dust that has accumulated around the circuit board. Do not touch the circuit board at all, though.
Once clean, do a once-over with a clean and dry cotton swab stick. It will pick up any last bits of dust or moisture left behind to ensure a clean under-platter.
You can use warm soapy water and a soft cloth to clean the plastic cover after removal. Then you can dry it properly and ensure it’s dry before reinstallation.
Reinstall the circuit cover and the platter.
Main Turntable Body
Treat the main turntable body as you would the cover. A moist, soft cloth and a wipe down for dust is likely all that is required.
Use extra caution around knobs or the slider. It would be best if you used the cotton swab sticks with rubbing alcohol in these areas. Rubbing alcohol ensures that it evaporates and that you don’t short anything out by leaving the water. Remember, you don’t need to use alcohol, but it’s better for electronics than water.
Tonearm Assembly
The turntable tonearm assembly is a bit more complicated to do a thorough cleaning. My advice is unless it is severely dirty, I would avoid disassembling. I’ve used the same turntables for years and never had to disassemble the actual tonearm assembly, although I have replaced one. Typically, you can maintain these assemblies with some TLC and delicate care. Here’s how I go about it:
I use mostly just cotton swab sticks and rubbing alcohol to clean the tonearm assembly (anti-skate, balance, and arm). Due to the delicate tiny cracks and crevices, it can be difficult to access, so I ensure a moist (but not enough to drip) cotton swab using rubbing alcohol.
Go over the edge carefully to remove any dust accumulated around the rotating unit’s perimeter. Remember that there are electronics underneath, so be cautious and never use anything wet that could drip.
Clean all the little nooks and crannies around the anti-skate, balance, and counterweight parts of the tonearm assembly. Use the cotton swab sticks because not much else will fit in many spots without you jamming it in. Doing this could cause liquid to drip out of the sponge or cloth, so stick to using the cotton swab sticks for this part.
As I don’t recommend disassembly (you need to take the body apart to get at the inside workings of the tonearm assembly), it shouldn’t be too difficult to clean. It’s just a bit time-consuming due to all the small spots you need to try to access in and around the tonearm assembly.
Lastly, take your stylus cleaning brush and gently brush the needle from back to front. You will only need to brush it a few times to remove any dust. Do not try to wash or wipe with your wet cloth or sponge.
To clean any further, you would need to disassemble your turntable seriously. Although I’ve done this a few times, I don’t recommend you disassemble any more than the cover under the platter, or you can seriously damage components. Having to replace an expensive part because of a failed attempt at cleaning is a poor way to reward yourself for the hard work of cleaning your appliance.
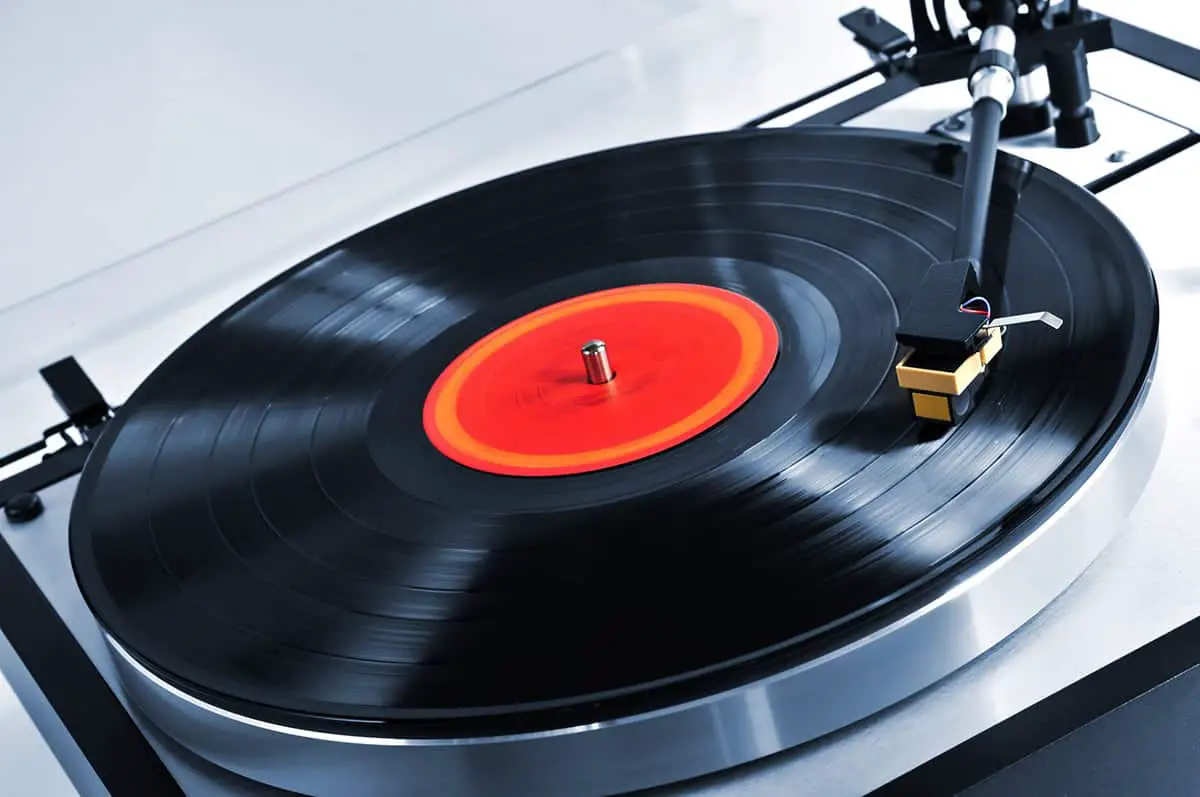
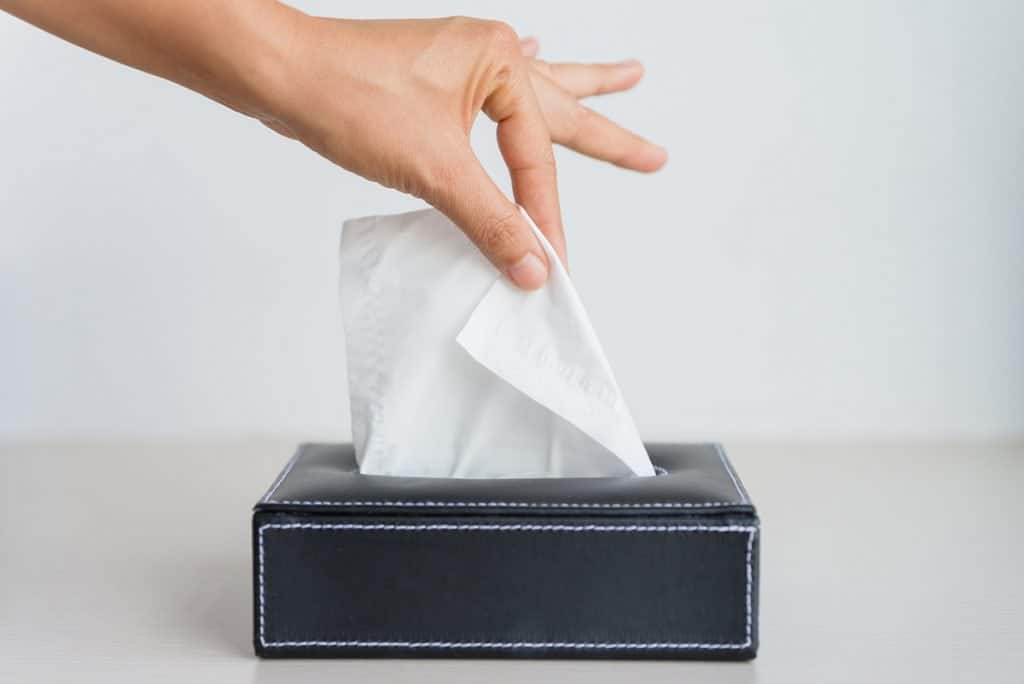


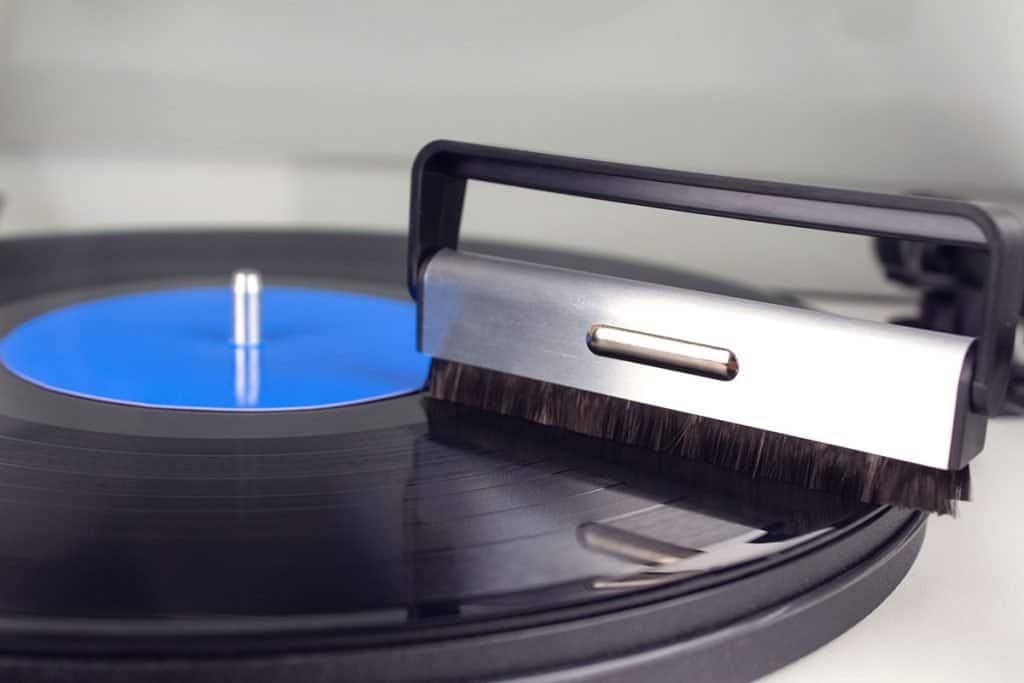

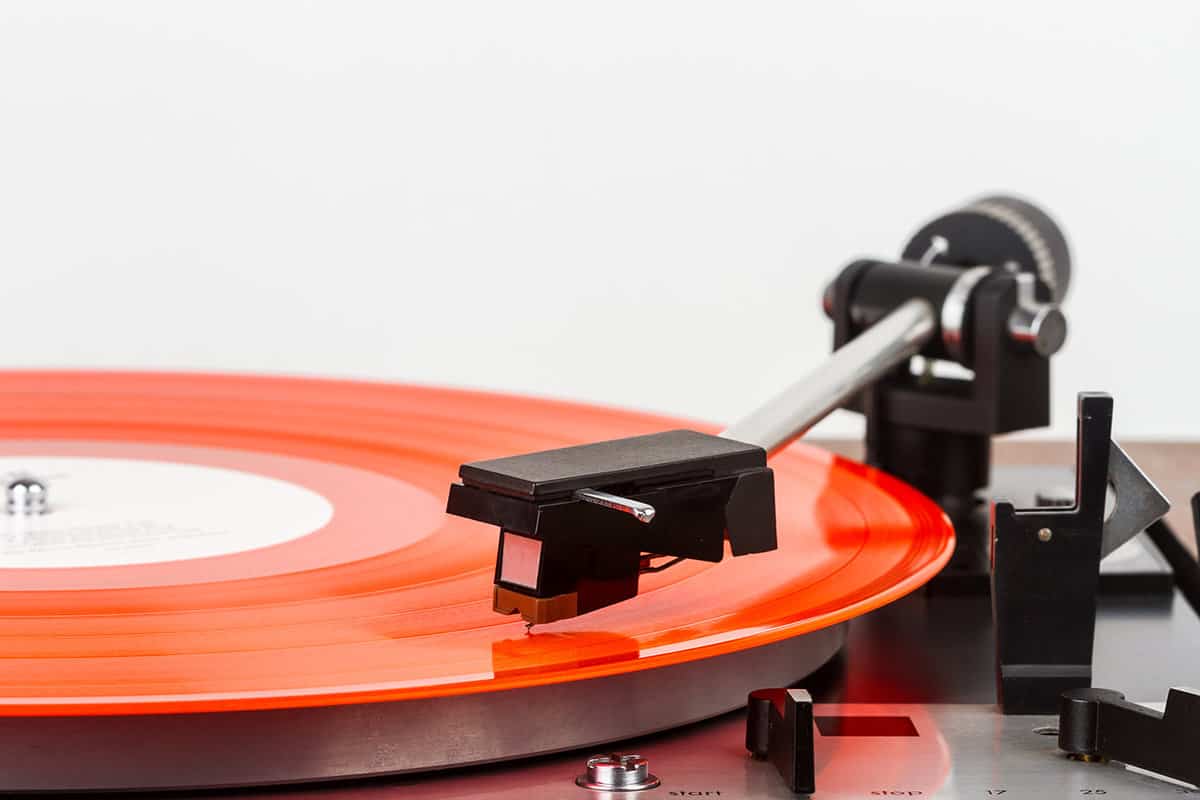
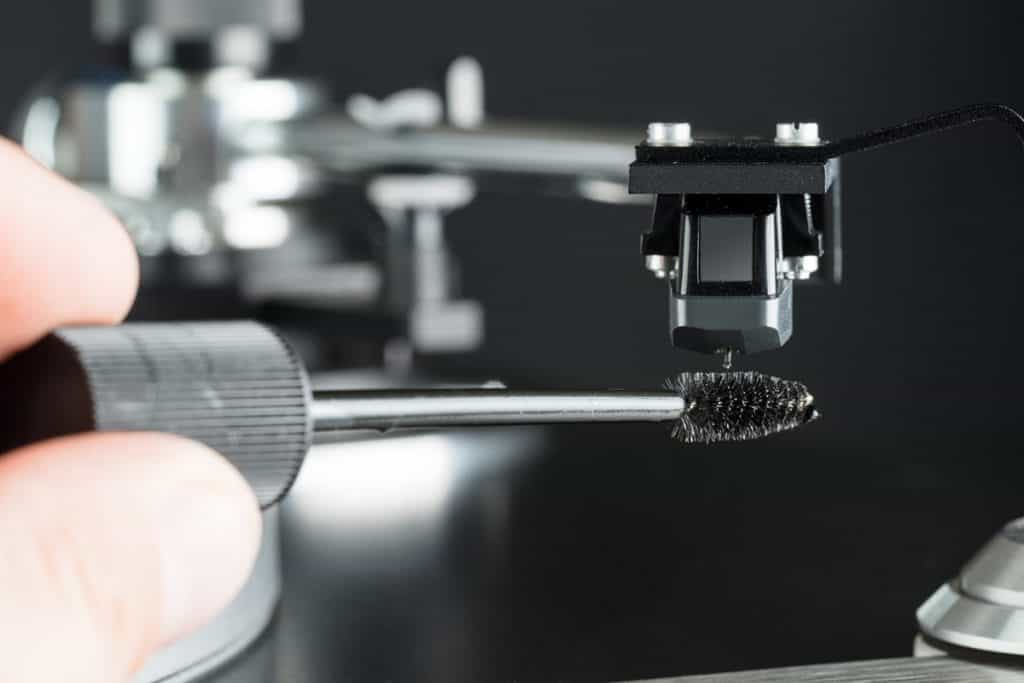
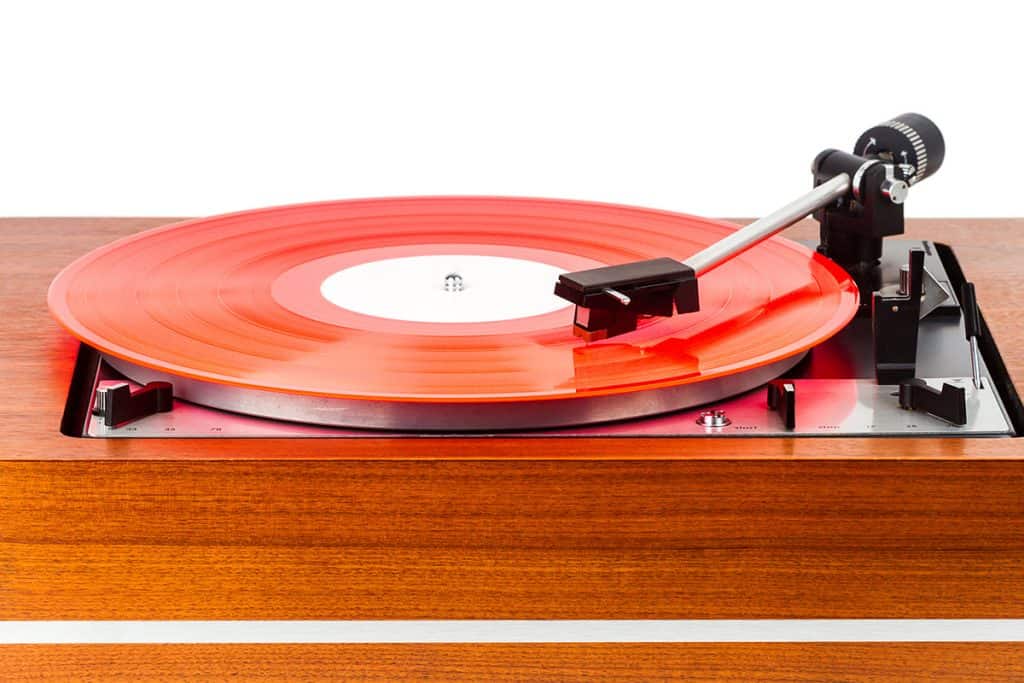
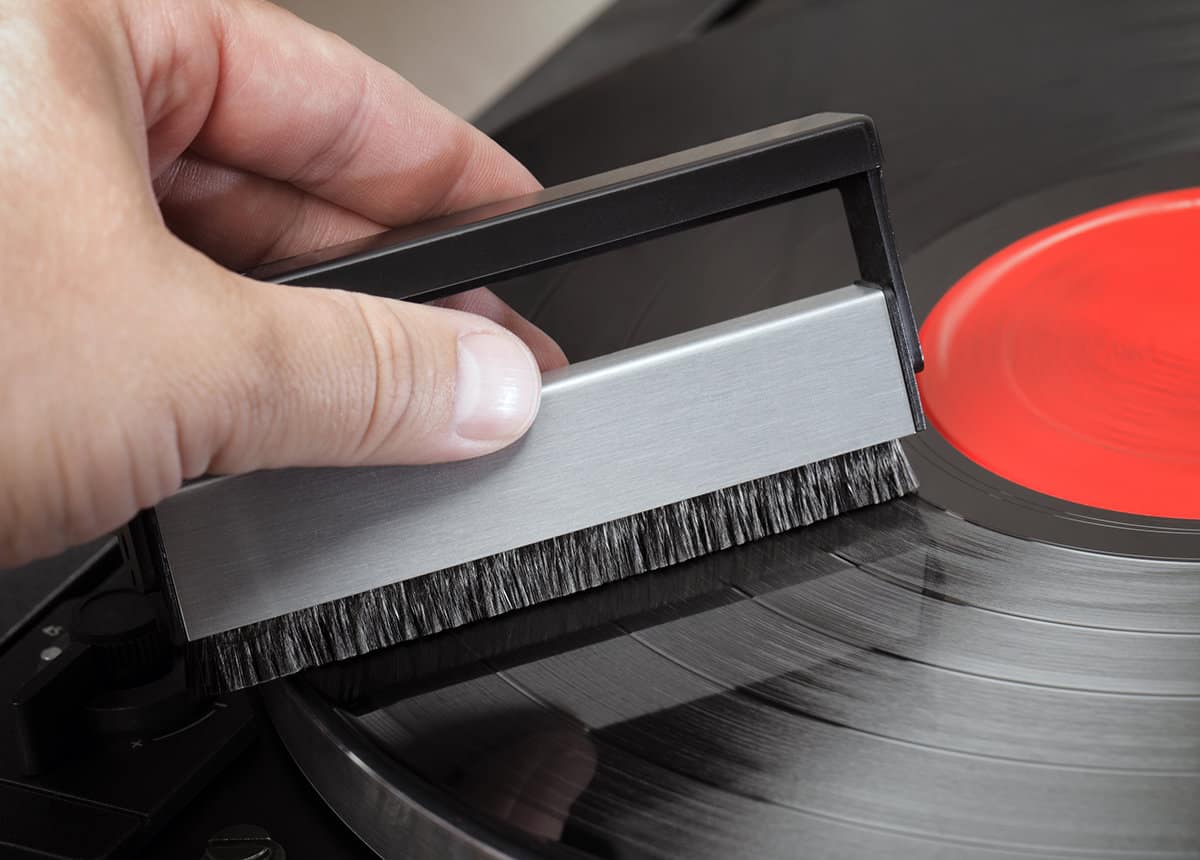
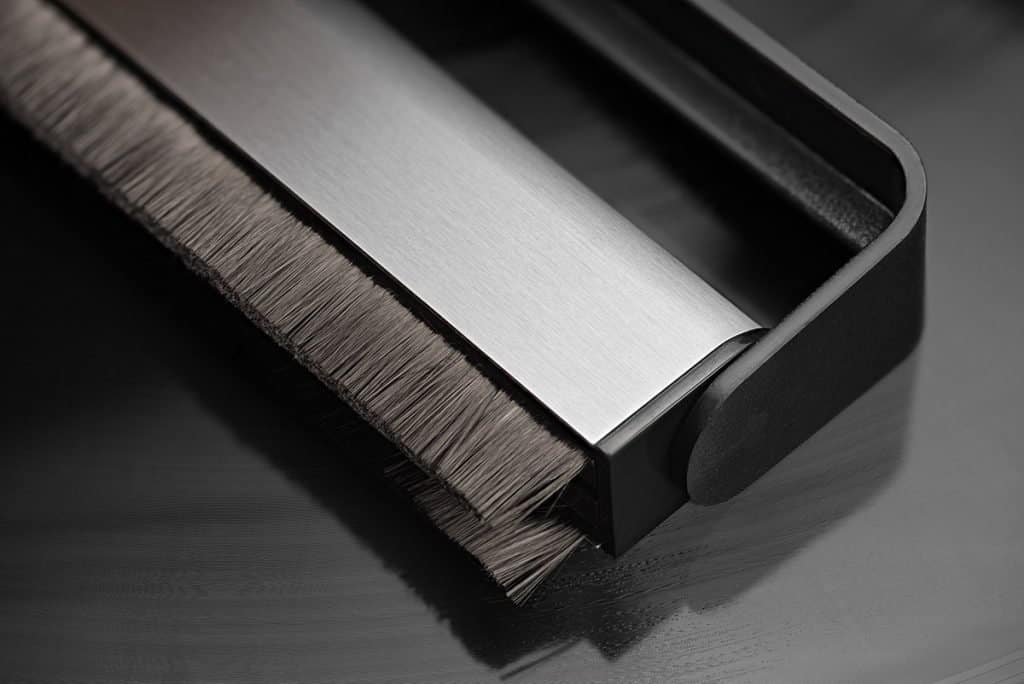

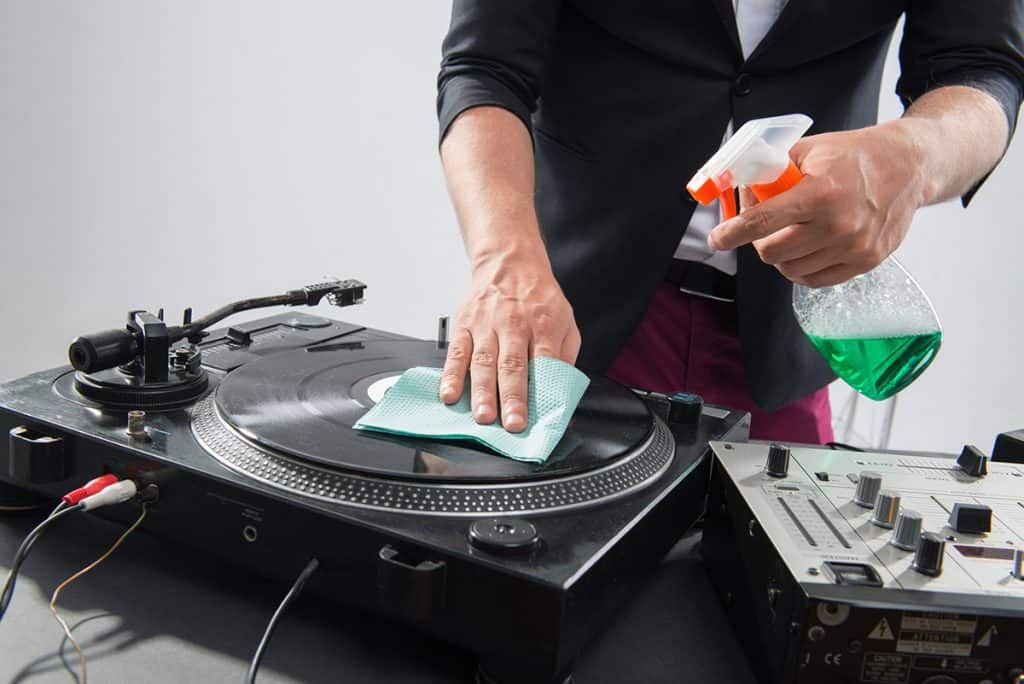


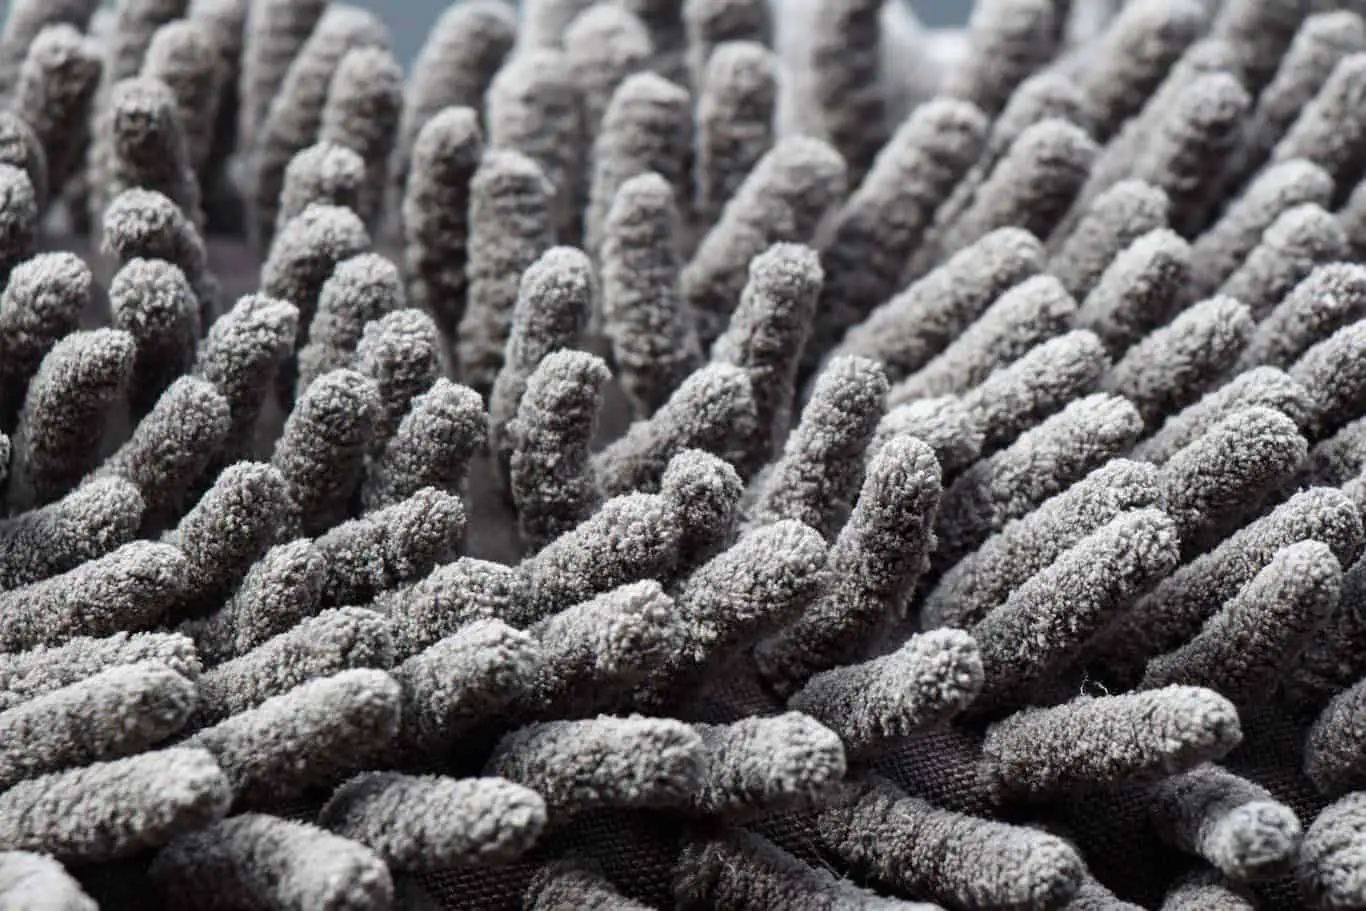
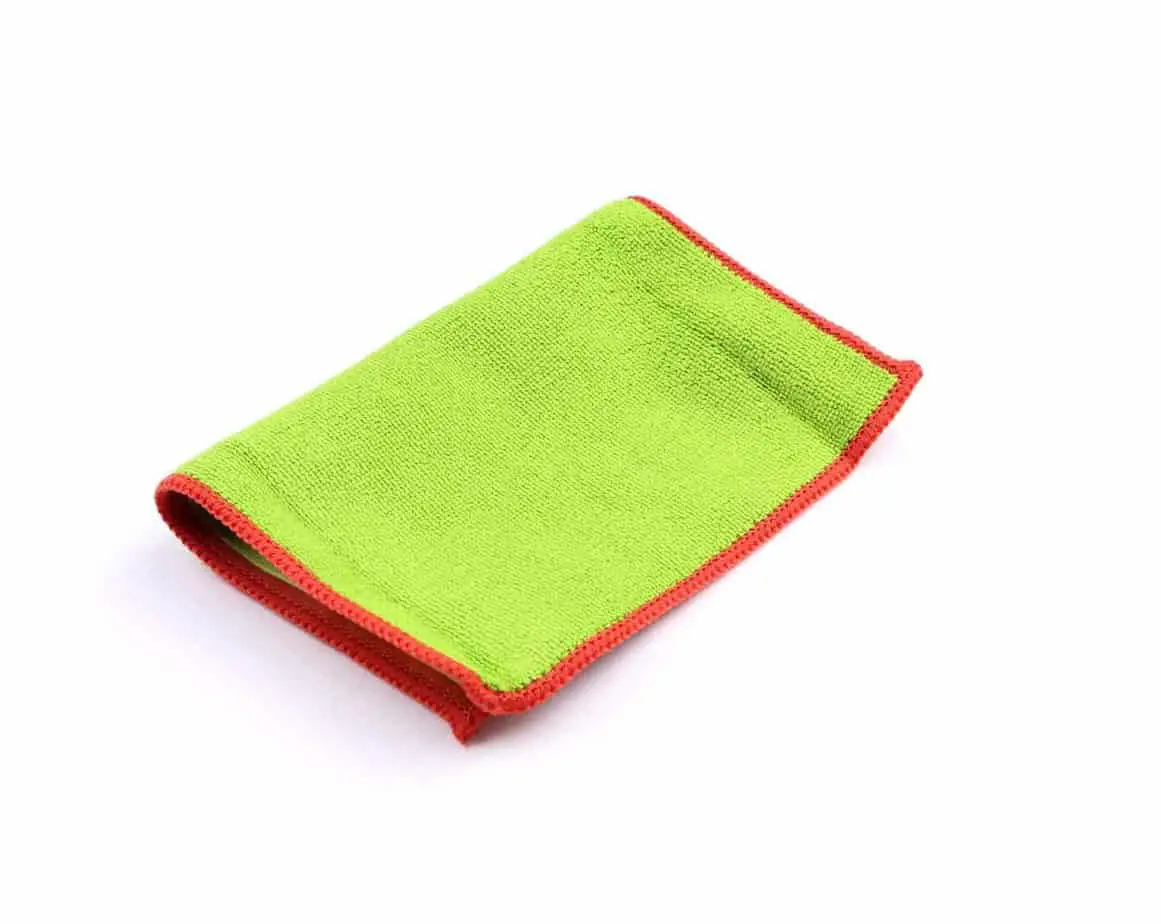
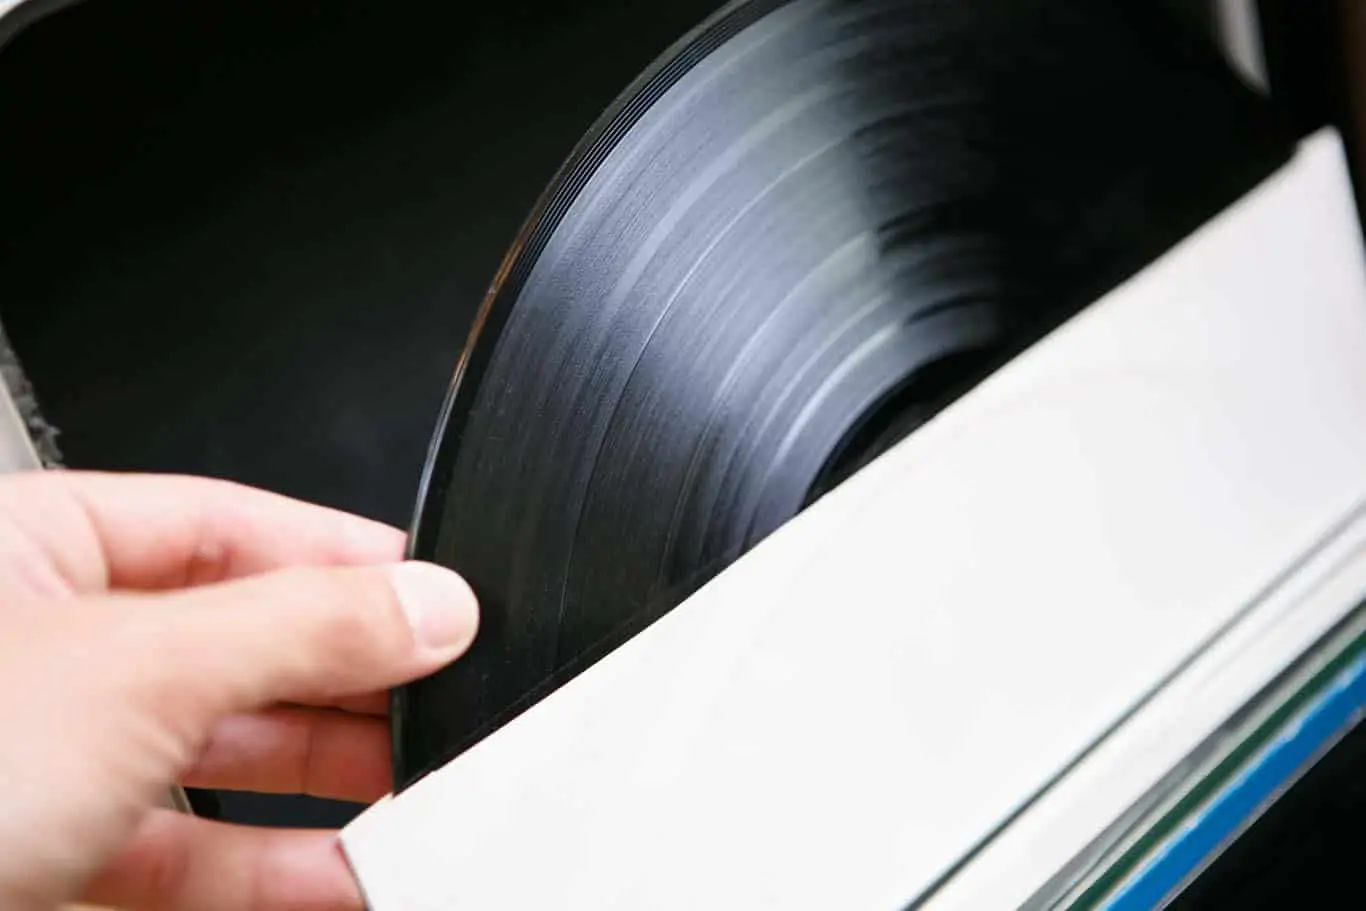
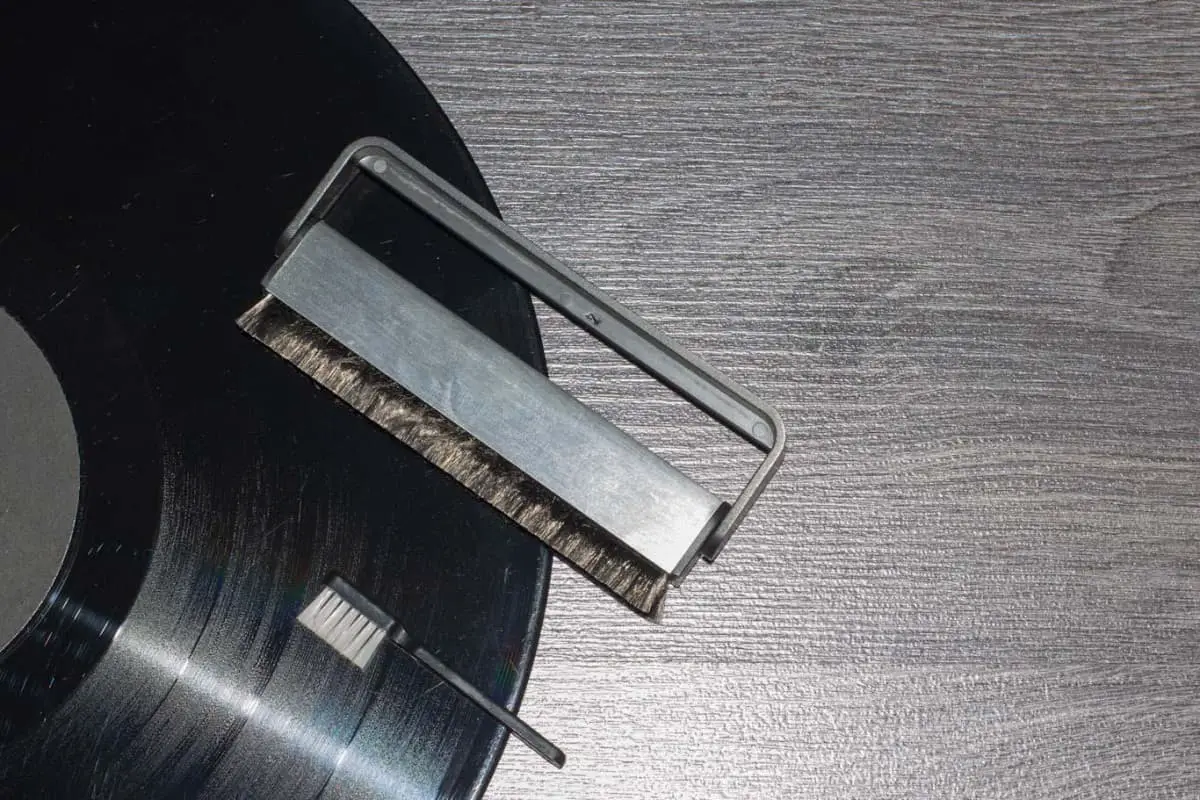
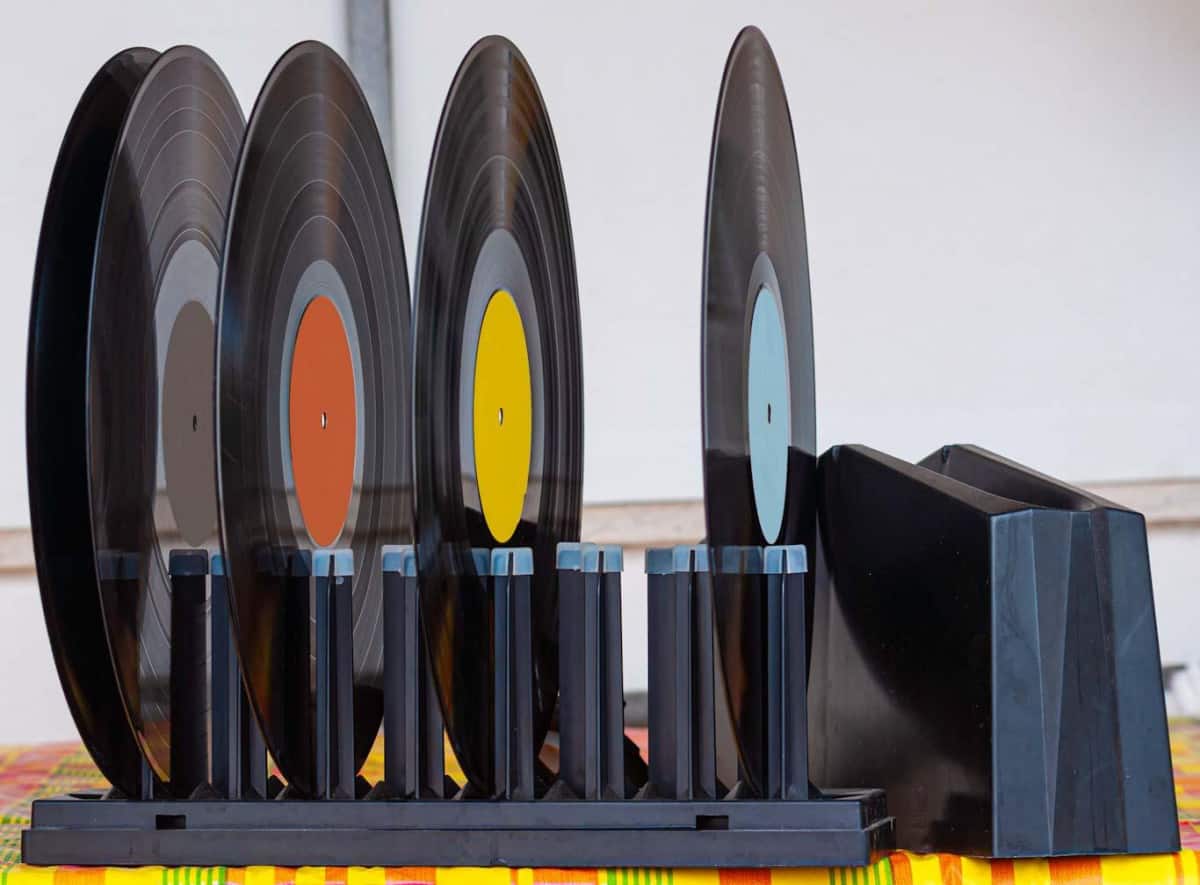
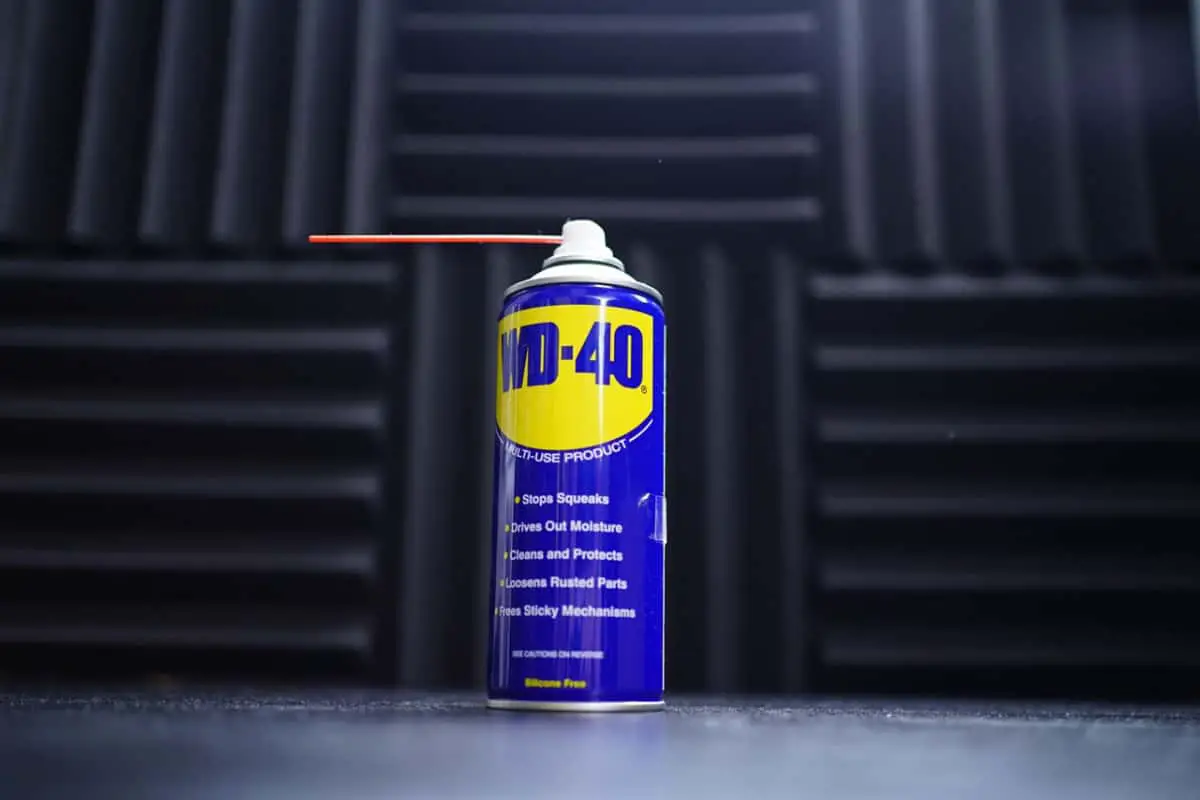
![WD-40 - 490224 Multi-Use Product with SMART STRAW SPRAYS 2 WAYS, 14.4 OZ [2-Pack]](https://m.media-amazon.com/images/I/51zKbE6lzrL._SL500_.jpg "WD-40 - 490224 Multi-Use Product with SMART STRAW SPRAYS 2 WAYS, 14.4 OZ [2-Pack]")
![WD-40 - 490224 Multi-Use Product with SMART STRAW SPRAYS 2 WAYS, 14.4 OZ [2-Pack]](https://m.media-amazon.com/images/I/51p7+YwdI9L._SL500_.jpg "WD-40 - 490224 Multi-Use Product with SMART STRAW SPRAYS 2 WAYS, 14.4 OZ [2-Pack]")