Category: Turntables

  • 10 Vintage Amplifiers for Turntables We Bet You Would Like

    10 Vintage Amplifiers for Turntables We Bet You Would Like

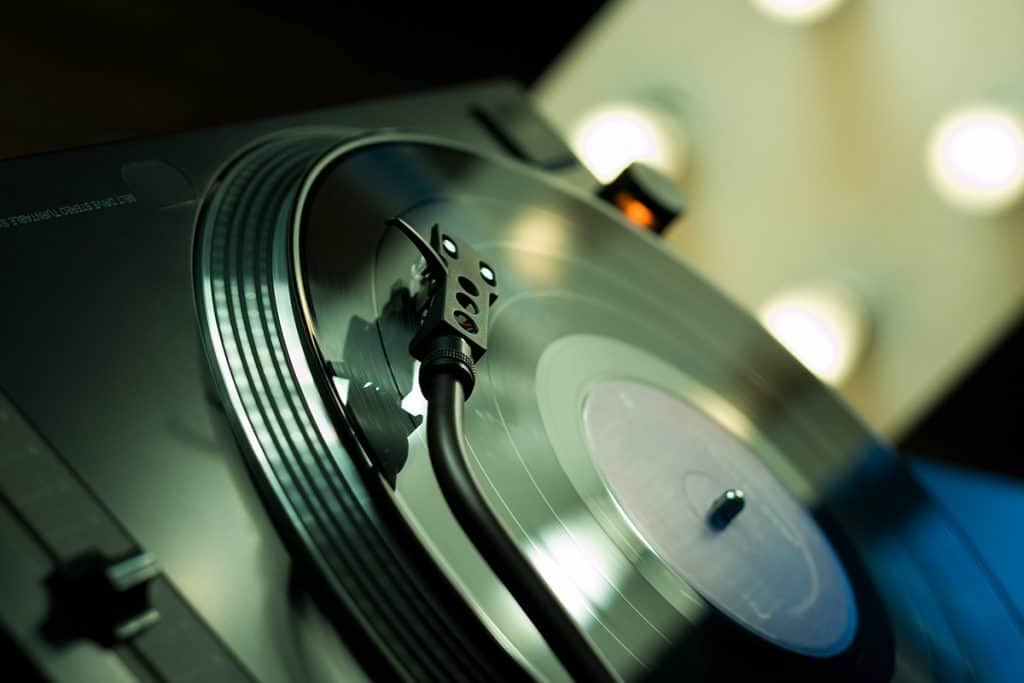
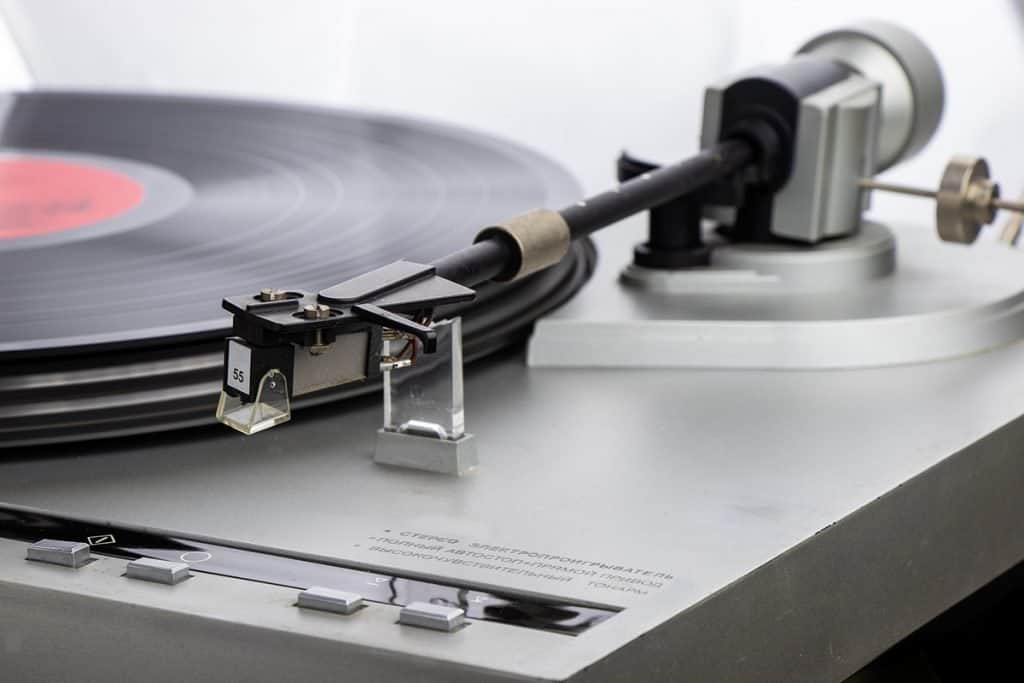
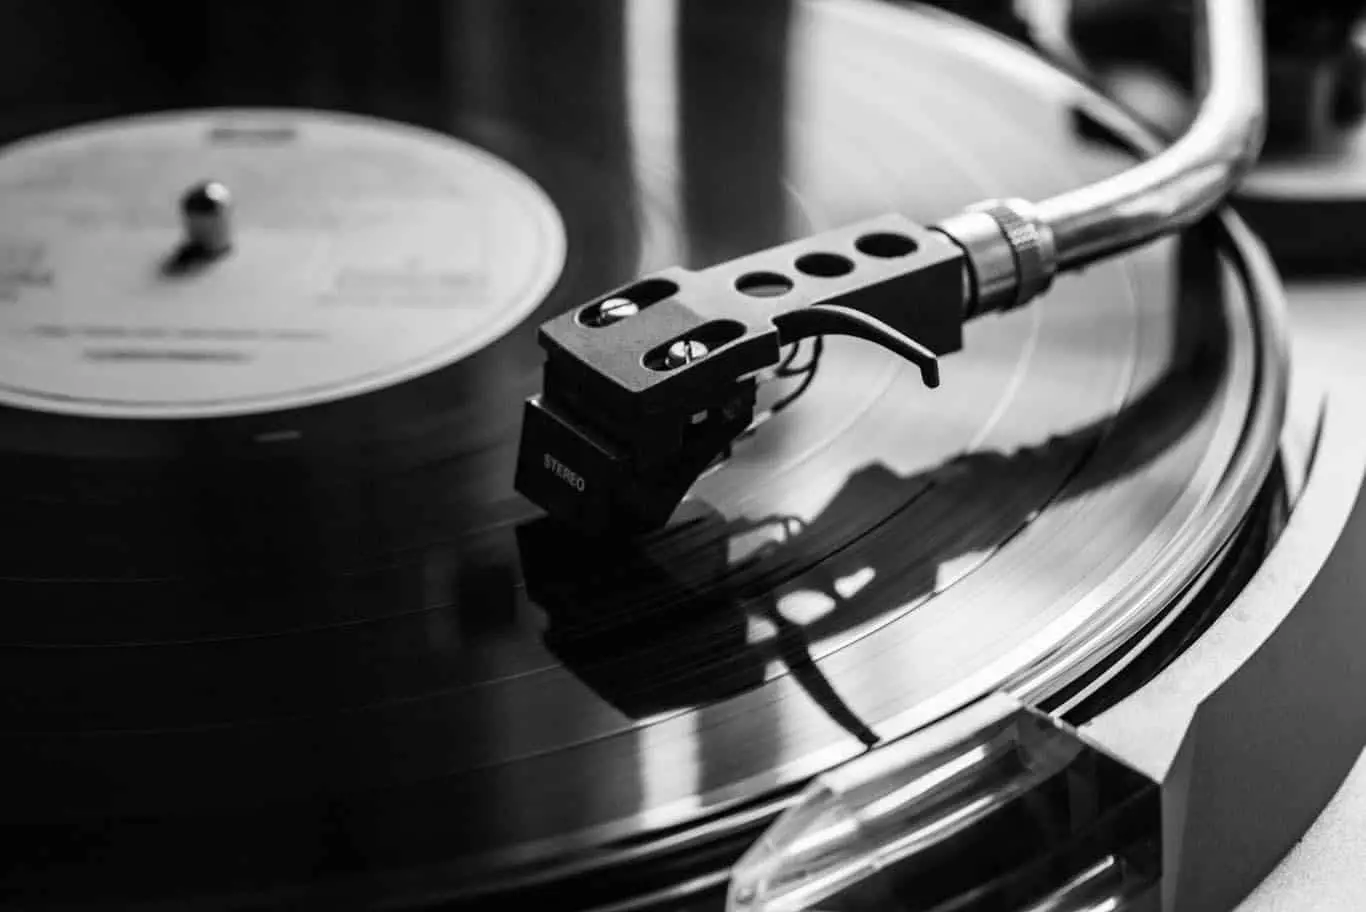
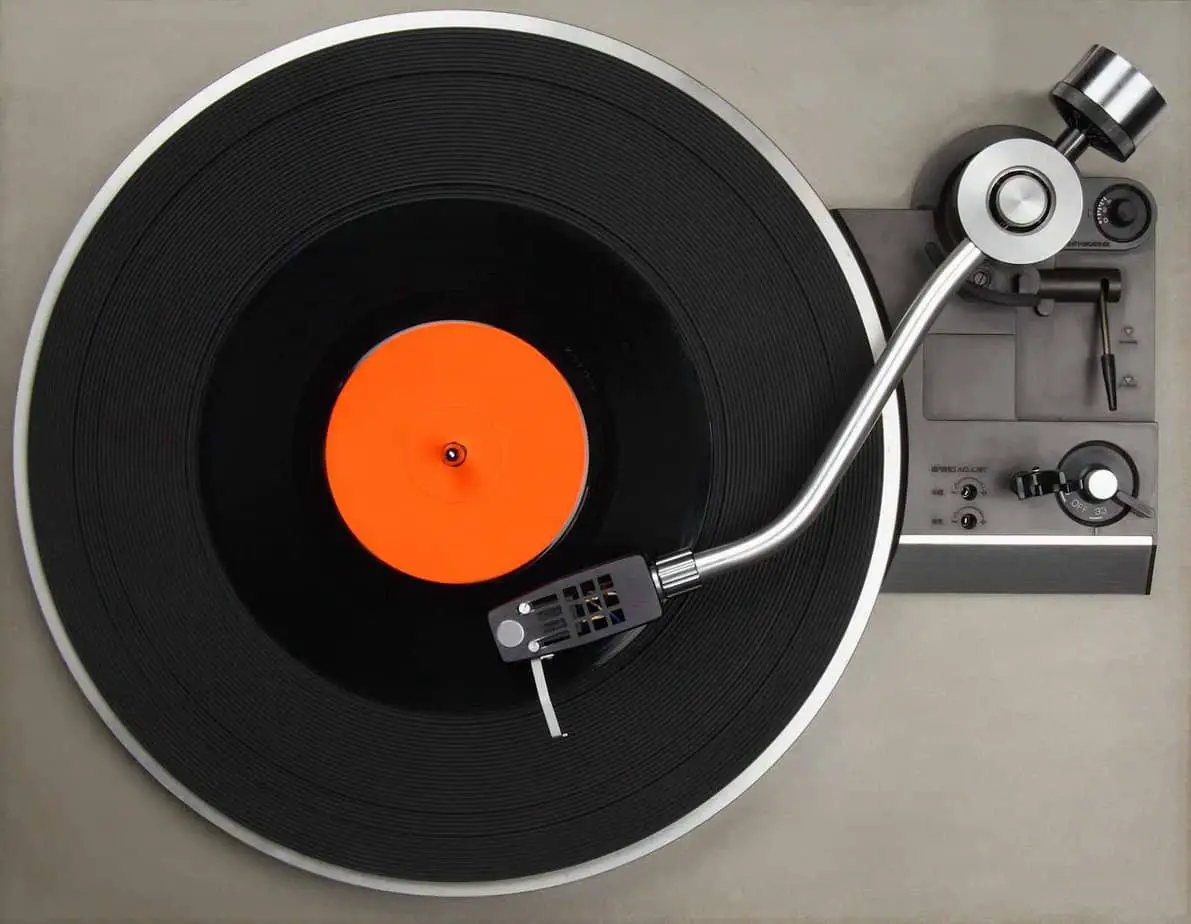
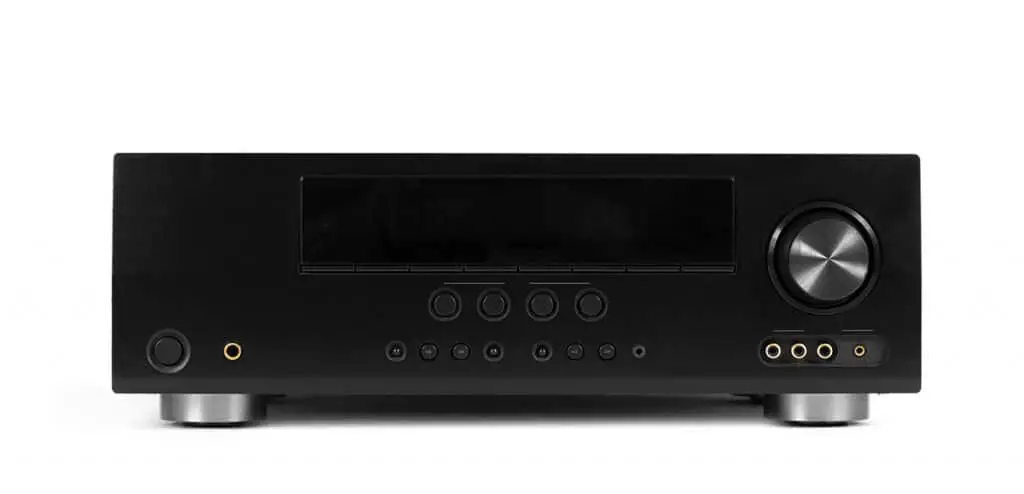
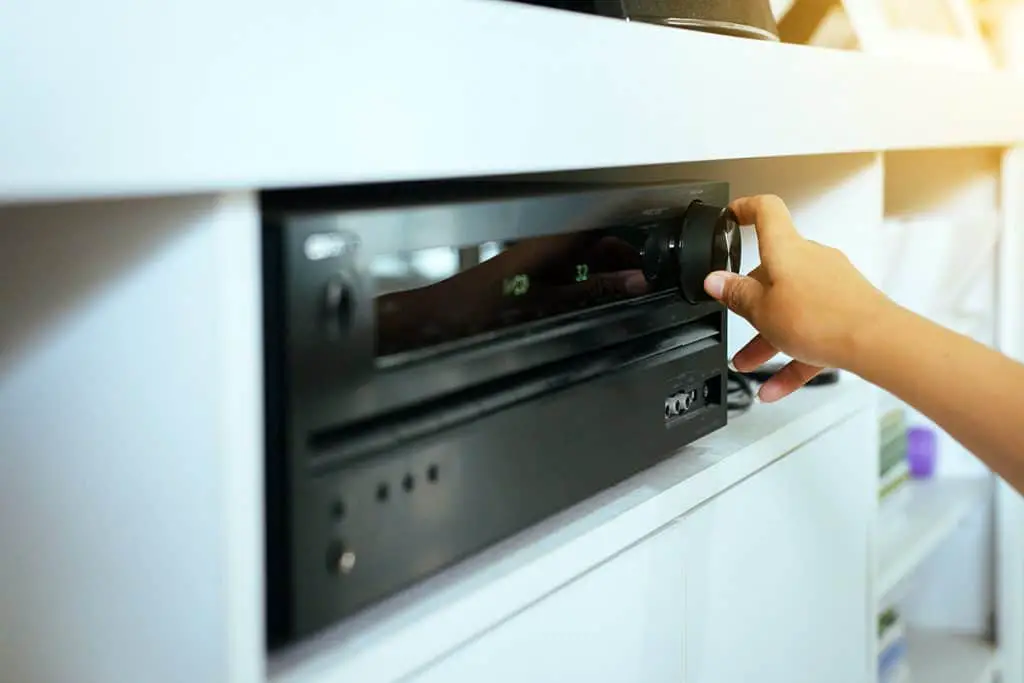
    If you own or are looking for a turntable, it means that you appreciate a good, smooth sound, and you enjoy high-quality sound systems. It also means that you need an amplifier, in which case you might be considering choosing a vintage one. So what are the best vintage amplifiers for you out there?

    Here’s a list of some vintage turntable amplifiers that are generally considered to be among the best.

    1. NAD 3020
    2. Marantz 2270
    3. Pioneer SX-1250
    4. Yamaha CR-1020
    5. Sugden A21
    6. Mission Cyrus 2
    7. A&R A60
    8. Audiolab 8000A
    9. Creek CAS4040
    10. Naim NAIT

    This article elaborates on the features that make these vintage amplifiers the best choice for your turntable. We’ll also give you some useful points to consider before choosing a vintage amplifier. 
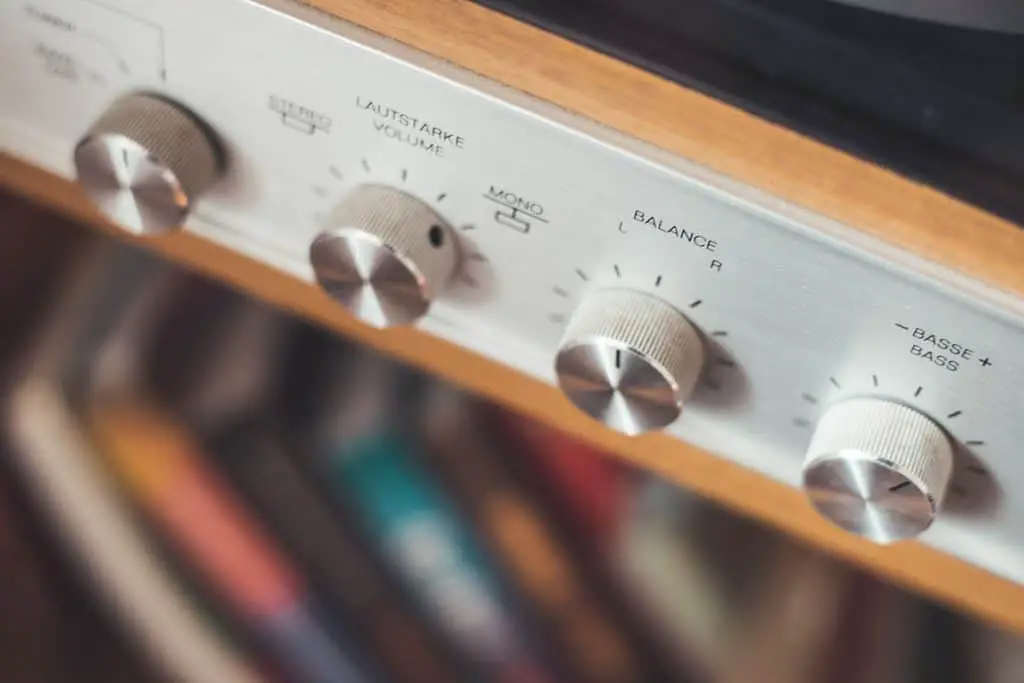
    Factors To Consider

    Amplifiers are essentially devices that boost (or indeed, amplify) the power of a signal. You need an amplifier to have a strong enough signal to drive the speakers. 

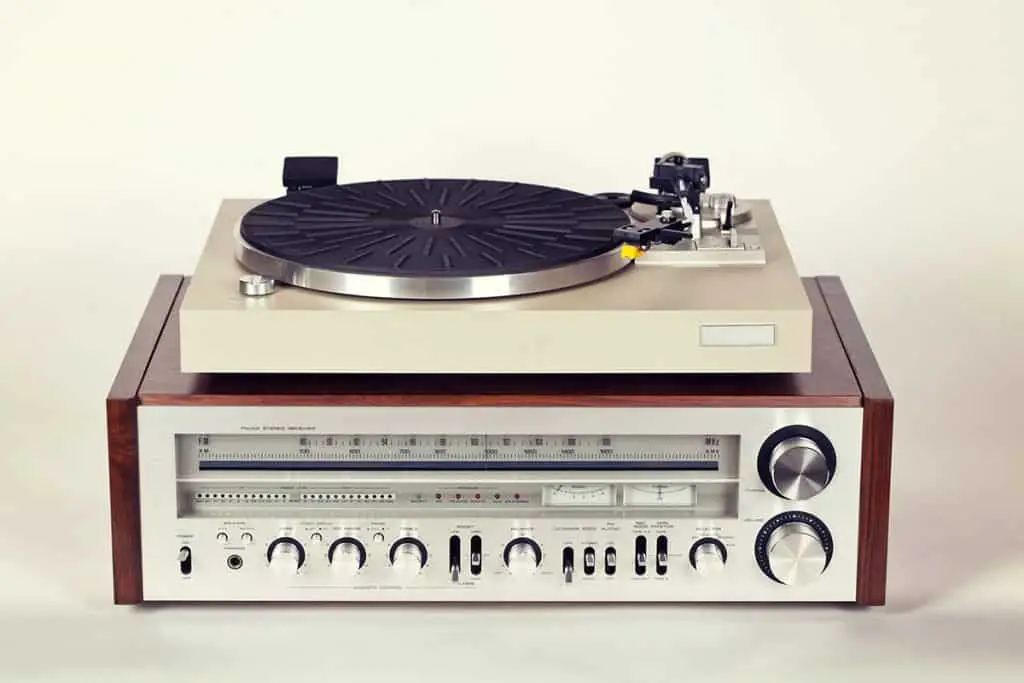
    An amplifier with an AM/FM radio tuner built-in (an integrated amplifier) is called a receiver. In order to choose the option that would best suit your needs, you should keep in mind where your priorities lie when looking for an amplifier.

    Some important amplifier features that you might want to consider before making an expensive purchase are:

    • Power (measured in Watts): the maximum power that an amplifier can extrude.
    • Headroom: the extent to which an amplifier can reproduce sudden, very loud sounds.
    • Distortion: anything that degrades the signal and, consequently, the sound’s quality.
    • Output Impedance: the amount of restriction of a speaker to the power of an amplifier.
    • Frequency Response: the extent to which the output of the amplifier is affected by the frequency of the signal received by the input terminal.

    All of these features contribute to the quality of the sound and the general experience of  enjoying music recordings. Once you know the characteristics of an amplifier, all you need is to review your options. Nowadays, a lot of audiophiles choose vintage amplifiers, and not just because they’re cool and interesting to look at.

    New isn’t always better when it comes to hi-fi. There are a lot of vintage amplifiers that not only work perfectly but are also aesthetically pleasing while being reasonably priced. Having said that, before you choose to go the vintage route, you need to make sure that the amplifier is in good condition and safe to use.

    So what are the best vintage amplifiers for turntables out there?

    Best Overall: NAD 3020 

    Specifications:

    • Power output: 20 watts per channel into 8Ω (stereo)
    • Frequency response: 10 Hz to 70 kHz.
    • Total harmonic distortion: 0.02%
    • Input sensitivity: 2.5mV (MM), 150mV (line)
    • Signal to noise ratio: 75 dB (MM), 110 dB (line)
    • Dimensions: 420 x 96 x 240 mm (17 x 4 x 9 in)
    • Weight: 5.26 kg (11.60 lbs)
    • Year: 1978
    • Price: c.$150

    NAD 3020 is probably one of the most classic and well-known vintage amplifiers. It was a game-changer for amplifiers in many ways, and it became one of the best-selling integrated amplifiers.

    The power output of NAD 3020 is among the lowest and yet it can outperform speakers with a much higher power level. This is thanks to the design of the power supply system that allows it to perform exceedingly well with more complex speakers.

    NAD 3020 is the best example of a high-quality budget amplifier. The sound is soft and sweet, and the bass is incredible. These qualities also make it ideal for those buying an amplifier for the first time who want to experience its benefits without making a risky investment. 

    This amplifier has a notable feature called “Soft Clipping,” which limits the output of the amplifier in cases when it’s being pushed to higher volume levels. This way, the sounds stay cleaner and softer, avoiding distortion.

    It’s hard to find better features and value when it comes to the under $200 price point, this is why the NAD 3020 takes the best overall title.

    Marantz 2270 Stereo Receiver

    Specifications:

    • Power output: 70 W per channel into 8Ω (stereo)
    • Frequency response: 7Hz to 50kHz
    • Total harmonic distortion: 0.3%
    • Input sensitivity: 1.8mV (MM), 180mV (line)
    • Speaker load impedance: 4Ω to 16Ω
    • Dimensions: 17-21/64 x 5-25/64 x 14 inches (356 mm)
    • Weight: 38.5 lbs (174.6 kg)
    • Year: 1973
    • Price: $550 – $1300

    Marantz is well known for building some of the finest pieces of hi-fi, especially its 2200 series of receivers. Audiophiles regard Marantz receivers as some of the best, being able to go against even modern amps nowadays.

    Marantz 2270’s sound is rich, full, and warm, ideal especially for orchestral recordings; reviewers say it feels like it fills the whole room. The design is unique and quite memorable with the blue backlit dials and the aluminum faceplates. Its combination of features make it ideal for more experienced users and collectors looking to find the finest options the market has to offer.

    When it comes to the price, the Marantz 2270 is among the more expensive Amplifiers, which makes it a true investment piece. You might find one in pretty good condition at around $550, but others are valued at more than $1200. While it might be costlier than others, it’s relatively easy to find replacement parts if you would like to service it..

    Pioneer SX-1250 Stereo Receiver

    Specifications:

    • Power output: 160 watts per channel into 8Ω (stereo)
    • Frequency response: 10Hz to 50kHz
    • Total harmonic distortion: 0.1%
    • Speaker load impedance: 4Ω (minimum)
    • Dimensions: 556 x 186.5 x 464.5 mm (22 x 7.3 x 18.3 in)
    • Weight: 29.2 kg (64.4 lbs)
    • Year: 1976
    • Price: $800 – $3700

    A beast from the 1970s, the Pioneer SX-1250 is a high-quality receiver with plenty of power and a sleek, vintage design. The sound is clear and detailed. The sound quality is superb, and the wood-side panels with the silver faceplate make this receiver a classic. It’s quite large and heavy, a testament to the tendency of manufacturers’ wattage wars at the time for big, powerful amps.

    The price varies, but it’s possible to find it on sale. One downside is that some of them need restoration and new parts, because at the moment they’re more than 40 years old. 

    The good news is that finding Pioneer SX-1250 parts in decent condition isn’t as challenging as you may think. 

    However, you can also find some options in perfect condition, which are reasonably much more expensive.

    Yamaha CR-1020

    Specifications:

    • Power output: 70 watts per channel into 8Ω (stereo)
    • Frequency response: 10Hz to 100kHz
    • Total harmonic distortion: 0.05%
    • Input sensitivity: 2mV (MM), 120mV (line)
    • Signal to noise ratio: 81dB (MM), 100dB (line)
    • Output: 120mV (line)
    • Speaker load impedance: 4Ω to 16Ω
    • Dimensions: 540 x 167 x 415 mm (21.3 x 6.6 x 16.3 in)
    • Weight: 18.8 kg (41.4 lbs)
    • Tuning range: FM, MW
    • Year: 1977
    • Price: $800-$1200

    Yamaha CR-1020 was introduced in the late 1970s and to this day is regarded as a great, high-quality piece of hi-fi. It’s known for the excellent quality of sound as well as the famous

    “loudness” dial that Yamaha amplifiers were known for at the time.

    Although modest in terms of power, the CR-1020 has a full, clean, and detailed sound.

    The bass is impressive, and the drums sound incredibly full. You might like the loudness control dial, which gives you a bass boost at low volume.

    The CR-1020 is particularly good-looking and unique compared to most amplifiers. Its silver fronts with analog power meters and the vintage wood side panels give it a distinct appearance.

    Like the Marantz, this amplifier can also be quite expensive compared to most vintage amplifiers, though the price will depend on the condition. You can find CR-1020s in good condition at $800 to $1200.

    Sugden A21

    ​Specifications:

    • Power Output: 23 Watts into 8 Ohms
    • Frequency Response: +/-1dB 10Hz-20kHz
    • Signal to Noise: 70dB (MM), 70dB (ceramic), 80dB (line)
    • Phono Input Sensitivity: 3mV/mm, 0.2mV/mc for max. output
    • Dimensions: 393 x 127 x 228 mm (15.5 x 5 x 9 inches)
    • Gross Weight: 11 kg (24 lbs)
    • Year: 1969
    • Price: c. $200

    The Sugden A21 is another high-quality amplifier dating back to the late sixties. Nowadays, you might recognize the name from some later models, but the one I want to talk about is the 1969 one.

    The Sugden A21 provides a sharp, clear sound with a lot of depth to it and remarkable bass quality. Although it’s rated at a much lower power level than others, it can hold its own among competitors. The Sugden A21 is relatively small compared to a lot of amplifiers. The design is simplistic but elegant.

    The prices at which you can find the Sugden A21 are pretty reasonable, especially compared to other vintage amplifiers. One disadvantage is that it uses DIN connectors, which can create problems with connectivity in the long run.

    Mission Cyrus 2

    Specifications:

    • Power output: 50 watts per channel into 8Ω (stereo)
    • Frequency response: 1Hz to 50kHz
    • Total harmonic distortion: 0.003%
    • Input sensitivity: 0.2mV (MC), 3mV (MM), 50mV (line)
    • Signal to noise ratio: 75dB (MC), 84dB (MM), 86dB (line)
    • Dimensions: 85 x 215 x 345 mm (3 x 8 x 14 in)
    • Weight: 5 kg (11 lbs)
    • Finish: black / grey
    • Year: 1984
    • Price: c. $350

    Cyrus 2 is a stylish amplifier from the 1980s that immediately catches your eye. It features a significant improvement from its predecessor, Cyrus 1, with increased headroom and power.

    The sound of Cyrus 2 is lively, powerful, and quite precise. It performs well enough to compare with modern amplifiers. The case has a unique look with incredible paintwork. All these features come at a pretty reasonable price point, which means the amplifier will deliver a lot of value for your investment..

    One major advantage of Cyrus 2 is the fact that the company is still committed to servicing even the earliest models in order to bring them back to life. Therefore finding parts and maintenance services is significantly easier than with other alternatives. 

    A&R A60

    Specifications:

    • Power output: 40 watts per channel into 8 ohms (stereo)
    • Frequency response: 20Hz to 20kHz
    • Total harmonic distortion: 0.2%
    • Input sensitivity: 0.1mV (MC), 2mV (MM), 100mV (line)
    • Signal to noise ratio: 63dB (MC), 70dB (MM), 85dB (line)
    • Dimensions: 450 x 255 x 60 mm (18 x 10 x 2 in)
    • Weight: 5 kg (11 lbs)
    • Year: 1977
    • Price: c. $70

    The A&R A60 is another affordable amplifier from 1977. It’s an excellent classic with good

    sound and an impressive built-in phono stage.

    The sound is smooth and powerful without being too harsh or abrasive. The bass is superb, although it doesn’t exactly pack a punch the way some contemporaries in the same price range do. The A60 impresses with an eye-catching, sleek, and retro design when it comes to design.

    The A&R A60 is very affordable; you may find earlier versions with DIN sockets at around $30, or you can spend a little more for later, more sophisticated versions. Either way, it can be an excellent starting point from which you can move onto more sophisticated models. Therefore if you’re looking to buy your first amplifier, this might be the ideal choice.

    Audiolab 8000A

    Specifications:

    • Power output: 60 watts per channel into 8Ω (stereo)
    • Frequency response: 20Hz to 20kHz
    • Total harmonic distortion: 0.05%
    • Input sensitivity: 0.11mV (MC), 2mV (MM), 100mV (line)
    • Signal to noise ratio: 75dB (MC), 78dB (MM), 80dB (line)
    • Speaker load impedance: 4Ω to 16Ω
    • Dimensions: 445 x 74 x 335 mm (18 x 3 x 13 in)
    • Weight: 7.6 kg (16.8 lbs)
    • Year: 1985
    • Price: c. $300

    Audiolab 8000A is a powerful, high-quality amplifier with a clear and cohesive sound. It first came out in the 1980s, but it was produced by Audiolab until the 90s, so you may find newer versions.

    The sound of 8000A is very powerful and dynamic, although it can get harsh if pushed too hard. The design includes many exciting features, and the tone controls are excellent.

    A disadvantage of 8000A is that sometimes the quality of connections and sockets

    might be poor, and it might need servicing.

    Creek CAS4040

    Specifications:

    • Power output: 30 watts per channel into 8Ω (stereo)
    • Frequency response: 20Hz to 20kHz
    • Input sensitivity: 2.5mV (MM), 250mV (line)
    • Signal to noise ratio: 79dB (MM), 79dB (line)
    • Dimensions: 420 x 60 x 185 mm (17 x 2 x 7 in)
    • Weight: 4.4 kg (9.7 lbs)
    • Year: 1983
    • Price: c.$90

    This amplifier is known for its very soft and smooth sound. It came out in the early 1980s, and even when it was introduced, it was presented as a high-quality amplifier at a more reasonable price than most. For a budget amplifier, it was incredibly popular and managed to stand apart from the rest at the time.

    CAS4040 has a sweet musical sound, much smoother than most of its competition at the time. It is powerful and dynamic enough for its size. Some disadvantages of the original included a high level of distortion at times, which was then remedied in the subsequent units produced.

    You can find a CAS4040 at excellent prices nowadays, ranging from $150 to $400.

    Naim NAIT

    Specifications:

    • Power: 13 watts per channel into 8 ohms
    • Features: mute switch, tape monitor switch, Solid-state integrated amplifier
    • Inputs: one tape monitor, one MM phono input, two line-level inputs
    • Dimensions: 206 x 286 x 76 mm (8 x 11 x 3 in)
    • Year: 1984
    • Price: c.$860

    Naim Nait is probably one of the most legendary pieces of hi-fi of all time. Introduced in 1983, the Nait was the subject of many debates because of its unique sound and design. Decades later, it’s still considered a legend and a favorite among integrated amplifiers.

    Nait’s sound is strong and dynamic, despite the low power output. The tone is warm, and the bass is dry. Nait shines in the high range, smoothing the edges, but it can be harsher in the mid-range.

    The design of the Naim Nait is elegant and simplistic; it’s a small, black aluminum case. It’s pretty expensive compared to other 1980s amps, but its unique sound makes it worth the money.

    Price Comparison

    Vintage AmpPrice
    NAD 3020 c. $150
    Marantz 2270 $550 – $1300
    Pioneer SX-1250 $800 – $3700
    Yamaha CR-1020$800-$1200
    Sugden A21c. $200
    Mission Cyrus 2c. $350
    A&R A60$70 – $150
    Audiolab 8000Ac. $300
    Creek CAS4040c.$150-$400
    Naim NAITc.$860

    As you can see, the price ranges from $70 to $3700, which is not unusual because we’re talking about vintage amplifiers. You might find much lower or higher prices at a vintage store near you, but these are the prices you will most likely encounter.

    The cheapest options would be A&R A60, Creek CAS4040, NAD 3020, and Sugden A21. Even though they’re relatively inexpensive, that doesn’t mean they won’t perform at the same level as the most expensive ones. These cheap turntable amplifiers are smaller and more compact than the others, but they produce high-quality sound nonetheless.

    Power Comparison

    Vintage AmpPower
    NAD 302020 W per channel into 8Ω
    Marantz 227070 W per channel into 8Ω
    Pioneer SX-1250 160 W per channel into 8Ω
    Yamaha CR-102070 W per channel into 8Ω
    Sugden A2123 W per channel into 8 Ω
    Mission Cyrus 2 50 W per channel into 8Ω
    A&R A6040 W per channel into 8Ω
    Audiolab 8000A60 W per channel into 8Ω
    Creek CAS404030 W per channel into 8Ω
    Naim NAIT13 W per channel into 8Ω

    The most powerful turntable amplifier is the Pioneer SX-1250, at 160 W, followed by Marantz 2270, Yamaha CR-1020 at 70, and Audiolab 8000A at 60.

    The greater the power output, the louder the amplifier will be. Plus the difference between a 50W amplifier and a 100W one doesn’t mean that the latter will be twice as loud as the former.

    Generally, an amplifier at 50 to 100 watts is good enough for a home setting. Anything more than that would be more suitable for bigger spaces.

    Best Vintage Turntable Amplifier

    The best vintage turntable amplifier I can recommend would be the NAD 3020, based on a combination of features and price. It’s a very high-quality amplifier that provides smooth, clear, and detailed sound. It might not have the biggest power output, but it can still outperform even new amplifiers, thanks to the impeccable craftsmanship with which it was designed.

    At around $150, it’s among the cheapest options you might have for vintage amplifiers for the kind of quality it offers. If you’re after power and are willing to spend whatever it takes, Marantz 2270, Pioneer SX-1250, and Yamaha CR-1020 are probably three other good options.

    If you’re looking for cheaper vintage amplifiers that still provide a perfect sound, you may check A&R A60 and Creek CAS4040.

  • Can A Turntable Be Used As A Record Player?

    Can A Turntable Be Used As A Record Player?

    Can a turntable be used as a record player? This article explores the differences between both devices and the possibility of using one instead of another.

    You can use a turntable like a record player. The difference in both devices has to do with their functions and not necessarily the quality of sound produced.

    Evidently, a record player needs a turntable to operate. The same also goes for the turntable in the same light, which requires a couple of additional pieces of equipment to function as a record player.

    What Is A Turntable?

    A turntable is a significant part of a record player. It is the part of the record player that holds the record and spins it.

    A turntable can also be a standalone device modeled to play records and transmit the signal to your speaker for amplification. The core components of a turntable are as outlined:

    • A plinth, which is the base of the turntable.
    • A platter, which is the spinning part.
    • A stylus, tonearm, and cartridge. These parts track and read the record.

    Since most turntable models do not have built-in speakers, you will have to connect the turntable to an amplifier or receiver to boost the sound before it can be transmitted loudly through speakers.

    You will also require a phono preamp to read the signal from the turntable and then send it to the amplifier.

    To simplify this, the stylus, also called the needle, runs in the grooves of the record, reading and transmitting the vibrations through wires found in the tonearm to the cartridge.

    The cartridge then reads that information and sends it to the phono preamp, turning it into sound through an external amplifier and then the speaker. The tonearm is the component that also holds the cartridge and stylus in place. (Source)

    In order to function effectively as a record player, a turntable will generally require external components for you to use them. It also affords you flexibility and range as you can endlessly customize and go for high-end external components.

    Benefits Of Owning A Turntable

    Superior Sound Quality

    While not every turntable is worth purchasing, some high-quality turntable models are explicitly designed to play vinyl records. You get what you pay for with a turntable when it comes down to quality.

    Adjustable

    A turntable comes with adjustable settings such as an anti-skate, tracking speed, and balance weights that you can fine-tune. Turntables are most preferred and exclusively used by electronic music lovers and DJs or hip-hop artists. (Source)

    Easy To Upgrade

    Ownership of a turntable is perfect for you for music lovers who like to build and tweak their sound systems and improve their sound setup.

    You can easily purchase replacement parts for the cartridge, needle, or tonearm. You can also upgrade with various external components of superior quality.

    Uniqueness

    Because you can customize and fine-tune your turntable with the best components that suit your taste, it means that the possibility of having the same setup as others is reduced.

    Each turntable user can build their device into precisely what is pleasing aesthetics and sound quality-wise.

    Disadvantages of Turntables

    Complicated

    Since you can purchase and build your turntable your preferred way, getting help with a difficulty or problem might be difficult, especially if you have to look online for a self-fix.

    Maintenance And Upkeep

    While maintaining your turntable might not be as frequent given that you follow the care guide and keep the turntable as clean as possible, you could have to deal with changing the components, primarily if you use the turntable frequently. Components like a belt or direct drive, depending on your turntable uses, and a cartridge will need to be oiled or replaced.

    Expensive

    Turntable units are generally more expensive than a record player unit, which doesn’t include the additional external components such as the phono preamp and speakers.

    What is a Phono Preamp?

    A phono preamp is an audio component that executes two main functions. The first function is to amplify the signal level from the turntable up to a certain level suitable for the standard receiver input on your system.

    The second function performed by the phono preamp is to apply the industry-approved and standard equalization curve RIAA (Recording Industry Association of America) to change the standard frequency adjustment recorded during the record cutting process. (Source)

    A phono preamp is pretty essential for a turntable; why? The signal produced by a turntable is feeble and much lower than the standard “line-level signal” made by other audio equipment generally.

    Bass frequencies are also reduced in cut records while the high frequencies boost. This equalization performed by the phono preamp helps to allow a much longer recording time by keeping the groove dimensions small. It also increases sound quality and decreases record wear.

    Some turntable models come with a built-in phono preamp. At the same time, most will require you to buy an external phono preamp or connecting cables to connect the phono preamp built into your amplifier or receiver.

    Related articles:

    What Is A Record Player?

    A record player is a device that comes with all the required components to playback and to listen to records on a single device.

    All the components, such as the turntable, the preamp, the amplifier, and the speakers, are all housed in a single unit. (source)

    The record player is usually much more elaborate than a turntable and comes with several additional features, such as the possibility of playing other audio formats like an MP3.

    When dealing with a record player, the main disadvantage is its size. Record players are commonly heavier and larger than turntables, making them less portable.

    That’s why record players stay inside the house in a dedicated area or a home entertainment section.

    Record players are also more expensive than turntables. Now, because of all the additional components they come with, there is a high risk of lower quality components instead of buying external components like with the turntable.

    The main benefit you’re paying for when purchasing a turntable is convenience. The fact that you don’t need to get any additional components makes it the most preferred choice, especially for vinyl newbies who tend to lean more towards aesthetics than sound quality.

    Benefits of getting a record player

    Portability

    Since a record player is an all-in-one unit, they are usually very easy to move and transport around instead of the turntable with multiple heavy components.

    Budget-Friendly

    There are record player models that sell for as low as $60. You also don’t have to spend extra fees on additional components.

    Style

    The aesthetically pleasing look of the record player makes it the most preferred for most record lovers.

    Extra Functionality

    Modern record players commonly have added functionality such as phone charging ports, MP3 players, Bluetooth speakers, CD players, and Radio.

    Disadvantages of Record Players

    Zero Upgrade Potential

    For people who love to build and tweak electronic devices, or commonly enjoy improving your vinyl setup, then the record player is not for you.

    Since all the components come pre-built into a single unit, you don’t have the luxury of building what you want.

    Lower Sound Quality

    Record players have been associated with producing a lower quality of sound when compared to turntables. It is mainly because most components are of lower quality and cannot be changed.

    Record Damage

    Record players have been commonly associated with adding unwanted and unnecessary wear and tear to vinyl records over some time. It is because the record player is less calibrated than the turntables.

    Turntable Vs. Record Player: Which is Better?

    There are pros and cons to getting each device, and the answer to this question largely depends on your primary intentions. Would you rather go with premium sound quality, or would you prefer aesthetics?

    Most sound-oriented lovers would go with the turntable, while vinyl newbies or record lovers who don’t care would choose a record player. The main deal-breaker is, of course, the performance and sound quality.

    But with most sound systems or equipment, the more you can build, the better sound production you get. You have to find a way to balance portability, price, sound quality, and aesthetics.

    However, when it comes to making a choice, A good and quality turntable will perform way better in the three core areas of sound quality, record wear, and build quality.

    Build Quality

    Some record player brands, such as Victrola and Crosley, design and manufacture some all-in-one record player models that include built-in speakers.

    Often, these models come with a highly appealing retro aesthetic, which targets the budget-conscious and affordable end of the market.

    Thus they do not have the same component and build rating and quality as a cheap turntable.

    Record Wear

    When it comes to preventing wear and tear on the record, most record players lack the same attention to detail commonly noticed in a turntable regarding tonearm alignment, performance, and tracking force.

    These components and settings come pre-set from the factory by design and are not user-adjustable in most cases.

    A stylus that isn’t correctly tracking the record groove will wear faster than it would typically, risking audio quality degradation to the record.

    Sound Quality

    Every single component of an audio system ultimately affects its final sound quality. When it comes to vinyl records, correctly tracking the record groove is highly instrumental to the quality of sound it will produce.

    No matter what type of external component you own, it will not boost a poor signal caused by poor tracking.

    With a record player, you are paying for convenience, portability, and a fixed design that you can’t upgrade when the situation warrants.

    You can change out the cartridge or other components with a turntable for a better and higher-quality part. You also get to make the better and superior choice for speakers.

    Budget

    For vinyl-loving newbies, a record player is generally a cheaper and preferred option to getting started since they are built to go and don’t require extra components.

    Most record player models are also super affordable and aesthetically pleasing to make up for features they lack.

    Can Your Turntable Double As A Record Player?

    Yes, your turntable can double as a record player. To get this done, all you need to do is purchase the best sets of additional external components required to help produce and transmit premium quality sound.

    However, it would be best to consider that your turntable doubling as a record player means you have to give up mobility.

    The additional pieces of equipment are usually bulky (for example, the speakers), and you cannot easily pack them up to transport. It also requires more in-depth maintenance practices.

    How To Set Up A Turntable

    When setting up your turntable, you need to get the following components:

    • The turntable
    • Preamplifier
    • Amplifier
    • Quality speakers

    There are five possible setups that you can use to make your turntable play as a record player. These are:

    1. The Turntable + Powered Speaker Combo

    It is the simplest, most compact way to set up your turntable. It involves only the use of powered speakers (that have their own amplifiers) and a turntable with a built-in preamp. All you need is an RCA cable to connect both devices.

    2. The Turntable + Preamp + Powered Speakers Combo

    This setup needs an additional preamp to give you more control over the quality of sound produced.

    To complete this setup, you need a grounding wire that connects the turntable to the preamp and the preamp to the powered speakers. It prevents buzzing sounds when you play music.

    The best turntables for this are ones without a built-in preamp or one that has a phono stage that you can easily bypass.

    3. Turntable + A/V Receiver + Passive Speakers Combo

    If you already have an existing speaker setup that allows multi-purpose use, like wireless music streaming or home theater watching, you can use this setup to connect your turntable. All you need to do is connect a turntable with a built-in preamp to the A/V receiver with an RCA cable.

    Some receivers have a built-in preamp that allows you to bypass your turntable’s built-in preamp or connect a turntable without a built-in preamp.

    4. Turntable + Standalone Speaker Combo

    This setup uses the same principle as the turntable and powered speaker combo. However, this is more compact.

    Connect your turntable to the standalone speaker using a wired RCA to aux connection. The most significant disadvantage of this setup is that it is hard to get proper stereo separation.

    5. Turntable + Preamp + A-V Receiver + Passive Speakers Combo

    It is the most disjointed, component-heavy setup so far. However, many vinyl enthusiasts prefer it because it gives them the most freedom to customize and upgrade the ability of their systems.

    Over time, you can replace specific components in this setup until you achieve the desired sound quality.

    Factors To Consider When Buying A Turntable That Can Double As A Record Player

    When choosing the best turntable that can double as a record player, there are several factors to consider. However, we have outlined the essential ones that will be useful for you below.

    Preamp

    Consider purchasing a turntable model that comes with a built-in preamp. This built-in preamp option lets you plug your connectors directly into any pair of receivers or powered speakers.

    However, purchasing a standalone preamp also benefits because you can upgrade to a better model over time.

    Standalone preamps are also generally of better quality than built-in ones.

    A good quality preamp is essential for professional or expert use, while newbies can settle for a built-in preamp.

    Built-in Speaker

    Setting up an external audio system to convert a tour turntable like a record player is not only time and effort-consuming, it can also be expensive.

    Consider going for a model with built-in speakers that will save money and effort and set up space.

    Digital Features

    While the vinyl record is in an analog music format, some modern turntables come packed with various digital features such as Bluetooth and USB ports. (Source)

    You can also use wireless speakers and digitize your vinyl record for safekeeping.

    Cartridge and Speaker Quality

    The cartridge is number one of the two most essential components in a turntable, and number two is the speakers.

    The cartridge converts the physical grooves already pre-carved into the record into an electrical signal.

    The preamp and the amplifier read this electrical signal before being transmitted to the speaker to broadcast as quality sound. (Source)

    Now, since the cartridge primarily starts the sound journey and the speaker ends it, they have the most impact on the sound performance of the turntable setup.

    Most low-range turntables commonly come with fixed cartridges, while mid-range and high-end turntables commonly come with upgradeable/replaceable cartridges.

    You must consider the cartridge’s quality on the turntable you want to purchase and confirm if it is replaceable or fixed.

    A cartridge is essential in determining the quality of sound produced by the turntable, so it’s advisable to always go for the best and easily upgraded choice.

    Conclusion

    We have talked about how the record player and the turntable came into existence. It is because learning this history is very helpful in understanding the primary need for both devices and what they offer.

    Judging by models available in the market today, it is safe to say record players are a single unit device that houses all the needed components.

    At the same time, a turntable is a device that requires additional external components to function as a record player effectively. However, choosing which to go with depends on your primary and personal need and want.

    Sources

    1. Dawson, Stephen. “How things work: The returning turntable, part one.” Connected Home Australia Mar 2014 (2014): 44-45.
    1. EE, Micaiah Reid, and Chung Yong Chan. “Vinyl Player 2.0 ” Department of Electrical & Computer Engineering, University of Central Florida 
    2. Galo, Gary A. “Disc recording equalization demystified.” ARSC Journal 27, no. 2 (1996): 188-211.
    3. Suzuki, Tory, Masao Toyosawa, and Chiaki Toyoda. “Record player.” The Journal of the Acoustical Society of America 67, no. 3 (1980): 1098-1098.
    4. Hansen, Kjetil Falkenberg. “Turntable music.” Musikklidenskapelig Årbok 2000 (2000): 145-160.
    5. McCarry, Kyle P. “Versatile USB Powered Turntable.” California Polytechnic State University  (2018), 
    6. Dawson, Stephen. “How things work: The returning turntable, part one.” Connected Home Australia Mar 2014 (2014): 44-45.
  • Are Marley Turntables Good? A Complete Review

    Are Marley Turntables Good? A Complete Review

    Are you curious about the Marley Turntables? Possibly you heard of them, and you are wondering if they are as good as they seem. Despite what one may think, turntables are different and sound different from each other.

    Inexpensive and poorly made turntables can sound screechy and have limited bass power and definition. It is not enough to just spin the platter; the same record played on two different turntables can sound different.

    This article will uncover all the details about Marley Turntables, so you can figure out if they are high-quality products or not.

    Marley Turntables Overview

    The House of Marley, which produces the Marley turntables, was founded based on Bob Marley’s vision, love for music, and respect for the planet. Its founder, Rohan Marley, is the one working to bring forward this vision by creating a product that forwards that respect for the environment but that at the same time provides quality.

    One of the main things that differentiate Marly’s turntables from the rest is the materials used to build them. They come from ecological elements and recycled materials mindfully crafted and put together.

    The design and the color make one of those turntables look fashionable and handsome. In addition, it has all the features that it should have, such as RCA stereo output jacks, USB ports, and an external wall-wart DC power supply (to reduce self-noises).

    Here are some of the pros and cons of using Marley turntables:

    Pros:

    • Low self-noise
    • Eco-friendly
    • High-quality sound
    • Good looking minimalist design
    • Upgradeable cartridge
    • Great packaging
    • Easy to set up

    Cons:

    • Wall wart can be annoying
    • Missing dust cover lid
    • Sometimes the arm doesn’t automatically return back

    Let’s see in detail the main features and qualities of Marley turntables.

    Marley Turntables Materials

    Involved in several projects to help and protect the environment, and it doesn’t come as a surprise the careful selection of materials employed. Marley turntables are unique and different from other turntables because of how the manufacturing process goes and the materials used.

    One of the leading materials used to build those turntables is bamboo. While bamboo can give a significant and modern look to a product, it can also provide strength and durability. Some types of bamboo have the same compress ratio as still and twice that of concrete.

    It is a lightweight material, sustainable, and easy to renew as a natural resource. In fact, many countries are using bamboo to build schools, hotels, and other structures because of its high strength.

    Other materials used are recycled plastic, paper, metals, aluminum, PET, organic cotton, cork, leather, rewind fabric, wood composite, stainless steel, and not toxics silicon. Another element used is called REWIND™. It is a fabric made of a blend of cotton, hemp, and PET, all organic, created to be durable and resistant.

    Marley Turntable Design

    The design is another strong point of Marley Turntables. When you look at it, you can see that the top is made from eco-friendly bamboo, while a fabric made of organic cotton and hemp cover the sides and bottom.

    The platter consists of recycled aluminum which looks nice, together with the slips mat made of recycled plastic and rubber. When all those parts go together, the general look is a minimalist and fashionable piece of equipment.

    To make it even more attractive, House of Marley has made sure that each turntable has meticulous details. For example, the logo impressed in each turntable looks beautiful, and so the three rasta stripes placed on the headshell to pay tribute to Bob Marley’s legacy.

    The only negative note reported by many users is the lack of a plastic dust cover, but instead, you can use a hemp dust cover.

    Marley Turntable Features

    Although Marley turntables have a minimalist look and are very compact, they still have a lot of features and functionalities. Here are the things you can expect to find in one of those turntables:

    • USB for registration on a pc
    • Pre-amplifier (with a switch to deactivate the outgoing audion)
    • RCA
    • Adjustable counterweight
    • Belt drive
    • Anti-skating control
    • Replaceable head
    • Aux out (3.5 mm)
    • Speed 33 and 45 rpm
    • Bluetooth for wireless connection

    Marley turntables are manual belt-driven; no automatic device does it for you. So suppose you want to get a record playing; you have to do it in the old way. You are responsible for raising and lowering the tonearm to get music playing.

    While some consider it an inconvenience to raise and lower the tonearm, remember that in the past when turntables were the only way to play a record, the concept of automatic did not exist. So it is a bit like going back to the past and enjoying records in the old way.

    The RCA output situated at the back is there to connect a speaker or a receiver, and there is also a headphone jack located in the front for those who do not want to use the speaker o wish to play music late in the night.

    Some versions of Marley turntables have Bluetooth capability, so one can use headphones without cables and move around. In addition, it is possible to rip music and place it in digital form on a pc through the USB port.

    An additional thing that you can do with a Marley turntable is the possibility of upgrading, which means it is possible to replace the cartridge and improve the sound quality. In addition, those turntables can play 33 or 45 rpm and have an anti-skate control system that helps protect the vinyl from damage.

    Finally, the belt drive offers stability and better sound quality with the automatic start function.

    Marley Turntable Performance

    Marley turntables sound as good as most entry-level turntables on the market. They aren’t great, but they aren’t the worst either.

    In other words, if you are looking for an audiophile turntable, this one may not meet your expectancies. But, although it is a perfect product for beginners, it provides a superior sound compared to similar turntables.

    Very high volumes can lead to hearing minimal tonal distortions, but otherwise, there are no visible situations. The good news is that Marley turntables leave some space for an upgrade that can improve the quality of music without spending tons of money for another turntable.

    House Of Marley Projects To Help The Environment

    What makes House of Marley so different from other turntables and sound companies is its work to protect the environment and build sustainable products. Each turntable construction occurs with sustainable materials, using entirely recyclable and organic elements.

    In other words, the House of Morley respects the environment in building its products. They actively seek to prevent the waste from their products from becoming harmful once the product requires disposal. The company follows Bob Marley’s legacy centered on love, peace, and environmental respect.

    For this reason, they have a partnership with One Tree Planted and the Surfrider Foundation. One Tree Planted works to plant trees worldwide and combat deforestation. House of Marley has worked with them since 2017 and has helped grow over 240.000 trees.

    Instead, the Surfired foundation works to protect the world’s ocean, waves, and beaches. House of Marly works with them to raise awareness worldwide and help them carry out their mission.

    Buying from the House of Marley means supporting those initiatives and helping support the ecosystem.

    Marley Turntable Typical Price For 2021-2022

    Marley turntables are considered entry-level products, with an excellent sound, many features, and an affordable price. There are two types of turntables one can buy from the House of Marley:

    • Stir it Up turntable – $199
    • Stir it Up Turntable Wireless – $249

    The version without wireless is the cheapest one but has the same functionalities as the other one besides Bluetooth. For example, both have the anti-skate control system, the belt drive, USB port, preamp, RCA, etc.

    Marley turntables cannot be considered cheap but are not expensive either. On the contrary, their quality, materials, and features place them amongst the top turntables but with an advantageous price range.

    There is a vast difference between a cheap and an expensive turntable. Higher quality devices have a better sound that lets you think it is more authentic and engaging. Specifically, you do not find other turntables made of rich materials like the Marley’s.

    What makes turntables good and thus more expensive is the quality of the more sensitive components, such as the cartridge, motor, platter, and tonearm. For example, the engine is a sensible and central turntable part and can significantly impact the overall sound.

    Turntables Price Ranges

    The quality and precision of its elements can make the difference in how a record is playing and the price. On average, a low-quality turntable costs under $150, but you will not get the best sound in this case.

    Turntables averaging between $150 and $300 can be suitable for beginners, and you can find premium brands with such an investment with a good quality sound. However, those who want a top-quality turntable and are real vinyl lovers and audiophiles need to be ready to invest between $300 and $600.

    With such an investment, one can get turntables with a premium cartridge and high-quality elements to make the sound clearer and very detailed.

    If Not Sold On Marley, Here’s What To Look At When Buying A Different Turntable

    How do you know if you are buying a good turntable? There are various factors to consider if you want to get a suitable device according to your budget and necessities.

    Here are some of the things you should take into account:

    1. Price Range And Budget

    The price range is one of the first considerations. If you have at least $200, you can get a good quality entry-level or beginner turntable. If you want a high-end model, you have to consider a higher budget, but in that case, you need to appreciate the perks of a more advanced device.

    If you are using a turntable infrequently and are not an enthusiast or an audiophile, it is better to consider a lower-budget device with the basic features.

    2. Sound Quality

    The quality of sound should be the next consideration. The choice of the needle (the stylus), the materials, and the quality and precision of the audio components determine the type of experience you will have.

    Cheap turntables are made of poor materials and are not so stable. So verify what types of materials are used to build it and if there is a chance of upgrading to better quality cartridges.

    3. Is It Portable Or Wireless?

    Needless to say that even with turntables the wireless capabilities are essential in these modern times. Although vinyl records bring people back to the old times, connecting devices such as speakers and headphones over a distance is still crucial.

    Or even the possibility to transform music played through the turntable into digital tracks to be used later on a computer or other device is essential. Wireless functionality can add value to a turntable and make it look modern.

    4. Levels Of Automaticity

    You can check if a turntable has a manual, automatic, or semi-automatic tonearm. Then, depending on your needs, you can choose the one that best fits them. For example, an automatic tonearm moves towards the record alone, without you doing anything, and moves back to the beginning.

    You have to place semi-automated tonearms on the record manually, but they can return automatically to the beginning. A person must operate a manual tonearm to begin and end the playback.

    5. Audio Input & Output

    The audio input and output are essential if you listen to music through headphones. In addition, if you want to play music from a digital device through your turntable, you should know if it has an aux-in function.

    This last function also allows you to connect external speakers. In this way, you can get extra options for listening to your music.

    6. Design

    Design is possibly not one of the top considerations for listening to music. But, it helps to have a nice-looking turntable matching the house furniture. Many turntables construction is designed to look retro, modern, or unique. Therefore one can choose between many options based on how it fits better.

    7. Possibility To Add Accessories

    Many turntables producers also provide accessories to complete the setup and add extra functionalities. For example, you can get additional spare parts such as needles or a dust cover to protect the record player.

    Some provide matching speakers, headphones, cables, cleaning materials, and more. It is crucial to verify that you will not run out of spare parts and that the turntable components are replaceable in case something happens.

    Final Take

    Marley turntables are a good investment for those who like to listen to vinyl records moderately and are beginners. People can listen to good music and buy a quality product that can last for a long time for a moderate and affordable price.

    Those who are not ready to make a considerable investment in a turntable can start with a Marley product and then, with time, move on with more advanced turntables.

    Frequently Asked Marley TurntableQuestions

    Is A Marley Turntable Any Good?

    Marley turntables are good because they provide a high-quality device packed with functionality and built with quality materials for an affordable price. However, it is best to think of them as beginners and turntables for medium users.

    Does The Marley Stir It Up Turntable Have Built-In Speakers?

    Marley Stir Up turntables do not have built-in speakers, but the House of Marley provides matching speakers for sale. The speakers range from $149 to $ 279, with various power and sound levels.

    In addition, each speaker is portable and can connect via Bluetooth. Finally, even if Marley turntables do not have built-in speakers, they have a built-in preamp that you can use to connect speakers and even USB ports.

    Do Vintage Turntables Sound Better?

    Vintage turntables sound better because of the higher quality in construction. However, some modern ones are made with cheap materials and not manufactured with the same care—for example, some of the “made in China” products are constructed in bulk with poor elements.

    If you do proper researches and find quality turntables, you can have a similar, if not better, sound than a vintage one. In fact, modern turntables, appropriately manufactured and made with the full use of existing technology, can be way better than those made many years ago.

    Do Expensive Turntables Sound Better?

    In general, expensive turntables sound better because they are made with superior materials and constructed with care and precision. In addition, they have a lot of extra features that cheap devices do not have. A more expensive turntable can play music way better, and the difference is quite noticeable.

    Sources

    1. https://www.cnet.com/tech/home-entertainment/can-one-turntable-sound-better-than-another/
    2. https://youtu.be/xNLKSx2efSQ
    3. https://www.thehouseofmarley.com/materials/
    4. https://www.greenhomeguide.com/know-how/article/5-benefits-of-building-a-home-with-bamboo
    5. https://recordsoundpro.com/why-are-turntables-so-expensive-and-why-they-are-worth-the-price/
    6. https://recordsoundpro.com/keep-this-in-mind-when-buying-a-record-player-and-what-to-avoid/
  • Are Garrard Turntables Any Good? A Review

    Are Garrard Turntables Any Good? A Review

    Are Garrard turntables any good? Before smartphones, walkmans, iPods, there was the Garrard turntable. Garrard was a turntable brand known for quality and excellence in the industry. However, in 1982, Garrad completely shut down, ceasing all turntable manufacturing. So are the legendary Garrard turntables any good?

    Garrard turntables are formidable turntables in the industry. They withstood the test of time and provided audiophiles with an impeccable experience.

    They serve as a collective piece for some vinyl enthusiasts. However, they still function effortlessly if adequately maintained.

    Most Garrard turntables aren’t in premium condition, and users will have to restore the turntables to their former glory. Regardless, you can find parts for this turntable on eBay and similar sites.

    Are Garrard Turntables Any Good?

    Garrard turntables were extremely popular during their time; not only were they present in films, huge companies like the BBC primarily used Garrard turntables in their stations. In the 1987 war comedy film Good Morning Vietnam, the late actor Robin Williams utilized a set of Garrard turntables in a broadcasting station.

    Garrard turntables were predominantly popular in Europe, most especially in the U.K. The British people would not listen to music from any turntable brand other than a Garrard. But it’s been over 30 years since Swindon, the company behind its production, shutdown the Garrard manufacturing plants.

    In the 21st century, Are Garrard turntables any good?

    The Sound

    Numerous owners and enthusiasts rave about the music quality that you get from a Garrard turntable. Some enthusiasts have called it a testament to the vinyl era. Garrard turntables are recognized immediately because of their almost musical tone.

    However, some people may argue that the brand image is a huge selling factor behind its legacy apart from the sound. Garrard created the turntables and designed their appearance to appeal to a broader audience.

    The Current Price of Garrad Turntables

    The current pricing of Garrard turntables speaks a lot about the value of a Garrard turntable. Depending on the state of the turntable, it could cost over $200 on platforms like eBay.

    Not only that but restored Garrard turntables can cost up to $4000 on eBay. Garrard turntables are remnants of the vinyl age and showcase a legacy. Not only that, but Garrard turntables were and still are high-quality turntables. Here’s why.

    What Made And Still Makes Garrard TurntablesTop-Tier?

    In 1953, Garrard introduced the classic Garrard 301. Its main selling point was that it could play in three speeds:

    • 78 rpm
    • 45 rpm
    • 33 1/3 rpm

    There were two schedules of the Garrard 301 turntables. Schedule 1 was the grease-bearing model, and Schedule 2 was the oil-bearing model.

    The 301 was an evolution in the turntable industry at the time; its appearance speaks true to its era.

    After the 301 came the 401, a step in the right direction for Garrard. But what made these turntables perform? Experts theorize that it all boils down to its motor.

    Other turntables in the industry (at that time) took a lot of time to start, but the Garrard turntables offered instant start-up due to the powerful motor unit.

    The powerful motor is what also made it so popular with radio stations. Broadcasting and radio stations needed a turntable with a faster start-up process, and the Garrard was the answer.

    So what makes it any good in the current decade?

    Garrard turntables come with problems that, at that time, had temporary solutions. Keep reading to find out more on what you need to know about Garrard turntables.

    If you have, find, or buy a Garrad turntable in good condition, you will have some problems you may need to solve. Once you solve those problems, you can now get the full capability of the Garrard turntable.

    But does that take away the originality of its sound? Some would argue it might, and others would argue otherwise. The answer lies with what you want from your Garrard turntable. Restoring a Garrard turntable will require you to make some compromises.

    The Garrard turntable is an excellent investment if you want a legendary turntable in your collection. After all, the Garrard turntable did rule the industry for nearly two decades before its downfall.

    What You Need To Know About The Garrard Turntable

    The Garrard turntable came with its share of problems that you can quickly solve today. At the time, the issues seemed less problematic and more a compromise to having a high-quality turntable. Here are some things you need to know about the Garrard turntable:

    1. The powerful motor emits a considerable amount of vibrational energy.
    2. The bearing wears out quickly.
    3. The aluminum platter.
    4. The stylus produces a drag.
    5. The idler wheel system

    The Motor

    The motor, although power, transmits a considerable amount of vibrations to the chassis. The vibrations make it harder for the user to get the whole listening experience from the turntable.

    Garrard did note this down as a drawback to their powerful motor. So they encouraged users to add ‘sound-proofing’ elements to the turntable. These elements would absorb the vibrations from the motor.

    The Bearing

    In the case you do find a Garrad turntable in the market right now, there’s a high probability that the turntable has a worn-out bearing.

    Nonetheless, you can take it out and examine it to be sure. If the turntable has a worn-out bearing, you may have to replace it.

    The Aluminum Platter

    The issue behind the aluminum platter is that it would ring like a bell when tapped. Not only that, but the platter would have an uneven thickness that would cause an imbalance.

    The Stylus

    The stylus can produce a drag that changes randomly, and its force depends on the speed at which the groove is moving. The result is that you get a shaky tone and smudged transients.

    The Idler Wheel System

    The idler, the motor pulley, and the platter work together through the means of springs. The springs will slowly start to wear out with time, and you have compromised stability.

    Not only that but the entire idler wheel system toughens with age. It begins to lose its grip and eventually causes increased vibrations.

    What Are The Vintage Garrard Turntable Models?

    Garrard made two main turntable models, the 301 and the 401. In 1965, Garrard introduced the Garrard SP25 with four speeds instead of three. It was extremely popular at the time.

    There are other honorable mentions, such as the Garrard Model Lab 80. A multi-purpose record changer that also served as a transcription turntable.

    What About The Garrard Type A Turntable?

    Garrard released the Garrard Type A Mark II turntable in the 1960s. Like its predecessors, it was a top-tier and durable turntable during its time. In the 60s, experts refer to this turntable as an automatic turntable.

    Collectors will generally seek vintage Garrard 301 and 401 models, so there isn’t much information regarding other models.

    Regardless, these models are still in existence and circulate the market.

    Why Did Garrard Shutdown?

    Garrard shut down due to failed product lines, late implementation of innovation, and derailing from its original image. But there is a silver lining in every cloud.

    There has been a rebirth of the Garrard turntables. In 2018, Cadence Audio SA, another turntable company, took ownership of Garrard.

    Conclusion

    Garrard turntables are an excellent investment for collectors and those interested in the Garrard legacy. If restored, they will function impeccably and deliver appealing results. So, are they worth it? Yes.

    Sources

    1. Garrard, Garrard, The Legacy Continues, Garrard, https://garrardturntables.co.uk/ Accessed December 16th, 2021.
    2. Wikipedia, Garrard Engineering and Manufacturing Company, Wikipedia, https://en.wikipedia.org/wiki/Garrard_Engineering_and_Manufacturing_Company Accessed December 16th, 2021.
    3. Swindon Web, Garrard in Swindon, swindonweb.com/?m=8&s=116&ss=394&c=1324&t=Garrard%20in%20Swindon Accessed December 16th, 2021.
    4. Adrian Wu, Ancient Garrard Turntables: Still Relevant Today? PS Audio, https://www.psaudio.com/copper/article/ancient-garrard-turntables-still-relevant-today/ Accessed December 16th, 2021.
    5. Gramophone Museum, Garrard History, Gramophone Museum, http://www.gramophonemuseum.com/garrard.html Accessed December 16th, 2021.
    6. Featured Image Credit: “Born in the USA” by werejellyfish is licensed under CC BY 2.0.
  • Where To Put Your Speakers And Turntables

    Where To Put Your Speakers And Turntables

    While you can place your speakers anywhere in the house and still enjoy your music, you can’t do the same with the turntable. After all, turntables function by measuring the vibrations, which can be affected by the vibrations produced by the speakers. (source) So if you want to know where to put your speaker and turntable, please read on…

    The best place to position your turntable is away from any source of vibrations, and this means your speakers. As well, walking past a turntable can make it skip if not secure, so a secure location, isolated from the speaker vibration is best.

    You may own the best speakers and turntable on the planet, but if they are not set up or positioned correctly, you won’t be able to get the best out of your system. So in this article, we’ll show you where to put your speakers and turntables. We will also show you the factors to consider when positioning your turntable and speakers.

    Does the Place Where You Put Your Turntable and Speakers Matter?

    Generally, turntables function by measuring the vibrations. The vinyl record forces the stylus to vibrate or move in its grooves. The records player turns the vibrations into a minute electrical signal amplified and converted into sound by your speakers. Therefore, for the record player to work, it only needs to read the groove’s vibrations.

    Unfortunately, the stylus is very sensitive and can even pick external vibrations. Therefore, it is a delicate operation, and external vibrations can affect the quality of your music. If the stylus is not getting a smooth ride, you won’t enjoy great music.

    On the other hand, the speakers’ work is converting the electrical signal to sound, and for it to do its job, the speaker must vibrate. Basically, the turntable and the speakers produce music this way; therefore, you should always keep the speaker and the turntables apart.

    You can keep a moderately-sized speaker on the same surface as the turntable with little to no issues. But the speaker should be well-made and not produce excess bass; plus, the surface must be solid. (source) Suppose you have a pair of powerful speakers. In that case, isolation is mandatory, especially if you don’t want the vibrations to affect the quality of your music.

    Some speakers are cranked up enough to force the stylus to skip a bit, and at times they can cause acoustic feedback. This can be very scary for audiophiles, especially since the vibrations are picked by the stylus, creating a loop. (source) Therefore, placing the speakers and the turntables on the same surface or close proximity can hinder the record players’ ability to produce high-quality music.

    Turntable Placement

    Let’s begin with the vital component, the record player. After all, it is the most sensitive part of the setup. For the stylus to convert the vibrations from the vinyl to an electrical signal, it needs to be protected from external vibrations. Therefore, for you to enjoy exceptional music every day, you should follow the following advice:

    Stability is Mandatory

    Firstly, to prevent tracking problems, you should place the turntable on a heavy, flat, and stable surface. Placing the turntable on a flat, leveled surface and far from the speakers can help prevent tracking problems and lower tonearm friction. A sturdy and flat surface will make it possible for the turntable and the vinyl record to last longer. You can also enjoy high-quality music every day without worrying about vibrations and tracking issues if you place your turntable in the correct position.

    The main reason you need a heavy and stable surface for the turntable is to lower the effects of vibrations and any other thing that can affect the quality of your music. If the right side is an inch lower than the left side, the tonearm and stylus will work extra hard when tracking the grooves on the vinyl records. Poor leveling can compromise channel balance, uneven wear and tear of the grooves, and slight distortion. (source)

    Isolation

    Isolation refers to getting rid of or reducing resonances or vibrations that can be easily picked up by the turntable’s stylus, cartridges, or tonearm. The vibrations that affect your record player can be categorized into three groups: self-generated, airborne, and structural. So make sure you address each of them independently when positioning your turntable and speakers.

    Structural Isolation

    Structural isolation refers to the sound waves that travel through the physical medium, including the surface where the turntable rests. Suppose your turntable is on a plastic surface with some speakers in close proximities. In that case, the lack of isolation can result in the stylus jumping out of the grooves. The vibration from the speakers can force the turntable to hum or rumble constantly. Luckily, there are many aftermarket solutions and creative DIY solutions for this problem. (source)

    Airborne Vibration

    The airborne vibration incorporates the airborne sound waves from the speakers that can create resonance or vibrations in the stylus/cantilever point, turntable, tonearm, and the circuit board. These issues typically present as mild distortions, which can be very annoying to audiophiles.

    Therefore, the main factors to consider when dealing with airborne vibrations are turntable and speaker placement. Moving the speakers or turntables away from each other can reduce the feedback they can generate and airborne vibrations. (source)

    Self-Generated Vibrations

    The self-generated vibrations can be triggered by the belt or turntable itself. Luckily, some turntables like the Technics SL-1200 have a magnetic motor; therefore, you’ll never have to worry about high self-generated vibrations. The design of the SL-1200, it’s unique dampening, and high-torque motor with low flutter and wow levels are what made this brand the best option in the industry. (source)

    Where to Position the Turntable?

    As aforementioned, the best position for your turntable should be perfectly leveled, have low resonance, and be as far from your speakers as possible. If your home has a concrete floor, a floor standing support can come in handy. Unfortunately, a floor standing support can cause footfall on suspended wooden floors. So, if you have a suspended wooden floor, you need to install a dedicated wall shelf. (source)

    A dedicated wall shelf can help you prevent footfall problems, so try and use some heavy-duty fixings and mounting screws. Unfortunately, they can be pretty costly, but they are worth the investment. These decks have some unique built-in isolation, with the simplest form of support being rubber feet. For some turntables, you can go for a fully suspended shelf design. (source)

    Therefore, the more isolated the turntable is, the less fussy your stand should be. In fact, the best designs will function better with exceptional support and careful placement. After identifying the best position for your turntable, the next step is ensuring that it is leveled.

    The stand or shelves should always be leveled; after all, this is the only way you can ensure that the stylus tracks the vinyl’s grooves correctly. You can even confirm if the shelves are leveled using a light, trim spirit level.

    You should begin with the pedestal, but you shouldn’t have a lot of work if the stand is leveled. But if you need to make some adjustments, then some adjustable turntables feet can help you get everything leveled.

    Next, confirm if the platter is leveled; luckily, most turntables’ platters are positioned relative to the stand. Therefore, they should be parallel from the start unless there is an issue from the factory. A suspended shelf design will make it possible for you to achieve some degree of adjustment. Usually, the leveling is done in its original position; however, some decks will require a specialized jig, so you may have to take it to the dealer.

    Speaker Placement

    After placing the turntable in the right place, the next thing you should consider is speaker placement. And with vibration from the speakers being a problem with turntables, the place where you position your speakers is essential. Therefore, you should ensure that the record player and the speakers never interact. Here are some of the things you have to consider when looking for the right place for your speakers include:

    Bad Vibrations

    One of the leading issues with turntables and speakers is their vibrations. Generally, the turntable works by reading the minuscule variations of the grooves of the vinyl records. And for it to do its work perfectly, it needs to be still and not affected by the external sources of vibrations like the one produced by speakers playing bass frequencies.

    Where Can You Put Your Wireless Turntable?

    You can move it from one place to another with a wireless turntable. Luckily, most turntables like Yamaha MusicCast Vinyl 500 use Wi-Fi to signal the speaker. Therefore, with a wireless turntable, you have an option. Still, some of the best places for putting a wireless turntable include:

    • Reading Nook
    • The home office
    • Enclosed patio
    • Bedroom
    • Dining room/ kitchen
    • Near your home bar
    • Game room (source)

    Securing the Speakers

    If you place the speakers on the same shelf or near the record player, the vibrations will affect the quality of your music. Therefore, you should put your speakers on wall brackets or stands and the turntable as far away from the speakers as possible. (source) You should never put them on the same surface.

    Therefore, if you own some bookcase speakers, you should use speaker stands to help isolate the vibrations. The floor-standing speakers are designed to sit on the floors. Still, you need to consider the connection between your speakers and the floor when using them with your turntable.

    What Should I Place Between the Speaker and the Stand to Minimize Vibrations?

    There has been an issue with floor standing speakers and stands between the floor and the speakers. And for the longest time, most folks have used spikes to nail their speakers to the stand and floors. In fact, some speakers come with spikes that can help you attach them to the floor to limit vibrations.

    But some folks have discovered that nailing the speakers to the floor negatively affects the sound quality. These folks claim that the best solution is isolating the speakers from the stand using some soft rubber or foam pads. Remember, the bigger the speakers, the larger the effects of isolation. Luckily, all speakers sound more open and better when isolated. (source)

    The speaker stands come in a wide range of sizes, types, and materials, with wood and metal being the famous options. Luckily, each material has the unique character that it adds to the quality of the sound it produces. But when it comes to the stand, the general rule stipulates that the heavier the material used to make a stand, the more rich and solid the sound.

    Therefore, if you need a controlled and tightly focused sound, you should place your speakers on a heavy metal stand. You can also go for a fast and open sound if you use a lighter stand. The interface between the stand and the speakers is crucial. If you place a sponge pad between the stand and speakers, you will get a better balance. (source)

    Therefore, you should get your speakers off the shelves or behind the sofa and look for a better position for them. If you find an exceptional place that won’t affect your turntable, you will notice the difference.

    Speaker Positioning

    The position of your speakers is crucial as it can play a pivotal role in the quality of your setup’s sound. The speakers should be at a listening height. If you’re on the sofa, then the placement height of the speakers should be determined by the height of your ears when seated. Placing the speakers near the back walls will give you more bass, while setting them far away will offer you convincing stereo imaging. (source)

    Even though it may be convenient, you should avoid placing the speakers in the corners. Putting them in the corner will give you a lumpy, fat bass that will affect the quality of the music produced by turntables. Imaging can also be affected by the speaker’s angle. In fact, most speakers sound perfect when toed-in towards the most common listening position in your home. (source)

    For peak sound dispersion, all speakers should be at an equal distance to your favorite listening position. So here are a few factors to consider when positioning your speakers:

    • Room length: if the room where you usually sit when listening to music is rectangular, the speakers should face the room’s length. Therefore, you should place the speakers on the shortest walls in the room.
    • Think about the room in thirds: start by dividing the room’s length by three and place your speakers in the first third and about a meter from the side walls.
    • The speaker angles: the sound of the music is spread between your speakers. If you have two speakers, positioning them at a 60-degree angle will create an exceptional stereo angle. So you should measure the angle ideally using a protractor. Simply place a marker on your listening position and start from there.
    • The space between the walls and the speakers: if you’re working with a huge room, you can leave a zone of about 2.2 meters between the walls and the speakers. After all, placing them near the wall will result in the speakers producing bass, which may cause too much vibration and end up affecting your turntable.
    • Place the sub-woofers about 30 cm from the corners: Subwoofers should never be placed in the corners; instead, they should be about 30 cm from the corner.
    • Speaker height: the speaker should always be leveled with your head, so if you love listening to the music when seated, it should be leveled with your head when seated or about 1.2m high. The tiny speaker cones, also referred to as tweezers, are responsible for the high-quality sound produced by the turntable. The sound from the tweezers always travels in a straight line. So they should point directly to your ears.
    • Place desktop speakers on foam: if you’re using some desk speakers, you should place them on a foam pad. The foam will prevent the desk from becoming a bass speaker. (source)
    • The center channel of the surround sound system should be in front of you: the center channel must always be in front of you with your side speakers at about 110-degrees to the side. The speakers should be at a 60-degrees angle from you.

    FAQs

    How Far Should Your Speakers Be From the Turntable?

    Speakers are known for producing vibrations that can affect your listening experience, so you should ensure that they are far apart. Therefore, the distance between the turntable and the speakers should be at least 2 meters.

    Where Can I Place My Speakers?

    Walls reflect sound and vibrations; plus, speakers have a rear-facing bass port. Therefore, the speakers should be at least 3 feet from the walls.

    How High Should Your Speakers Be Off the Floor?

    The best place for the center speakers is at your ear level when seated on the sofa. The right height is usually between 30 and 50 feet from the floor. If you can lift the center speaker, you should tilt it, making sure it fires directly into your ears.

    Conclusion

    There is nothing more relaxing and fun than listening to a vinyl record of your favorite. Unfortunately, any form of vibration can affect the quality of your music, including the speakers’ vibrations. Therefore, the speakers and the turntable should be as far away from each other as possible.

    Sources

    1. Ketan Bharadia, How to get the best sound from your turntable, Accessed January 02, 2022
    2. Jeffrey Lee Puckett, The importance of isolation and how to fix vibration in your turntable setup, Accessed January 02, 2022
    3. RA Pro staff, a guide to troubleshooting turntables, Accessed January 02, 2022
    4. Jason Kennedy, Speaker Placement: A step-by-step guide, Accessed January 02, 2022
    5. Andrew Murphy, How to set up and position your speaker, Accessed January 02, 2022
    6. Tom Davenport, How to position your speakers perfectly, Accessed January 02, 2022
    7. Mac Randall, Seven Fun Places to Put Your Wireless, Accessed January 02, 2022
  • The 7 Best Turntables Under $500

    The 7 Best Turntables Under $500

    There is nothing more nostalgic than popping a vinyl into a turntable and allowing the music to take you back in time – back to memories of your grandparents and their favorite records playing in the background while you play a board game. Thankfully, we’ve found some affordable modern turntables to help you unlock those memories without breaking your bank. 

    The best turntable for under $500 is the Fluance RT85. This turntable has the Ortofon 2M Blue, which provides excellent sound. It also comes with an Acrylic Platter that’s heavy and dense, contributing to a more consistent speed and reducing vibration. The Fluance RT85 is well designed and superb. 

    In this article, I’ll walk you through the difference between a turntable and a record player. We’ll also chat about what to look out for and expect from one priced at under $500. We’ll also discuss each of these affordable turntables, along with their pros and cons.

    Turntables vs. Record Players

    A turntable and record player are pretty much the same thing; however, a few differences set them apart.

    A turntable makes up a record player. It’s the part of the record player that spins and holds the record. A turntable in itself has a plinth, platter, tonearm, motor, stylus, cartridge, and sometimes a preamp. A pure turntable doesn’t have speakers or an amplifier, but it does have the ports for you to connect external components to it. 

    Most vinyl record enthusiasts prefer a turntable to a record player because it’s customizable, and you can add high-quality components to it. 

    A record player is a convenient all-in-one audio system. It doesn’t need external components to be added to it because it’s already got everything it needs, from the turntable to its built-in speakers. A record player also has many more features than a turntable and can read various audio files, not just the vinyl records.

    Record players aren’t customizable like pure turntables are, and the components used in them aren’t typically as high of a quality as the external component that you’d plug into your turntable. They’re also bigger, heavier, and less portable than turntables.

    Turntables aren’t superior or inferior to record players. They both have their pros and cons and appeal differently to different people. What you intend to use your turntable or record player for will determine which is best for you. 

    What To Look Out for When Buying a Turntable

    Although turntables under $500 are still considered “budget” turntables, there are a few key questions that you need to ask yourself when making your buying decision.

    Replacing the Parts

    If you buy a turntable that has a stylus with a needle that can’t be replaced, your whole turntable will no longer be operational when it wears, breaks or bends. You’re also stuck with that same needle when newer ones are released, and you won’t be able to upgrade your turntable. Not all turntables on the lower price allow you to replace the parts, but lookout for the ones that do because it’ll benefit you in the long run and keep your turntable operational for years to come.

    Speed Options

    If you get a turntable that only has a one speed option, you’re going to be limited with your records and won’t get the correct sound that you desire. Lookout for turntables with more than one speed option because your records are made to be played at different speeds.

    High Quality Components 

    If you’re going to buy a turntable for under $500, you will not get the highest quality, but that doesn’t mean you should settle for the worst either. Playing a turntable made up of poor components will affect the sound quality, and you’ll hear buzzing, crackling, and distortion. You may even end up with damaged vinyl. The Ortofon 2M Blue elliptical cartridge is an excellent quality component that you can find in this price range.

    Are Turntables Under $500 Worth It?

    Turntables under $500 are worth it. Depending on where your budget falls, turntables under $500 perform well, produce a beautiful and rich sound, and will be enjoyed by vinyl record enthusiasts starting out in this hobby.

    I would not recommend spending less than $200 on a turntable because turntables found in that price range typically produce poor sound, are made up of poor quality components, fail quickly, and can damage your vinyl records.

    7 Best Turntables Under $500

    The Fluance RT85 is well-loved, popular, and value for money, but it won’t meet the needs of every person. You can find all the products I’ve listed in this article on Amazon.com.

    • If you’re looking for a more affordable Fluance turntable, the Fluance RT81 will suit your budget just fine.
    • If you’re looking for a less traditional turntable, the Electrohome Kingston 7-in-1 has many features to enjoy.
    • If you’re looking for a traditional turntable design, the Sony PS-LX310BT boasts a stunning one.
    • If you’re looking for a turntable for DJing purposes, the Yamaha TT-S303 is the best option.
    • For a fantastic sound worth more than its price tag is the Pro-Ject T1 turntable. 
    • The Music Hall MMF-1.5 Turntable allows you to change and replace various pieces so that you can upgrade your turntable without having to buy a brand new one.
    • For something completely different from the other turntables on this list is the Denon DP-400.

    Fluance RT85

    The Fluance RT85 from Amazon.com is one of the best turntables on this list. If you’re looking for a beautiful turntable to match the aesthetics of your well-designed house, look no further because the Fluance RT85 is stunning. Plus, you have a variety of color options to choose from to best suit you!

    Fluance RT85 Reference High Fidelity Vinyl Turntable Record Player with Ortofon 2M Blue Cartridge, Acrylic Platter, Speed Control Motor, Solid Wood Plinth, Vibration Isolation Feet - Walnut

    Two key draw points to this turntable are that it comes with an Ortofon 2M Blue elliptical cartridge and an Acrylic Platter. The Ortofon 2M Blue is a great quality piece that adds to the resolution and dynamics of the sound produced. You can expect a warm, natural, and rich sound from this Fluance RT85 turntable.

    The Acrylic Platter is denser than the MDF, weighing around 3 pounds (1.36 kg). This heavier density and weight results in a better speed consistency, producing a clean and detailed sound without vibrations. Thanks to the Acrylic platter, a turntable mat isn’t necessary.

    For more on the benefits of the Acrylic platter, check out this YouTube video:

    Another factor that reduces vibration is the three adjustable rubber feet under the turntable. The S-shaped tonearm and belt motor feel good and are solid.  

    The auto-stop on this turntable is a useful option. You can choose to use this feature or not, thanks to the switch on the back. One thing that is missing from this wonderful model is a preamp.

    Setting up your Fluance RT85 will be a breeze if you follow the instructions provided. Make sure to use the gloves that accompany your turntable so that you don’t leave fingerprints all over it when you set it up.

    The Fluance RT85 will have you questioning if you have a live band playing right in your home!

    Pros

    • Beautiful aesthetic design
    • A range of colors are available
    • Ortofon 2M Blue
    • Acrylic Platter
    • A turntable mat isn’t necessary
    • Adjustable rubber feet to absorb vibration
    • Great quality
    • Auto-stop option
    • Easy to set up
    • Comes with gloves

    Cons

    • It doesn’t have a preamp

    Fluance RT81

    Another excellent but more affordable turntable is the Fluance RT81 from Amazon.com. This model is from the same brand as our previous turntable but doesn’t have some factors that made it rank as our best turntable. However, for the price and what it has to offer, the RT81 is impressive.

    Fluance RT81 Elite High Fidelity Vinyl Turntable Record Player with Audio Technica AT95E Cartridge, Belt Drive, Built-in Preamp, Adjustable Counterweight, Solid Wood Plinth - Walnut

    Unlike the RT85, the RT81 has a good-sounding built-in preamp. This semi-automatic turntable stops turning the record when it has completed the side. 

    Not only does this Fluance RT81 look fantastic, but the tonearm is excellent, the Audio Technica AT95E is clear, it comes with a high-quality rubber mat, and the base is solid and heavy. The wooden materials and the isolation feet absorb the vibrations.

    The Fluance RT81 has an aluminum platter and S-type tonearm, resulting in a lovely clear and precise analog sound to bring back all your nostalgia. 

    The setup of this turntable is quick and simple, and you’ll be able to do it in a few minutes if you follow the video guide on their YouTube page.

    An issue with the Fluance RT81 is that the speed isn’t consistent as I’d like it to be, and this is another area where the Fluance RT85 comes in first with its consistent and stable speed. 

    The RT81’s speed fluctuates and slightly distorted when playing orchestral pieces. Most people probably wouldn’t be too bothered by it, but it does distract me. Another issue is the inconvenience placement of the RPM adjuster. It’s underneath the turntable, making it hard to access with ease.

    Pros

    • Affordable 
    • Built-in preamp
    • Fantastic design
    • High-quality
    • Solid wood
    • Clear and precise analog sound
    • Easy setup

    Cons

    • Inconsistent speed
    • Inconvenient placement of the RPM adjuster

    Electrohome Kingston 7-in-1

    Another “budget-friendly” category turntable is the Electrohome Kingston 7-in-1 from Amazon.com. Not only is it one of the more affordable options on our list, but it’s ready to impress with its versatility.

    Electrohome Kingston 7-in-1 Vintage Vinyl Record Player Stereo System with 3-Speed Turntable, Bluetooth, AM/FM Radio, CD, Aux in, RCA/Headphone Out, Vinyl/CD to MP3 Recording & USB Playback (RR75C)

    The Kingston 7-in-1 is a turntable that beautifully plays vinyl records, has an AM/FM radio, and can play CDs. Thanks to its Bluetooth option, you can connect your phone to the turntable and play your music through it, transforming it into a Bluetooth speaker. 

    The turntable also features both AUX-in and USB, and although it has four high-quality built-in speakers, it has RCA outs, allowing you to plug in your stereo system for an even better sound.

    Although already quite impressive, this turntable also boasts a stunning vintage, retro design. It’s well built and has a real wood veneer cabinet. It’s heavy, has a plastic platter and a sapphire needle, and produces a warm, analog sound. It also has EQ options.

    With this Electrohome Kingston 7-in-1 able to play so many different audio files, I’m disappointed that it doesn’t have a cassette player. 

    Pros

    • Well-priced
    • Versatile
    • Four built-in speakers
    • Stunning design
    • Well built
    • EQ options

    Cons

    • No cassette player

    Sony PS-LX310BT

    If you’re all about connectivity and flexibility, the Sony PS-LX310BT is a turntable you’re going to enjoy! The PS-LX310BT is a fully automatic, quality Bluetooth turntable that has been made to last and is worth every penny!

    Sony PS-LX310BT Belt Drive Turntable: Fully Automatic Wireless Vinyl Record Player with Bluetooth and USB Output Black

    The platter of the Sony PS-LX310BT is aluminum, along with the tonearm. It comes with a polyester mat and a nice dust cover. The rest of the turntable is mostly made from plastic, which isn’t great. The speed is pretty consistent, and the sound is decent.

    I love this turntable because you have control over almost every aspect of it. You’re able to change or replace both the cartridge and the stylus. There are also two speed options (33 1/3 rpm and 45 rpm) that you can choose from. All you have to do is move the switch to the speed you want, and you’ve got it. 

    This turntable has a built-in preamp, although you can choose to turn it off and use your external amplifier instead. You can even choose the volume for the built-in preamp. There are three options available – low, medium, and high.

    The connectivity options are where this turntable outshines many of its other low/mid-range competitors. Thanks to its USB options, you’re able to connect to your computer and rip the vinyl records onto it.

    Thanks to its Bluetooth option, you’re able to connect your wireless headphones or soundbar. And with the RCA cable, you can directly connect your turntable to your stereo system.

    Pros

    • Various connection options
    • Flexible
    • Fully automatic
    • Two speed options
    • Built-in preamp
    • Volume choices

    Cons

    • A lot of the turntable is made from plastic which isn’t great for combatting vibration

    Yamaha TT-S303

    A popular turntable is the Yamaha TT-S303. Yamaha is known to make great-quality equipment that produces excellent sound, and this turntable is no exception. 

    Yamaha TT-S303 Hi-Fi Vinyl Belt Drive Turntable – Piano Black

    Although this turntable is on the higher side of our “under $500” list, it looks and sounds exceptional and is worth the money!

    The Yamaha TT-S303 has a clean, elegant look, an aluminum platter, a built-in phono preamp, and it produces detailed, deep, and lifelike sound. 

    You don’t have to tiptoe around this turntable, thanks to its isolating feet. The belt drive, located underneath the turntable, also reduces vibrations. Unless you’re deliberately jumping in front of the turntable, the stylus won’t be affected by movement and will play smoothly.

    The Yamaha TT-S303 is a manual turntable, which means that you’ll have to lift the tonearm and move it to its cradle once the record has finished playing. It’s a wired turntable and doesn’t have Bluetooth or USB.

    The setup is fairly easy except for the tonearm balancing. However, there are YouTube videos to guide you through the process.

    Pros

    • Clean, elegant look
    • Built-in phono preamp
    • Detailed, deep, and lifelike sound
    • Isolating feet
    • Pure, manual turntable

    Cons

    • The setup of the tonearm balance is tricky

    Pro-Ject T1

    I’m in love with the Pro-Ject T1 turntable just from the way it looks. It boasts a clean and minimalist look that will stand out in any room of your house or studio. It doesn’t only look amazing, but it’s also plastic-free, which is better for the environment and better for sound.

    Pro-Ject T1 Turntable (Satin Walnut)

    The Pro-Ject T1 Turntable sounds like it should be more pricey than it is. It has a full-bodied sound that is natural and warm. The model has no hollow spaces, which decreases vibration. Another piece that contributes to the lack of unwanted vibration is the heavy glass platter.

    The tonearm on this turntable is made from aluminum, and it has the OM 5E Moving Magnet cartridge. It also has an excellent elliptical diamond stylus tip. Unfortunately, this model’s tonearm isn’t height-adjustable, so you’re not going to be able to change out your cartridge.

    The tonearm and cartridge come already set up. You just need to place the platter onto your turntable. This easy setup is ideal for those who hate the construction process or are just starting out.

    There are three different Pro-Ject models in this line, with different prices. The T1 doesn’t have a phono preamp, but the more expensive model does. Unfortunately, the T1 doesn’t have speed control either. If you need to adjust the speed, you’ll have to remove the platter and adjust the belt’s height. This is both frustrating and inconvenient.

    All of the Pro-Ject T1 models are handmade and well built.

    Pros

    • Clean and minimalistic design
    • Plastic-free
    • No hollow spaces
    • No vibrations
    • Full-bodied, warm, and natural sound
    • It comes already set up
    • Handmade and well built

    Cons

    • No speed control
    • The tonearm isn’t height adjustable
    • No built-in phono preamp

    Music Hall MMF-1.5 Turntable

    A very affordable and user-friendly turntable is the Music Hall MMF-1.5 Turntable. It’s a beautiful turntable that has a classic style. 

    Music Hall MMF-1.5 Turntable

    Although this turntable only has one color option on Amazon.com, the real cherry wood veneer stands out as a statement piece. The tonearm is aluminum. The S-shaped tonearm aids in tracking that is accurate and smooth. It also has a tonearm lift lever.

    The Music Hall MMF-1.5 Turntable has a Music Hall Melody Moving Magnet cartridge that is easy to replace. Being able to replace components of your turntable is necessary to keep it running for years to come and to upgrade your turntable without having to buy a whole new one. I recommend upgrading the stylus on this turntable because it’s quite basic. You may appreciate an elliptical stylus more.

    The platter is aluminum, and it has a thick turntable mat to go on top of it to decrease vibration. The vibration dampening feet also help with this.

    You can plug your turntable in and play it without extra bits and pieces because it comes with a built-in phono preamp. However, it doesn’t have the best preamp, and you may benefit more by using an external preamp instead.

    I’m happy to tell you that this turntable has three different speed options – the 33 ⅓, 45, and 78 RPM. 

    The Music Hall MMF-1.5 Turntable is not automatic and doesn’t have AUX, but it does have RCA ports. It also doesn’t have a USB output, so you won’t be able to convert your vinyl records to MP3 files.

    The turntable comes with a dust cover for protection and is made of excellent quality.

    Pros

    • User-friendly
    • Tonearm lift lever
    • Built-in phono preamp
    • Three speed options
    • RCA ports
    • Dust cover

    Cons

    • Poor preamp
    • No Aux or USB

    Denon DP-400

    For something a little more unique, we’ve added in the Denon DP-400. Although it hits the high end of our price range, we thought it was worth mentioning.

    Denon DP-400 Semi-Automatic Analog Turntable with Speed Auto Sensor | Specially Designed Curved Tonearm | Supports 33 1/3, 45, 78 RPM (Vintage) Speeds | Modern Looks, Superior Audio

    Thanks to the dust cover, this turntable has a whole different look when compared to other turntables. The dust cover can come off and can even be used as a vinyl record cover stand so that everyone who comes into the room will know which band or musician is playing on the record. 

    Thankfully, the good features don’t stop there. The sound produced by this turntable is high-end, warm, and sophisticated. There are three speed settings to use, giving you freedom with your vinyl records. The speed is consistent.

    Denon DP-400 Semi-Automatic Analog Turntable with Speed Auto Sensor | Specially Designed Curved Tonearm | Supports 33 1/3, 45, 78 RPM (Vintage) Speeds | Modern Looks, Superior Audio

    The Denon DP-400 comes in black or white and has an S-shaped tonearm that enhances its sound. It also has a built-in phono equalizer. This turntable is sturdy and durable, and it can be seen throughout, right down to the knobs.

    The turntable is semi-automatic and has an auto-stop feature. It’s easy to set up and a well-rounded user-friendly turntable. The only issue that may bother some people is that it’s pretty heavy. Weight is great for stabilization; however, it makes moving the turntable around difficult. 

    Pros

    • Unique design
    • Dust cover can be used as a vinyl record cover stand
    • High-end sound quality
    • Durable
    • Various speed settings
    • S-shaped tonearm
    • Built-in phono equalizer
    • Auto-stop feature
    • User-friendly

    Cons

    • Weight makes moving the turntable difficult

    Key Takeaways

    Although many of the turntables on this list are excellent for the price range, the Fluance RT85 still comes out on top. The Ortofon 2M Blue cartridge and Acrylic Platter are two factors that stand out with this model, as well as its superb design.

    You have a range of colors to choose from, and you don’t even need a turntable mat. It has a convenient auto-stop option and boasts great quality. The gloves that come with, to avoid leaving fingerprints on your new turntable, are another nice touch.

  • How To Clean a Turntable Needle (Let’s Find Out)

    How To Clean a Turntable Needle (Let’s Find Out)

    Around 75 thousand turntables are sold in the US each year. One can’t help but wonder whether all those vinyl enthusiasts know how to maintain their gear properly and get the most out of it. Cleaning a turntable needle is one of the essential elements in properly experiencing your music collection.

    Here’s how to clean a turntable needle:

    1. Use a stylus brush for regular maintenance.
    2. Do light cleaning using a magic eraser.
    3. Use a stylus cleaning gel for more detailed cleaning.
    4. Do deep cleaning using a liquid stylus cleaner.
    5. Use ethanol for extremely grimy turntable needles.

    Keep reading to find out all the details on cleaning a turntable needle quickly and effectively.

    1. Use a Stylus Brush for Regular Maintenance

    Like most things in life, prevention is also the best medicine for turntable needle longevity. Regular stylus cleaning and maintenance is the key to keeping your turntable sounding good and keeping your records scratch-free.

    All you need for regular turntable needle maintenance is a soft paintbrush. Vinyl enthusiasts who are willing to spend a few extra bucks can even get a specialty stylus brush for regular needle cleaning.

    Whatever of the two items you choose, here’s how the regular turntable needle cleaning process should look:

    1. Run the stylus brush or a soft paint brush across the tip of the turntable needle two to three times per cleaning.
    2. Keep each brushstroke light to avoid damage to the turntable needle.
    3. Repeat the cleaning process at least once per week.

    The stylus brush method is considered the most traditional method for cleaning the turntable needle. Such a method isn’t as much of a cleaning method as it aims to prevent dirt from accumulating on the needle.

    There’s one important thing to remember with turntable needle cleaning.

    All of the dirt that reaches the needle has originated from the records you’re playing. That’s why, in addition to cleaning the needle, you should also look into wiping down your records after a few uses. 

    All of the dirt that reaches the needle has originated from the records you’re playing. This is why, in addition to cleaning the needle, you should also look into wiping down your records after a few uses. 

    2. Do Light Cleaning Using a Magic Eraser 

    Now that you know that regular cleaning and prevention of dirt accumulation is the best method to keep your turntable needle clean. What’s the next best solution if you neglect regular turntable needle maintenance?

    Melamine foam pads, more commonly known as magic erasers, are an excellent way to clean your turntable needle. This cleaning method is especially effective on needles that have been slightly neglected and won’t benefit from a light brushing.

    Here’s how you can safely apply the magic eraser cleaning method to your turntable needle:

    1. Cut a piece of the magic eraser (you won’t need more than a sixth of the pad).
    2. Place the piece of the magic eraser under the needle.
    3. Lower the turntable needle slowly onto the eraser and lift it.
    4. Repeat the process until the needle is clean.

    Vinyl users who decide to use a magic eraser-type product to clean their turntable needle should keep something in mind: this is an abrasive product that can easily cause more harm than good by damaging the needle. Don’t rub the needle on the piece of foam padding to avoid any potential damage.

    Additionally, you shouldn’t use a wet magic eraser for cleaning your turntable stylus. While adding water softens the pad, a dry magic eraser is more abrasive. That’s what makes it capable of cleaning the needle with just a few light touches.

    3. Use a Stylus Cleaning Gel for More Detailed Cleaning

    Some turntable users might find the previous method too risky or too aggressive. In case the brushing can’t help you, and you’re hesitant to use a magic eraser on your turntable needle, there’s a much safer cleaning solution.

    Stylus cleaning gels are purpose-made turntable needle cleaning products. These gels provide the best cleaning performance and micro-dust control, according to experts. Stylus cleaning gels are most commonly urethane-based, meaning you can reuse them as many times as you want.

    Follow these steps to effectively utilize any stylus gel product for a detailed turntable needle cleaning:

    1. Open the packaging that the stylus cleaning gel arrived in.
    2. Remove any protective covers from the gel.
    3. Lower the tonearm and the turntable needle into the gel.
    4. Lift the arm and repeat the last two steps as many times as necessary.

    As already mentioned, stylus cleaning gels are products that have a single purpose — cleaning the turntable needle. That means this needle cleaning product has no potential drawbacks, caution alerts, and use warnings.

    Stylus cleaning gels are perfectly safe as long as you follow the above instructions. An excellent benefit of this turntable needle cleaner is that you can reuse it.

    Once the urethane resin (gel) part gets dirty, you can take it out of the packaging. Rinsing gently with tap water and allowing it around 30 minutes of room temperature drying time should make the gel as good as new.

    4. Do Deep Cleaning Using a Liquid Stylus Cleaner

    If the gel cleaning method can’t get your turntable needle as clean as new, then you need something that offers a deeper and more powerful cleaning.

    Liquid stylus cleaners most commonly come in a bottle that resembles nail polish. While some of the bottles might have an included applicator in the cap, others might require a stylus brush to apply.

    Here’s how you use a liquid stylus cleaner the right way:

    1. Open the bottle and see if there’s an applicator inside.
    2. Get a stylus brush or a soft paintbrush if there’s no applicator.
    3. Apply a small amount of the liquid cleaner to the applicator or the brush.
    4. Remove any excess by tapping the applicator or the brush against the inside of the bottle.
    5. Run the applicator or the brush across the turntable needle using light pressure.
    6. Reapply the liquid and repeat the application process until the stylus is clean.

    Liquid stylus cleaners are most commonly a mild mixture of rubbing alcohol and water, making them capable of removing dirt from almost any turntable needle. In addition, this alcohol and water mixture also makes liquid stylus cleaners perfectly safe for use and easy to make on your own.

    The only thing I’d recommend is to maintain a light touch while applying the product to your turntable needle, just like with any other cleaning method. Suppose you decide to make your own mixture; make sure you use ethanol and distilled water.

    5. Use Ethanol for Extremely Grimy Turntable Needles

    Suppose none of the methods listed previously can’t clean your turntable needle. That means the turntable needle has been neglected for a while. Don’t worry; there’s always a solution.

    Ethanol, or rubbing alcohol, is an excellent way to clean stubborn dirt accumulations from hard surfaces. Using ethanol with no addition of water can be the way to go for those who need to get rid of dirt from their stylus.

    You can clean your turntable needle with ethanol by following these steps:

    1. Apply some rubbing alcohol on a stylus brush or a soft paintbrush.
    2. Clean the stylus by moving the brush lightly over it.
    3. Make sure that you use front-to-back and back-to-front motions.

    Even though this method is perfectly safe to use on occasion, it shouldn’t be overused. Getting too much liquid onto your turntable needle might increase its degradation. 

    Final Thoughts

    Although there are multiple ways you can clean a turntable needle, all of them share a few common features. Here are just some of the things that every turntable owner should keep in mind if they want to keep their device and records playing for a long time:

    • Get a soft stylus brush for regular turntable needle maintenance.
    • Use the brush at least once a week.
    • Wipe down your records after every use.
    • Use other cleaning tips from this article as needed.
  • Belt Drive vs. Direct Drive Turntable: How To Choose?

    Belt Drive vs. Direct Drive Turntable: How To Choose?

    Turntables have an eclectic history since 1857, but there have only been 4 mechanisms to drive the platter, of which only 2 are common and popular. Both belt drive & direct drive mechanisms have had a fascinating journey over the decades, and it is still difficult to choose between them. 

    Choose a belt drive turntable if your priority is high fidelity audio playback. Consider a direct drive turntable if you want higher torque and more efficient manual control of the playback. Direct drive is more suited for turntablism, while belt drive is for avid listeners. 

    Audiophiles have strong preferences, and they often get into heated debates to champion their favored drive mechanism. However, the choice is truly perplexing if you don’t have a preference. This guide explains the theoretical & practical differences of belt drive vs. direct drive turntables. 

    How Does a Direct Drive Turntable Work?

    In 1857, French inventor Edouard-Leon Scott de Martinville created the phonautograph, the first-ever turntable to record sound, not play it back. In 1877, Thomas Edison created the phonograph, and Alexander Graham Bell made the first graphophone in 1886. 

    The foundation of modern record players and turntables is Emile Berliner’s gramophone, invented in 1887. The primitive turntables required hand cranking, and a few expensive models ran on a loud motor. In 1898, Eldridge Johnson patented a spring motor to drive gramophones. 

    Hence, you could say that direct drive was the first sustainable and reliable mechanism to rotate the platter. You may read about direct drive as a much later invention in 1969 by a Panasonic (then Matshusita) engineer named Shuichi Obata, but this is not accurate by any definition. 

    Eldridge Johnson’s direct drive gramophones were commercially available in the United States as early as the 1900s. Watch the following video at ~1:02, and you will see a direct drive turntable manufactured in 1927. 

    A direct drive turntable has a simple mechanism. An electric motor inside the plinth and underneath the platter is connected to the spindle through its rotor. As you power it on, the turntable’s motor spins and rotates the platter, depending on your selected settings. 

    Direct Drive Turntable Pros

    Here are the pros of direct drive turntables: 

    • Faster starts and rotations per minute 
    • Easier maneuverability like scratching for DJs 
    • Power-free spinning possible 
    • Less maintenance due to fewer components 
    • Highly reliable for turntablism 
    • Exceptional durability, subject to brand & model 

    The free-spinning attribute of direct drive motor-operated platters makes them popular among performers. Also, scratching is more convenient with a direct drive turntable because the motor retains the rotation per minute. Furthermore, many artists often need faster RPMs or speeds. 

    Direct Drive Turntable Cons

    Direct drive turntables have only 2 significant downsides: 

    • Audio quality 
    • Speed consistency

    The latter may not be an issue in premium models, but entry-level or low-quality direct drive turntables may have fluctuating speeds due to the various settings and thus electric signals.

    Audio quality should not be a dealbreaker in premium models as the motors are almost quiet and not much vulnerable to external factors causing any distortion or performance issues. However, louder and inefficient motors can have a noticeable impact on audio fidelity. 

    Also, the vibration affecting the tonearm may be reduced by using a torque generator or another motor. However, you will need to buy a direct drive turntable with such a feature to eliminate the vibration effects on the tonearm and audio fidelity. 

    How Does a Belt Drive Turntable Work?

    A belt drive turntable uses elastic rubber wrapped around the platter to rotate it when you power the device and its motor. Unlike the direct drive mechanism, the motor in a belt drive turntable is not directly under the platter but towards a side inside the plinth. 

    The first belt drive turntable was created by the audio pioneer Edgar Marion Villchur, and it was commercially released in 1961. Since then and the renewed direct drive turntable popularized by many brands, the two mechanisms are at loggerheads, drowning out the idler and flywheels. 

    The belt drive turntables are not necessarily complicated compared to the direct drive mechanism. However, there is an additional component, the belt, and thus you have to weigh its strengths and weaknesses vis-a-vis the pros and cons of a direct drive motor under the platter. 

    Belt Drive Turntable Pros

    Here are the pros of belt drive turntables: 

    • High fidelity audio playback due to less vibration 
    • Consistent speed unless the belt is worn out 
    • Aesthetic designs and a classic appearance 
    • More suitable for listening to an audio playback 

    Belt Drive Turntable Cons

    Here are the downsides of belt drive turntables: 

    • Slower start as the belt attains the requisite speed 
    • No free spins without power due to the belt’s tension 
    • Difficult to maneuver during turntablism, such as scratching 
    • Belt issues: looseness, tightness, wear & tear, damage, etc. 

    You can spin a belt-driven platter without power, but the elastic rubber’s tension will cause some inconvenience. Also, you may inadvertently cause a bit of wear & tear in the belt. Besides, scratching is not easy due to the omnipresent tension of the belt in such designs. 

    Belt Drive Turntable vs. Direct Drive – Audio Quality

    Direct drive turntables have an inherent challenge due to the vibration caused by electric motors. Since the motor is directly under and connected to the platter, there is a slight vibration and distortion of your playback audio. However, this effect may not be cognizable to all. 

    A belt drive turntable eliminates this motor-induced vibration and distortion because it is housed away from the platter. Also, the belt is rubber and has some elasticity that can absorb any inevitable vibration caused by the electric motor. Thus, the audio quality is apparently better. 

    The earliest electric motors used in gramophones were large, heavy, and noisy. The vibration was a serious issue and the audio playback quality suffered as a result. Modern electric motors are much smaller, lighter, and quieter. Thus, you may or may not notice any loss in audio fidelity. 

    Eventually, the practical difference in audio quality comes down to the particular turntables, their manufacturers, the designs, the deftness of the engineers, and the precision of all components. A poor quality belt drive turntable will distort the audio quality, much like an unsuitable motor. 

    Furthermore, the drive mechanism is not the only factor in high fidelity sound reproduction or audio playback. Everything from the entire design to the type & quality of materials, cartridge, coil & magnet, stylus, and customizable settings will determine the real-world audio quality. 

    Belt Drive vs. Direct Drive Turntable – Durability

    The only undisputed difference between belt drive and direct drive turntables is durability. Direct drive turntables may last longer because they have one less component that can fail. In other words, there are fewer chances of a part failing in direct drive compared to belt drive turntables. 

    Both types of turntables have motors, which may fail at some point in time. Also, the stylus, cartridge, coils or magnets, springs, and other parts may suffer from damage in due course. With belt drive turntables, you may have to replace the belt if it is loose, worn out, or damaged. 

    While a belt can get loose, wear out, and be unusable, a premium-quality turntable should not have this problem any time soon. You can use a belt drive turntable for years, if not decades, before you may need to replace the rubber strap. Also, use & maintenance are decisive factors. 

    How To Choose a Turntable Drive Mechanism

    Consider your priorities and preferences. The direct drive mechanism will be a more practical option if you are into turntablism and intend to reproduce or perform. The belt drive mechanism is better if you are a home user who wants impeccable, high fidelity audio playback. 

    It is necessary to note a caveat about both these mechanisms. A bad belt will distort the audio, and it will be vulnerable to many external factors, including the turntable’s functioning components, such as: 

    • Spindle rotation 
    • Stylus position 
    • Tonearm 
    • Cartridge performance 

    Likewise, a low-cost motor in direct drive turntables can nearly ruin audio fidelity. This problem can also occur in belt drive turntables, as the rubber cannot absorb phenomenal vibration caused by a failing or bad quality motor. Thus, you need a brand & model-specific comparison. 

    The general practice among DJs and other musicians is to go for a direct drive turntable. Home users and non-performing audiophiles can prefer a belt drive turntable as none of the free-spinning, scratching, and higher torque features will be a concerning issue or shortcoming. 

    Final Thoughts

    Like the belt and direct drive mechanisms, the styli shapes, the cartridges, spindles, and other model-specific features will affect audio fidelity. Besides, every turntable model operates best at its optimum settings. Stressing the drive or using demanding settings will impair durability. 

    Furthermore, the materials play a significant role. For instance, metal or alloy is heavier than plastic, so a motor must work harder and may be noisier to rotate such platters. Lighter platters are easier for smaller and quieter motors to operate. These aspects matter for all turntables. 

    Related Articles:

  • Cartridges and Turntables: Everything You Need to Know

    Cartridges and Turntables: Everything You Need to Know

    The capability of their cartridges defines the ultimate performance of all record-playing systems. Therefore, clarity of the peaks of the music, tonal balance, stereo separation, and freedom of distortion and noise is affected by the quality of your cartridge. The quality of the cartridge also affects the life of your records. So after thorough research, we created the following article on everything you need to know about cartridges and turntables.

    The turntable cartridge is the crucial part of the turntable situated at the end of the turntable’s tonearm that supports the stylus. The stylus is the pickup or needle that reads the grooves of the record and produces music.

    The turntable cartridge is the hardest working part of the record player that sits on the vinyl record’s grooves. The cartridge is responsible for reading the undulations on the groove’s wall and converting it into a signal that the amplifier can pick.

    So in this article, we’ll give you cartridge and turntable information. We’ll also show you how they work.

    Turntable And Cartridge Information

    The turntable is a part of the record player that supports the vinyl records. The turntable is responsible for rotating the vinyl with its needle on the record’s grooves and producing sound. Turntables revolve at a speed of 78, 45, 33 1/3, and 16 2/3.

    Most recorders have a gearing system that allows you to pick the right pace for your record. (source)

    The record player has many parts that work together to guarantee you a high-quality output. The platter is responsible for holding the record in place while being spun by the motor. But the most crucial part of the turntable that’s responsible for sound production is the cartridge.

    What Is A Cartridge?

    Cartridge, styli, needle, call it whatever you like, but every turntable comes with a unique device that sits on the records’ grooves and reads its undulations. The signal produced by the cartridge travels through the arm to the amplifier.

    And then, the amplifier boosts and equalizes the signal to a level that a second amplifier can pick before being transported to the speakers. (source)

    The cartridge is the most hardworking part of a turntable responsible for converting mechanical movements to electric signals. It is a transducer that does the opposite of loudspeakers which convert the signal to vibrations. (source) So, depending on the type of cartridge your turntable has, you have to set it up correctly to minimize record damages.

    Types Of Cartridges

    Generally, the ancient ceramic and crystal pickups in high-end systems got replaced by magnetic cartridges (moving coil or moving magnet). And that is because the magnetic cartridges lower record wear by applying lighter pressure on the grooves and improved playback fidelity. Magnetic cartridges are known for using less tracking force and reducing the likelihood of the grooves getting damaged. Magnetic cartridges also have lower voltage outputs than ceramic and crystal pickups. (source)

    Moving Iron (Mi) And Moving Magnet (Mm) Cartridges

    The moving iron and magnet cartridges function the same way, and the only difference between the two is that one has a magnet attached to the cantilever while the other has a piece of iron.

    The stylus of the moving magnet cartridges has a small magnet between two coils that create an electromagnetic generator. When the stylus reads the undulations on the record, the magnet vibrates, which induces a current in the coils. (source)

    Since the magnet is tiny and isn’t attached to a generator like ceramic cartridges, it has a unique stylus that requires less tracking force and faithfully follows the grooves.

    The moving iron cartridges have a moving iron attached to the cantilever and a hug magnet over its coils to provide the needed magnetic flux. (source)

    Moving Coil Cartridge (MC)

    This cartridge comes with a tiny electromagnetic generator, but with the coils and magnet reversed. Instead of attaching the magnet to the cantilever, the coil is attached to it and moves in a permanent magnetic field.

    The coil is made using fine wires, and since the windings connected to the armature are tiny, the voltage produced is also small. (source)

    The signal produced by this cartridge is a few hundred microvolts. So, noise can easily swamp it out. Therefore, instead of a preamplifier, most turntables with these cartridges use a step-up transformer.

    Luckily, some high output MC cartridges produce the same output as the MM cartridges. MC cartridges are tiny instruments that are generally costly but preferred by audiophiles. (source)

    Moving Micro-Cross (MMC) Cartridges

    The MMC is a variation of the MI cartridge that was patented and invented by Bang & Olufsen. In this cartridge, the coils and magnets are stationary while its micro-cross moves with its stylus. The MMC design allows for channel separation since the movements of these channels appear on a separate axis. (source)

    What Is The Difference Between The Moving Coil And Moving Magnet Cartridges?

    Generally, MC design is quite common among high-end turntables, while most low-end turntables come with MM cartridges. The debate over which design produces better sound is entirely subjective and heated.

    • The MC cartridge offers low impedance and inductance, which means that the capacitance’s effect is negligible. On the other hand, the MM cartridge provides high impedance and inductance.
    • The MC cartridges sport low-moving masses. But even high-quality MM designs offer lower moving masses than MC designs. (source)

    Parts Of A Cartridge

    Most cartridges have a unique design that features many components, with the most common ones being:

    • Stylus: the stylus is the tip of the needle that rides on the grooves of the vinyl records. The stylus comes built from either a polished diamond or unique industrial gemstones.
    • Cantilever: you may think that the only work of the cantilever is a stylus holder, but it does more than just support the needle. The cantilever carries the vibrations from the stylus to the coil and magnets. Some models of MM cartridges have a detachable design, which means that you can detach the stylus when replacing it instead of changing the cartridge. (source)
    • Magnets: each cartridge comes with a magnet. The magnets are the most crucial part of the cartridge that induces the voltage in the coil after the cantilever moves.
    • Coil: the coil is a tightly wrapped wire column that usually situates in the cartridge. The coil helps the cartridge generate more than enough electrical signals to make a sound.

    How Does The Cartridge Work?

    The work of the cartridge is turning the movement of the stylus into a signal with the magnet attached to the cantilever. Every time the needle moves, the cantilever carries the tiny magnet, which induces a voltage in the coil. The coil is connected to the pins situated on the rear parts of the cartridge.

    Since each cartridge has two coils, the four pins are negative and positive connections of the channels (this is how the MM cartridges function). (source)

    On the other hand, the magnets of the MC design are always static. It provides a lighter moving mass, which means that the coils, cantilever, and stylus can start and stop quickly. But you need thinner wires and high precision when making MC cartridges. It is why they are way more expensive than the MM cartridges. (source)

    Unfortunately, the power or size of the signal is relatively low; therefore, the turntable needs an amplifier to help boost the voltage to a level that the regular amplifier can handle. The MC cartridges produce even lower voltage, so the phono stage must be quieter than MM cartridges. How efficient a cartridge will depend on:

    • The materials used to make the cantilever
    • The shape of the stylus
    • Arrangement of the coil or magnet in the cartridge
    • The material used to make the body of the cartridge

    Remember, the Japanese manufacturers make the body of the cartridges using jade or hardwood, while some MC have nobody.

    The lady of an outer body helps lower the weight of the cartridge, but it does expose the delicate parts of the cartridge. (source)

    In an ideal situation, all the vibrations the stylus gets from the groove of the record player should be transformed to sound by the cartridge. But this system is constantly battling unwanted sounds from the furniture and the air; therefore, you must place the turntable away from furniture and speakers. The best place for setting the turntable is on a wall shelf at the end of the room, but make sure it’s as far from the speakers as possible. (source)

    Setting Up The Cartridge

    If you plan to reduce vinyl wear and listen to a lot of music, you should set up the cartridge correctly. But one thing is clear; the stylus will not always be in line with the grooves on the vinyl.

    And that is because the tonearms are usually attached to a fixed point; therefore, the cartridge will have to describe the arc as it traverses the vinyl.

    Therefore, the set-up of the cartridge should be a balance of compromises. You have to optimize the position and angle of the stylus for a considerable part of the record’s surface as humanly possible. To get the correct position, you need an alignment protractor to help you position the cartridge correctly.

    Set Up An Appropriate Downforce

    Too much force can result in high wear of the stylus and vinyl; therefore, it’s crucial to set the correct downforce. You can find the proper downforce in the cartridge manual or online. And if the arms have some calibration markings, you can balance the arm so that it floats with the tip of the stylus near the vinyl’s surface.

    You can do this by simply adjusting the counterweight and dialing into the required downforce. (source)

    If the arm of your turntable doesn’t have this feature, you need a downforce gauge like Shure SFG-2. And then adjust the exact position of its counterweight until you get the proper downforce.

    With the correct downforce, your turntable will produce high-quality sound, and your records will last longer. The old technique of putting a coin on the turntable’s headshell to prevent it from jumping is not a great idea. (Art Zuckerman 1980) (source)

    You can read more about putting a coin on the turntable’s headshell in this article that I wrote: Putting A Penny On A Record Player Finally Explained!

    After setting the downforce, you can look for a protractor and fine-tune the angle and position of the stylus and cartridge.

    Unfortunately, the fancier the cartridge, the more demanding it will be to set up. A good thing about MM cartridges is that they come with a spherical stylus that is easy to align. The high-end MC cartridges come with a line-contact stylus that you must align correctly for the best results. (source)

    If the tonearm allows it, then you can even adjust the VTA (vertical tracing angle). The VTA is the angle of the styli in the grooves, as seen from the side.

    Remember, the vertical tracking angle is correct if the tonearm is parallel to the record’s surface when the stylus is in its track. If it is not, then you should lower or raise the arm for better results. (source)

    Factors To Consider When Choosing The Correct Cartridge For Your Turntable

    When you purchase a turntable, it always comes with a pre-installed stock cartridge. Unfortunately, the stylus tends to get damaged with time, so you may have to replace the entire cartridge at some point.

    Or, if you love music and want to listen to more details from your vinyl record, then you may have to upgrade its cartridge. It means getting an even better cartridge. (source)

    After all, most folks purchase low-end record players and then upgrade them with time. They replace the stylus, platter, tonearm, and even the belt to improve the output quality.

    The gradual process of upgrading and customizing a turntable helps them get the right tone. So the first and most common replacement done by audiophiles is cartridge replacement.

    The correct cartridge can help keep your records safe and make them last longer while producing high-quality sounds.

    So getting a better cartridge can make a huge difference. And with vinyl becoming hard to replace, you must select the correct cartridge for your turntable.

    Unfortunately, most entry-level turntables have a non-removable stylus, so instead of just replacing the stylus, you may have to purchase a new cartridge. High-end turntables come with detachable needles that can you can easily replace when damaged. So here are a few factors to consider when buying the best turntable cartridge:

    Stylus Construction And Shape

    The stylus is the most crucial part of the cartridge that rides on the grooves of the vinyl records. Therefore, it plays a pivotal role in how great the cartridge replicates the sound from your record.

    And due to the access, it has on the surface of the vinyl, it does play a vital role in the wear and tear of the records. Therefore, the shape of the stylus matters a lot, and if you want to listen to high-end audio, you should be ready to spend more. (source)

    Before getting into the different types of styles, we must consider shank construction. The stylus that is usually attached to the cantilever is either tipped diamond or nude diamond.

    A nude diamond stylus is made from diamond and glued to the cantilevers.

    On the other hand, the tipped diamond stylus is just that-the tip of the stylus is the only part made from the diamond; the rest is just metal. (source)

    The nude diamond stylus is the premium option that tracks more accurately and has a low mass. The different types of the stylus are:

    Spherical

    The most common kind of stylus that is cheaper is the conical or spherical stylus. The spherical stylus resembles a tip of a ball-point pen. And thanks to their radius, this stylus traces less of the small groove modulations that produce high frequencies.

    The debate on whether it creates more wear is still debatable, with some claiming it produces less wear.

    Others claim that it produces the most wear since the contact region is restricted to 2 points. (source)

    Elliptical

    The second most common types of stylus are the bi-radial or elliptical stylus. This stylus makes contact across a considerable part of the grooves thanks to their dual radii. It guarantees improved phase response, improved frequency response, precise tracking, and lower distortion.

    Unfortunately, the Elliptical stylus wears out faster; plus, you’ll have to pay attention to the tonearm and cartridge alignment. (source)

    Micro-Ridge Stylus

    Micro-ridge also referred to as a Microline stylus, is the most advanced style available. Its computer-designed tip allows the stylus to offer better high-frequency performance with a longer stylus and record life. Micro-ridge stylus is quite costly and hard to produce. (source)

    Hyper Elliptical Stylus

    The hyper elliptical stylus also referred to as stereohedron, fine line, or Shibata is an advanced elliptical stylus.

    This improved version of the elliptical stylus has a unique design that offers more significant contact with the grooves. Hyperellipticptic stylus can offer improved tracking, lower record wear, and longer tip when appropriately aligned.

    Audiophiles are always looking for perfection, and this has forced engineers to become inventive.

    So if you want to listen to quality music, then you should be ready to upgrade the diamond-tipped stylus that comes with your low-end turntable with a cartridge with a nude stylus.

    The nude styles can be costly, but it’s the best option for transferring the kinetic energy needed to create the signals. (source)

    Do I Need A Headshell?

    You might have noticed that some turntables come with a factory-installed cartridge attached to a light headshell. You can uninstall these headshells by loosening the screws on the tonearms.

    Therefore, if you are a vinyl lover who likes replacing their cartridges, you will have to purchase multiple headshells for convenient and easy swapping for your different cartridges. (source)

    Therefore, if your collection includes standard recordings, mono-recordings, and some 78s, you need multiple headshells.

    Mounting System

    Confirm if your turntable has a p-mount or a standard mounting system. It will help you pick the correct cartridge that will match your turntable. Luckily, most turntables come with standard cartridges.

    These cartridges can be mounted on the underside of the tonearm and then secured with vertical screws.

    On the other hand, the P-mount cartridge inserts into the end of the tonearms and typically get secured using one horizontal screw.

    Your Vinyl Records

    Most modern 78rpm records get pressed using standard-width micro-groove technology. Therefore, you can play them using any cartridge, but if you have the older original records, you’ll need to get a specialized needle such as Audio-Technica VM670SP. The standard needle has a diameter of less than one mil, while the correct stylus for playing the old records should have a diameter of approximately three mil* (mil* is equal to 0.001inch). (source)

    Other Specs To Consider

    For beginners, reading the specs on the cartridges can be quite challenging. Understanding some of the specs on the cartridge can feel like going back to your high school physics classes.

    So here are some of the most crucial specs to consider when buying a cartridge:

    • Frequency response: this is the measure of the range of sounds the cartridge can produce uniformly. It starts from a baseline of between 20 and 20,000Hz, with high-end cartridges going higher or lower. (source)
    • Channel separation: this is the ability to deliver the right signal to the proper channels of the cartridge when there is no signal on the right and vice versa. Channel separation is measured in dB, and the lower the number, the lower the separation and vice versa. Separation is crucial when dealing with higher frequencies. (source)
    • Channel balance: this is the measure of excellent basic design and production quality. Technically either side of the cartridge must have equal loudness when the recorded levels are present.
    • Output level: you must match the output levels of your electronics with that of the cartridge. Remember, a lower level can result in too much noise, and a higher level can over-drive your preamplifier into distortion. (source)

    How to Replace a Cartridge

    Replacing a cartridge is a simple procedure that anyone can do; all you need are some simple tools. But first, make sure you know exactly where the cartridge is located. To replace the cartridge, you should do the following:

    1. Open the dust cover of your turntable and look for where the headshell is situated.
    2. Since the needle can be pretty dangerous, the next step is detaching the stylus if it’s possible. But don’t pull it out aggressively, as it can break the cartridge in the process. It might be the best time also to replace the stylus if the current one is damaged.
    3. Release the headshell from its tonearm by turning the nut holding it in place towards you.
    4. Remove all the screws attaching the cartridge to the tonearm using a screwdriver and uninstall it.
    5. Finally, unplug the wires connecting the cartridge to the turntable from its pins.
    6. Install the new cartridge, but first, make sure you plug the pins correctly into the tonearm. You can match the colors of the pins with the wires.
    7. Screw the cartridge back to its original place and return it to the headshell.
    8. Finally, you can install the new stylus, and you’re good to go. But if your turntable’s stylus is not detachable, you can skip this step. Or you can replace it with a cartridge that has a detachable needle. (source)

    FAQs

    How Do I Know If I Can Replace The Cartridge On My Machine?

    If you are not sure, then you should look at the end of the tonearm (the end that you lift when placing the needle on the vinyl). If you see some screws connecting the cartridge to the arm, then it can be replaced. But if you don’t, then you can only replace the stylus.

    When Should I Replace The Stylus?

    Most producers recommend that you should replace the stylus after about 1,000hours of playing time. So if you listen to music for an average of an hour every day, then you can replace it after about three years.

    How Long Does It Take To Break In A New Stylus?

    Generally, the break-in time of most styluses is 14 days, but this will depend on how often you use it. But after two weeks, the bearing, which is ordinarily stiff when new, will be ready to deliver high-quality sounds.

    Conclusion

    In terms of output quality, no sound player can rival a record player. A record player uses an analog signal, and it gives you a great experience that is almost tangible. But for you to enjoy memorable songs, you have to be ready to get the suitable turntable and make sure it’s properly serviced. You can even upgrade some parts for better performance and increase the life of your records.

    Sources

  • 7 Steps To Fixing A Record Player Arm

    7 Steps To Fixing A Record Player Arm

    Are you looking for the best ways to fix your record player arm? Then you’re in the right place. We’ll show you how to fix your faulty record player arm in seven easy steps.

    It is essential to read through the manufacturer’s manual to fix or change a record player’s tonearm. Ensure that all steps are followed correctly while setting up the tonearm, as an incorrect setup causes the most common tonearm faults.

    The tiniest issue from an incorrect setup of a turntable’s tonearm either single-handedly or combined with other factors can ruin the quality of sound it produces. Mechanical problems can also cause poor sound quality. That’s why you have to get your record player’s tonearm fixed right.

    The tonearm is as much an essential part of the record player as the record itself. It has been so easy to overlook the tonearm and its role when talking about the parts of a turntable; however, all changes now.

    The Record Player’s Tonearm

    Initially, the tonearm was intended to conduct soundwaves from the soundbox to an amplifying horn, as was introduced with the earliest design of the electronic record in 1925. (Source)

    Over the years, several changes have been made to the tonearm ranging from the type of materials used to the design and its primary function. (Source)

    A record player’s arm is designed to support the cartridge in the proper position over the record, permitting it to move inwards towards the center of the record without changing its position. To be able to do this effectively, it also has to perform a few other tasks simultaneously.

    Firstly, the cartridge has to be in the correct position. It means its height and angle above the record must permit it to trace the groove towards the center.

    Then it proceeds to apply the exact amount of weight to the stylus, ensuring that the anti-skating force is in place to prevent the cartridge from darting towards the inside of the record before finally moving the signal transmitting cabling from the cartridge to the turntable.

    The significant issues identified when dealing with a record player’s arm can be categorized into two groups:

    • Visual issues – These are defects identifiable by sight, such as a bouncing tonearm or one which won’t lower properly.
    • Mechanical issues – The issues that you can’t see but can hear audibly; an example of such is a skipping record.

    Let’s get into common visual and mechanical issues that can affect a record player’s tonearm and how to troubleshoot them.

    Table Showing Different Tone Arm Issues And How To Fix Them

    Visual Issues

    How To Fix The Issues

    Single side swinging of the tonearm

    Check to confirm the platter of the record player is level as most tonearms are super sensitive.

    The tonearm won’t stop returning.

    With your arms, manually rotate the record player’s platter till you hear a click.

    The tonearm does not lower all the way.

    It is caused when the tonearms bridge does not lower enough when the cueing lever is in use. Tweak the adjustment screw to regulate the bridge’s height.

    The tonearm drops too fast.

    Adjust the tonearm’s bridge screw or

    Lubricate the cueing lever with some damping oil

    A bouncing tonearm

    Avoid manually lifting and lowering the tonearm

    Lubricate the cueing lever with some damping oil

    Mechanical Issues

    How To Fix Them

    Sounds produced from a single channel during record play

    Contact a Professional

    Be sure that the cartridge is accurately connected to the tonearm

    A skipping record

    Check that the VTF is correct

    Check that the anti-skate is correct

    Noise or humming sounds during record play

    Confirm the balance of the tonearm/ VTF

    Clean the contact connecting the headshell to the tonearm with a cotton wool swab with a dab of alcohol

    Interference when you move the tonearm

    Contact a Professional

    No sound during playback

    Adjust the tonearm’s bridge to regulate it

    Read through the manual to confirm that the Vertical Tracking Force (VTF) is correct.

    How To Fix A Record’s Player’s Arm

    There are several methods to fixing a record player’s arm. However, these methods are dependent on which issue you’re experiencing.

    With your tonearm and your knowledge and expertise with the tonearm, if you aren’t sure what to do to fix it, it is advisable to seek professional help if you are unfamiliar or new with a record player and its components.

    Mounting And Adjusting The Tonearm

    A most common mistake amongst new record owners is incorrectly adjusting or incorrectly mounting the tonearm of their turntable. Several individuals use turntables with tubular tonearms and adjustable screws to change and replace the tonearm if and as needed.

    However, if you own a plug-and-play record player, likely, you do not need to install or perhaps even adjust the tonearm. But it is always good to have some knowledge. A particular model from a specific brand can have its settings.

    However, this means you always have to keep these settings in mind and adjust them accordingly when replacing the cartridge. You can also write them on a sticky note and keep them in your record player corner.

    Aligning The Record Player Tonearm

    In order to produce the sound of the best quality, the stylus has to align perfectly with the record. The best alignment is when the stylus rests vertically in the groove at precisely 20 degrees to the front. It is because the sound is generated when the stylus touches the sides of the groove.

    Most record players come with their adjusting ring or locking lever to align the stylus. With this, you can properly align the tonearm and stylus to the record with great precision.

    To adjust the tonearm, firstly release the lever, then place the needle on the record, ensuring the drive is turned off during this period.

    Now you can turn the adjusting ring carefully without touching the tonearm until it runs parallel to the record.

    Now lift the needle off the record and secure this setting with the locking lever. This process is always the same. If you can’t find certain parts, it is best to read the manual, for it could be the case that your turntable lacks this feature.

    Balancing The Tonearm

    Your turntable can start to experience a skipping stylus problem for several reasons. It is the process to help you align the tonearm.

    The Vertical Tracking Force (VTF) is the weight at which the needle contacts the record and might be why you are experiencing a skipping record. Your turntable must run with the correct VTF, as too high a VTF can damage the record, and too low will damage the stylus. (Source)

    The proper VTF weight varies across models and brands as the cartridge’s manufacturer determines the proper vertical tracking force. There are several determinants of a VTF, including variations in the tonearm.

    To adjust the VTF, follow the following steps:

    • Proceed to the component of the tonearm known as the counterweight. It is usually found at the tail end of the tonearm
    • By turning the counterweight to a specific number, you can adjust the tonearm’s weight
    • If your turntable includes an anti-skating setting, turn this to zero. If not, reset the tonearm, so it is balanced mid-air.
    • Check the cartridge’s manual for the correct VTF or check online.
    • Set the counterweight to the specific number setting for your cartridge. For turntables with anti-skate settings, adjust this to match that of the cartridge.
    • Once this is done, this should move the cartridge downward towards the record and sit at the correct weight.

    Once the vertical tracking force has been set to the correct weight, your record should not experience further skipping issues.

    Getting a digital gram is an easier way to determine the weight of the VTF easily. They are easy to use and can measure the needle pressure accurately.

    Fixing A Tonearm’s Interference

    If you’re experiencing difficulties moving the tonearm or hearing some interference feedback that you do not notice during playback, then the problem might be the tonearm’s cabling.

    The wires within the cable might be rubbing against each other or the casing walls. It can induce current or cause static.

    To fix the wiring of the tonearm is not as easy as changing other components. That’s why we generally recommend you contact a professional to prevent irreversible damage to your record player.

    Fixing A Bouncing Tonearm

    Most turntable owners manually lift and lower the tonearm rather than use the cueing lever to control the lifting and dropping when your turntable is in use. The bouncing might also be caused by the fast movements of the cueing lever or by loose screws.

    There are two ways to fix this. The first method is by tightening the bridge screw. The bridge screw is found at the base of the tonearm.

    Adjusting this screw controls the height and brings the stylus within proper contact of the record.

    The second method is to apply some damping oil to the cueing lever. Since the lever controls the up and down movement of the tonearm, the damping fluid would naturally dry up over time and might lead to stiffness.

    Maximum output by the cueing lever would require a certain level of fluidity. That’s where the damping oil comes in.

    There are cueing levers damping oils sold in syringes for easy and minimal application. The thin mouth of the syringe allows it to access narrow and tight spots.

    If, after trying these methods, your tonearm is still experiencing the same issues, it is best to contact a professional.

    Cartridge Replacement

    Your turntables cartridge is an essential component in ensuring that the record player works well and produces quality sound. Changing a record player’s cartridge is easy to do with the right tools and some patience.

    Follow the following steps to change your cartridge when the need arises:

    • Open the turntable’s dust cover to identify the headshell.
    • Gently detach the stylus from the cartridge. Pay attention not to damage the plastic.
    • Once this is done, gently release the headshell from the tonearm.
    • Remove the screws with a screwdriver to release the cartridge.
    • Gently unplug the wires from the pins with a long nose plier. An easy way to do this is by pulling them from the metal detector at the end of the cartridge.
    • Replace the cartridge and the pins making sure to connect the wire to the pins following the provided color codes.
    • Tighten back the cartridge screw the same way you took them off.
    • Connect the new stylus to the cartridge before joining the headshell. Pay attention to adjusting the alignment of the cartridge.
    • Join the assembled headshell to the tonearm.
    • Your tonearm is ready to be tested and used.

    If you follow these steps accurately and with caution, your turntable should produce quality sound, given that the cartridge was faulty. (Source)

    Needle Replacement

    The function of the needle is to read and turn the vibrations on a record player into sounds. The movement of the needle on the groove creates an electric signal that the amplifier produces to us as good sound.

    Constant use over time can result in chips or bending. Once this happens, it automatically affects the quality of sound it produces. That’s the point where you start to hear crackles and distorted sounds.

    Also called a stylus, a tired needle would contribute nothing but ruin your record. It is essential to know when to change your turntable’s needle and learn how to change one when the need arises. (Source)

    When Should You Replace Your Needle?

    Few signs indicate when your turntable’s needle is due for a change. Such signs include:

    • When the quality of sound changes or drops. Soon as you notice sound warps or dull vocals, your needle is due for a change.
    • After purchasing a pre-owned turntable, most turntable needles have an average usage rate of 500 hours, after which it is due for a change. It is advisable to change the needle when you are unsure about its state or usage period to avoid possible damage to your record.

    To replace the needle, identify the correct type of needle your turntables use. A helpful tip would be checking the serial number on the cartridge to determine the exact kind of needle you need.

    Once you have purchased a similar needle replacement for the turntable, consult the accompanying manual or check online if you don’t have access to the manual for the appropriate guidelines and steps to follow when changing the needle.

    Make sure you have a plate or bowl handy to hold the disassembled part to ensure that you do not lose any while replacing the needle.

    How To Fix A New Tonearm’s Rest

    The tonearm rest is a clip-like instrument that is used to hold the tonearm firmly in place. The tonearm’s rest is typically constructed out of strong plastic, and replacing this rest is as easy as it comes. Follow the following steps when replacing your tonearm’s rest:

    • Remove the plastic dust cover on the tonearm
    • Then you remove the counterweight on the tonearm
    • Proceed to remove the headshell and the cartridge
    • Once complete, gently move the tonearm to the center of the turntable’s platter
    • With a screwdriver, unscrew the nut under the tonearm’s mounting bridge
    • Remove the old tonearm’s rest and replace it with the new one
    • Tighten the screw and assemble other disassembled parts

    Those are the simple and easy steps to changing your turntables tonearm’s rest.

    How To Clean The Tonearm

    The tonearm and its components have spaces and holes that can collect dust and debris. Due to the sensitivity of a turntable and record surface, these specks of dirt can cause poor sound quality and negatively impact the listening experience.

    To clean your tonearm, you need a stylus brush, anti-static dust cloth, compressed air, and rubbing alcohol.

    • Clean the needle with the stylus brush from the front to the back. You can also dab the brush with some alcohol and brush gently.
    • Wipe down the tonearm with a cloth dabbed with alcohol. You can use the can of compressed air to blow dirt out of small and inaccessible spaces.
    • Wipe down the tonearm with a clean and dry cloth

    Always pay careful attention and try not to touch surfaces of the record player or the stylus with your bare finger. Make sure your hands are clean before you start cleaning your turntable.

    Conclusion

    A record player cannot function with even the slightest defect to any of its components. Appearances can be deceiving, and even though the tonearm looks like a simple rotating tube on the record player, it is one of its most essential components.

    We have shared the different processes to identify and troubleshoot possible issues the tonearm could develop.

    Remember always to follow the instructions outlined in the product manual and purchase original and exact replacement parts.

    Always consult a professional when you are unsure about fixing any part of your turntable.

    Sources

    1. “Phonograph Arm Systems” Wikipedia, Accessed November 17, 2021,

    2. Heitaro Nakajima, Yoshimoto Omura, and Isao Kawashima, “Tonearm assembly,” The Journal of the Acoustical Society of America 66, 941-941 (1979)

    3. “Audio Solutions Question of the Week: How Do I Balance the Tone Arm and Set the Tracking Force for Turntables?” Audio-Technica, Accessed November 17, 2021

    4. “How to Change Turntable Cartridge” Wikihow, Accessed November 17, 2021,

    5. “How to Change the Needle on a Record Player” Wikihow, Accesses November 17, 2021,